Sethmo's Smartrap Core Build v1.0
Posted by sethmo
|
Sethmo's Smartrap Core Build v1.0 May 06, 2015 11:56AM |
Registered: 9 years ago Posts: 40 |
I currently have a Makibox which I have upgraded enough over the past year to get good results, so I am using it to print out all the printed parts for the Smartcore. The plant is to build a 200x200x300 Smartcore with new parts, then work on a second larger smartcore using my current Makibox parts(D8 board, E3dv6 hotend, stepper motors, end stops, ect). I would like to make my second printer out of acrylic, but will have to see how that plays out.
This is my working BOM:
[docs.google.com]
Most parts ordered from eBay so far:
[i.imgur.com]
My first Smartcore will be spec'ed as below:
Build Size: Width 200; Height 300; Depth 200;
Chassis:
1/2" Birch plywood
Right: 322x440
Back: 365x440
Bottom: 365x440
Smooth Rods 8mm:
X: 2x255
Y: 2x265
Z: 2x410
First printed parts:
Edited 1 time(s). Last edit at 05/06/2015 12:46PM by sethmo.
|
Re: Sethmo's Smartrap Core Build v1.0 May 06, 2015 01:17PM |
Registered: 9 years ago Posts: 104 |
|
Re: Sethmo's Smartrap Core Build v1.0 May 06, 2015 02:28PM |
Registered: 9 years ago Posts: 178 |
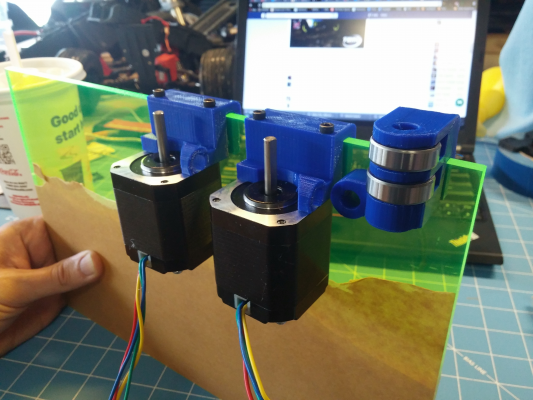
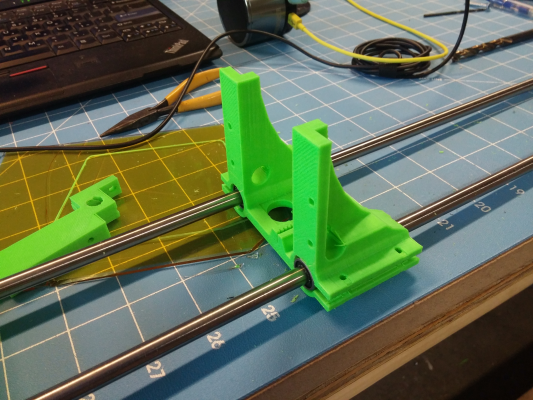
Not trying to be a jerky know it all but looks like you need to mirror one of those r-rod motor mounts, if your trying to print from the individual parts from the youmagine j-scad they are not included unless you run a full plate or mirror them yourself. Other then that...looks good man!!
|
Re: Sethmo's Smartrap Core Build v1.0 May 06, 2015 03:00PM |
Registered: 9 years ago Posts: 40 |
Yeah, I need to mirror them, I realized that after it was done printing lol. I now have a spare? I printed those for 6mm acrylic, which I am still debating on if I want to use. It would look cool, but might not be as rigid as 1/2" MDF and the acrylic would also cost an extra $70 or so.
Is there any way to print only one part of the whole plate STL? The individual files is missing a part for the head.
Edited 1 time(s). Last edit at 05/06/2015 03:01PM by sethmo.
Is there any way to print only one part of the whole plate STL? The individual files is missing a part for the head.
Edited 1 time(s). Last edit at 05/06/2015 03:01PM by sethmo.
|
Re: Sethmo's Smartrap Core Build v1.0 May 06, 2015 03:05PM |
Registered: 9 years ago Posts: 178 |
So what I did was generate the entire plate for the build in the sizes I want, then I used Cura to split and delete what I didnt want on a print, like I would do the whole x axis in one run, the y in another etc etc it takes a bit but once you have your sizes right your golden. Also IIRC the sizes don't account for dec so 1/2mdf 12.8mm(by demension not actuall) would just come out at 12, keep that in mind when sourcing wood, don't be like me and print all your stuff, pick up your wood to find out its the wrong size. I was able to sand my mdf to account but just an extra step to deal with.
|
Re: Sethmo's Smartrap Core Build v1.0 May 06, 2015 04:39PM |
Registered: 9 years ago Posts: 40 |
|
Re: Sethmo's Smartrap Core Build v1.0 May 06, 2015 05:58PM |
Registered: 9 years ago Posts: 180 |
|
Re: Sethmo's Smartrap Core Build v1.0 May 06, 2015 06:02PM |
Registered: 9 years ago Posts: 180 |
I went the long route so that I could print individual parts quickly if needed. I saved the entire plate, then created individual STL files for for each part.
Good point on the print size vs the part size vs the wood size. It also depends on the calibration of your printer. 12.88mm sized parr may not be printed exactly at 12.8mm
Good point on the print size vs the part size vs the wood size. It also depends on the calibration of your printer. 12.88mm sized parr may not be printed exactly at 12.8mm
|
Re: Sethmo's Smartrap Core Build v1.0 May 08, 2015 08:33AM |
Registered: 9 years ago Posts: 40 |
Slow progress, ran into some clogging issues with my current printer. Hopefully I can get it cleared up tonight, I only havery a few parts left to print.
I couldn't find any 1/2"mdf at my local lumber yard so I am going to make a trip to Lowes today so I can get the chassis built this weekend.
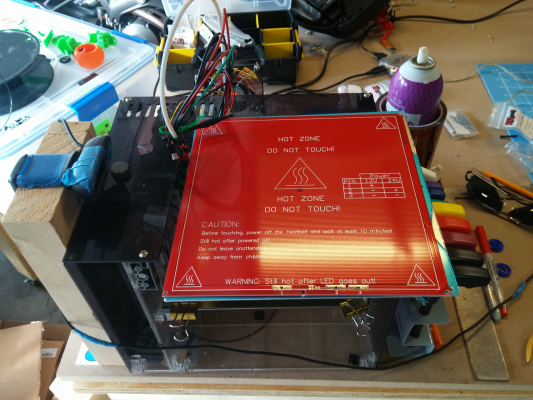
The new bed is almost as big as my old printer!
Some parts layed out.
Hotend parts.
Edited 2 time(s). Last edit at 05/08/2015 08:37AM by sethmo.
I couldn't find any 1/2"mdf at my local lumber yard so I am going to make a trip to Lowes today so I can get the chassis built this weekend.
The new bed is almost as big as my old printer!
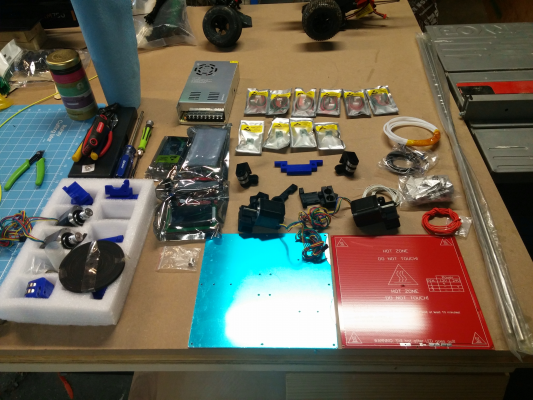
Some parts layed out.
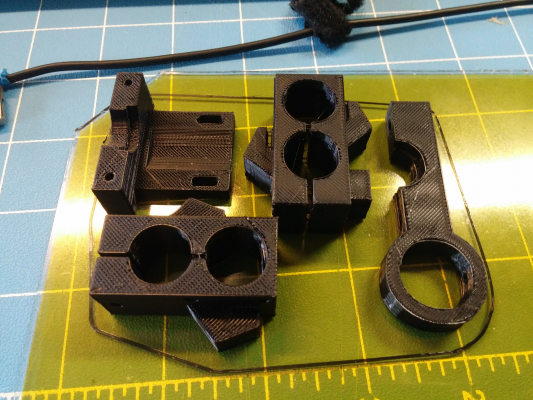
Hotend parts.
Edited 2 time(s). Last edit at 05/08/2015 08:37AM by sethmo.
|
Re: Sethmo's Smartrap Core Build v1.0 May 08, 2015 08:50AM |
Registered: 9 years ago Posts: 107 |
I don't know if Lowes has a cutting service but B&Q in UK does it free if you're buying a sheet from them. It's mm perfect and super square. Definitely worth getting them to do it IMHO, unless you're the typical American I have concocted in my head from watching too much YouTube - you have all got massive workshops full of professional machines, proper lighting, heating and ventilation, whereas the typical Brit is working in a 6' x 8' shiplap shed with a head torch, wrapped in a blanket for warmth and using hand tools on a rickety potting bench...
|
Re: Sethmo's Smartrap Core Build v1.0 May 08, 2015 09:41AM |
Registered: 9 years ago Posts: 40 |
I guess I am your stereotypical American tool lover. I have a 24ftx30ft garage workshop with table saw with outfeed table, miter saw, bandsaw, and plenty of other power and hand tools, but if Lowes doesn't have any 2ftx4ft MDF sheets, I will have them cut a full sheet down for me. Lowes does have a panel saw, but their blade is always dull and does not give the best cuts.
Edited 1 time(s). Last edit at 05/08/2015 09:44AM by sethmo.
Edited 1 time(s). Last edit at 05/08/2015 09:44AM by sethmo.
|
Re: Sethmo's Smartrap Core Build v1.0 May 08, 2015 10:01AM |
Registered: 9 years ago Posts: 107 |
|
Re: Sethmo's Smartrap Core Build v1.0 May 08, 2015 10:47AM |
Registered: 9 years ago Posts: 180 |
|
Re: Sethmo's Smartrap Core Build v1.0 May 08, 2015 11:11AM |
Registered: 10 years ago Posts: 814 |
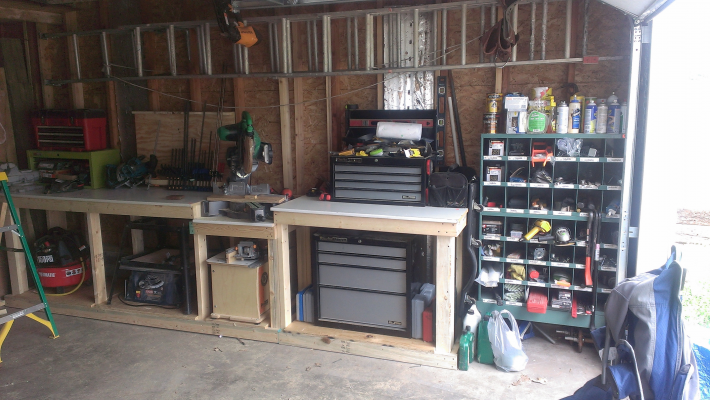
Mines divided in three sections... Oily Side (Cars\Engines\Welding\Metal) Dusty Side (Woodworking Stuff) and now what I call Fumey Side (3D Printers/Shapeoko/R/C Plane&Cars)
Even then, I used Home Depots Cut service on the board for the Funbot. I only need a couple simple cuts and it was easier to load in the car.
Even then, I used Home Depots Cut service on the board for the Funbot. I only need a couple simple cuts and it was easier to load in the car.
|
Re: Sethmo's Smartrap Core Build v1.0 May 08, 2015 11:27AM |
Registered: 9 years ago Posts: 35 |
|
Re: Sethmo's Smartrap Core Build v1.0 May 08, 2015 11:38AM |
Registered: 9 years ago Posts: 40 |
I think I will try Home Depot this time instead of Lowes. I drive a Subaru sedan, so I can't fit a full 4x8 sheet, makes me wish I would have bought a Subaru wagon!Quote
madmike8
Mines divided in three sections... Oily Side (Cars\Engines\Welding\Metal) Dusty Side (Woodworking Stuff) and now what I call Fumey Side (3D Printers/Shapeoko/R/C Plane&Cars)
Even then, I used Home Depots Cut service on the board for the Funbot. I only need a couple simple cuts and it was easier to load in the car.
I hear ya, I have lived many years living garage-less apartments!Quote
willera
I am so jealous of your guys garages. I'm a student so i'm doing this all by the side of my bed/on the lounge floor!
|
Re: Sethmo's Smartrap Core Build v1.0 May 08, 2015 11:52AM |
Registered: 9 years ago Posts: 178 |
|
Re: Sethmo's Smartrap Core Build v1.0 May 09, 2015 08:49AM |
Registered: 9 years ago Posts: 40 |
Still having problems with my Makibox. I need to reprint the Z slide or file down the inside of the bearing holders so the bearings fit better.
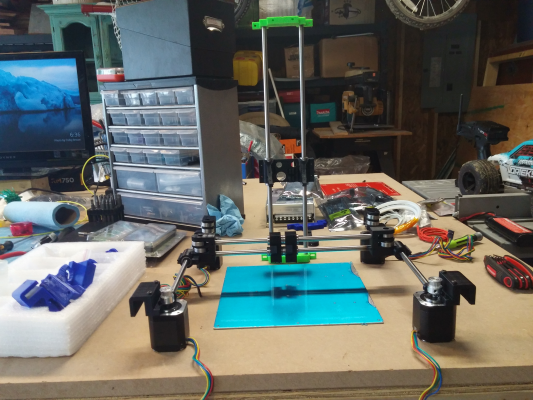
I just cut the smooth rods and test fit:
(I Know my Z axis is upside down )
)
I am going to pick up my MDF today, so hopefully I can get a chassis together by tomorrow and test fit all my pieces.
Edited 2 time(s). Last edit at 05/09/2015 08:55AM by sethmo.
I just cut the smooth rods and test fit:
(I Know my Z axis is upside down
 )
)I am going to pick up my MDF today, so hopefully I can get a chassis together by tomorrow and test fit all my pieces.
Edited 2 time(s). Last edit at 05/09/2015 08:55AM by sethmo.
|
Re: Sethmo's Smartrap Core Build v1.0 May 09, 2015 09:12AM |
Registered: 9 years ago Posts: 107 |
|
Re: Sethmo's Smartrap Core Build v1.0 May 11, 2015 02:28PM |
Registered: 9 years ago Posts: 40 |
I hate my Makibox printer so much. It seems like it will print great for a little while, then all of a sudden I get slop in the X-axis and it under extrudes even though it is calibrated and has a new nozzle.
I printed the new Z slide yesterday, although it is an ugly print, it should get me by for right now. I am going to work on finishing up my cuts for the chassis and assemble it tonight. Might start on some wiring too.
I really want to be done with my Makibox, it causes me so much frustration lol! Once I get my Smartcore built, I will reprint all the new v1.2 pieces and try them out.
Edited 1 time(s). Last edit at 05/11/2015 02:32PM by sethmo.
|
Re: Sethmo's Smartrap Core Build v1.0 May 11, 2015 03:14PM |
Registered: 9 years ago Posts: 180 |
|
Re: Sethmo's Smartrap Core Build v1.0 May 11, 2015 06:34PM |
Registered: 10 years ago Posts: 992 |
sorry for the update now. I know it's always anoying to print those big plates and see a new version coming out !
For the info, i have 4 smartrapcore working in production with the 1.0.1 and it works well. This new version is just a normal evolution to make it more stable and easier to build . It's not that important to start with 101 or 1.2 , it will work anyway.
there will be other updates and the trick is to start with "some" version and update later when we feel it's important ( usually when something doesn't work well ) .
That's why we keep desiging with printed parts
the Smartrap project
[smartfriendz.com]
[www.thingiverse.com]
[reprap.org]
[github.com]
doc assemblage: [reprap.org]
NEW: Forum smartfriendz: [smartraptalk.smartfriendz.com]
For the info, i have 4 smartrapcore working in production with the 1.0.1 and it works well. This new version is just a normal evolution to make it more stable and easier to build . It's not that important to start with 101 or 1.2 , it will work anyway.
there will be other updates and the trick is to start with "some" version and update later when we feel it's important ( usually when something doesn't work well ) .
That's why we keep desiging with printed parts

the Smartrap project
[smartfriendz.com]
[www.thingiverse.com]
[reprap.org]
[github.com]
doc assemblage: [reprap.org]
NEW: Forum smartfriendz: [smartraptalk.smartfriendz.com]
|
Re: Sethmo's Smartrap Core Build v1.0 May 12, 2015 09:02AM |
Registered: 9 years ago Posts: 40 |
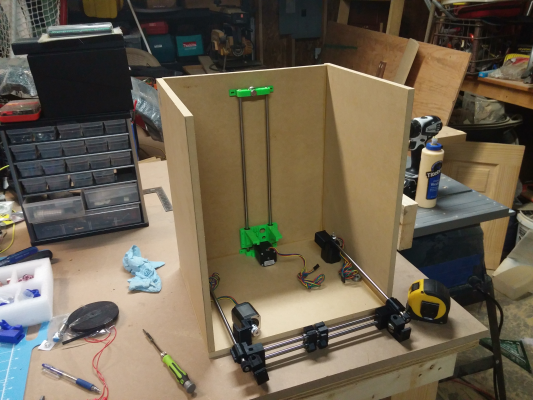
I appreciate the continuous updates on projects like these! I had to reprint my MotoryXY and Bearing pieces as I printed them for 12mm walls and my 1/2 walls are really 12.8. Printing them with the 13mm walls got them close enough.
I ended up getting my chassis together last night. I am going to put a small brace across the top front to help close and square it up. I also for some reason made the whole thing too tall, so I need to cut about an 1-1/2" off the top, shouldn't be too bad.I was thinking about adding about 6" to the whole thing and adding a floor so I would have an enclosed space for the electronics, but I decided to keep it simple.
Going to finish up the v1.2 pieces today, test fit them, and then start wiring tonight.
Edited 1 time(s). Last edit at 05/12/2015 09:34AM by sethmo.
|
Re: Sethmo's Smartrap Core Build v1.0 May 12, 2015 09:58AM |
Registered: 9 years ago Posts: 180 |
|
Re: Sethmo's Smartrap Core Build v1.0 May 12, 2015 09:58AM |
Registered: 9 years ago Posts: 180 |
|
Re: Sethmo's Smartrap Core Build v1.0 May 12, 2015 01:57PM |
Registered: 10 years ago Posts: 992 |
thank you 
the big win with the 1.2 are the Zslide more stale ( but still, i think it will be updated again later ) , and the new head in one piece. The two parts head was a good idea at start but had problem when you assembled the all head .. it was forcing on the bearings ( three parts assembly).
Yes, we never stop
a good design will take something like 6 or iterations before to be really good , i've learned that with the smartrap.
the Smartrap project
[smartfriendz.com]
[www.thingiverse.com]
[reprap.org]
[github.com]
doc assemblage: [reprap.org]
NEW: Forum smartfriendz: [smartraptalk.smartfriendz.com]

the big win with the 1.2 are the Zslide more stale ( but still, i think it will be updated again later ) , and the new head in one piece. The two parts head was a good idea at start but had problem when you assembled the all head .. it was forcing on the bearings ( three parts assembly).
Yes, we never stop

a good design will take something like 6 or iterations before to be really good , i've learned that with the smartrap.
the Smartrap project
[smartfriendz.com]
[www.thingiverse.com]
[reprap.org]
[github.com]
doc assemblage: [reprap.org]
NEW: Forum smartfriendz: [smartraptalk.smartfriendz.com]
|
Re: Sethmo's Smartrap Core Build v1.0 May 12, 2015 02:06PM |
Registered: 9 years ago Posts: 107 |
@sethmo, I like your idea about possibly putting the electronics in a false floor. I settled on hiding it round the back and cut slots with 3x 6mm drilled holes next to each other to push plugs through to the rear. I think the cooling requirements would make me nervous of putting the stepper drivers and mosfets in too enclosed a space until I have forced ventilation.
|
Re: Sethmo's Smartrap Core Build v1.0 May 12, 2015 09:32PM |
Registered: 9 years ago Posts: 40 |
|
Re: Sethmo's Smartrap Core Build v1.0 May 13, 2015 02:48AM |
Registered: 10 years ago Posts: 992 |
That's strange, it is designed to print stand up ? I've made angles under the belt tensioners so it could print like it is . If you remove support system it should print ok (we do actually pretty good here ) .
the Smartrap project
[smartfriendz.com]
[www.thingiverse.com]
[reprap.org]
[github.com]
doc assemblage: [reprap.org]
NEW: Forum smartfriendz: [smartraptalk.smartfriendz.com]
the Smartrap project
[smartfriendz.com]
[www.thingiverse.com]
[reprap.org]
[github.com]
doc assemblage: [reprap.org]
NEW: Forum smartfriendz: [smartraptalk.smartfriendz.com]
|
Re: Sethmo's Smartrap Core Build v1.0 May 13, 2015 05:18AM |
Registered: 9 years ago Posts: 95 |
Quote
sethmo
I ended up getting my chassis together last night. I am going to put a small brace across the top front to help close and square it up. I also for some reason made the whole thing too tall, so I need to cut about an 1-1/2" off the top, shouldn't be too bad.I was thinking about adding about 6" to the whole thing and adding a floor so I would have an enclosed space for the electronics, but I decided to keep it simple.
Lol, you 're describing my box

I 've built it exactly like this back in December (or was it November?), when I was first aware of smartcore's existence:
A 100mm brace across the top front (which also doubles as a mount space for camera and/or spool holder) and a fake "floor" (another 100mm) at the bottom where all electronics (ramps+octoprint+powersupply) are mounted and wired through small (12mm) holes in the floor corners.
Edited 1 time(s). Last edit at 05/13/2015 05:19AM by mandrav.
Sorry, only registered users may post in this forum.
