Sethmo's Smartrap Core Build v1.0
Posted by sethmo
|
Re: Sethmo's Smartrap Core Build v1.0 May 13, 2015 08:15AM |
Registered: 9 years ago Posts: 40 |
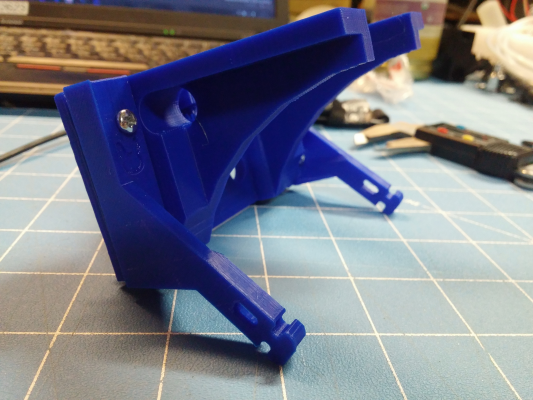
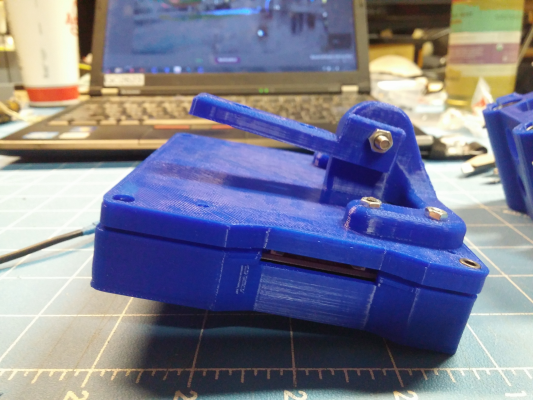
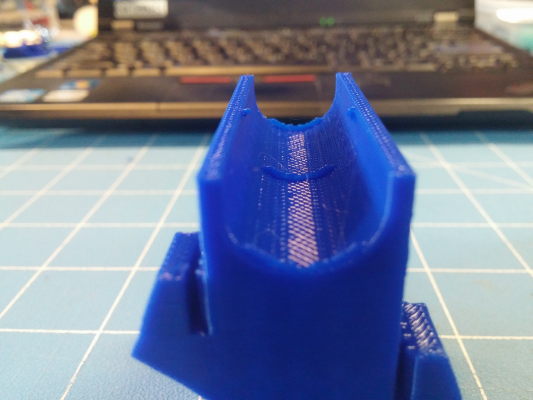
I am a dummy, I did not realize that the hot end mount was separate from the entire block body lol. It should print fine without supports once I split them. I was however able to print both pieces together with supports and it turned out not completely terrible lol.Quote
smartfriendz
That's strange, it is designed to print stand up ? I've made angles under the belt tensioners so it could print like it is . If you remove support system it should print ok (we do actually pretty good here ) .
Quote
mandrav
Quote
sethmo
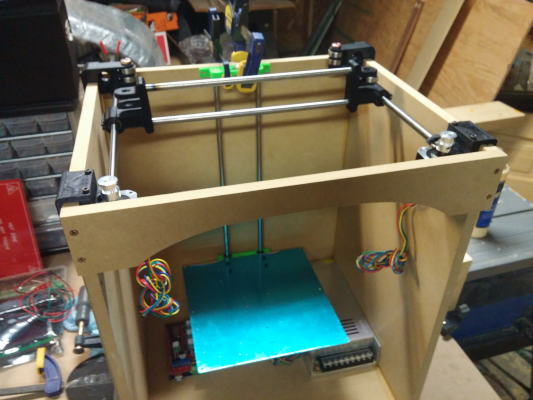
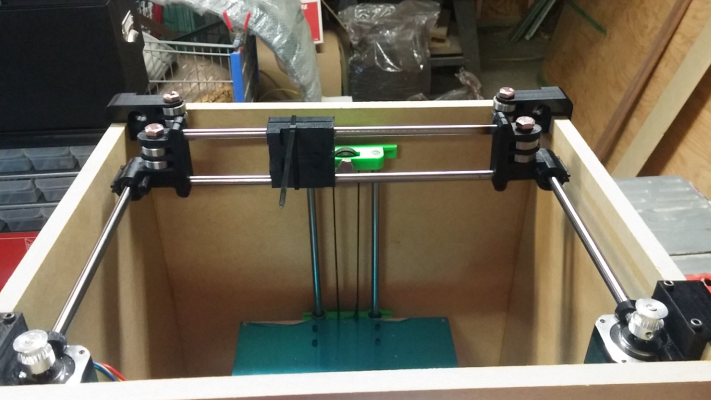
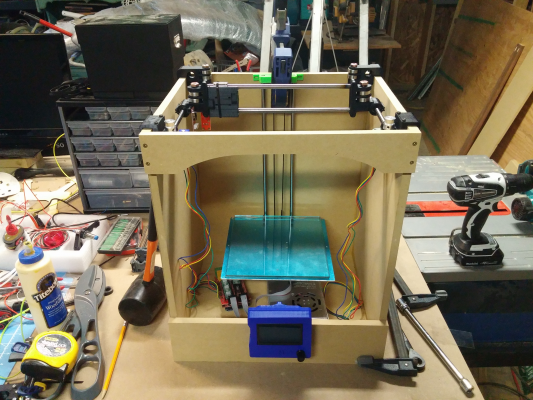
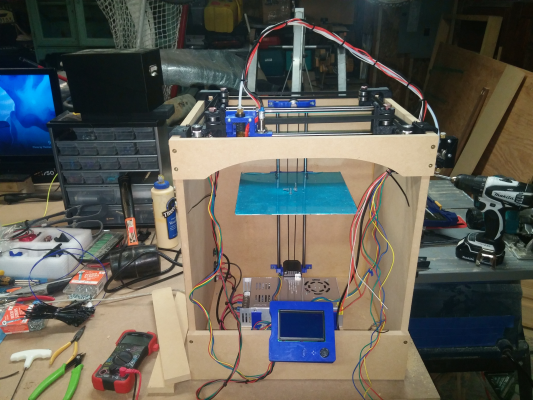
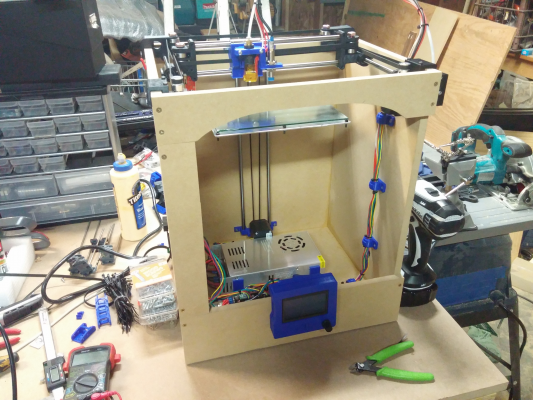
I ended up getting my chassis together last night. I am going to put a small brace across the top front to help close and square it up. I also for some reason made the whole thing too tall, so I need to cut about an 1-1/2" off the top, shouldn't be too bad.I was thinking about adding about 6" to the whole thing and adding a floor so I would have an enclosed space for the electronics, but I decided to keep it simple.
Lol, you 're describing my box
I 've built it exactly like this back in December (or was it November?), when I was first aware of smartcore's existence:
A 100mm brace across the top front (which also doubles as a mount space for camera and/or spool holder) and a fake "floor" (another 100mm) at the bottom where all electronics (ramps+octoprint+powersupply) are mounted and wired through small (12mm) holes in the floor corners.
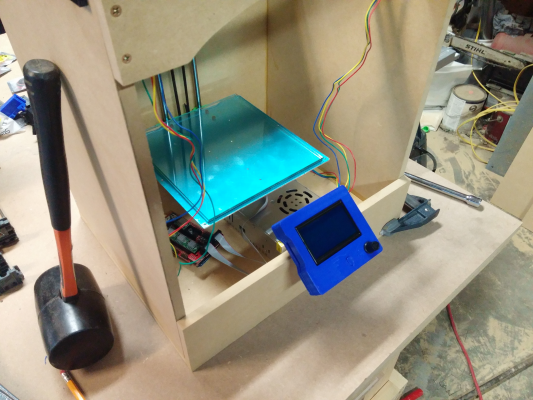
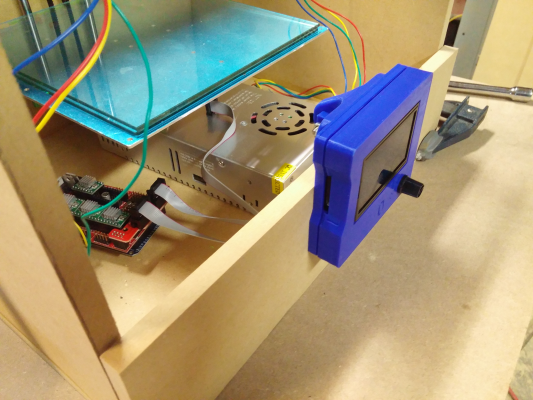
I cut a piece and screwed it to the top to square it off. I am going to add two side pieces and a bottom piece where I can mount my LCD. I may make and print a mount for my Ramps so I can mount it behind the bottom cross plate.
I really need a drill press. I might look into buying one today. I have to drill out most of the 8mm rod holes as my printer cannot print a perfect circle.
Edited 2 time(s). Last edit at 05/13/2015 09:28AM by sethmo.
|
Re: Sethmo's Smartrap Core Build v1.0 May 13, 2015 03:54PM |
Registered: 10 years ago Posts: 992 |
cool one ! i like the box 
it looks better than our production ones actually.. i will get jalous
congrats .
the Smartrap project
[smartfriendz.com]
[www.thingiverse.com]
[reprap.org]
[github.com]
doc assemblage: [reprap.org]
NEW: Forum smartfriendz: [smartraptalk.smartfriendz.com]

it looks better than our production ones actually.. i will get jalous

congrats .
the Smartrap project
[smartfriendz.com]
[www.thingiverse.com]
[reprap.org]
[github.com]
doc assemblage: [reprap.org]
NEW: Forum smartfriendz: [smartraptalk.smartfriendz.com]
|
Re: Sethmo's Smartrap Core Build v1.0 May 14, 2015 01:43PM |
Registered: 9 years ago Posts: 40 |
Thanks Serge!
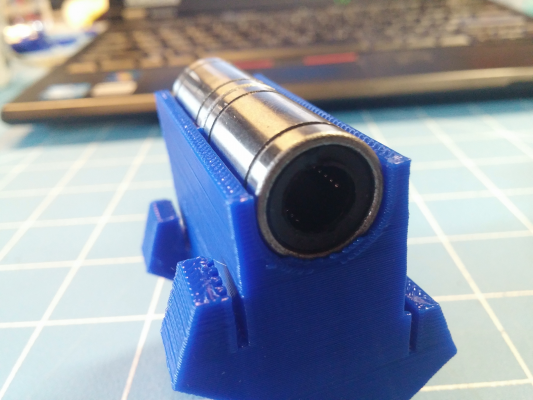
I haven't had much of a chance to work on it. I did print the v1.2 XY Bearings, Y Slide, and Head. For the head, I am not having good luck mounting the bearings in the open slot, my printer must have printed the openings too tight. I sanded one head block down and ended up having to zip tie the bearing in. Any tips?
I also installed the belt on the Z axis and it is very smooth. I ended up having to use a 3 in 1 oil on all of the LM8UU bearings in order for them to slide smoothly, but they do slide pretty nicely now.
|
Re: Sethmo's Smartrap Core Build v1.0 May 19, 2015 09:46AM |
Registered: 9 years ago Posts: 40 |
Haven't had a whole lot of time to work on this again, but I did spend some time cleaning my Makibox and it is printing well again.
I made a new v1.2 Z Slide and printed the landing gear made by Bruno
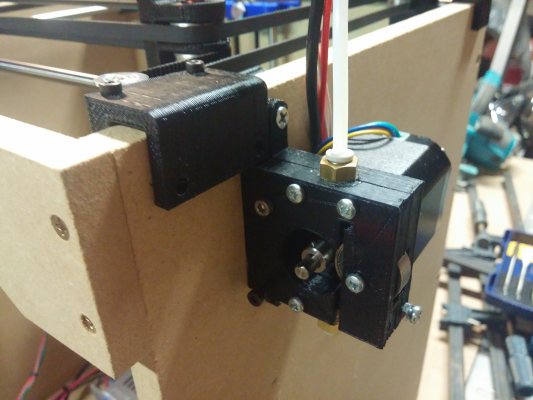
I printed a case for my full LCD and modified a bracket to work
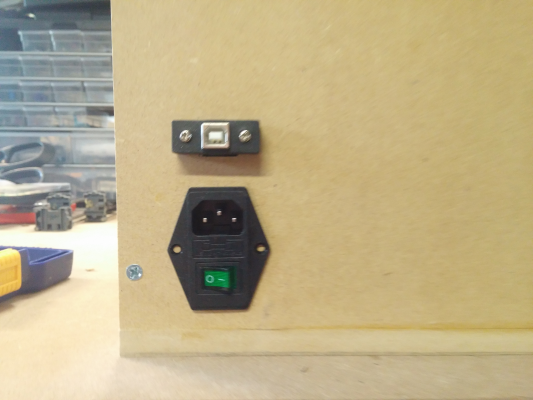
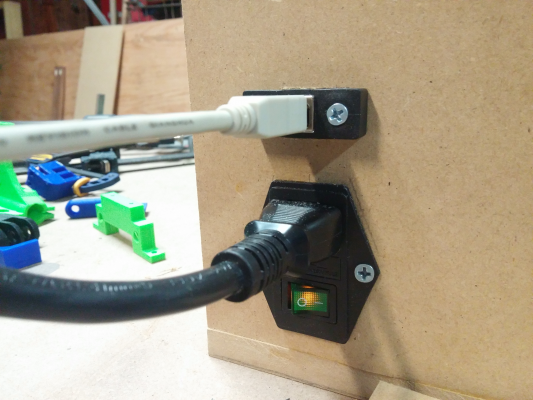
That is about it for progress. For some reason, my Ramps 1.4 board only came with 2 jumpers, so I have to scavenge for jumpers in my junk closet at work. I am going to try to get some wiring done in the next few days. I also bought a cool little switched power plug and a panel mount USB connector so I can make things look all professional!
Also, bonus. I ordered a single piece of Borosilicate glass off Amazon and they sent me two pieces of glass ... score!
Edited 2 time(s). Last edit at 05/19/2015 09:51AM by sethmo.
|
Re: Sethmo's Smartrap Core Build v1.0 May 19, 2015 10:29AM |
Registered: 9 years ago Posts: 35 |
|
Re: Sethmo's Smartrap Core Build v1.0 May 19, 2015 11:05AM |
Registered: 9 years ago Posts: 40 |
|
Re: Sethmo's Smartrap Core Build v1.0 May 19, 2015 12:55PM |
Registered: 9 years ago Posts: 180 |
|
Re: Sethmo's Smartrap Core Build v1.0 May 19, 2015 02:33PM |
Registered: 9 years ago Posts: 40 |
Haha I love my mallet! I have a hammer in my office with a "ASUS Repair Kit" label on itQuote
rcjoseb
...
SmartRapCore adjustment tool!! Comes in handy!

I had a few minutes on my lunch hour so I cut out two holes for these. The switch is cool, I don't really like how bulky the USB connector is, but it should work.
[Edit]
Here is a link to all of the pictures I have taken thus far:
[imgur.com]
Edited 1 time(s). Last edit at 05/19/2015 02:35PM by sethmo.
|
Re: Sethmo's Smartrap Core Build v1.0 May 19, 2015 04:53PM |
Registered: 10 years ago Posts: 814 |
|
Re: Sethmo's Smartrap Core Build v1.0 May 19, 2015 05:03PM |
Registered: 10 years ago Posts: 992 |
beautiful build ... it will certainly be the most clean we have seen so far ( we are woking on those connectors to integrate in kits actually ).
congrats !
don't use the mallet on the ramps if it doesn't work , ask us before ?
the Smartrap project
[smartfriendz.com]
[www.thingiverse.com]
[reprap.org]
[github.com]
doc assemblage: [reprap.org]
NEW: Forum smartfriendz: [smartraptalk.smartfriendz.com]
congrats !
don't use the mallet on the ramps if it doesn't work , ask us before ?

the Smartrap project
[smartfriendz.com]
[www.thingiverse.com]
[reprap.org]
[github.com]
doc assemblage: [reprap.org]
NEW: Forum smartfriendz: [smartraptalk.smartfriendz.com]
|
Re: Sethmo's Smartrap Core Build v1.0 May 20, 2015 07:10AM |
Registered: 9 years ago Posts: 6 |
|
Re: Sethmo's Smartrap Core Build v1.0 May 20, 2015 02:39PM |
Registered: 8 years ago Posts: 65 |
|
Re: Sethmo's Smartrap Core Build v1.0 May 20, 2015 03:42PM |
Registered: 9 years ago Posts: 40 |
I used this is the enclosureQuote
Zlob
I love your LCD enclosure .. can we have the stl file ?
And what is "3 in1 oil" ???
thanks
[www.thingiverse.com]
This is the bracket I used, but I made a new bracket arm so I could mount it behind the mdf
[www.thingiverse.com]
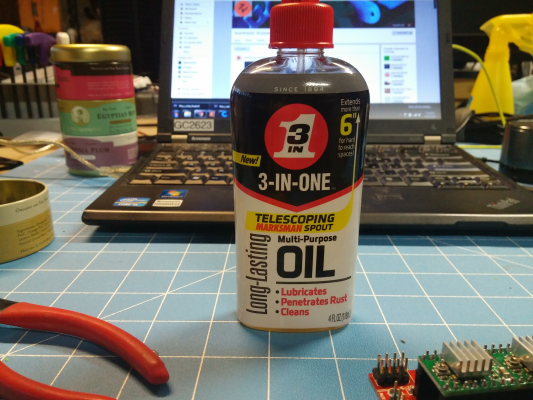
And this is the 3-in-1 oil I used on the bearings, I got it at Auto Zone
|
Re: Sethmo's Smartrap Core Build v1.0 May 20, 2015 03:51PM |
Registered: 8 years ago Posts: 65 |
|
Re: Sethmo's Smartrap Core Build v1.0 May 20, 2015 05:01PM |
Registered: 9 years ago Posts: 156 |
|
Re: Sethmo's Smartrap Core Build v1.0 May 20, 2015 07:02PM |
Registered: 9 years ago Posts: 344 |
Quote
Zlob
Thanks a lot for the enclosure links.
The oil will remain an enigma ...
I never ssee something like that in italy ...
I must investigate for it !
Thanks again !!!
Eccolo, although not the same brand: http://www.conrad.it/ce/it/product/812615/Olio-multifunzione-WD-40-WD40-Company-SMART-STRAW-41037-450-ml?queryFromSuggest=true
|
Re: Sethmo's Smartrap Core Build v1.0 May 21, 2015 04:26AM |
Registered: 9 years ago Posts: 107 |
I think 3 in 1 is very different to wd40, which is much lower viscosity. Are you sure that's equivalent to 3 in 1? Wd40 company actually produces 3 in 1 so that makes me think there's more difference than just viscosity. I stand ready to be corrected by someone who knows what they're talking about though!
|
Re: Sethmo's Smartrap Core Build v1.0 May 21, 2015 04:29AM |
Registered: 9 years ago Posts: 107 |
|
Re: Sethmo's Smartrap Core Build v1.0 May 21, 2015 10:00AM |
Registered: 9 years ago Posts: 40 |
I have heard that they are similar, but the viscosity is different, at least comparing the Aerosol WD40 to this 3-in-1 oil. Check your local auto parts store, they should carry some sort of general lubricating oil. Whatever you do, don't use a white lithium grease, I made that mistake in my Makibox, the grease turned tacky after a few months and I had to clean everything.
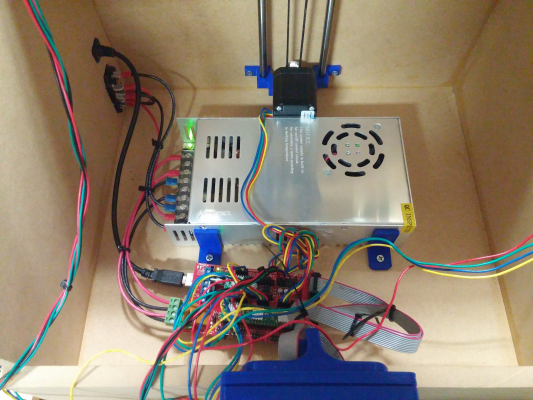
Last night I got my PSU and ramps wired.
We have power!
My wiring mess
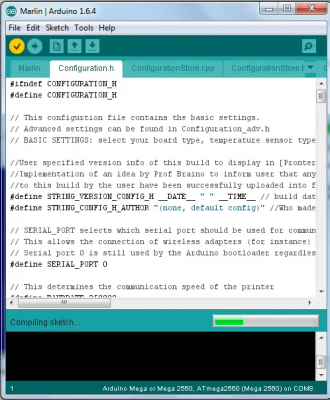
I started making some changes to the default Marlin firmware and it got stuck in the verify/compile stage. Below are the only changes I made, I am new to messing around with Marlin firmware
#define MOTHERBOARD 33
#define TEMP_SENSOR_0 1
#define TEMP_SENSOR_1 0
#define TEMP_SENSOR_2 0
#define TEMP_SENSOR_BED 1
#define COREXY
Also, I am still having issues snapping the LM8UU bearings into the top of the v1.2 head block. I am printing them in PLA, should I try ABS, maybe it flexes more? When I push the bearings in, the sides of the block start to bow and will crack if I push hard enough. I am not sure if it is an issue with PLA or my printer not printing the right dimensions though the LM8UU bearings slide right into the bottom of the head block.
[Edit]
I fixed my compiling issue by downloading the u8glib library(Used for my Reprap discount full graphic lcd) from the source's bintray. I was using the u8glib files from the reprap discount site previously.
Edited 3 time(s). Last edit at 05/22/2015 10:10AM by sethmo.
|
Re: Sethmo's Smartrap Core Build v1.0 May 21, 2015 11:56AM |
Registered: 8 years ago Posts: 65 |
Wow.
Reading about your trouble with head v1.2 scare me.
I have also printed the new head but havn't tryed the bearing yet (they aren't still arrived !), BUT i have a similar trouble with the Z axis (point start carving when i push bearings) but at least nothing get broken.
Hope that when bearings come the head is ok ...
Meanwhile, i will print the old version too
About the firmware wich version u get ?
The "official" one or the smartrap-core version ?
In this case i suggesto to do a copy of the original firmware and make change ONE at time ...
Edited 1 time(s). Last edit at 05/21/2015 12:07PM by Zlob.
Reading about your trouble with head v1.2 scare me.
I have also printed the new head but havn't tryed the bearing yet (they aren't still arrived !), BUT i have a similar trouble with the Z axis (point start carving when i push bearings) but at least nothing get broken.
Hope that when bearings come the head is ok ...
Meanwhile, i will print the old version too

About the firmware wich version u get ?
The "official" one or the smartrap-core version ?
In this case i suggesto to do a copy of the original firmware and make change ONE at time ...
Edited 1 time(s). Last edit at 05/21/2015 12:07PM by Zlob.
|
Re: Sethmo's Smartrap Core Build v1.0 May 21, 2015 01:58PM |
Registered: 8 years ago Posts: 6 |
I also printed out the v1.2 head and the troughs are not big enough for LM8UUs on the top. The length is hardcoded to 19mm which is the length of a lm6uu bearing. On top of that, my printer had a partial jam and one of the sides in the bottom bearing holder missed part of layer and was very weak and ended up breaking.
I tried to modify the JSCAD file, but there are still lots of tweaks needed to get a good print. For now I will just use the older v1.0.2 head until a proper v1.2 is released. If I end up getting the v1.2 head modified I'll share the changes immediately.
I tried to modify the JSCAD file, but there are still lots of tweaks needed to get a good print. For now I will just use the older v1.0.2 head until a proper v1.2 is released. If I end up getting the v1.2 head modified I'll share the changes immediately.
|
Re: Sethmo's Smartrap Core Build v1.0 May 21, 2015 02:32PM |
Registered: 9 years ago Posts: 40 |
|
Re: Sethmo's Smartrap Core Build v1.0 May 22, 2015 05:36AM |
Registered: 9 years ago Posts: 95 |
|
Re: Sethmo's Smartrap Core Build v1.0 May 22, 2015 07:25AM |
Registered: 8 years ago Posts: 65 |
|
Re: Sethmo's Smartrap Core Build v1.0 May 22, 2015 09:28AM |
Registered: 9 years ago Posts: 40 |
Quote
mandrav
Here's the modified head.stl for LM8UU, if anyone needs it.
I printed it yesterday and it's running as expected so, yeah, it's also tested
I printed one at .3mm layers and 25% infill and one at .2mm layers and 40% infill. Both printed about the same for me where one side of the bearing snaps in tighter than the other. I installed the head regardless though and it seems to work just fine. I am not too familiar with jscad, but I might look into it some more this weekend since Serge is probably out this weekend.
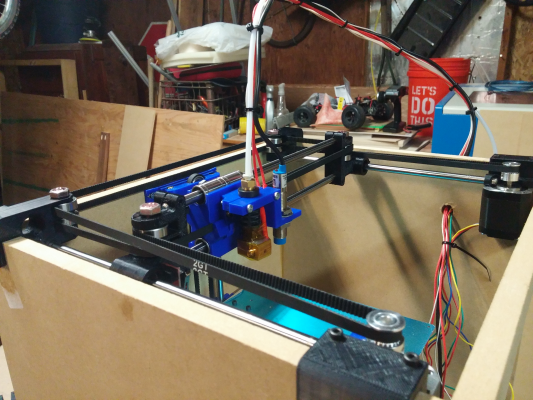
I got some more progress done yesterday. I installed the head block, hot end, induction sensor, and the belts. I tested the end stops by homing it from the LCD menus and right away had to reverse the X and Z axis in the marlin firmware. After that though, everything homed as it should and the movements seem to be pretty smooth.
New modified head block
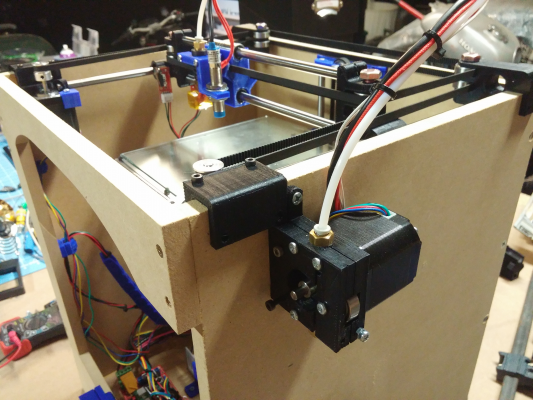
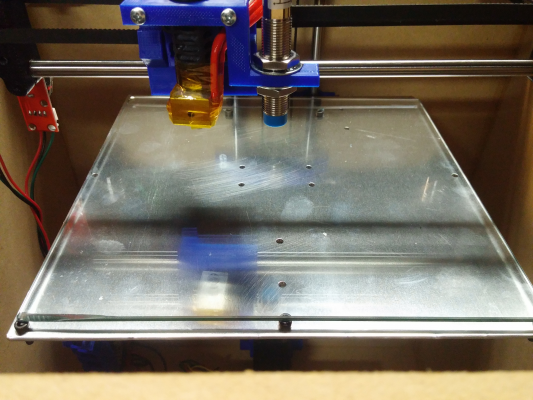
Hot end, sensor, belts, and extruded mounted
And video of it's first movements!
[youtu.be]
Edited 1 time(s). Last edit at 05/22/2015 09:33AM by sethmo.
|
Re: Sethmo's Smartrap Core Build v1.0 May 22, 2015 11:38AM |
Registered: 8 years ago Posts: 6 |
Sorry I am a bit late on this, here is the link to my Youmagine page on the design and the modified JSCAD file:
[www.youmagine.com]
mandrav, it looks like we made the same changes!
sethmo, I suspect that the reason on side fits tightly is due to the fact that the "washer" size is a fraction. I want to rework the head to make this a whole number regardless of the bearing size.
[www.youmagine.com]
mandrav, it looks like we made the same changes!
sethmo, I suspect that the reason on side fits tightly is due to the fact that the "washer" size is a fraction. I want to rework the head to make this a whole number regardless of the bearing size.
|
Re: Sethmo's Smartrap Core Build v1.0 May 25, 2015 11:11AM |
Registered: 9 years ago Posts: 40 |
I got a lot done over the past few days. Everything is now wired as of yesterday morning, then I went to lunch and when I came back, one of my stepper drivers stopped working. I moved the driver to a different axis and that axis would no longer move. I ordered some new ones and will have to wait for them to come in, not sure what really happened though.
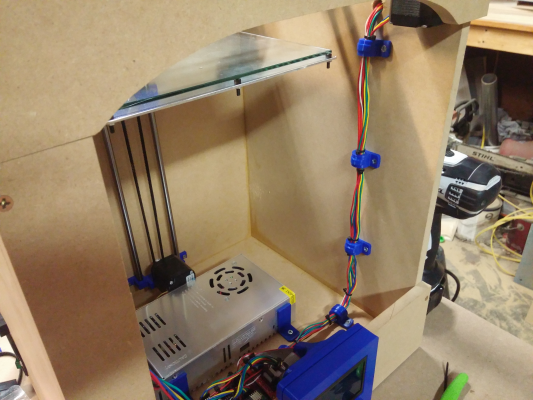
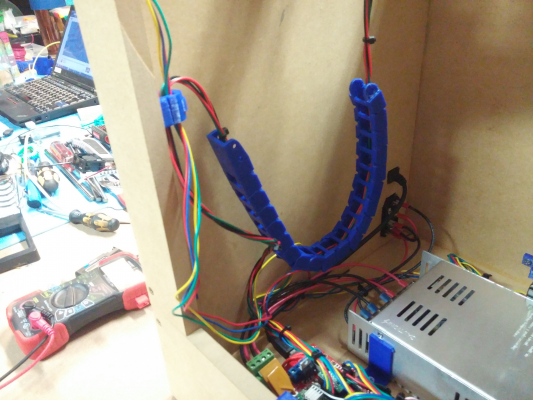
Still not done with wiring management, but will work on that this week. I started working on a cable chain for the end stops which will work, but will take some more modifications to the mounting point.
I also need to work on getting my heated bed wired and mounted.
I really want to be able to print at faster speeds, I don't know what the limiting factor for speed with this printer is, but it seems to handle 75mm/s moves just fine. My Makibox is capped around 40mm/s and doubling that with the Smartcore would be cool.
[www.youtube.com]
Edited 2 time(s). Last edit at 05/25/2015 11:20AM by sethmo.
|
Re: Sethmo's Smartrap Core Build v1.0 May 25, 2015 12:20PM |
Registered: 10 years ago Posts: 814 |
Sethmo, your printer is looking very nice.
I was thinking of using small PVC pipe attached to the walls to run the wiring up. I do like the cable chain too.
I don't have a lot of experience in printing fast, but I gave it a go when I did the Funbot. It printed perfect looking parts at 70mm/s but had no strength as the layers didn't bond together good. Since I wanted to get it ready to take to work I backed it back down to 40mm/s, and haven't tried again. I'd really like to hear about your trials with printing fast, so I can learn what to try on my printers.
|
Re: Sethmo's Smartrap Core Build v1.0 May 26, 2015 11:58AM |
Registered: 9 years ago Posts: 180 |
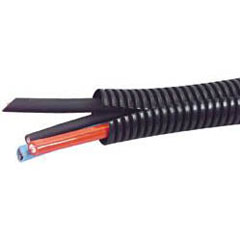
I extended my motor wires and ran them underneath my printer since I have a 3/4" recess below the floor of the printer. I connected the motor wires to terminal blocks and then from there to another set of wires into the RAMPS. The wires from the motors are run through a split loom tube, which you can get in various diameters. You can find it on ebay or your local hardware store like lowes or home depot or an electronics store.
What irks the hell out of me is that the X/Y endstop switches move with the X/Y carriage and the wires have to dangle. I figured out a way to have the Y endstop fixed to the left motor but that would still leave the X endstop mobile since the whole carriage moves along it. For now I just left them as is.
[scontent-dfw1-1.xx.fbcdn.net]
|
Re: Sethmo's Smartrap Core Build v1.0 May 26, 2015 12:31PM |
Registered: 10 years ago Posts: 992 |
what a work. congrats again for all that .
about the X/Y endstops, I've just redesigned them :
- X comes under the head now and the cable goes with the other cables of the head
- Y is fised to the right wall and a new support is add to the right Yslide, under, to click it.
no more dangle cables..
update is only on our github for now . I will update to youmagine and thingiverse by the end of the week .
the Smartrap project
[smartfriendz.com]
[www.thingiverse.com]
[reprap.org]
[github.com]
doc assemblage: [reprap.org]
NEW: Forum smartfriendz: [smartraptalk.smartfriendz.com]
Sorry, only registered users may post in this forum.
