mandrav's SmartCore build
Posted by mandrav
|
mandrav's SmartCore build June 19, 2015 03:27PM |
Registered: 9 years ago Posts: 95 |
It's been quite some time since I first built my smartcore, back in December I believe, right after Serge posted it on g+.
Since then I 've performed many updates on it, some mine, some from the evolution of the original design.
Initially I created it as per the design: in a wooden box but with a twist: I added a fake "floor" to the box so that I could hide all the electronics and wiring under it. This worked a treat in terms of appearence. It was, maybe, my cleanest looking machine by far
But, throughout my journey with it, I had a major issue: unwanted noise amplified by the wooden box...
So, I decided it was time to do something about it (as always ) and settled on using cheap aluminum extrusions (the plain square type).
It was at around the same time, while I was evaluating my options for this idea, that madmike posted a link to thingiverse for a corner connector for the same type of aluminum square tubes I was gonna be using. What a great timing (thanks Mike!).
Fast forward today, I present my latest smartcore build using the aluminum tubes.
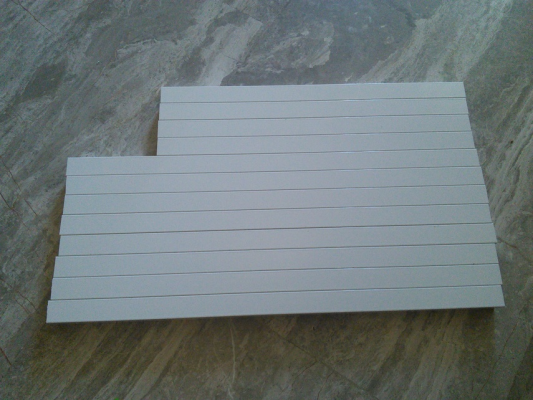
It started with these at hand:
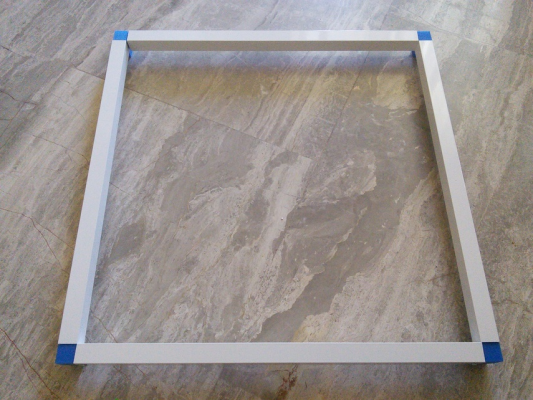
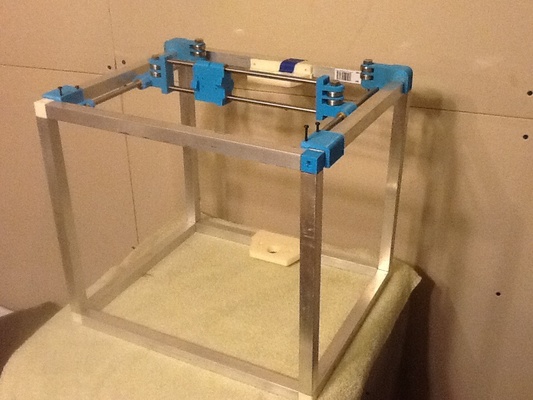
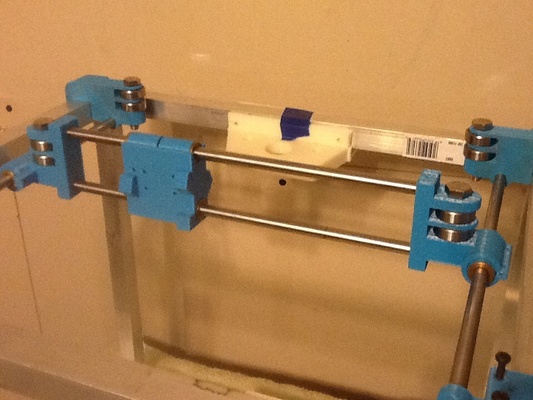
With which I made the upper frame:
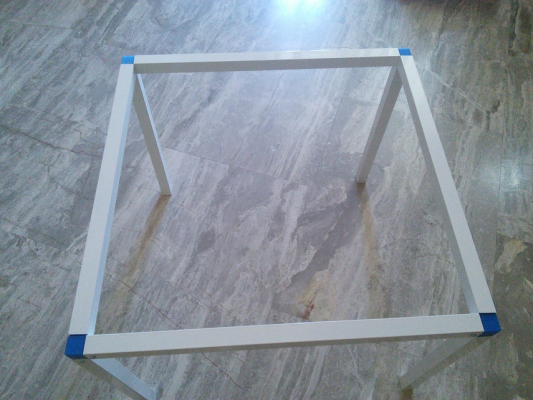
I added the posts that would connect the upper and lower frames:
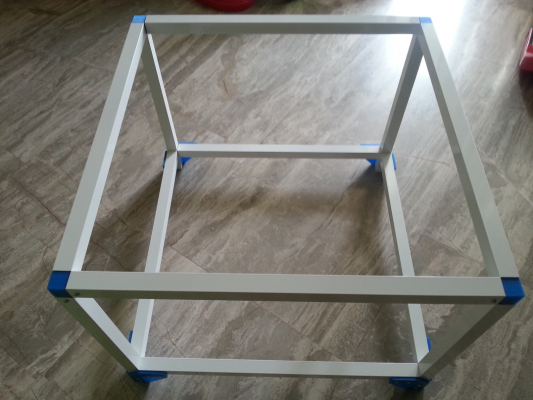
And finally the whole frame got shape! Note that for the lower frame, I didn't use the same connectors as those I used for the upper frame. I designed instead different connectors because I wanted the lower frame to be above ground so I can mount the Z axis stepper as you 'll see in later pictures:
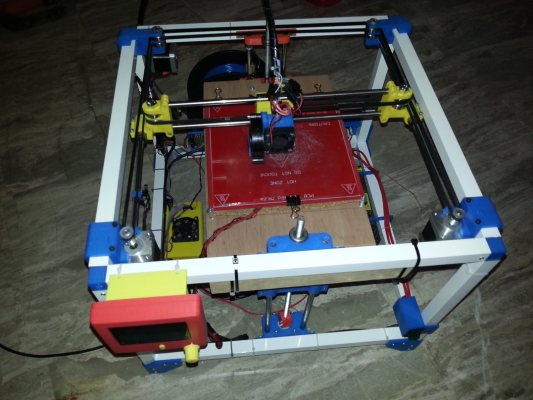
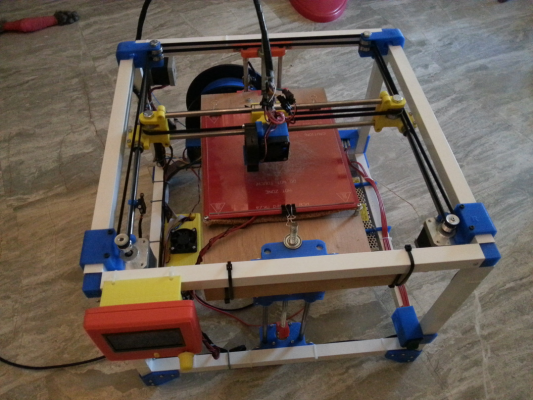
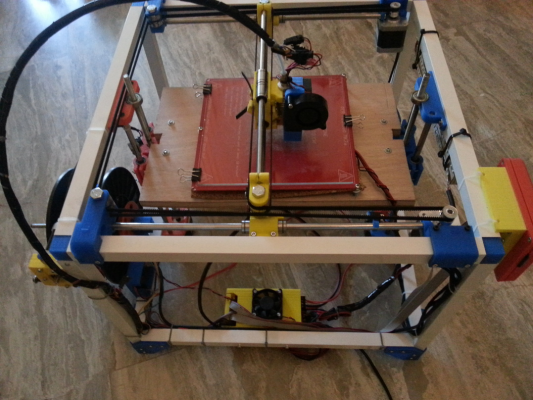
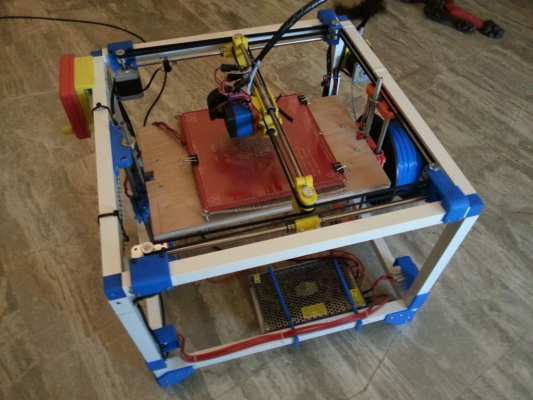
Quite some time later, after a few iterations of positioning and (re)arranging everything, I settled with the current design which you can see in the following pictures from various angles:
All in all, I 'm very happy with the machine right now. It prints beatifully, it's quiet and very easy to service/upgrade.
If someone would ask me what would be the most critical part regarding print quality with the smartcore, I 'd definitely tell them the second Z axis I 've added, in case you missed it in the photos . This made a world of difference for me. And since I mentioned the Z axis, I should give credits also to Jerry because I 'm using his design for the threaded rod driven Z axis (thanks Jerry!).
Feel free to ask or comment on anything. I 'd be happy to hear everyone's opinion
Yiannis.
Edited 1 time(s). Last edit at 06/19/2015 03:28PM by mandrav.
Since then I 've performed many updates on it, some mine, some from the evolution of the original design.
Initially I created it as per the design: in a wooden box but with a twist: I added a fake "floor" to the box so that I could hide all the electronics and wiring under it. This worked a treat in terms of appearence. It was, maybe, my cleanest looking machine by far

But, throughout my journey with it, I had a major issue: unwanted noise amplified by the wooden box...
So, I decided it was time to do something about it (as always
 ) and settled on using cheap aluminum extrusions (the plain square type).
It was at around the same time, while I was evaluating my options for this idea, that madmike posted a link to thingiverse for a corner connector for the same type of aluminum square tubes I was gonna be using. What a great timing
 (thanks Mike!).
Fast forward today, I present my latest smartcore build using the aluminum tubes.
It started with these at hand:
With which I made the upper frame:
I added the posts that would connect the upper and lower frames:
And finally the whole frame got shape! Note that for the lower frame, I didn't use the same connectors as those I used for the upper frame. I designed instead different connectors because I wanted the lower frame to be above ground so I can mount the Z axis stepper as you 'll see in later pictures:
Quite some time later, after a few iterations of positioning and (re)arranging everything, I settled with the current design which you can see in the following pictures from various angles:
All in all, I 'm very happy with the machine right now. It prints beatifully, it's quiet and very easy to service/upgrade.
If someone would ask me what would be the most critical part regarding print quality with the smartcore, I 'd definitely tell them the second Z axis I 've added, in case you missed it in the photos
 . This made a world of difference for me. And since I mentioned the Z axis, I should give credits also to Jerry because I 'm using his design for the threaded rod driven Z axis (thanks Jerry!).
Feel free to ask or comment on anything. I 'd be happy to hear everyone's opinion

Yiannis.
Edited 1 time(s). Last edit at 06/19/2015 03:28PM by mandrav.
|
Re: mandrav's SmartCore build June 19, 2015 04:07PM |
Registered: 10 years ago Posts: 814 |
Very Cool. I'm liking the extrusions. Very nice job!
I've been trying to figure out a clip over the beam Z axis from Jerry's file, but I haven't gotten it nailed down yet.
I've been trying to figure out a clip over the beam Z axis from Jerry's file, but I haven't gotten it nailed down yet.
|
Re: mandrav's SmartCore build June 22, 2015 10:28AM |
Registered: 10 years ago Posts: 814 |
|
Re: mandrav's SmartCore build June 22, 2015 12:23PM |
Registered: 9 years ago Posts: 95 |
|
Re: mandrav's SmartCore build June 22, 2015 07:54PM |
Registered: 9 years ago Posts: 107 |
|
Re: mandrav's SmartCore build June 23, 2015 06:09AM |
Registered: 9 years ago Posts: 95 |
Quote
smerrett79
Yiannis, please could you share your print cooling fan setup? thanks
Sure thing!
The first attachement is the one you see in the pics above but I wasn't too happy with its performance. Maybe my squirrel cage fan's CFM was too low...
Then I designed the second one, which I have now mounted on the printer, and I 'm very happy with it (I 'm only using a 40mm fan on one side plus a 40mm fan for the hotend).
Note though that I designed them for the hotend I currently use which is about 60mm in length.
If you need to adapt this for a different hotend, either tell me its dimensions and I 'll edit it for you or, even better, look for the design files in OnShape (where I 've made them public) and edit it yourself
 (I 'm not sure how I can provide links to them directly).
HTH.
|
Re: mandrav's SmartCore build June 28, 2015 05:32AM |
Registered: 9 years ago Posts: 95 |
Just the other day I received the bushings I had ordered. I first tried to use them with adapters but they were binding too easily.
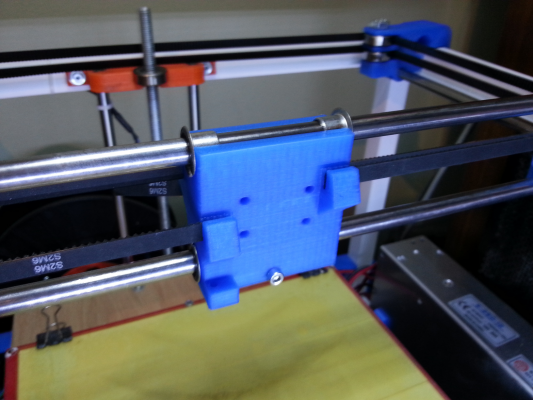
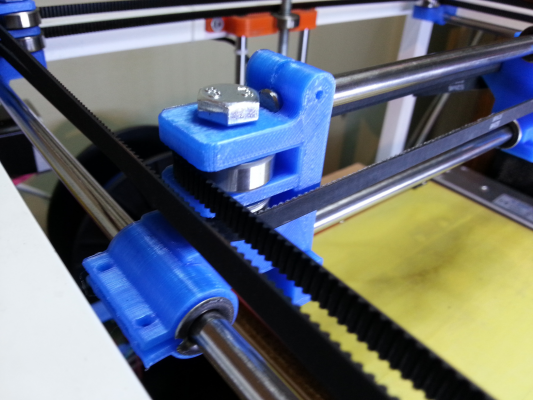
So I went ahead and changed the design of 'head' and 'slide_y' to use the bushings with them directly.
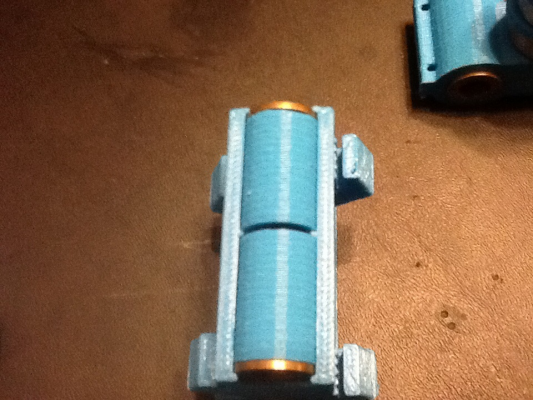
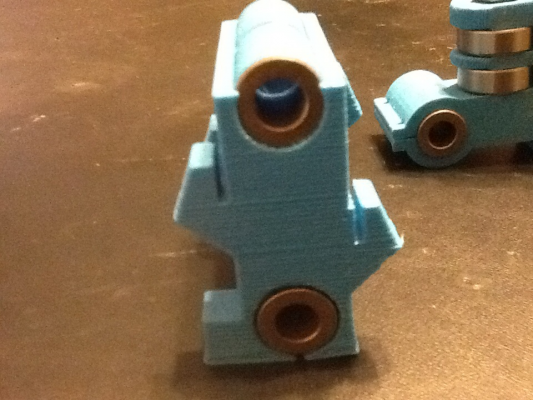
Here's how that turned out:
The machine is now ultra-quiet, working right next to me and I can barely hear it
My wife was even happier than me! And we all know how important it is to keep the wife happy at all times
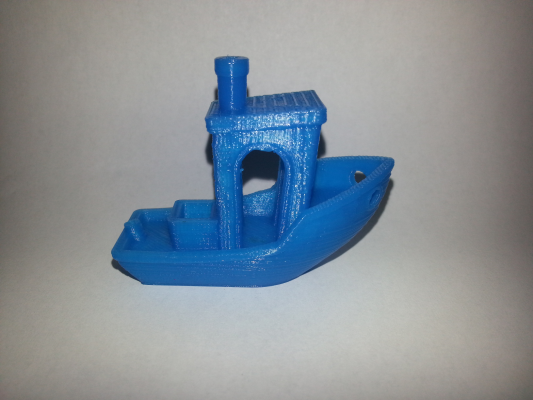
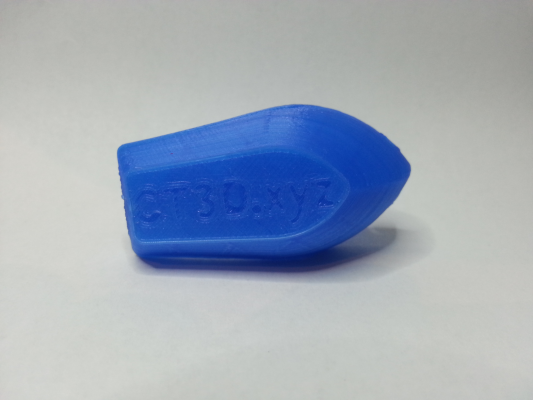
Anyway, seeing that I forgot to upload a picture of a print, here's a couple of them.
Just keep in mind that the picture exaggerates some features which are otherwise unnoticeable in real life...
So I went ahead and changed the design of 'head' and 'slide_y' to use the bushings with them directly.
Here's how that turned out:
The machine is now ultra-quiet, working right next to me and I can barely hear it

My wife was even happier than me! And we all know how important it is to keep the wife happy at all times

Anyway, seeing that I forgot to upload a picture of a print, here's a couple of them.
Just keep in mind that the picture exaggerates some features which are otherwise unnoticeable in real life...
|
Re: mandrav's SmartCore build June 28, 2015 09:23AM |
Registered: 10 years ago Posts: 992 |
impressive ! this smartrapcore surpises me everyday !
very nice work mandrav. We should try some bushing soon
the Smartrap project
[smartfriendz.com]
[www.thingiverse.com]
[reprap.org]
[github.com]
doc assemblage: [reprap.org]
NEW: Forum smartfriendz: [smartraptalk.smartfriendz.com]
very nice work mandrav. We should try some bushing soon

the Smartrap project
[smartfriendz.com]
[www.thingiverse.com]
[reprap.org]
[github.com]
doc assemblage: [reprap.org]
NEW: Forum smartfriendz: [smartraptalk.smartfriendz.com]
|
Re: mandrav's SmartCore build June 28, 2015 11:10AM |
Registered: 10 years ago Posts: 814 |
|
Re: mandrav's SmartCore build June 29, 2015 06:18PM |
Registered: 9 years ago Posts: 107 |
|
Re: mandrav's SmartCore build June 30, 2015 05:12AM |
Registered: 9 years ago Posts: 95 |
Quote
smerrett79
@Mandrav, thank you. Not sure I'll get those files to work for my setup (E3D Lite6) but I'm going to try something else first. Your prints look amazing! Please could you give us more detail on the bushings/rods you use?
The rods I use on this machine I reused from my i3 so they 're "standard" chromed hardened steel (I guess!).
The bushings are these. Note that this is the first time I 've used bushings for linear movement so I can't say if they're the best you could get. They work fine for me though

As for the hotend mount, if you have trouble editing the files you can provide me with the dimensions of your hotend and I can adjust the file for you.
|
Re: mandrav's SmartCore build July 01, 2015 06:20AM |
Registered: 9 years ago Posts: 95 |
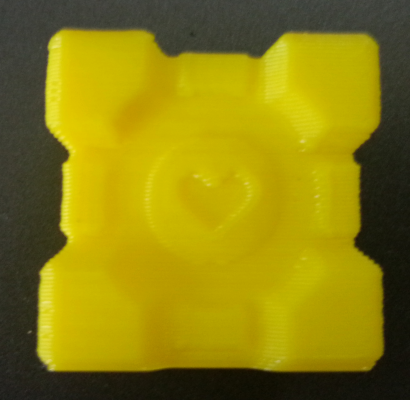
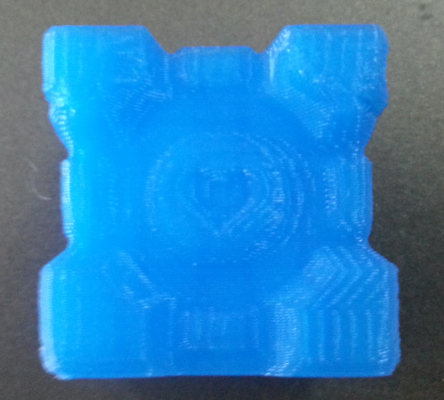
Here's another test piece printed at 0.3mm layer height, 60mm/s.
These settings are nothing spectacular (they 're actually what I call "low-res mode") but the reason I 'm posting this is because I was amazed to see that the ringing effect was almost completely eliminated with the bushings I now use! I mean, if you see the same print back when I had the lm8uu bearings on the printer, you wouldn't believe it's the same printer
The new print with bushings:
The old print with lm8uu bearings:
Note: one other thing I changed is I have also put my good hotend on the machine now but I fail to see how the hotend would affect the ringing...
Edited 1 time(s). Last edit at 07/01/2015 06:25AM by mandrav.
These settings are nothing spectacular (they 're actually what I call "low-res mode") but the reason I 'm posting this is because I was amazed to see that the ringing effect was almost completely eliminated with the bushings I now use! I mean, if you see the same print back when I had the lm8uu bearings on the printer, you wouldn't believe it's the same printer

The new print with bushings:
The old print with lm8uu bearings:
Note: one other thing I changed is I have also put my good hotend on the machine now but I fail to see how the hotend would affect the ringing...
Edited 1 time(s). Last edit at 07/01/2015 06:25AM by mandrav.
|
Re: mandrav's SmartCore build July 01, 2015 01:33PM |
Registered: 9 years ago Posts: 180 |
I had the opposite effect with the bushings I used made from PLA. They were good starting out but when I started to do longer prints, it would randomly bind and cause one of the axis to get stuck a little bit and it would destroy the whole print. I converted every bushing to a bearing which happen to be very smooth on the rods. I got lucky I had some that were well behaved :-) Prints are much better. Am working on getting the prints faster without compromising quality. I printed out Jerry's top z axis bracket for a leads crew/threaded rod in Cura going super slow but at very, very high quality. With 60 percent infill the part is actually quite heavy and looks really nice. The bad, it took 5.5 hours to print.
|
Re: mandrav's SmartCore build July 02, 2015 04:45AM |
Registered: 8 years ago Posts: 24 |
Hi
What parameters you changed to use this bushings?
I'm planing about use this ones Bushings
I'm a bit losed with the code
Edit: Maybe can use this ones Other bushings
Edited 1 time(s). Last edit at 07/02/2015 04:47AM by CeledaBcn.
What parameters you changed to use this bushings?
I'm planing about use this ones Bushings
I'm a bit losed with the code

Edit: Maybe can use this ones
 Other bushings
Edited 1 time(s). Last edit at 07/02/2015 04:47AM by CeledaBcn.
|
Re: mandrav's SmartCore build July 02, 2015 08:00AM |
Registered: 9 years ago Posts: 95 |
Quote
CeledaBcn
Hi
What parameters you changed to use this bushings?
I'm planing about use this ones Bushings
I'm a bit losed with the code
Edit: Maybe can use this onesOther bushings
Both bushing types you linked should work just fine.
For using them you have two options:
a) edit the jscad file to change the hole dimensions for 'head' and 'slide_y' so that the bushings you choose fit, or
b) you can search thingiverse for 'bushing adapter'. With these you will fit your bushings inside the adapter and use the adapter in place of the lm8uu/lm6uu you would otherwise use.
I finally went with option (a). But I first had tried option (b) and that didn't go too well for me... YMMV...
HTH.
|
Re: mandrav's SmartCore build August 18, 2015 07:57AM |
Registered: 10 years ago Posts: 49 |
Hi,
I have a problem with firmware marlin and corexy setup.
I made a new printer Smartrapcore
I had setted:
#define COREXY
#define INVERT_X_DIR true
#define INVERT_Y_DIR true
After installed firmware the axis X is ok but the axis Y work is on wrong direction and doesn't return to home
I used the firmware [github.com]
on Minitronics 1.0
somebody can help me ?
Thanks.
|
Re: mandrav's SmartCore build August 18, 2015 04:32PM |
Registered: 9 years ago Posts: 107 |
|
Re: mandrav's SmartCore build August 18, 2015 04:48PM |
Registered: 9 years ago Posts: 107 |
@Mandrav please could you give us an update on your printer? I'm especially interested in the performance and longevity of the bushings and whether you are still recommending two z axis drives. What were the issues you think the second z drive helped with?
I'm about to build a new smartcore and want to reduce noise (by cutting out the middle portion of each box panel) and improve quality - specifically the ribbing that you document above being sorted by the bushings. Also, did you have to sand/polish the rods? Any chance of taking calipers to them and confirming the precise diameter?
Thank you.
Edited 1 time(s). Last edit at 08/19/2015 01:45AM by smerrett79.
|
Re: mandrav's SmartCore build August 19, 2015 09:05AM |
Registered: 9 years ago Posts: 95 |
In my case I need the 2nd Z axis because with a single one the bed is not stable enough for me. I believe it needs a better Z carriage but it was easier for me to just add a second motor that I had lying around 
I reused the rods as they were. No sanding/polishing. I can measure dimensions with calipers but it will have to wait for the weekend because I 'm on a deadline at work and I barely even go home these days...

I reused the rods as they were. No sanding/polishing. I can measure dimensions with calipers but it will have to wait for the weekend because I 'm on a deadline at work and I barely even go home these days...
|
Re: mandrav's SmartCore build August 19, 2015 11:11AM |
Registered: 10 years ago Posts: 49 |
|
Re: mandrav's SmartCore build August 19, 2015 03:55PM |
Registered: 8 years ago Posts: 90 |
|
Re: mandrav's SmartCore build August 19, 2015 04:08PM |
Registered: 9 years ago Posts: 95 |
Quote
MichaelBrock
Mandrav, have the two separate z-axis motors been working well for you? It is my plan to add a second z-axis carriage and saw some discussion that running two separate motors makes it difficult to keep them in sync.
Yes, no problems that I can see. Two z-motors is not uncommon either for many popular designs (think i3, Mendel, etc) so I can't see why it would be a problem for this machine

|
Re: mandrav's SmartCore build August 20, 2015 02:13AM |
Registered: 9 years ago Posts: 107 |
Quote
MichaelBrock
Mandrav, have the two separate z-axis motors been working well for you? It is my plan to add a second z-axis carriage and saw some discussion that running two separate motors makes it difficult to keep them in sync.
Michael
@MichaelBrock, RAMPS 1.4 has two connections to the z axis driver so each stepper would receive the same power and commands. I can only imagine that this would be a problem if one side was so heavily loaded that it skipped a step and the other side didn't. I'm thinking of printing a pair of gears and using GT2 belt to mechanically couple two threaded rods (probably 8mm lead screw) and only use one stepper to drive them both.
|
Re: mandrav's SmartCore build August 20, 2015 02:17AM |
Registered: 9 years ago Posts: 107 |
Quote
mandrav
In my case I need the 2nd Z axis because with a single one the bed is not stable enough for me. I believe it needs a better Z carriage but it was easier for me to just add a second motor that I had lying around
I reused the rods as they were. No sanding/polishing. I can measure dimensions with calipers but it will have to wait for the weekend because I 'm on a deadline at work and I barely even go home these days...
Very grateful, thanks. I agree with the z carriage comment. Wish I had the spare motor lying around! Hope the rest of the week goes well.
Simon
|
Re: mandrav's SmartCore build September 03, 2015 06:38PM |
Registered: 9 years ago Posts: 107 |
|
Re: mandrav's SmartCore build September 03, 2015 07:46PM |
Registered: 10 years ago Posts: 814 |
Just use whatever cad program you use to make a bushing holder that the internal diameter matches the outside diameter of the bushing, and the outside diameter matches whatever LMxUU bearing your using on your SmartCore. Press the bushings in place and then snap them into the head.
Edited 1 time(s). Last edit at 09/03/2015 07:51PM by madmike8.
Edited 1 time(s). Last edit at 09/03/2015 07:51PM by madmike8.
|
Re: mandrav's SmartCore build September 04, 2015 04:25AM |
Registered: 9 years ago Posts: 95 |
Quote
smerrett79
Yiannis, please could you point to the lines in the code you edited to make the head accept the bushings and describe if you went for interference fit between bushing and head hole etc? Thank you
Simon, I unfortunately lost my changes during a cleanup of my disk

It was an easy task though and took me probably around 5 mins to make the changes. If you 're really set to go this way, I could try making the changes again (and share them this time!).
Or you could go with Mike's way. Nothing wrong with that too

|
Re: mandrav's SmartCore build September 04, 2015 05:26PM |
Registered: 9 years ago Posts: 107 |
@madmike8, yours look great - are they bronze bushings? I went with the exact items that Yiannis linked to in his earlier post so was hopeful for an instant fit.
@Mandrav, thanks for the offer but I can't possibly ask you to do it again just for me. I was after a short cut but will give it a try myself (not super confident in openjscad yet).
Will post on my build thread if I make progress. Can't believe how quiet the bushings sound on just the rod - looking forward to a converted printer.
Ps, if anyone is interested I have plenty of spare bushings as MOQ is 100! Happy to send in UK for pennies plus postage.
|
Re: mandrav's SmartCore build September 11, 2015 05:01AM |
Registered: 9 years ago Posts: 104 |
|
Re: mandrav's SmartCore build September 17, 2015 12:29PM |
Registered: 8 years ago Posts: 13 |
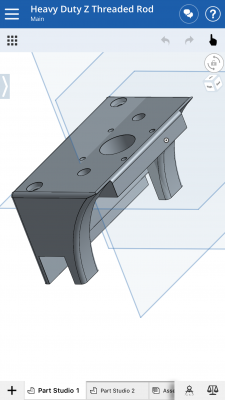
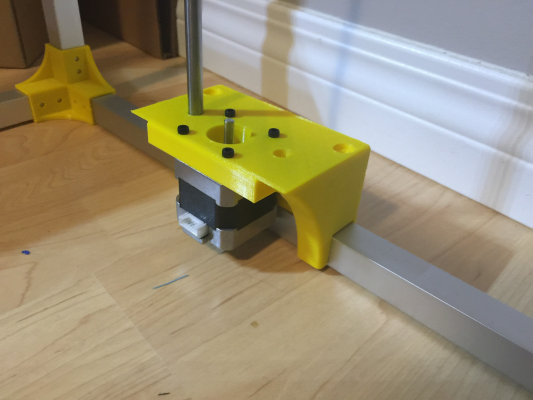
I just finished making new motor mounts or 3/4 aluminum tubing for djinn's heavy duty threaded rod Z axis and they turned out pretty good. I did them up in Onshape and I was pretty impressed at how fast it was to design them. Search Onshape for Heavy Duty Z Threaded Rod. Works with the top mount and Z Sled from djinn's heavy duty Z. This way the whole frame can sit flat.
Sorry, only registered users may post in this forum.
