G&C Printer
Posted by filipeCampos
|
Re: G&C Printer May 04, 2016 02:34AM |
Registered: 8 years ago Posts: 9 |
Quote
filipeCampos
At the moment i starting the design a new version of this printer that will use two 9mm rails for the y axis and one 12mm rail for the x. The structure and bed will be the same, i will simply remove my actual corexy mechanism and replace with the new one. The main problem of this new version it will be probably necessary to have access to a cnc to cut 3 to 5 aluminium pieces.
Sounds great! Keep us posted!
|
Re: G&C Printer May 04, 2016 04:17AM |
Registered: 8 years ago Posts: 346 |
@Amoniak
Missing;
- one mk8 extruder
- If you go with a bowdem extrduer you need the pieces that goes on top of the carriage, it will secure the ptfe tube and electric cables
- all (x, y and z) the min endstop support. you can print the max endstop latter.
- the two rectangle that will secure the M3 screw to adjust the min / max X endstop must be printed in separated.
- the top pieces of the Z axis can be printed latter.
All the piece do not need print support, only is necessary to print in the correct position. print in pla with 30 to 50% infill, no need more infill.
the reset looks to be ok.
|
Re: G&C Printer May 05, 2016 01:19AM |
Registered: 7 years ago Posts: 4 |
Quote
Amoniak
I'm trying to figure out what the minimum printed parts needed is to get this printer going.
I've build mine with the same philosphy (i didn't have access to "good" a 3d printer and 3dhubs is very expensive...)
the top support for the z screw is not needed to get the printer working (you can print it later)
endstops mounts can be omitted (i've used hot glue and some "waste" material)
you can also buy a cheap metal extruder online (without having to print one)
PS: hi everyone, i've built this printer too!
|
Re: G&C Printer May 05, 2016 06:27AM |
Registered: 8 years ago Posts: 346 |
was Nikel90 indicate, is better to buy this plate instead of the printed one:
[www.ebay.com]
if you go with the mk8 bowden setup or the dual mk8 direct version, you can buy the next extruder on ebay (they work fine). For the direct mk8 you need to use the printed one.
[www.ebay.com]
[www.ebay.com]
if you go with the mk8 bowden setup or the dual mk8 direct version, you can buy the next extruder on ebay (they work fine). For the direct mk8 you need to use the printed one.
[www.ebay.com]
|
Re: G&C Printer May 05, 2016 07:11PM |
Registered: 7 years ago Posts: 33 |
Thanks!
Regarding extruder, I'm not sure yet what type I will go for... But I will definitely order the alu hotend plate though.
I'll order som PLA and hope I can convince my colleague to use the company Zyyx printer off hours to print the parts.
What would you recommend as primary layer hight, 0.2? (Think it's a 0.4 nozzle)
I've made some rearrangements to what parts to print and also to what position (I think) they should be printed on.
I guess you attache the M3 screw holders for the min / max X endstops with glue? (I was almost sure there was I post here somewhere to combine them to the Y carrige)
Another (stupid) question, if using bowden setup, how much clearance on top would you need (above the printers 52cm)?
|
Re: G&C Printer May 05, 2016 08:29PM |
Registered: 8 years ago Posts: 11 |
|
Re: G&C Printer May 06, 2016 04:31AM |
Registered: 8 years ago Posts: 346 |
If you have never print before where some tips:
-Is very important to print with the correct temperature, if the temperature is to low the pieces will not be strong enough. Normally i use bq pla and print at 210ºc to get a solid adhesion between layer. But the temperate depends a lot of the type of pla you use.
-I have the same opinion was critter42, go with 0.3. print faster and was good enough resolution.
-Use 35% infill (rectangular or honeybee shape) and 3 outside layers.
-Bed at 60ºC-65ºC at first layer, them lower to 50ºC. I normally configure the slider to have the first layer 70ºC-75ºC, this is because the real temp of the glass will be a little less.
Another (stupid) question, if using bowden setup, how much clearance on top would you need (above the printers 52cm)?
No sure if i understand the question, are you wasking the lengt of the ptfe tube?
I guess you attache the M3 screw holders for the min / max X endstops with glue?
yes (super glue), done this way to place with precision the screw.
Edited 2 time(s). Last edit at 05/06/2016 04:49AM by filipeCampos.
|
Re: G&C Printer June 10, 2016 08:29AM |
Registered: 7 years ago Posts: 33 |
So printing has begun, very exciting and I’m maybe 1/3 complete. It will take some weeks until I’m finished as I only print 1 or 2 pieces every other day or so.
I’ve realized that I’ll blow my budget, which is ok but I’ll still try to be economical where I can.
There are somethings I’m contemplating, and I’d like to ask your advice / feedback (forgive my inexperience in this).
Power supply 12v vs 24v
Generally it seems suggested to go 24v, it’s even suggested in the BOM of G&C.
With my limited electrical knowledge I’m trying to understand the full benefits of going 24v vs 12v.
The most apparent benefit seems to be the heatbed heating time with 24v, but on the other hand all the electrical accessories (Fans etc) also need to be 24v. Which is not a huge deal, it may be a little more costly and not as available as the 12v alternatives.
- Are there more benefits to going 24v? If so what would the recommended Amp be for the PSU?
Controller board
I’d like to go with an economical choice here, not wanting to spend 100 buks on a duet or similar cards.
What I’ve found so far that seems to be an alternative to the usual Arduino + RAMPS that also support the eventual 24v is the MKS Sbase v1.2.
The concern I have though is some reports of high motor noise with the DRV8825 drivers. And low noise is a priority for me as I live quite small.
- As some built the G&C with it, and even build other printers with it I’d like to hear your opinion, specially considering motor noice.
Slide bearings
As mentioned sound level is of importance for me, so I’d like to avoid the LM8UU route.
IGUS could be an alternative, but it seems to be a hit or miss based on your ability to clamp them just right in the carriages.
I’ve thought about trying Bronze bushing, they are fairly inexpensive so if it does not work it wouldn’t be too big of a deal.
I however foresee the same problems with them as with IGUS, the ones I’ve found usually have an outer Ø of 10. Meaning material thickness of just 1mm. They would probably warp to from clamping pressure in the carriages.
Heatbed
Certainly I will go the 3 point leveling instead of 4. And it will heated for sure.
One of my priorities is to have a removable build plate.
- In that case is the only alternative Glass on top of whatever heatbed you use?
Motor choice.
Again, excuse my ignorance but I’m trying to understand what kind of motors I should use.
The BOM mentions 1.7A, which normally have a holding torque of 40N.cm, would it be enough for this printer?
As the DRV8825 on the MKS Sbase has a Maximum current per phase of 2.2A, would going with 2A motors be better?
Thanks in advance!
|
Re: G&C Printer June 10, 2016 12:59PM |
Registered: 10 years ago Posts: 14,672 |
Quote
Amoniak
Controller board
I’d like to go with an economical choice here, not wanting to spend 100 buks on a duet or similar cards.
What I’ve found so far that seems to be an alternative to the usual Arduino + RAMPS that also support the eventual 24v is the MKS Sbase v1.2.
The concern I have though is some reports of high motor noise with the DRV8825 drivers. And low noise is a priority for me as I live quite small.
- As some built the G&C with it, and even build other printers with it I’d like to hear your opinion, specially considering motor noice.
Two things to bear in mind:
- To some extent, you get what you pay for, in terms of manufacturing quality - and even more important, testing. The MKS SBASE has gone through a few iterations to fix design defects, some of which would have become apparent sooner had they tested the boards thoroughly. Maybe the design defects are all fixed now, maybe not.
- The MKS SBASE is a derivative of Smoothieboard. As Smoothieboard is open source, you may take the view that this is fair game. But MKS doesn't reward Arthur and the others who have put a lot of work into developing Smoothieboard and Smoothieware and continue to support and develop Smoothieware. If you want to reward those who have done the work to develop advanced 3D printer electronics and firmware, buy a genuine Duet 0.8.5 or Smoothieboard.
[Full disclosure: although I and a few others have taken over the maintenance of RepRapFirmware, I don't earn anything from sales of the Duet. I do have a financial interest in the new Duet WiFi.]
Edited 3 time(s). Last edit at 06/10/2016 01:04PM by dc42.
Large delta printer [miscsolutions.wordpress.com], E3D tool changer, Robotdigg SCARA printer, Crane Quad and Ormerod
Disclosure: I design Duet electronics and work on RepRapFirmware, [duet3d.com].
|
Re: G&C Printer June 10, 2016 04:15PM |
Registered: 12 years ago Posts: 548 |
Quote
Amoniak
Power supply 12v vs 24v
Generally it seems suggested to go 24v, it’s even suggested in the BOM of G&C.
With my limited electrical knowledge I’m trying to understand the full benefits of going 24v vs 12v.
The most apparent benefit seems to be the heatbed heating time with 24v, but on the other hand all the electrical accessories (Fans etc) also need to be 24v. Which is not a huge deal, it may be a little more costly and not as available as the 12v alternatives.
- Are there more benefits to going 24v? If so what would the recommended Amp be for the PSU?
The stepper motors have more torque with 24v, which means you can run them faster.
Quote
Amoniak
Controller board
I’d like to go with an economical choice here, not wanting to spend 100 buks on a duet or similar cards.
What I’ve found so far that seems to be an alternative to the usual Arduino + RAMPS that also support the eventual 24v is the MKS Sbase v1.2.
The concern I have though is some reports of high motor noise with the DRV8825 drivers. And low noise is a priority for me as I live quite small.
- As some built the G&C with it, and even build other printers with it I’d like to hear your opinion, specially considering motor noice.
Another controller to look at is the RADDS and an Arduino Due. I used 8825 drivers on the radds at 12v, and they were quieter than the 4988 drivers. Mostly due to the 32 microstepping setting. I'm now using a Duet 0.85 at 24v and it's quieter and easier to use with it's web interface.
Quote
Amoniak
Slide bearings
As mentioned sound level is of importance for me, so I’d like to avoid the LM8UU route.
IGUS could be an alternative, but it seems to be a hit or miss based on your ability to clamp them just right in the carriages.
I’ve thought about trying Bronze bushing, they are fairly inexpensive so if it does not work it wouldn’t be too big of a deal.
I however foresee the same problems with them as with IGUS, the ones I’ve found usually have an outer Ø of 10. Meaning material thickness of just 1mm. They would probably warp to from clamping pressure in the carriages.
I have used bronze self-aligning bushing on the x-axis and they're quieter that LM8UU bearings and currently use makerslide for the x and y axes.
Quote
Amoniak
Heatbed
Certainly I will go the 3 point leveling instead of 4. And it will heated for sure.
One of my priorities is to have a removable build plate.
- In that case is the only alternative Glass on top of whatever heatbed you use?
I use a 1/4" MIC-6 AL plate and print directly on it using a purple glue stick to get pla, abs, and petg to stick. I also use a McMaster-Carr 800w silicon AC heater & SSR to heat the bed. I also have a thermal fuse wired in to prevent problems if it ever over heats.
Quote
Amoniak
Motor choice.
Again, excuse my ignorance but I’m trying to understand what kind of motors I should use.
The BOM mentions 1.7A, which normally have a holding torque of 40N.cm, would it be enough for this printer?
As the DRV8825 on the MKS Sbase has a Maximum current per phase of 2.2A, would going with 2A motors be better?
Unless you can cool the 8825 well enough, you won't be able to get 2a from them. The current plug-in style with the chip on top, you can't cool them efficiently since those chips cool through the circuit board mounting. Usually with a 3d printer, you shouldn't need that much run a stepper motor. On my printer the highest current setting is for the extruder, which is 1000ma, the other axes are less.
|
Re: G&C Printer June 11, 2016 12:07PM |
Registered: 8 years ago Posts: 346 |
Hi, sorry to respond only know. Passed one week of vacation out of home and with no time to go online.
About 12v vs 24v: in my opinion in make only sense to go with 24v if you will have a big heated bed, otherwise simply go with 12v. 24v to power motors only make sense in building a cnc, the 3d printer do not need so much torque.
About the 1.7A motors: I have 3 of theses on my printer (x, y and z), then i use 2 small 1.4A motor in the dual extruder. In my opinion is better to go with all 1.4A motors. The 1.7A are too big and you probably do not use the little more torque they provide in relation to the 1.4A.
About the board: i strongly advise to go with a 32bit board. If noise is a big factor them i suggest radds with 1/128 steppers, but is a more expensive solution (more of 100 buks). If money is more important than go with the duet 0.6 or on ebay you can buy a smoothieboard clone for 50 buks.
slide bearings: I use igus and they work great for me, very silent. But they are pretty difficult to install and not cheap. The main problem about the igus there are all made of plastic and they have by default a small gap. This gap is intentional and you need to apply some force on the casing to remove the gap. But, to much force and the bearing will not slide. I think bronze bearing is the best option, but i never tried, you can be the first.. check the next video about a review of the igus: [www.youtube.com]
heated bed: Why do you want use a 3 point bed? The bed arm is not prepared to have this setup and i do no see any vantage doing this way.
motor choise: You can go with small 1.4A motors, they are less expensive and they have enough torque for the printer. The 1.7A have the advantage to have a little more torque and will heat less.
|
Re: G&C Printer July 23, 2016 12:08PM |
Registered: 8 years ago Posts: 346 |
Hi,
Planning to make some big upgrades on the printer, on this post i will put the list of planned changes.
I only in the planning phase and release the project in hope i get some good critics and this way correct possible problems i do not have see.
The modification made:
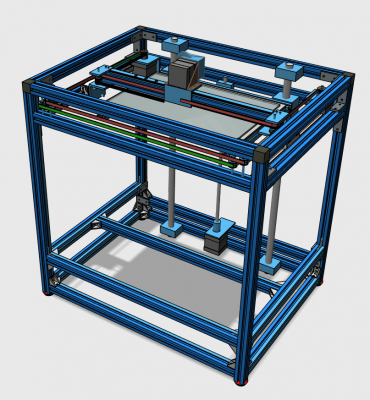
-There is no printed parts, all parts are made aluminium. this allow to reduce rigidity problem and someone without a 3d printer can build one. some metal parts is necessary to make 4mm holes, but there is not need of a cnc.
-bigger print volume: 300mm x 200mm x 310mm
-All axis have better linear mechanism: it use 2 x 15mm linear rails on the Y axis and a long 12mm linear rail on the X. The Z bed use 2 x 16mm rods and 2 x longs linear bearing. Z screw is 8mm with 1.5 pitch to have better resolution and to be drive by only one motor.
-moved the bed more close of the 16mm rods to reduce vibrations problems.
-changed to only support 1 direct extruder. I almost never used my dual extruder setup, was fun to build and is pretty useless for me. Print with two color is a big challenge with a dual extruder setup because of the oozing contamination problem.
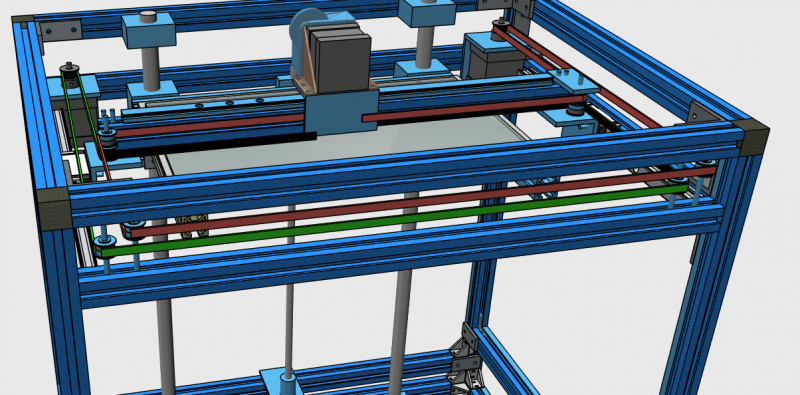
For the corexy belts configuration i used on the based on the the_digital_dentist was build and shared on is thread. I not sure in this part if the one i designed is correct... need help where to check if i do not have made any error.
The 3d design can be found on the next link:
[www.thingiverse.com]
This next printer will be build using the material of the g&c, and i designed this next version the reuse the most of my atual print.
The list of the material i planning to buy:
linear rail X (370mm): [lineareasy.de]
2 x linear rail Y (300mm): [lineareasy.de]
9 x 2020 profile 480mm: motedis shop
1 x 2020 profile 408mm: motedis shop
1 x 2060 profile 320mm: motedis shop
2 x angle bars 40x40x4mm with 50mm size: [www.motedis.com]
1 x angle bars 40x40x4mm with 62mm size: [www.motedis.com]
E3D titan extruder and is support: ebay? not sure..
4 x 16 shaft suport: [lineareasy.de]
2 x 16mm linear bearings: [lineareasy.de]
2 x 16 precision shafts (520mm): [lineareasy.de]
z motor mount: [www.motedis.com]
2 x motor mount for the x and y: [www.ebay.com]
Z screw nuts: [www.motedis.com]
8mm Z screw with 1.5 pitch: not found where they sell
heated bed with 300mm x 200mm: ebay
more M5 and M6 tnuts and M5, M6 screws...
Problems this design was:
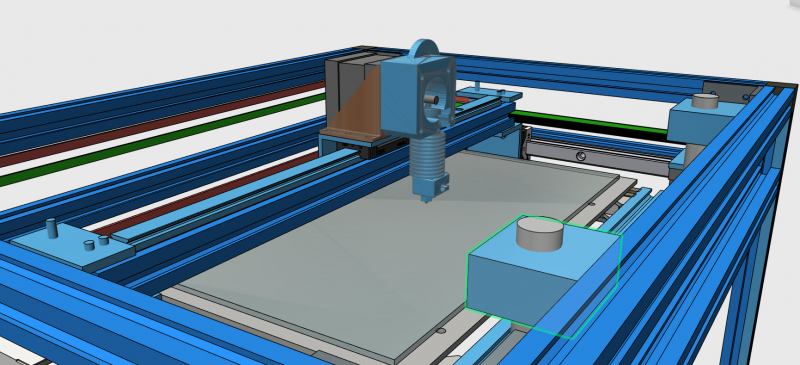
- the hotend is not facing the front of the printer, it was necessary to do this way to move the bed closer to the rods.
- I will reuse only 2 acrylic panels.
Edited 6 time(s). Last edit at 07/23/2016 02:22PM by filipeCampos.
|
Re: G&C Printer July 23, 2016 12:32PM |
Registered: 8 years ago Posts: 9 |
Looks very interesting!
I'm currently using a titan extruder on the original design, but with a similar 'front hanging' hot end arrangement to the new version. This meant I had to extend the bed platform and move the bed forward to compensate for the change in position of the print head.
It's a bit of a shame that you've decided to change the size of the frame, the current size fits absolutely perfectly on top of an Ikea drawer unit that I happened to have spare.
I might try a similar rail based approach, but retain the original frame size, any idea whether this would give a significant increase in print area?
|
Re: G&C Printer July 23, 2016 01:03PM |
Registered: 8 years ago Posts: 346 |
If you use the same linear rails in the actual frame of the printer you will lose 2cm.
But you can use 12mm compact linear rail insteaded of the 15mm normal ones and you will have the complete 20cm. The 12mm compact linear rail each have less 11mm in relation to the 15mm rail (normal version).
I have increase the frame 12cm only in the X direction to allow me two things:
1) install a 300mmx200 heated bed
2) use normal 15mm linear rail are 26€ less of the compact version and they are stronger. The normal use 4 sets of bearing and the compact use only 2 sets.
The increase of the 12cm of the frame will not be expensive, something like 20€.
Edited 1 time(s). Last edit at 07/23/2016 01:12PM by filipeCampos.
|
Re: G&C Printer July 24, 2016 11:32AM |
Registered: 8 years ago Posts: 346 |
Made more changes:
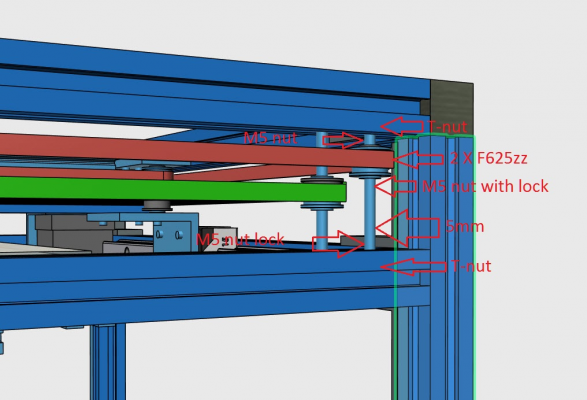
-changed the 4 front belt pulleys using 8 x F625zz. it will allow to use a 5mm rods with heavy t-nuts to secure them directly on the 2020 profile. The bearings have a bigger radius of 16mm instead of the 13mm of the first version.
-modify the extruder to a bulldog clone instead of the E3D titan. It is 5 times cheaper (14€) and i do not like some aspects of the titan (all plastic and use the rod motor shaft to secure on of the plastic pieces).
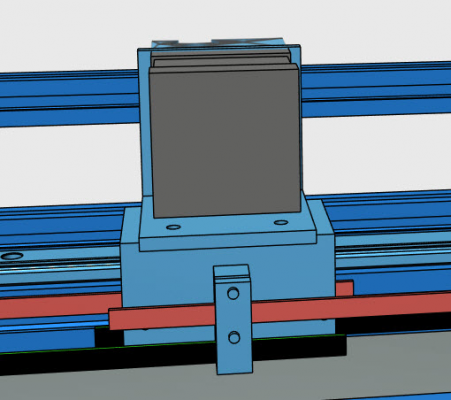
-Finished the pieces that will secure the belts on the carriage. It will use 3 simple metal pieces and one will be printed
Edited 1 time(s). Last edit at 07/24/2016 11:36AM by filipeCampos.
|
Re: G&C Printer September 10, 2016 02:17PM |
Registered: 9 years ago Posts: 104 |
|
Re: G&C Printer September 10, 2016 04:38PM |
Registered: 8 years ago Posts: 346 |
Hi,
I have dropped this build version and i doing a different one that use a big aluminium plate that goes on top of the g&c printer. I am in the building fase but it is not yet finished. The new version i doing reuse the same main structure but all the x, y and z was redesigned to not use printed parts and have more precision. Is a very big upgrade and expensive one, i think i will create a new thread because it modify complety the printer. I only reusing the main structure and electronic.
Specifications:
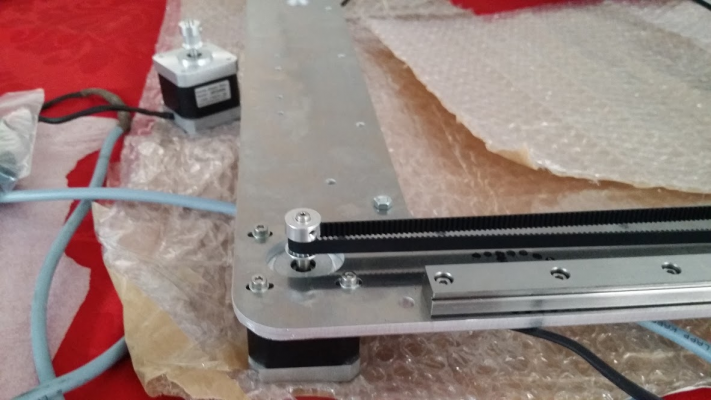
-3 x 15mm HiWin compact linear rails
-The corexy is only in one plane, using a twist on front to achieve this. the belt in front do not touch because there are two pulley that are in different planes.
-Only two pulley are in contact with the teeth of the belt.
-The carriage was made using two nema17 motor plates
-Using only one big 4 meter belt instead of two belts.
-The extruder is a bulldog clone and E3D V6 hotend. I think the E3D titan extruder can be used instead of the bullgod, but i need to confirm this.
-Only printed parts are used to secure the endstop and the belt on the carriage.
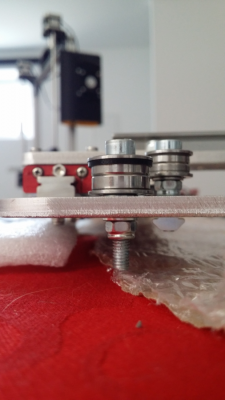
-Using only flagged bearings was pulleys, the two bearing that are in contact with the tooth belt have 16mm diameter, all the other was 13mm diameter. All are secure using 5mm (M5) screws.
-The carriage was designed to be to most simple possible and light, the belt tension mechanism was not put on the carriage and was moved on the motor support. Each motor allow to add 5mm of tension on the unique belt.
-The printer was 40cmx40x50 of dimension and the print area will be 31x28x?. I still do not know the exact Z print volume, but is planned to be 40cm. Overall it was a good print volume in relation to the printer volume.
Problems:
-The corexy is one top of the printer and is not hidden or protected.
-Is a printer planned to print pla and not abs, it will be pretty difficult to add a enclosure.
-It will use a big cantilever beg (33x31cm), upscale the printer can not be a possible option.
-Expensive...
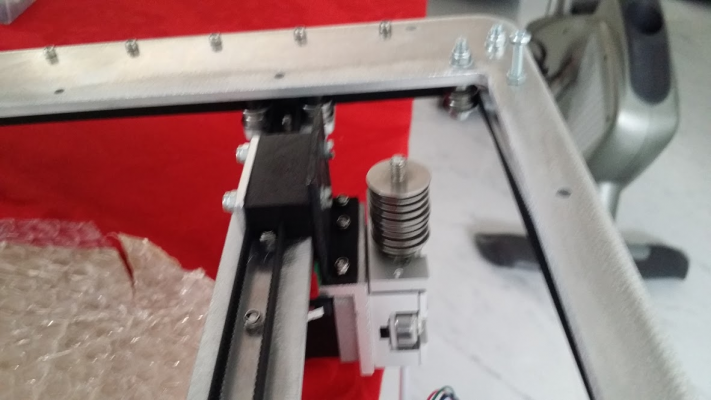
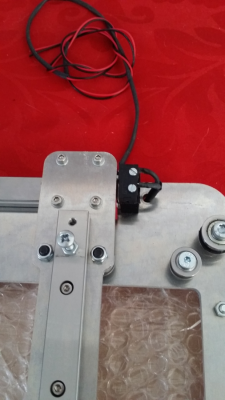
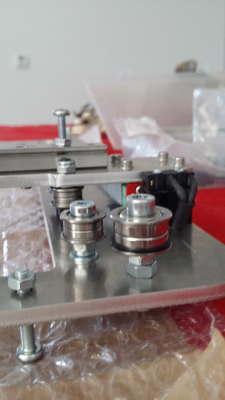
some photos of the top plate:
Edited 4 time(s). Last edit at 09/11/2016 07:14AM by filipeCampos.
|
Re: G&C Printer September 11, 2016 07:26AM |
Registered: 8 years ago Posts: 346 |
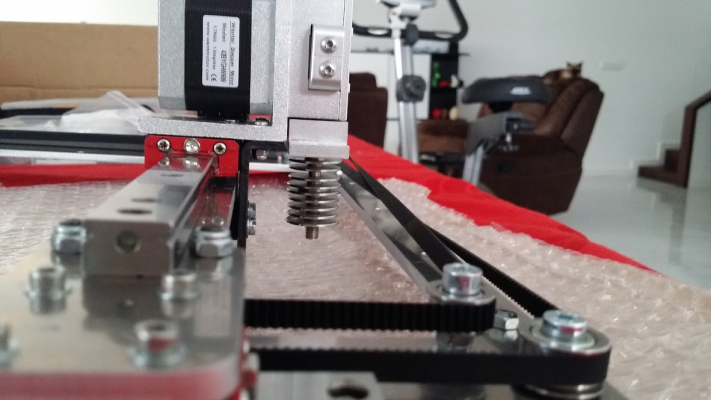
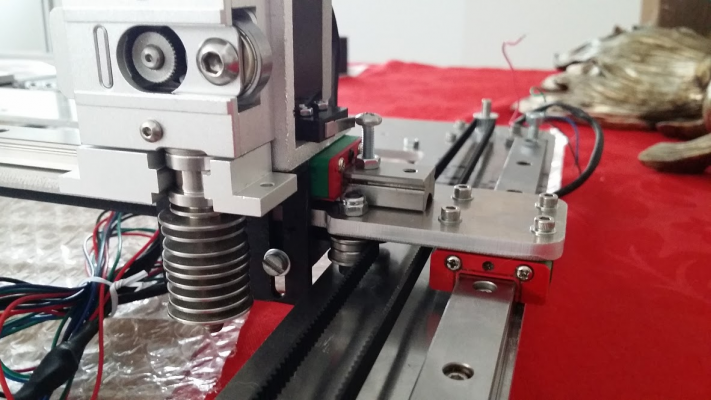
some more photos:
The Y endStop, it work too was a bloquer to the Y rails.
Added a 1.5mm black printed spacer to secure the 6mm belt on top of the left pulley.
Added a 1.5mm black printed spacer to secure the 6mm belt on bottom of the right pulley. One of the pulley will be secure directly on the top of the printer in the 2020 aluminum profile using T-nut M5
The printed pieces that secure the 4meter belt, it was a 4mm gaap to allow to pass the M3 lock nuts that secure X 15mm rail.
Edited 2 time(s). Last edit at 09/11/2016 07:53AM by filipeCampos.
|
Re: G&C Printer September 11, 2016 10:33AM |
Registered: 9 years ago Posts: 104 |
|
Re: G&C Printer September 11, 2016 11:29AM |
Registered: 8 years ago Posts: 346 |
|
Re: G&C Printer September 11, 2016 12:58PM |
Registered: 9 years ago Posts: 104 |
|
Re: G&C Printer September 11, 2016 01:36PM |
Registered: 8 years ago Posts: 346 |
The main point of the upgrade is to have better linear movements. I never used wheels but do you think you could achieve better result with wheels instead of linear rails?
I already tested the corexy movement using the linear rail and i get zero play of the carriage in any direction, the movement is smooth and is necessary very little effort to move it. The rail are far superior to the rods but i do know not about wheels. But i can tell you it will be pretty difficult to beat.
made a quick video and uploaded on youtube:
[www.youtube.com]
Edited 2 time(s). Last edit at 09/11/2016 01:53PM by filipeCampos.
|
Re: G&C Printer September 11, 2016 05:10PM |
Registered: 10 years ago Posts: 221 |
|
Re: G&C Printer November 08, 2016 06:40AM |
Registered: 9 years ago Posts: 893 |
Hi Filipe,
I'm still playing around with this printer!
It continues to work well, but I've decided to try a direct extruder rather than bowden. I'm going to use the same aluminium mechanism that you used in your duel extruder setup - but just one of them. I was going to use the same plastic parts on the swinging arm of the extruder (the parts that hold the bowden coupler) but I'm having some problems...
In the file two_hotend.123dx it shows 2 parts to locate the coupler, and I was just wondering why? There's the part that is screwed onto the arm, then a square block that the coupler screws into. Is that square block meant to be loose, or glued to the other piece? Or was it meant to be all one part?
Whichever way it's meant to be, Autodesk produces an error when I try to export the square block as an STL file - one corner is distorted, so that's another little problem to sort out...
Cheers,
David
I'm still playing around with this printer!

It continues to work well, but I've decided to try a direct extruder rather than bowden. I'm going to use the same aluminium mechanism that you used in your duel extruder setup - but just one of them. I was going to use the same plastic parts on the swinging arm of the extruder (the parts that hold the bowden coupler) but I'm having some problems...
In the file two_hotend.123dx it shows 2 parts to locate the coupler, and I was just wondering why? There's the part that is screwed onto the arm, then a square block that the coupler screws into. Is that square block meant to be loose, or glued to the other piece? Or was it meant to be all one part?
Whichever way it's meant to be, Autodesk produces an error when I try to export the square block as an STL file - one corner is distorted, so that's another little problem to sort out...

Cheers,
David
|
Re: G&C Printer November 08, 2016 07:06AM |
Registered: 8 years ago Posts: 346 |
hi David,
In the file two_hotend.123dx it shows 2 parts to locate the coupler, and I was just wondering why?
I forget to merge it, is only one part. i have uploaded this part with the name "top.stl" on thingiverse
i have try before the dual direct setup and the carriage turn to be very heavy, it will be necessary to slow down the print speed or else you get artefact. I later decided to remove one of the direct extruder and used only one was you want. Overall it will work, but is far to be the best solution because the hotend will not be centred and the carriage could be smaller. If you use the printed direct mk8 extruder it will be a better and cheaper solution and will give you better print quality.
Edited 1 time(s). Last edit at 11/08/2016 07:09AM by filipeCampos.
|
Re: G&C Printer November 08, 2016 09:04AM |
Registered: 9 years ago Posts: 893 |
Filipe,
I will be making my own mount for the extruder, so centring isn't an issue - the output of the extruder will be directly over the input to the hot-end.
I can't fit your printed extruder as I have other stuff in the way! (I have mounted a cable chain on one side of the carriage, and it's where the motor will need to go).
I'll go and download that part now... thanks for the quick service!
UPDATE: Sorry Filipe, that STL file is broken. I thought I'd fixed it with Netfabb, but when I went to print it there was a gap between the bracket and the square block - I guess the merge didn't go as planned.
SECOND UPDATE: I have just remembered that your printed extruder can be turned to 4 positions! I will have to take another look at it.
Edited 1 time(s). Last edit at 11/08/2016 09:51AM by David J.
I will be making my own mount for the extruder, so centring isn't an issue - the output of the extruder will be directly over the input to the hot-end.
I can't fit your printed extruder as I have other stuff in the way! (I have mounted a cable chain on one side of the carriage, and it's where the motor will need to go).
I'll go and download that part now... thanks for the quick service!
UPDATE: Sorry Filipe, that STL file is broken. I thought I'd fixed it with Netfabb, but when I went to print it there was a gap between the bracket and the square block - I guess the merge didn't go as planned.

SECOND UPDATE: I have just remembered that your printed extruder can be turned to 4 positions! I will have to take another look at it.
Edited 1 time(s). Last edit at 11/08/2016 09:51AM by David J.
|
Re: G&C Printer November 08, 2016 09:53AM |
Registered: 8 years ago Posts: 346 |
|
Re: G&C Printer November 08, 2016 10:14AM |
Registered: 9 years ago Posts: 893 |
|
Re: G&C Printer November 08, 2016 10:18AM |
Registered: 8 years ago Posts: 346 |
|
Re: G&C Printer November 08, 2016 10:25AM |
Registered: 9 years ago Posts: 893 |
Sorry, only registered users may post in this forum.
