G&C Printer
Posted by filipeCampos
|
Re: G&C Printer October 30, 2015 12:54PM |
Registered: 9 years ago Posts: 893 |
Your tablet bracket looks very neat and tidy.
There is no rush to fix the belt holders - it's not a problem for me, as what I've got is now working well. It would be good for any subsequent builders though. My problem may be due to the thickness of my GT2 belt; perhaps mine is a bit thicker than yours, hence my struggle to get it in the slot - if it had slotted in easily then the peg would not have been stressed.
This morning I started building the Z axis using the mounts I got from the UK supplier - and the Chinese ones arrived in the post! Ah well, that's life. The Z axis is now installed and working nicely, so now I'm moving on to the wiring. A couple of my motor leads are too short, and I don't have any of the right sort & colour of wire, so that's another on-line order I'm waiting for...

|
Re: G&C Printer November 07, 2015 04:23AM |
Registered: 9 years ago Posts: 893 |
And we have life! 
Powered everything up this morning, with no disasters. However, I am getting a headache trying to get the X and Y movements to go in the right direction.
If I request a +X movement, I get -Y.
If I request a +Y movement, I get +X.
I've tried reversing drives in the Duet's config.g file, but I haven't quite worked out which one to reverse. Every time I reverse one I get a different wrong action. Sigh.
Never mind, if this was easy everybody would be doing it...
Once I get Z and Y working properly I can get on with fitting the heated bed. At least the Z axis moves in the right direction!

Powered everything up this morning, with no disasters. However, I am getting a headache trying to get the X and Y movements to go in the right direction.
If I request a +X movement, I get -Y.
If I request a +Y movement, I get +X.
I've tried reversing drives in the Duet's config.g file, but I haven't quite worked out which one to reverse. Every time I reverse one I get a different wrong action. Sigh.
Never mind, if this was easy everybody would be doing it...

Once I get Z and Y working properly I can get on with fitting the heated bed. At least the Z axis moves in the right direction!
|
Re: G&C Printer November 07, 2015 05:19AM |
Registered: 8 years ago Posts: 346 |
|
Re: G&C Printer November 07, 2015 05:27AM |
Registered: 9 years ago Posts: 893 |
Not that easy - I have to work out which one to reverse - but I have been experimenting.
Unfortunately the instructions for the M569 gcode are a bit vague. I'm not too concerned at the moment, as it's early days, and it's all a learning experience.
(you edited your answer as I typed mine - I'll take a look at your sys file now)
Edited 1 time(s). Last edit at 11/07/2015 05:30AM by David J.
|
Re: G&C Printer November 07, 2015 11:10AM |
Registered: 10 years ago Posts: 14,672 |
From [reprap.org]:
I think you need to swap the X and Y motor connections (with the power off!), then play with the S values on the M569 P0 and M569 P1 commands to get the right motion. You can send the M569 commands from the gcode console on the web interface, no need to restart the printer each time you change them.
Large delta printer [miscsolutions.wordpress.com], E3D tool changer, Robotdigg SCARA printer, Crane Quad and Ormerod
Disclosure: I design Duet electronics and work on RepRapFirmware, [duet3d.com].
Quote
The X motor moves the head in the +X and +Y directions when it runs forwards. The Y motor moves the head in the -X and +Y directions when it runs forwards.
I think you need to swap the X and Y motor connections (with the power off!), then play with the S values on the M569 P0 and M569 P1 commands to get the right motion. You can send the M569 commands from the gcode console on the web interface, no need to restart the printer each time you change them.
Large delta printer [miscsolutions.wordpress.com], E3D tool changer, Robotdigg SCARA printer, Crane Quad and Ormerod
Disclosure: I design Duet electronics and work on RepRapFirmware, [duet3d.com].
|
Re: G&C Printer November 07, 2015 01:45PM |
Registered: 9 years ago Posts: 893 |
|
Re: G&C Printer November 07, 2015 02:11PM |
Registered: 10 years ago Posts: 14,672 |
No, leave the homing switches alone.
Large delta printer [miscsolutions.wordpress.com], E3D tool changer, Robotdigg SCARA printer, Crane Quad and Ormerod
Disclosure: I design Duet electronics and work on RepRapFirmware, [duet3d.com].
Large delta printer [miscsolutions.wordpress.com], E3D tool changer, Robotdigg SCARA printer, Crane Quad and Ormerod
Disclosure: I design Duet electronics and work on RepRapFirmware, [duet3d.com].
|
Re: G&C Printer November 07, 2015 02:24PM |
Registered: 9 years ago Posts: 893 |
Big grin time!
I started off by swapping the two motor connectors, as David suggested, ready for a session of playing with the config file parameters...
... and it worked properly before I made any changes!
Both directions work as they should, and the homing is fine. Now to move on to the next task - make the print surface support, wire up the heatbed and thermocouple, and set up the Z probe.
Thanks to everyone who gave suggestions, with an extra thank you to dc42.
I started off by swapping the two motor connectors, as David suggested, ready for a session of playing with the config file parameters...
... and it worked properly before I made any changes!

Both directions work as they should, and the homing is fine. Now to move on to the next task - make the print surface support, wire up the heatbed and thermocouple, and set up the Z probe.
Thanks to everyone who gave suggestions, with an extra thank you to dc42.

|
Re: G&C Printer November 16, 2015 09:49AM |
Registered: 9 years ago Posts: 893 |
Filipe, you must be wondering whether I've abandoned this printer! Actually, I've made very good progress and just have a few details to sort out (in fact, I just need one connector, which I ordered from ebay over the weekend).
I have started configuring the Duet, with just a couple of issues to sort out - currently in discussions with dc42 about them. They are probably due to something I've done wrong...
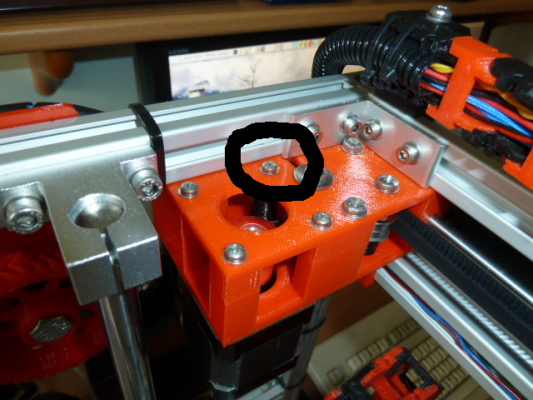
There is one part of the design that you might like to amend - one of the motor mount screws on each side is largely unsupported, and the plastic distorts if you tighten it up firmly. I guess that this wasn't a problem with the original metal version, which was stiff enough to resist the tightening.
I inserted a post between the two flat areas, and this effectively transfers the compression forces from the screw head directly to the motor body leaving the flat surfaces unchanged. I suppose that you could make the post part of the upper and lower motor mount pieces, or just leave it separate.
I'll post some pictures once the printer is finished, by which time I hope to have actually printed something.
Regards,
David
|
Re: G&C Printer November 16, 2015 10:41AM |
Registered: 8 years ago Posts: 346 |
Hi,
You are almost finishing.
In my case the pla mount only use 2 screw to secure the damper, and the motor is secure in the damper using other 2 screws. The 2 screw that secure the damper do not have any distortion, because i using the holes that have pla in the middle. Only one of the holes do not have pla in the middle and there is not need to tight to much this one. Or you can simply remove this screw...
I using only 2 holes and everything is well secure.
I have ordered some new material from ebay, my objective is to design an new carriage that will have 2 hotend (e3d V6 and e3d v6 little) and 2 direct mk8 alumium extruders. I will make a new carriage and make some changes in the motor mounts to support an axis of 10mm. I will try to make these 2 mount better and more rigid. The original motor mount was designed to be made of metal and there are lot that can be done to add rigidity to these 2 pieces.
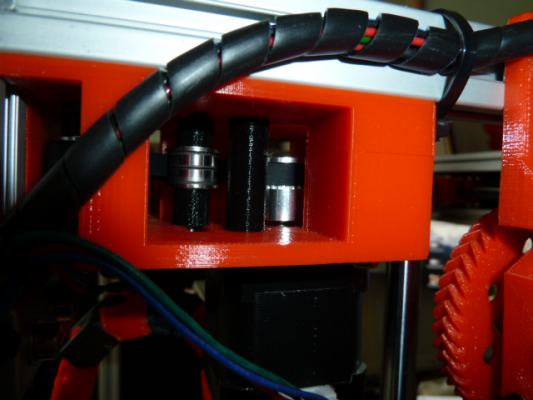
There is an other person that is making an new printer using this one was model, is main modifications consist in simplify the corexy pieces. Is already send to me an new model of the left motor mount. This new model do not use any bearings and removed the need of the belt to do an 90 degree turn. I think i will try to use the same idea...
Edited 1 time(s). Last edit at 11/16/2015 10:58AM by filipeCampos.
You are almost finishing.

In my case the pla mount only use 2 screw to secure the damper, and the motor is secure in the damper using other 2 screws. The 2 screw that secure the damper do not have any distortion, because i using the holes that have pla in the middle. Only one of the holes do not have pla in the middle and there is not need to tight to much this one. Or you can simply remove this screw...
I using only 2 holes and everything is well secure.
I have ordered some new material from ebay, my objective is to design an new carriage that will have 2 hotend (e3d V6 and e3d v6 little) and 2 direct mk8 alumium extruders. I will make a new carriage and make some changes in the motor mounts to support an axis of 10mm. I will try to make these 2 mount better and more rigid. The original motor mount was designed to be made of metal and there are lot that can be done to add rigidity to these 2 pieces.
There is an other person that is making an new printer using this one was model, is main modifications consist in simplify the corexy pieces. Is already send to me an new model of the left motor mount. This new model do not use any bearings and removed the need of the belt to do an 90 degree turn. I think i will try to use the same idea...
Edited 1 time(s). Last edit at 11/16/2015 10:58AM by filipeCampos.
|
Re: G&C Printer November 16, 2015 11:12AM |
Registered: 8 years ago Posts: 346 |
I checked your video about the leveling problem you have.
Are you planning to use some fan to cold down the pla print?
The one i have overall work only ok. It have some issues: not very good to cold down the pla and complicate a lot to change the nozzles.
I telling you this because i think in not very good and is better to you not to install the same one.
Are you planning to use some fan to cold down the pla print?
The one i have overall work only ok. It have some issues: not very good to cold down the pla and complicate a lot to change the nozzles.
I telling you this because i think in not very good and is better to you not to install the same one.
|
Re: G&C Printer November 16, 2015 11:40AM |
Registered: 9 years ago Posts: 893 |
I will have a fan, but I've not made the pieces yet. Here's the design I'll probably use: Thingiverse fan. I will have to modify the mount, but that shouldn't be too hard. I don't like the all-round nozzles, so I use a similar nozzle on my Prusa, although it's a little smaller than this one. It works well enough.
|
Re: G&C Printer November 18, 2015 03:55PM |
Registered: 9 years ago Posts: 893 |
Well, I got bored waiting for the connector for my heatbed to arrive, so I thought I'd try printing onto blue tape...
YouTube
This was the result:
It's just a 20mm cube with a round hole part-way down from the top. Strictly speaking, this was the second attempt - the first time I had the Z sensor offset wrong in the config file resulting in the head being too high, so had to stop the print after the first layer. This retry was made after some adjustments, printed at 0.2 layer height. The motors are running a bit noisy as I haven't got the currents set up properly, and some of the panels are resonating in sympathy, making it sound worse than it is in reality. All fixable.
Now I'm just waiting for the connector so I can get it all finished properly.
Edited 2 time(s). Last edit at 11/18/2015 04:10PM by David J.
YouTube
This was the result:
It's just a 20mm cube with a round hole part-way down from the top. Strictly speaking, this was the second attempt - the first time I had the Z sensor offset wrong in the config file resulting in the head being too high, so had to stop the print after the first layer. This retry was made after some adjustments, printed at 0.2 layer height. The motors are running a bit noisy as I haven't got the currents set up properly, and some of the panels are resonating in sympathy, making it sound worse than it is in reality. All fixable.
Now I'm just waiting for the connector so I can get it all finished properly.

Edited 2 time(s). Last edit at 11/18/2015 04:10PM by David J.
|
Re: G&C Printer November 18, 2015 04:28PM |
Registered: 8 years ago Posts: 346 |
The print quality looks good 
Other test you can do is to print something at high resolution to check if you do not have any Z axis related problem.
About the noise, is very difficult to remove all the vibrations.
I have invested a lot of time and money to reduce the noise, and each upgrade have remove some noises but is not a easy task to have a silent printer..
the list of upgrades i have done, maybe some of this list can help you:
- installed something soft in the printer feet. Is an cheap and good upgrade, lot of the noise is result of vibration that are transmitted to the table.
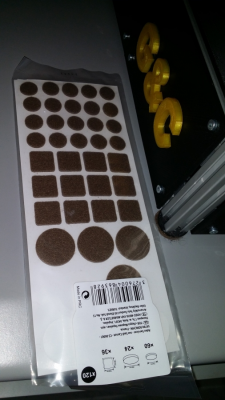
- glued something soft between the printed panels and the 2020 bars. I have glued some of the plastic used in the package i have received from ebay to the printed panels. glued only an tiny plastic in the middle of each upper panels. check the photo.. This an other cheap upgrade.
- The metallic objects (do not now the name in English..) used to secure the glass, after installed you can easy remove is two metallic handles.
- corrected the voltage of the steppers.
- installed dampers in the motors.
- installed 1/128 steppers.
- igus bearings.
print with all upgrades installed
[www.youtube.com]
Edited 3 time(s). Last edit at 11/18/2015 05:24PM by filipeCampos.
|
Re: G&C Printer November 18, 2015 05:24PM |
Registered: 9 years ago Posts: 893 |
I have already fitted soft felt pads under the feet, and cork gaskets between the X-Y motors and their mounts (they worked better than I thought they would). It's already a lot quieter than it was when I started.
My next things to do are:
The dimensions of the cube are already very close, so hopefully there's little problem with the Z axis. I'll do more investigation once I can run the heated bed and print onto glass.
My next things to do are:
- Adjust the motors.
- Put soft material between the panels and the frame (I like your idea).
The dimensions of the cube are already very close, so hopefully there's little problem with the Z axis. I'll do more investigation once I can run the heated bed and print onto glass.
|
Re: G&C Printer November 18, 2015 06:14PM |
Registered: 10 years ago Posts: 179 |
I have an aluminium framed i3 and it was crazy loud before I added some printed springy foot to it.
I have just built a 2020 framed corexy [www.instructables.com] and it is just crazy silent. Extruder's fan is the only thing that really makes any noise. And my printer sits directly on a metal cabinet so I would expect vibration to be resonated through it if there was any. I think it so silent simply because of the TMC2100 stepper drivers that are used for X and Y motors only. I would highly recomend them.
Edited 1 time(s). Last edit at 11/18/2015 06:14PM by Edvardas.
|
Re: G&C Printer November 19, 2015 04:05AM |
Registered: 9 years ago Posts: 893 |
|
Re: G&C Printer November 20, 2015 09:33AM |
Registered: 9 years ago Posts: 893 |
Well, it's finished (apart from the print cooling fan). 
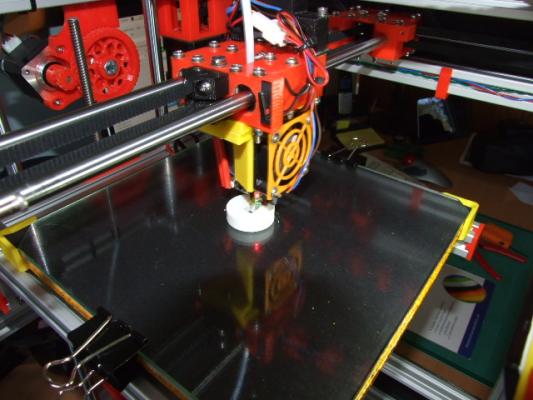
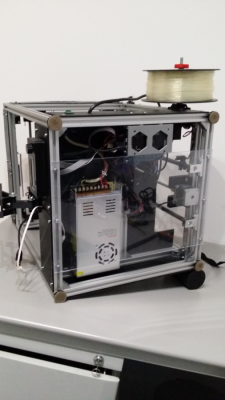
All of the major parts such as the frame, CoreXY motion, Z axis and most panels are exactly as Filipe designed them. Some parts have been amended/redesigned to suit my own needs, and these are shown below. Note that I picked Filipe's design BECAUSE it was versatile and could be modified as required - some other designs force the builder to use specific components.
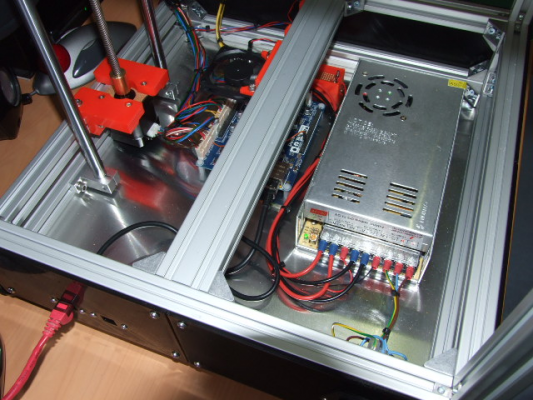
Aluminium floor: I decided that I wanted to fit a floor to the frame, mostly so that I could mount components securely. This was easy, using a card template initially to get the shape.
LED light fixings: My printer runs on 24v and the LED strip is 12v, so I had to find room for a Pololu 12v switching regulator & a capacitor (it's the small lump in black heat-shrink behind the light). Note that initially I tried a LM7812 linear voltage regulator, but it couldn't cope with dumping the excess from high input voltage and got very hot, even with a light load. The Pololu switching regulator barely gets warm.
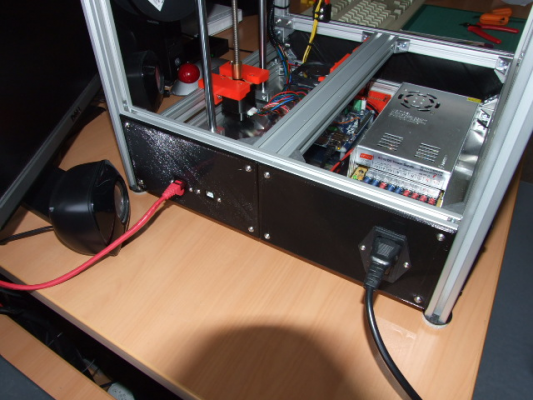
Side panels: I redesigned some panels so that I could screw in some extension sockets for the Ethernet and USB, together with the mains input socket & switch.
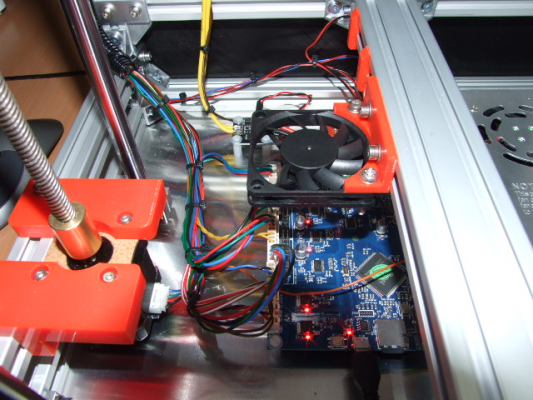
Duet cooling fan: I designed a small bracket to hold the fan that blows over the Duet's drivers.
Mount for the E3Dv6 & dc42 IR height sensor: This was the main reason for picking this printer - I wanted to use this specific hot-end mount as it also holds my dc42 IR height sensor very rigidly, and also allowed me to fit a great big cooling fan.
Re-use of my existing extruder and filament spool mount: Prior to making this machine I had made a CherryPi delta, but couldn't get on with it. Apart from recycling the Duet board and motors, I also re-used the geared extruder, which fitted very nicely and works well on the new machine. I also re-used most of the spool holder, with the addition of a bracket lifted from a Thingiverse design.
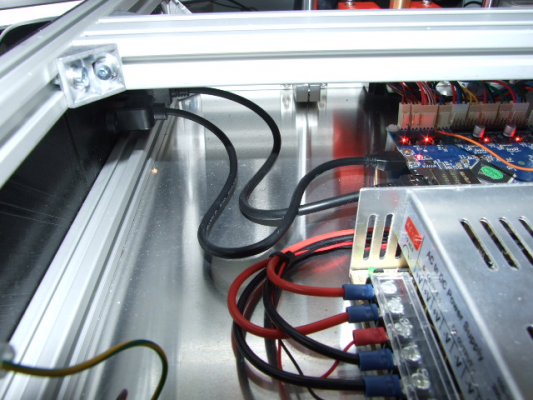
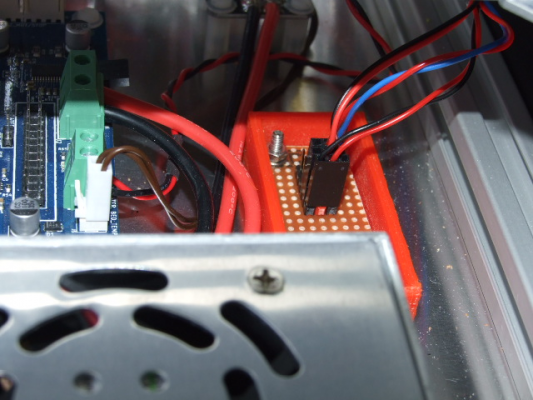
Power distribution for peripherals: This is the third printer I've built and I decided that I wasn't going to lash odd bits of wire onto random terminals to get power for fans, lights, etc. I designed this little box to hold a bit of veroboard, onto which are soldered some terminal pins. Each peripheral is wired to a connector (the sort used for radio-control servos) and is plugged in here. The input power comes straight from the PSU. Note that I have soldered extra wires along the strips underneath, as the current limit for unmodified veroboard strips is around 0.5A.
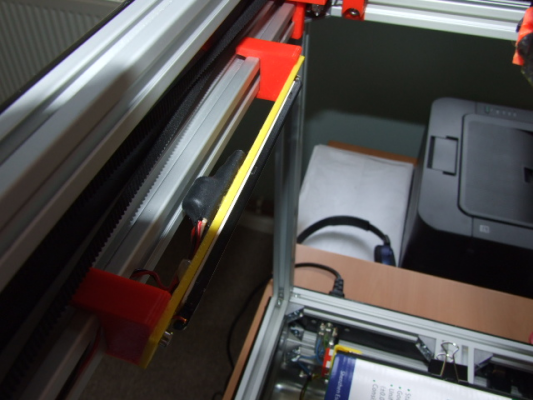
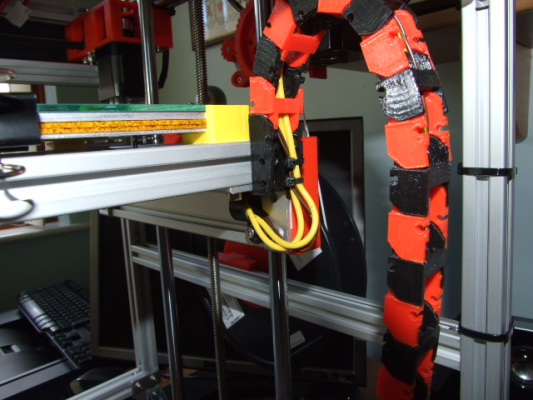
Cable chains: I have fitted cable chains to both the X-Y and Z motions, which makes everything much tidier. The Z cable chain(shown below) is a keeper, but the X-Y chain is subject to testing - it may get replaced in the future if it doesn't work as intended.
Sorry for the long post - but I'll post some more details once I get a chance.
|
Re: G&C Printer November 20, 2015 09:44AM |
Registered: 9 years ago Posts: 893 |
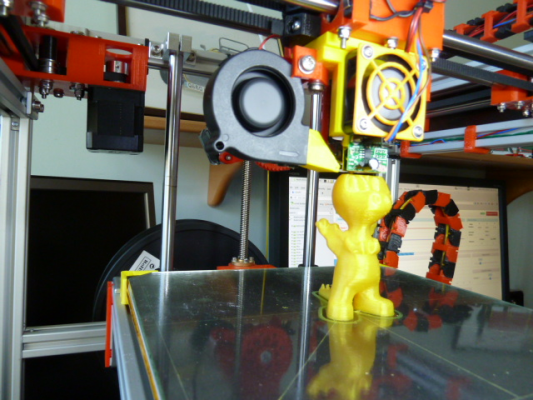
I've also printed this little chap - about 75mm high - he is almost impossible to print nicely without a print cooling fan, but I think the result is quite reasonable considering.
|
Re: G&C Printer November 20, 2015 11:21AM |
Registered: 8 years ago Posts: 346 |
|
Re: G&C Printer November 20, 2015 11:48AM |
Registered: 9 years ago Posts: 893 |
The top is acrylic sheet (Perspex), a dark grey transparent colour. I'm not sure it's ideal, as I can imagine it cracking in the future - this is 3mm thick, maybe I should have used 5mm.
The bottom plate is 2mm aluminium sheet, thick enough to be rigid when fastened without being difficult to shape with a hacksaw and files.
I was lucky with the bowden - the whole setup came from my old delta, and I had already spent a lot of time getting the calibration and retraction working properly. All I had to do was attach it to this printer, plug in and copy over the old settings. I have had a couple of problems with the Duet and the bowden, but in the end one turned out to be an issue with the Duet's web page and the other was bad default gcode coming from the slicer. I've fixed the second problem, and I can live with the other.
|
Re: G&C Printer November 20, 2015 01:14PM |
Registered: 9 years ago Posts: 5 |
I'm still waiting on a bunch of parts for my build. I'm kind of working on a mashup of several CoreXY designs. One in particular is the Vulcanus V1 [www.thingiverse.com] because of it's simpler XY motor mounts and belt design. Any advantage/disadvantage over the different motor mount designs?
I'm planning on using the Smoothieboard, but I'm also interested in the Duet. Problem is that I can't find a Duet anywhere. The couple of places I've found are out of stock. Any suggestions?
I'm planning on using the Smoothieboard, but I'm also interested in the Duet. Problem is that I can't find a Duet anywhere. The couple of places I've found are out of stock. Any suggestions?
|
Re: G&C Printer November 20, 2015 02:02PM |
Registered: 10 years ago Posts: 14,672 |
Quote
getSurreal
I'm planning on using the Smoothieboard, but I'm also interested in the Duet. Problem is that I can't find a Duet anywhere. The couple of places I've found are out of stock. Any suggestions?
I think that think3dprint3d may have the Duet 0.8.5 back in stock next month - try asking them when. The 0.8.5 supports dual extrusion like the Smoothieboard 5XC. You can also get a Duet 0.6 (single extrusion) from [www.replikeo.com] very cheaply, but there have been several reports of faulty boards received from them - which they seem happy to replace, but you have to wait for shipping from China again.
Large delta printer [miscsolutions.wordpress.com], E3D tool changer, Robotdigg SCARA printer, Crane Quad and Ormerod
Disclosure: I design Duet electronics and work on RepRapFirmware, [duet3d.com].
|
Re: G&C Printer November 20, 2015 04:25PM |
Registered: 9 years ago Posts: 95 |
Quote
David J
LED light fixings: My printer runs on 24v and the LED strip is 12v, so I had to find room for a Pololu 12v switching regulator & a capacitor (it's the small lump in black heat-shrink behind the light). Note that initially I tried a LM7812 linear voltage regulator, but it couldn't cope with dumping the excess from high input voltage and got very hot, even with a light load. The Pololu switching regulator barely gets warm.
What I did in a similar situation,instead of adding a regulator, I put two 12V strips in series. This allows them to work with double the voltage (24V).
Great job with the printer! Love it

Edited 1 time(s). Last edit at 11/20/2015 04:26PM by mandrav.
|
Re: G&C Printer November 20, 2015 04:52PM |
Registered: 9 years ago Posts: 893 |
Quote
mandrav
What I did in a similar situation,instead of adding a regulator, I put two 12V strips in series. This allows them to work with double the voltage (24V).
Great job with the printer! Love it
I'm not sure I could have fitted 2 LED strips into the space! The single one I've got (same as Filipe's) is remarkably bright, so I doubt I'd need extra anyway.
|
Re: G&C Printer November 20, 2015 05:15PM |
Registered: 8 years ago Posts: 346 |
|
Re: G&C Printer November 20, 2015 05:47PM |
Registered: 9 years ago Posts: 893 |
Starting from the top: I have a 3mm sheet of glass, a sheet of black paper (to keep the ir sensor happy), the aluminium heatbed, 2 layers of 2mm cork sheet, and a sheet of 1.6mm aluminium. The cork is edged with kapton tape to keep the visible bits tidy (it tends to flake when rubbed). I also have a stack of washers at each corner to keep the 2 metal plates neatly separated (they tend to squash together if unsupported). Note that I used a nylon washer against the heated bed - for electrical insulation - then metal washers.
I use the cork to help insulate the bottom of the bed so that the target temperature is reached a bit sooner - or at all! I have the same setup on my Prusa and when I tried that without insulation I couldn't reach 100C. Today I connected up the bed on my CoreXY and reached 110C without too much trouble (it did take a while though). I usually put a sheet of corrugated cardboard on top of the bed while it's heating, to help it along, but I'm trying to find something a bit better.
I use the cork to help insulate the bottom of the bed so that the target temperature is reached a bit sooner - or at all! I have the same setup on my Prusa and when I tried that without insulation I couldn't reach 100C. Today I connected up the bed on my CoreXY and reached 110C without too much trouble (it did take a while though). I usually put a sheet of corrugated cardboard on top of the bed while it's heating, to help it along, but I'm trying to find something a bit better.
|
Re: G&C Printer November 23, 2015 05:53AM |
Registered: 8 years ago Posts: 346 |
Hi,
After see your printed i have added an acrylic panel at the bottom to protect the cables. I only have 1/2 of the floor protected to have better heat dissipation.
I really like your bed heat solution ,but on ebay the 5mm cork panel are too expensive. Where do you have buy your cork panels?
After see your printed i have added an acrylic panel at the bottom to protect the cables. I only have 1/2 of the floor protected to have better heat dissipation.
I really like your bed heat solution ,but on ebay the 5mm cork panel are too expensive. Where do you have buy your cork panels?
|
Re: G&C Printer November 23, 2015 09:25AM |
Registered: 9 years ago Posts: 893 |
|
Re: G&C Printer November 27, 2015 02:12PM |
Registered: 9 years ago Posts: 893 |
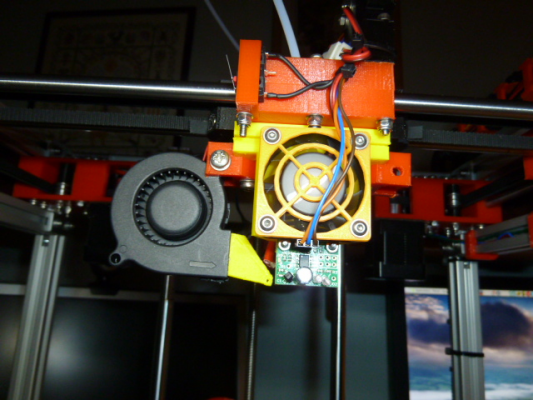
Filipe, I know that you were having some problems with your print cooling fan, so I thought I'd try something different. The radial blower fan is the best for moving a lot of air, so I mounted that underneath the X carriage, on one side.
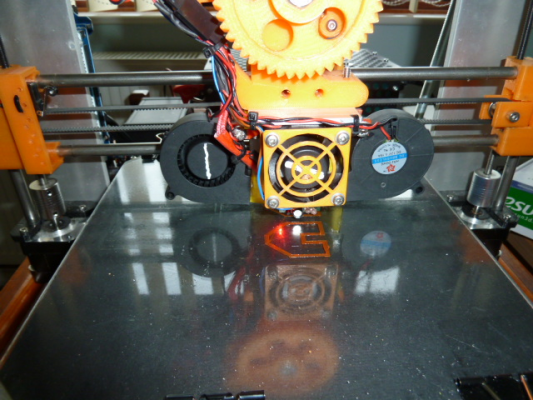
At the moment I only have one fan, but I have fitted a bracket on the other side for a second one as soon as it arrives from China. I'm not sure that it will be needed, as the single one is quite fierce and knocks the hot-end temperature down from 210C to 205C. Here are 2 fans fitted in the same way on my Prusa i3 (the hot-end mount is almost identical).
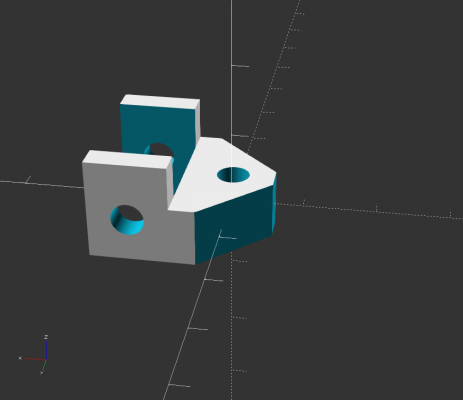
The fixing bracket is really simple.
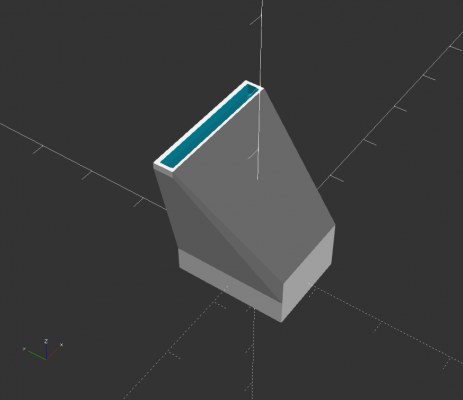
The nozzle is also simple - it just pushes into the fan outlet. Mine stays there, but I might glue it later.
Finally, here it is in action. It is proving to be a very effective for cooling the print.
The only warning is that it will only fit on certain types of hot-end. Mine is an E3Dv6, I believe yours is the 'Lite', so you should be OK. It won't work with anything shorter, and the file will need modification if longer. I should also add that the fan *just* fits inside the frame when the carriage is at the end of its travel.
If you want to design your own versions then you can get the important dimensions from the SCAD files (they're in plain text). Alternatively, I believe that you can import STL files into 123D, but I haven't tried that yet.
Sorry, only registered users may post in this forum.
