My coreXY design is progressing to the build stage
Posted by the_digital_dentist
|
Re: My coreXY design is progressing to the build stage March 06, 2017 10:46PM |
Registered: 7 years ago Posts: 8 |
|
Re: My coreXY design is progressing to the build stage March 12, 2017 11:50AM |
Registered: 11 years ago Posts: 5,780 |
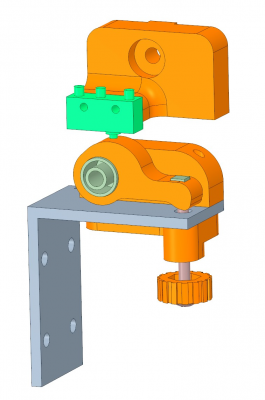
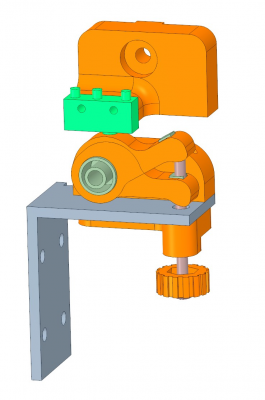
I decided to redesign the z=0 switch to do what I intended the first time. Here's the new version, designed to fit my printer. This time, the adjustment screw and lever are mounted on the bracket that moves up and down with the print bed:
Rotating the lever by 30 degrees by turning the screw about 12 mm moves the cam at the switch about 1.4 mm, so there's about an 8:1 ratio, making the screw look like about 10 threads per mm. It isn't quite a constant ratio, but fine adjustment of the zero position will be very easy anyway. The small gray block at the screw end of the lever is a magnet that will keep the lever in contact with the screw at all times, eliminating the need for a spring.
If someone really wanted to go nuts with this sort of thing, you could use a planetary gear reducer from a small, cheap motor, put a knob on the input side and a screw on the output side, then have it fit into a tube that lets the body slide vertically as the screw turns into a block. You can get some really high reduction ratios that way.
Ultra MegaMax Dominator 3D printer: [drmrehorst.blogspot.com]
|
Re: My coreXY design is progressing to the build stage March 13, 2017 12:59AM |
Registered: 11 years ago Posts: 5,780 |
Here it is mounted on the printer. This one does what I intended the original to do.
https://vimeo.com/208080500
Ultra MegaMax Dominator 3D printer: [drmrehorst.blogspot.com]
https://vimeo.com/208080500
Ultra MegaMax Dominator 3D printer: [drmrehorst.blogspot.com]
|
Re: My coreXY design is progressing to the build stage March 13, 2017 10:23AM |
Registered: 12 years ago Posts: 72 |
|
Re: My coreXY design is progressing to the build stage March 13, 2017 10:39AM |
Registered: 11 years ago Posts: 5,780 |
The X axis is an IKO LWLF-24 (24mm W x 8 mm H) linear guide. The Y axis guides are also 24x8 mm parts make by THK, IRIC. I have not printed with it yet, so I can't tell you if there are any problems, but I have leveled the bed and found that there isn't any appreciable sag in the X axis rail.
Ultra MegaMax Dominator 3D printer: [drmrehorst.blogspot.com]
Ultra MegaMax Dominator 3D printer: [drmrehorst.blogspot.com]
|
Re: My coreXY design is progressing to the build stage March 13, 2017 10:42AM |
Registered: 12 years ago Posts: 72 |
|
Re: My coreXY design is progressing to the build stage March 13, 2017 02:34PM |
Registered: 8 years ago Posts: 88 |
Quote
the_digital_dentist
Some test video of a dry run at 150 mm/sec. Acceleration is 1000 mm/s/s. I used a large enough object that the thing will actually hit 150 mm/sec when running the infill at 45 and 135 degrees driven by a single motor. I set all speeds in the slicer, including small perimeters, to 150 mm/sec.
The Z axis is operating during all this, too. It lifts on retract and of course, steps 0.2 mm for each layer.
No matter what sort of crazy stuff the extruder carriage does, I don't see the edges of the bed plate bouncing or vibrating at all.
Here's the Z=0 switch in operation I added a lever because I have found (in my other printer) that bed zero position is just too hard to control when the adjuster screw pushes the switch directly. One turn of the screw results in almost 800 um of bed displacement. Since adjustments more typically need to be on the order of 50 um at a time, it's a little hard to know just how far the bed's going to move when you turn the screw. The lever provides about an 8:1 reduction in sensitivity, so one full turn of the 32 TPI screw results in about 100 um of bed movement. It tilts on a bearing removed from a HDD that press fits into the lever. The small spring ensures that the switch opens when the bed moves down (instead of relying on the weight of the lever alone to open the switch).
Here's the Zmax switch in operation The Z axis motion stops about 1/2 mm above the bright green rubber bumper.
I've added two front-back beams attached to the Z-nuts boxes and another beam for the front Z adjustement screw. Instead of a "T" it is a reversed "A" now, so no more torque applied to the horizontal beam. Now it is rock solid. Cheap and easy, too

|
Re: My coreXY design is progressing to the build stage March 16, 2017 07:24AM |
Registered: 11 years ago Posts: 5,780 |
I tested the bed heater and ran the PID autotune on it last night. The bed temperature got to 70C (PLA print temperature) in about 2 minutes, and took 4:30 to get to 105C. This was done with a 750W line powered heater with power switched by an SSR.
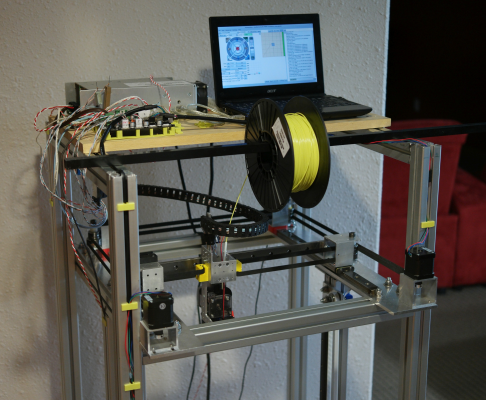
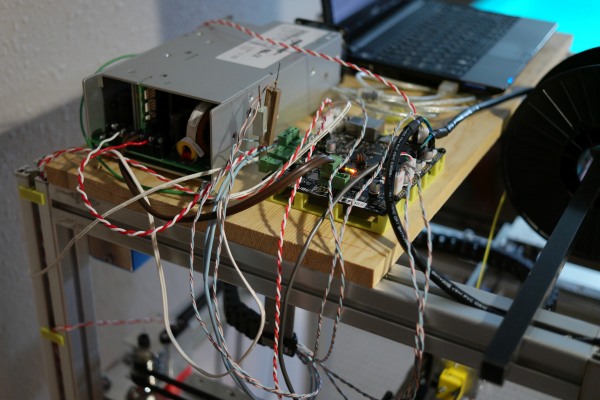
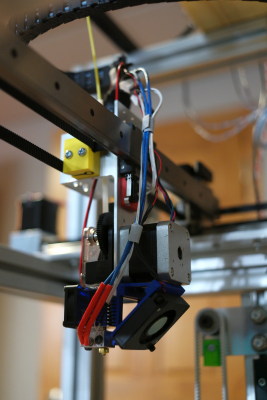
I have temporarily set up the power supply and controller on a board that I bolted to the top of the machine. I also added a drag chain for the extruder carriage wiring. If all goes according to plan, I'll wire the extruder carriage this weekend and try a few test prints in PLA.
Ultra MegaMax Dominator 3D printer: [drmrehorst.blogspot.com]
|
Re: My coreXY design is progressing to the build stage March 18, 2017 12:24AM |
Registered: 11 years ago Posts: 5,780 |
First print! I ran a 40 mm cube at 100 mm/sec. I used PLA and don't have a print cooling fan mounted on the extruder yet, so when I stopped the print at about 20 mm high, I found it was quite soft. The corners are distorted, but that should improve with a print cooling fan. Nothing is calibrated yet. I'll get a print cooling fan set up in the next day or so and do some calibration, then try again.
Video here: [vimeo.com]
Ultra MegaMax Dominator 3D printer: [drmrehorst.blogspot.com]
Video here: [vimeo.com]
Ultra MegaMax Dominator 3D printer: [drmrehorst.blogspot.com]
|
Re: My coreXY design is progressing to the build stage March 18, 2017 04:07AM |
Registered: 8 years ago Posts: 5,232 |
|
Re: My coreXY design is progressing to the build stage March 18, 2017 07:03AM |
Registered: 9 years ago Posts: 1,873 |
|
Re: My coreXY design is progressing to the build stage March 18, 2017 09:53AM |
Registered: 11 years ago Posts: 5,780 |
I haven't used the Titan with a pancake motor. Maybe soon.
Ultra MegaMax Dominator 3D printer: [drmrehorst.blogspot.com]
Ultra MegaMax Dominator 3D printer: [drmrehorst.blogspot.com]
|
Re: My coreXY design is progressing to the build stage March 18, 2017 02:43PM |
Registered: 12 years ago Posts: 72 |
|
Re: My coreXY design is progressing to the build stage March 19, 2017 01:22PM |
Registered: 11 years ago Posts: 5,780 |
I added a print cooling fan- a small blower type thing that came with the BullDog XL for cooling a hot-end. I didn't think it could move enough air to make any difference, but it helped a lot.
Here's the test set-up:
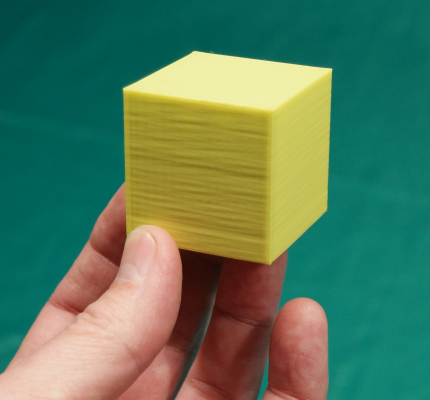
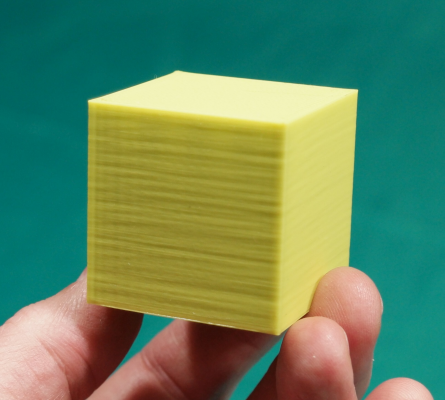
Here's the result, printed at 100 mm/sec including external perimeters. You can see some ringing toward the left edge of the print and some slight misregistration of the layers. I'll have to run more tests to see if that's XY speed related or is caused by something going on with the Z axis:
Edited 2 time(s). Last edit at 03/19/2017 03:29PM by the_digital_dentist.
Ultra MegaMax Dominator 3D printer: [drmrehorst.blogspot.com]
|
Re: My coreXY design is progressing to the build stage March 19, 2017 02:52PM |
Registered: 12 years ago Posts: 72 |
I'm not sure what to make of the layer alignment issue, if it was related to resonance you'd expect to see a consistent pattern given that the sides of the cube are all the same. I'm thinking that it could be backlash, although I'd also expect a consistent pattern in that.
The more I look at your X carriage setup the more I like it, I think the only thing I'd change would be to turn the extruder around so that it was backwards. This means that you have better access to the extruder's idler lever and I think it would give you better visibility of the nozzle with your current fan. [[b]Edit:[/b] Looking at it closer, maybe the rail would get in the way of the extruder's idler and the incoming filament.]
How easy was it to tension the belts with the moving motor mounts ? I was going to build tensioners into my X carriage but the fixed belt clamps are a lot simpler.
Edit 2: Would you be willing to publish the models / source files for your belt clamps, please ?
Edited 2 time(s). Last edit at 03/19/2017 10:49PM by yngndrw.
|
Re: My coreXY design is progressing to the build stage March 20, 2017 12:59AM |
Registered: 11 years ago Posts: 5,780 |
I put the extruder low so that I could easily get my hand in to release the lever and service the extruder without having to take apart the entire extruder carriage. The worst thing about the design of the Titan is the way you have to mount it. Servicing it requires pretty significant disassembly. It really needs some sort of plate that the extruder bolts to, and a matching socket on the extruder carriage that holds the extruder on the printer with a single screw. I've only made a couple prints with it but I'm liking the way the extruder/hot-end is behaving. Very promising! It probably won't need much servicing.
Tensioning the belts was very easy. The mechanism seems to be square in spite of my lack of effort - beyond plucking the belts and listening for the same tone (probably not very accurate), to ensure it. All you do is loosen the motor mount screws, run the belts around the pulleys, then pull back on the motor mount until the belt feels pretty tight, then screw it down. You try it a few times to gauge the effort exerted with the tightness of the belt and then you lock it down and work on the other one. You could probably do something more precise by making a sliding mount that is screw adjusted, and you might even include a strain gauge to measure and match the stretch accurately.
Ultra MegaMax Dominator 3D printer: [drmrehorst.blogspot.com]
|
Re: My coreXY design is progressing to the build stage March 20, 2017 10:00AM |
Registered: 12 years ago Posts: 72 |
Last night I had an idea about how the extruder access issue could be resolved. It moves away from the tube mount idea, but ends up requiring a single plate (10-12mm thick) being machined with little more than a few pockets and holes on each side. I used 10mm in my mock-up but 12mm would probably be better for clearances:
[imgur.com]
It's based off the MGN15 rails as I haven't found any of the low-profile IKO ones of the right size, but the same principal applies.
I didn't mock up the bearing blocks, but I envisage them being printed as a single piece and bolted above the motor and sharing the bearing block bolts. You could extend the plate downwards for the cooler (A rough approximation of the CiiCooler is shown) and the top mount is for the cable chain. You'd probably also want a mount for a Z height sensor.
|
Re: My coreXY design is progressing to the build stage March 22, 2017 08:01AM |
Registered: 11 years ago Posts: 5,780 |
That is a nice design, and something I could do pretty easily on the CNC mill at the makerspace. I may do that in the future, after I have determined everything that will be on the extruder carriage. The tube I used is drilled full of holes that makes it easy to attach things to the front, back and left side of the carriage. In the few days I've been testing and printing I have found that the release lever is quite easy to access and changing filament is no problem at all. I used a teflon tube about 100mm long to feed the filament to the extruder, so it extends above the top of the carriage.
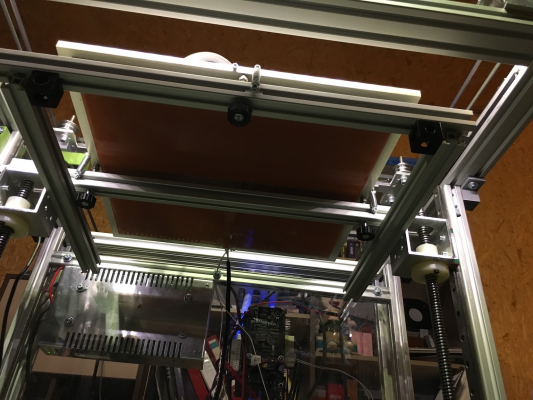
I have determined that there is absolutely no need for autoleveling or zeroing. I've printed several small test parts and haven't had to readjust the level or zero position since the initial set-up. Yesterday I dragged the machine out of my basement, put it in my car on it's back, drove it to the Makerspace, took it out of the car, plugged it in and started printing without making any adjustments. Then I put it back in the car, drove it home, took it back to the basement, plugged it in and started printing again without any adjustments.
I may yet add some bracing to the frame as the top of the machine tends to wobble a bit when the Y axis is flying around. I think I'd like bigger wheels, too. Going up and down stairs with the tiny wheels is a little more difficult than I anticipated.
Ultra MegaMax Dominator 3D printer: [drmrehorst.blogspot.com]
|
Re: My coreXY design is progressing to the build stage March 23, 2017 11:14PM |
Registered: 11 years ago Posts: 5,780 |
Here's the print I ran after returning the machine to my basement (I sliced it at 200% scale):
Video of the print a few hours in: [vimeo.com]
Video of the print near the end: [vimeo.com]
39 hours total, I sliced using the autospeed function in slic3r and set max print speed to 100 mm/sec. It seemed to run awfully slow toward the end.
Microscopic exam coming soon...
Ultra MegaMax Dominator 3D printer: [drmrehorst.blogspot.com]
|
Re: My coreXY design is progressing to the build stage March 24, 2017 10:08AM |
Registered: 12 years ago Posts: 72 |
The layer alignment looks really good and there doesn't seem to be any ringing, as far as I can see from the picture - Especially good considering the speeds.
Where were you planning on adding the bracing ? Diagonals across the sides ? It's quite a tall printer so maybe even the 40mm (45?) extrusion wasn't quite big enough for the vertical bits. Then again, the wobble that you mentioned doesn't seem to have affected your print.
Where were you planning on adding the bracing ? Diagonals across the sides ? It's quite a tall printer so maybe even the 40mm (45?) extrusion wasn't quite big enough for the vertical bits. Then again, the wobble that you mentioned doesn't seem to have affected your print.
|
Re: My coreXY design is progressing to the build stage March 24, 2017 03:22PM |
Registered: 11 years ago Posts: 5,780 |
I'll be adding some bracing, though I haven't decided what form it will take yet. I may just use rigid panels on the sides of the machine, or may try some other things. I'm focusing on getting the electronics squared away now, then I'll be in full-on enclosure mode.
The controller and power supply will be mounted on the top of the machine, close to where they are now. I'm going to put the electronics enclosure on a hinge so I can tilt it up to allow easy access from the side of the machine. I'll probably replace the power supply with a fanless unit.
Ultra MegaMax Dominator 3D printer: [drmrehorst.blogspot.com]
|
Re: My coreXY design is progressing to the build stage March 26, 2017 12:42PM |
Registered: 8 years ago Posts: 338 |
|
Re: My coreXY design is progressing to the build stage March 26, 2017 01:17PM |
Registered: 11 years ago Posts: 5,780 |
I have been using DesignSpark Mechanical, though I'm starting to play with Fusion360. DSM is very easy to learn and use, and more than adequate for a 3D printer design project, though it can only model static things. For example I can draw belts, but I can't define them as being flexible, so if I move the Y axis the belt won't follow the pulleys. That's why there are no belts shown in the corexy stage of my model. Of course, when I was laying out the XY stage I did draw belts to ensure that the pulleys would all be aligned properly. In the Z axis the belts are simple loops and don't change with the position of the bed along the Z axis so I can draw those belts in place. I have the design broken into components and subcomponents so I can select the extruder carriage and move it and all the parts of it move together. That makes it easy to check clearances if I want to add a print cooling fan, etc. I can't constrain its motion to always be along the X axis, so I have to be careful to only move it that way. When I select the X axis, the extruder carriage is a subcomponent so it moves along with the X axis.
In a CAD package like Fusion360 I believe you can draw in the belts in the corexy stage and have them follow movement of the carriage and Y axis by setting up appropriate constraints. I suspect that setting it up to do that is a fairly advanced level of skill and might take quite a long time to achieve.
If you like SolidWorks, you can get a free license by joining the Experimental Aircraft Association ($40 per year). OnShape is a freebie that was written by the people who wrote SolidWorks, so it is similar, but on-line only. OnShape allows you to do 3D CAD with any device that has a browser, including a phone. I think it's the best option for doing 3D CAD in Linux.
Edited 3 time(s). Last edit at 03/26/2017 01:30PM by the_digital_dentist.
Ultra MegaMax Dominator 3D printer: [drmrehorst.blogspot.com]
|
Re: My coreXY design is progressing to the build stage March 26, 2017 01:56PM |
Registered: 8 years ago Posts: 338 |
Yeah, i have heard some nasty things about onshape as far as the functionality goes.
I have never used SolidWorks, but i see there are a lot of free models (eg, 2020 extrusion) made for it, so i was thinking about going that route. I might check out DSM though. Thanks
Edited 1 time(s). Last edit at 03/26/2017 01:57PM by Qdeathstar.
I have never used SolidWorks, but i see there are a lot of free models (eg, 2020 extrusion) made for it, so i was thinking about going that route. I might check out DSM though. Thanks

Edited 1 time(s). Last edit at 03/26/2017 01:57PM by Qdeathstar.
|
Re: My coreXY design is progressing to the build stage March 26, 2017 02:23PM |
Registered: 11 years ago Posts: 5,780 |
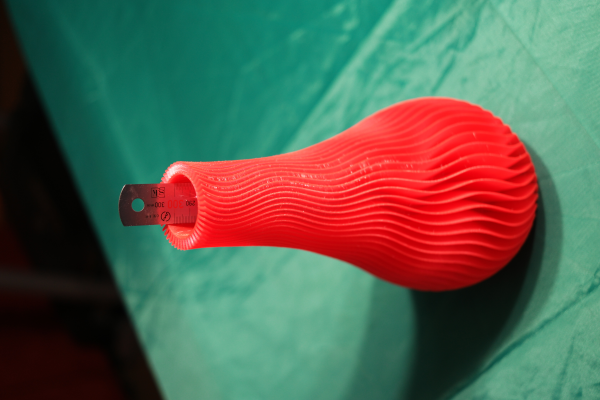
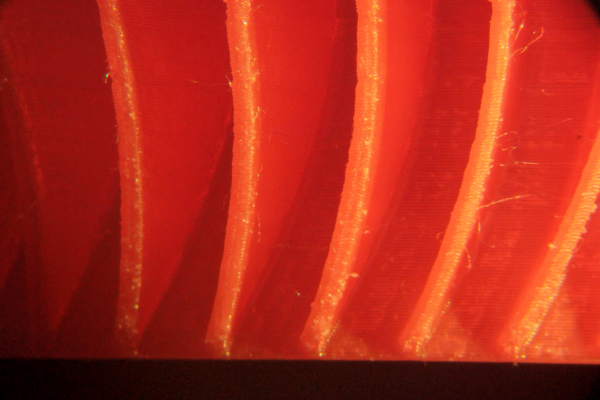
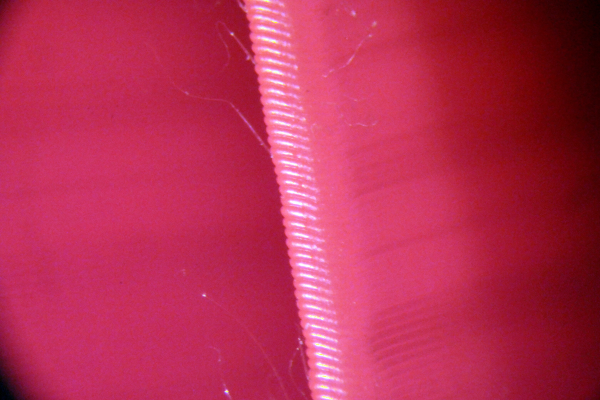
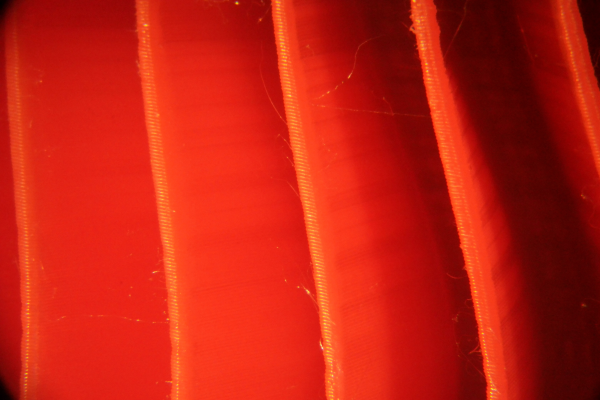
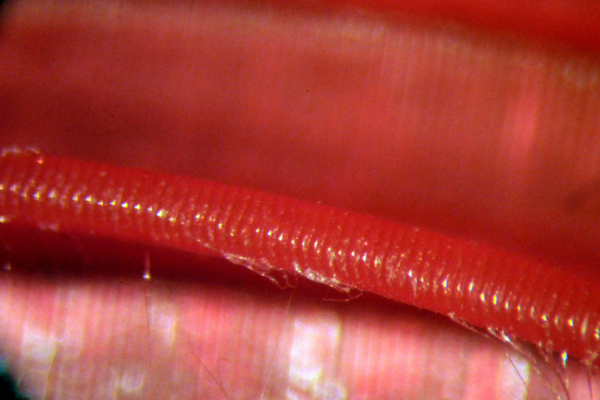
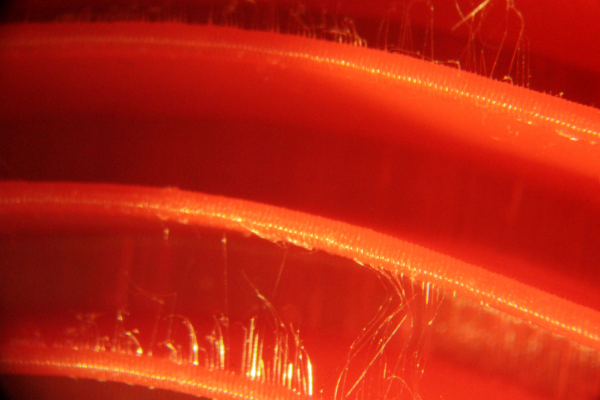
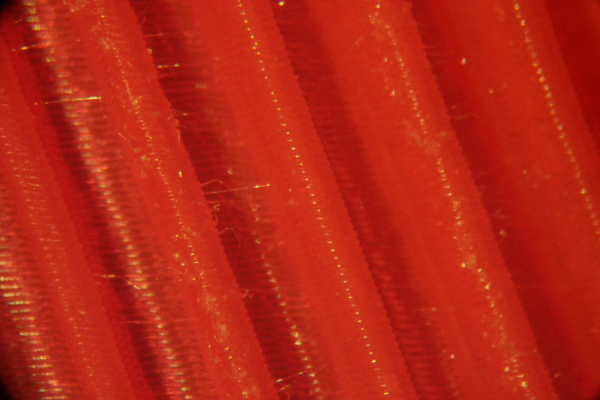
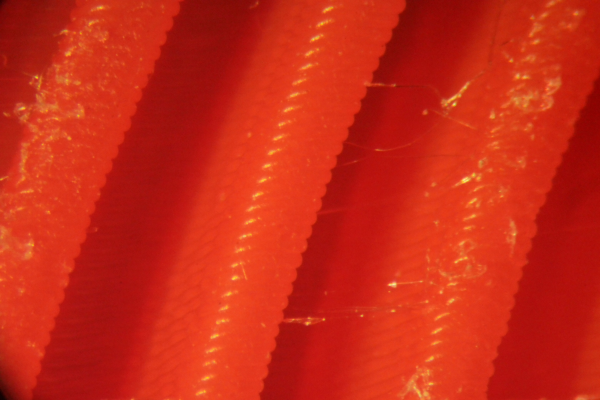
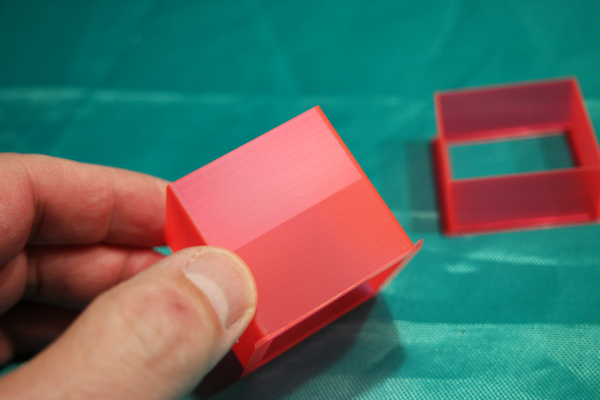
I took some pictures of the big red vase with the microscope. I'm not sure why it came out as hairy as it did, maybe the extruder temperature is a little high for that filament, but the layer registration appears pretty consistent from bottom to top. Some slight misregistration is occuring, as seen in the first yellow cube I printed. I thought it might be due to belt tension but I tightened them up before printing the red vase and that doesn't seem to be it. I'm going to go back to printing cubes to test different tweaks to try to fix that.
Ultra MegaMax Dominator 3D printer: [drmrehorst.blogspot.com]
Ultra MegaMax Dominator 3D printer: [drmrehorst.blogspot.com]
|
Re: My coreXY design is progressing to the build stage March 26, 2017 09:58PM |
Registered: 11 years ago Posts: 5,780 |
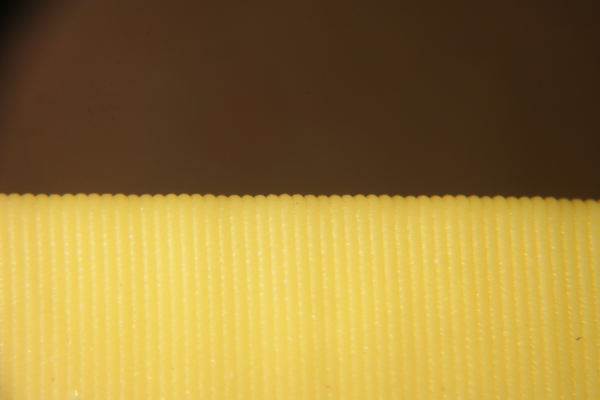
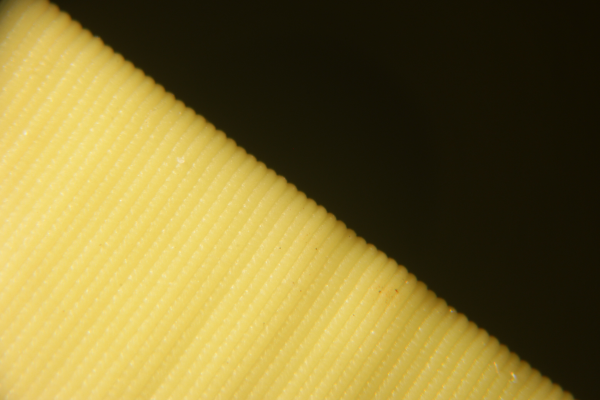
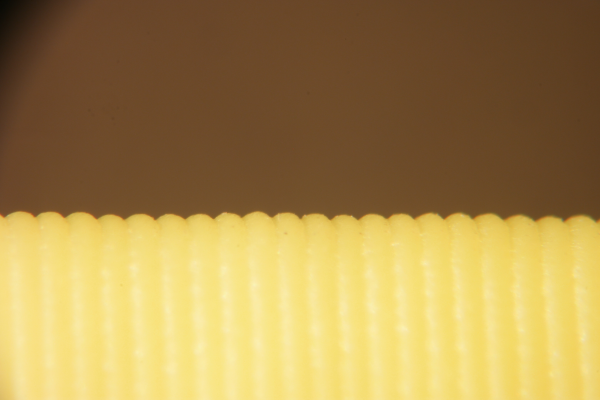
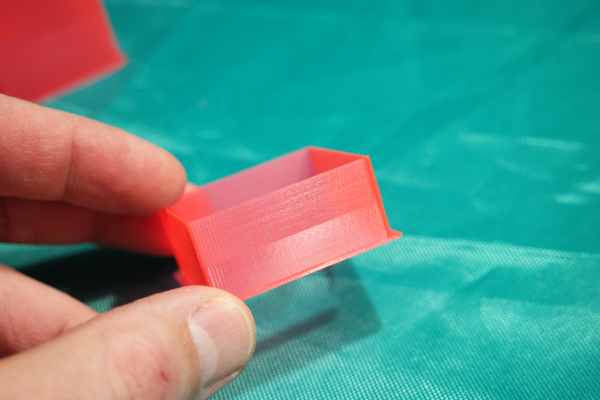
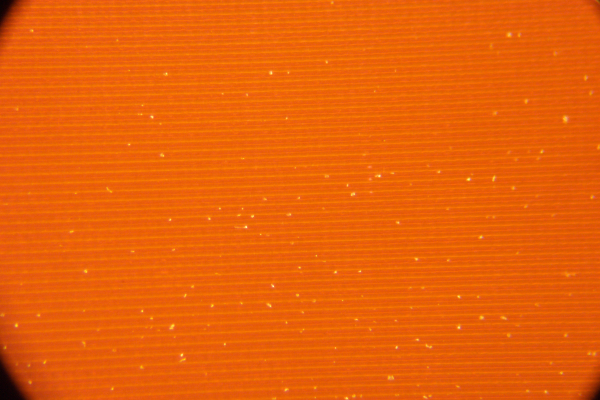
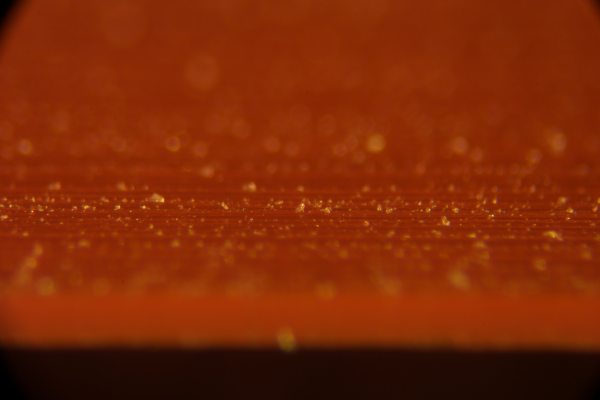
I ran some tests on single walled cubes and got the layer registration to look better. I tightened up the XY belts, tweaked the extruder steps per mm, and adjusted the Z axis parameters of the prints. I crunched some numbers and came up with layer thicknesses and lift-on-retract heights that correspond to full steps in the Z axis motor. I ran a couple more tests to tweak the extruder motor steps per mm and I thinks it's working pretty well now.
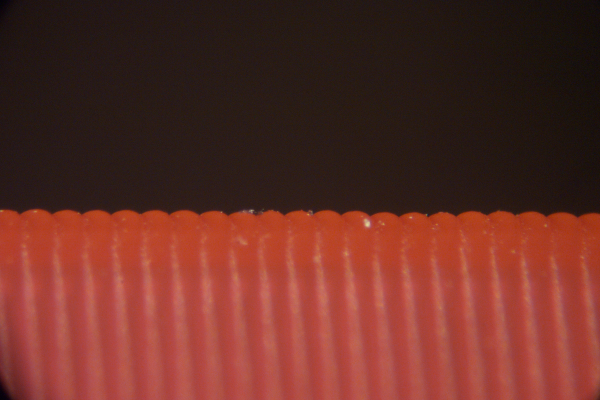
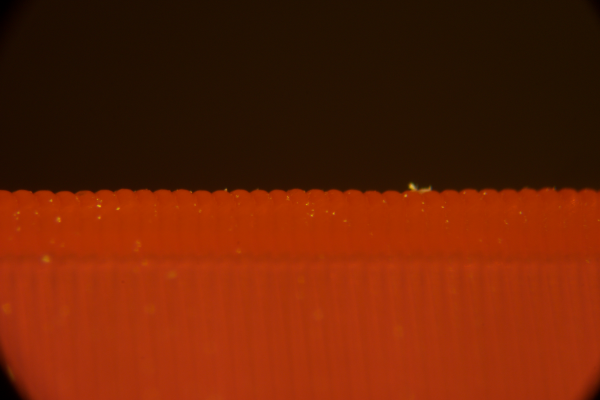
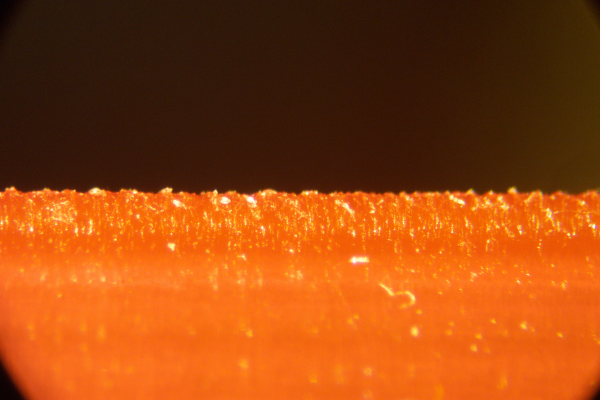
Each full step of the Z axis motor moves the bed 0.018 mm. I ran new prints at 0.27 mm and 0.090 mm, and at 0.090 and 0.036 mm, all whole motor step intervals. At 0.036 mm the layer registration looks OK, but the surface gets a little rough. I think it's safe to say I probably won't be printing much at that layer thickness, certainly not anything 700mm tall.
Here's the 0.27 mm and 0.09 mm single walled cube:
Here's the 0.09 and 0.036 mm single walled cube:
Here's one of the 0.27 mm corners:
Here's one of the 0.09 mm corners:
Here's one of the 0.036 mm corners:
Here's an oblique view of the 0.09 mm wall:
Finally, here's an oblique view of the 0.036 mm wall:
Moving on to the next thing...
Edited 2 time(s). Last edit at 03/26/2017 10:44PM by the_digital_dentist.
Ultra MegaMax Dominator 3D printer: [drmrehorst.blogspot.com]
|
Re: My coreXY design is progressing to the build stage March 26, 2017 10:41PM |
Registered: 7 years ago Posts: 128 |
|
Re: My coreXY design is progressing to the build stage March 26, 2017 10:46PM |
Registered: 11 years ago Posts: 5,780 |
Smoothieboard with 24V supply. All motors are being driven directly by the drivers on the board.
Edited 1 time(s). Last edit at 03/26/2017 10:47PM by the_digital_dentist.
Ultra MegaMax Dominator 3D printer: [drmrehorst.blogspot.com]
Edited 1 time(s). Last edit at 03/26/2017 10:47PM by the_digital_dentist.
Ultra MegaMax Dominator 3D printer: [drmrehorst.blogspot.com]
|
Re: My coreXY design is progressing to the build stage March 27, 2017 07:20AM |
Registered: 12 years ago Posts: 72 |
I've been using OnShape and it feels very much like Solidworks. I can't say there's much functionality that I've been missing in my use. My only complaint is that some of the operations feel slow, as it has to be done on the server.Quote
Qdeathstar
Yeah, i have heard some nasty things about onshape as far as the functionality goes.
Why has the surface gotten so rough on the 0.036mm part ? There also seems to be some ringing on the second cube that wasn't there on the first.Quote
the_digital_dentist
I ran some tests on single walled cubes and got the layer registration to look better. I tightened up the XY belts, tweaked the extruder steps per mm, and adjusted the Z axis parameters of the prints. I crunched some numbers and came up with layer thicknesses and lift-on-retract heights that correspond to full steps in the Z axis motor. I ran a couple more tests to tweak the extruder motor steps per mm and I thinks it's working pretty well now.
Each full step of the Z axis motor moves the bed 0.018 mm. I ran new prints at 0.27 mm and 0.090 mm, and at 0.090 and 0.036 mm, all whole motor step intervals. At 0.036 mm the layer registration looks OK, but the surface gets a little rough. I think it's safe to say I probably won't be printing much at that layer thickness, certainly not anything 700mm tall.
I don't know if you've seen the new E3d Titan Aero that they announced a few days ago, but it would move the nozzle 25mm closer to your bearing block. I'm not sure what you'd do with part cooling though, I managed to just squeeze an E3D Titan Aero into my new design, but it relies on a really short 13NM stepper and captive nuts which are giving me a right headache.
|
Re: My coreXY design is progressing to the build stage March 27, 2017 07:36AM |
Registered: 11 years ago Posts: 5,780 |
The ringing is there on both of the cubes, I just happened to have the one turned toward the camera. That is due to the Y axis moving mass interacting with the acceleration and junction deviation settings. I may tune it a bit more.
I don't know what's going on with all the crumbs on the 0.036 mm print. Maybe something specific to the filament, but who knows?
I have a CubeX Duo that is designed so that it's just about impossible to see what's going on at the extruder nozzle. In my CoreXY machine I can clearly see the nozzle while it's printing, right from the first layer, by design. I want to keep it that way, so the Aero might not be so good for this printer.
Edited 1 time(s). Last edit at 03/27/2017 10:52AM by the_digital_dentist.
Ultra MegaMax Dominator 3D printer: [drmrehorst.blogspot.com]
Sorry, only registered users may post in this forum.
