G&C Printer [Metal Upgrade]
Posted by filipeCampos
|
G&C Printer [Metal Upgrade] September 14, 2016 04:28PM |
Registered: 8 years ago Posts: 346 |
Hi everyone,
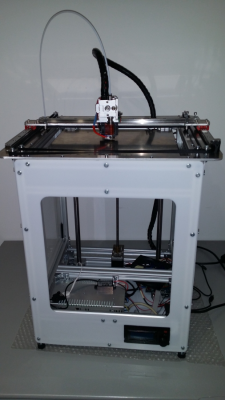
Created this new thread to present the upgrade i have done to my G&C printer.
Still not finished, but i almost where... Only missing to reconfigure the firmware with the new dimension, Z axis and extruder and modify to acrylic panels that do not fit anymore.
resuming the biggest upgrades:
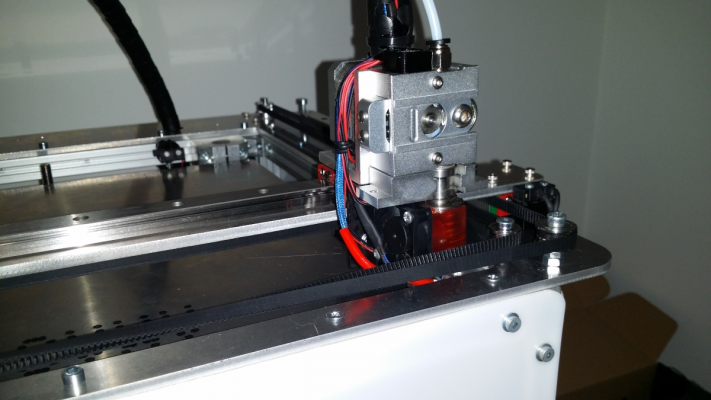
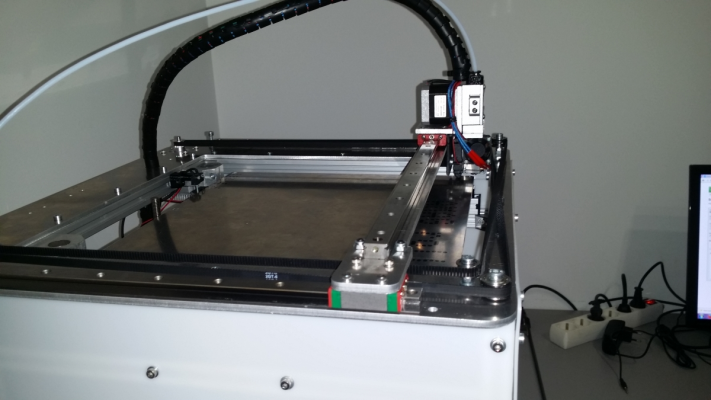
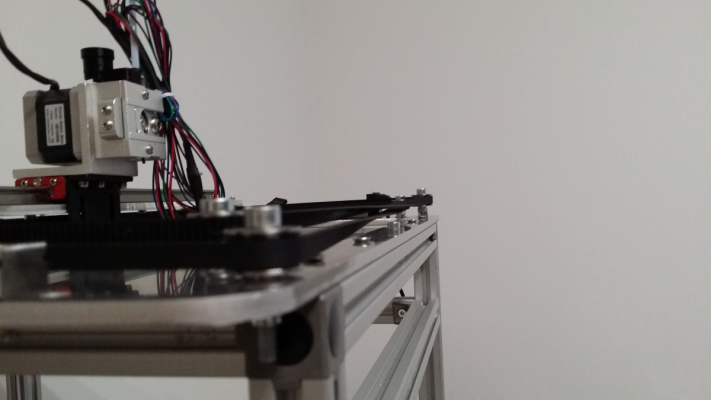
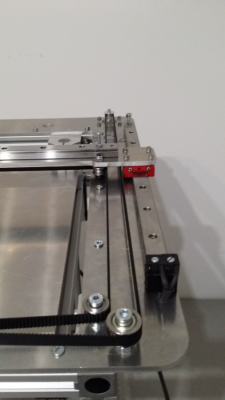
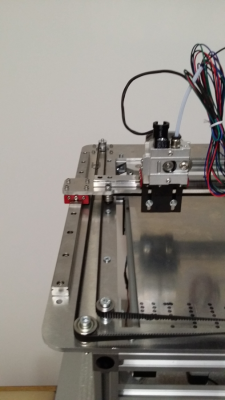
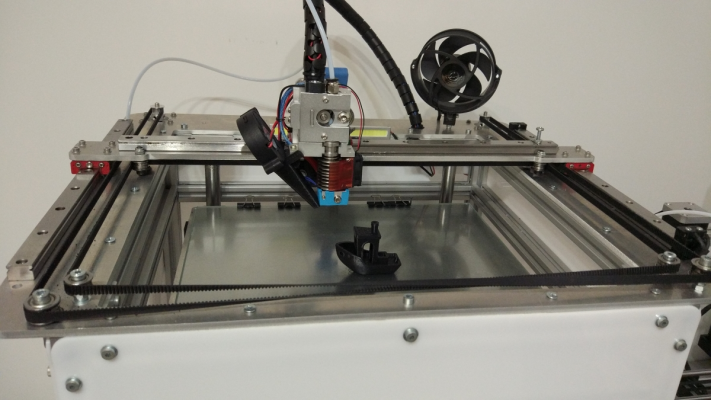
-All metal corexy mechanism, using 15mm HiWin linear rails on top of a 5mm aluminum plate.
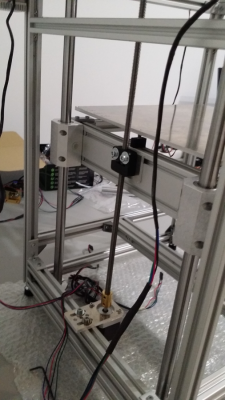
-All metal Z axis: 16mm high quality rods (German brand), new 8mm threads screws with 1.5 pitch. Bigger 5mm aluminum plate (310x290), with a print area of 305 x 275 x 370
Added some minor upgrades:
-new anti-vibrations fets
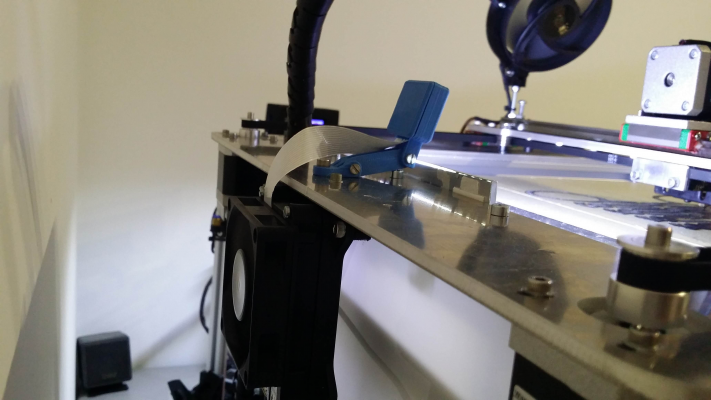
-lighter carriage: all metal Bulldog extruder, small compact 40mm turbine fan
This was a upgrade and i implemented to reuse the most of the hardware i already have. Was result, the printer overall aspect is strange and lost the "comercial aspect". But was advantage is the precision gain and the +/- 100mm print area gain in all the axis.
Printer use the exact same frame and acrylic from the G&C printer:
Compact carriage
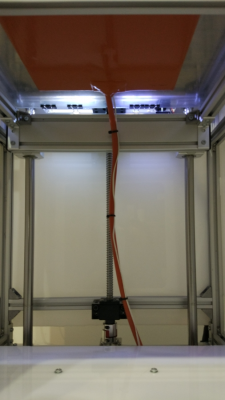
New Z axis:
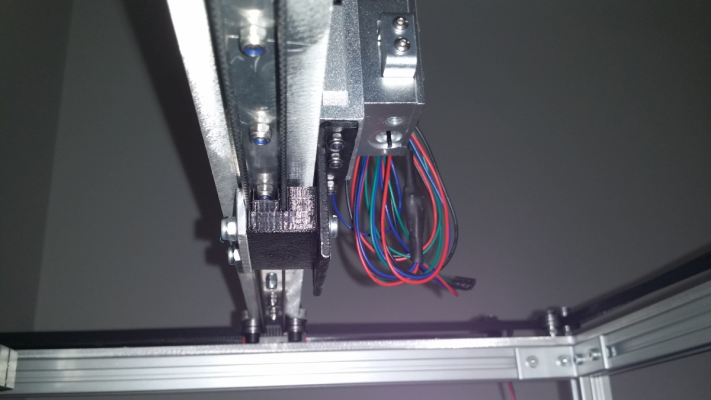
One belt one the same plane, used a twist on the front. The belt do not touch because two of the bigger pulley are have 6mm difference in the z direction.
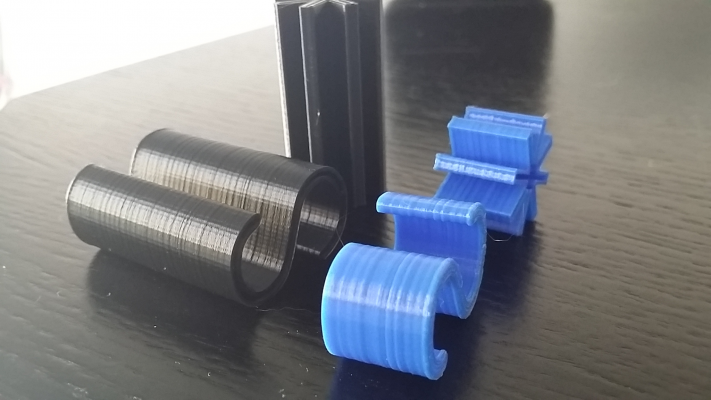
Printed piece that secure the unique 4 meter belt:
The plate was laser cut, it allow to easy installation and have a perfect aliments of the corexy components:
Edited 1 time(s). Last edit at 09/14/2016 04:34PM by filipeCampos.
|
Re: G&C Printer [Metal Upgrade] September 14, 2016 08:44PM |
Registered: 8 years ago Posts: 346 |
finished to configure the firmware, but i still need to adjust some parameters.
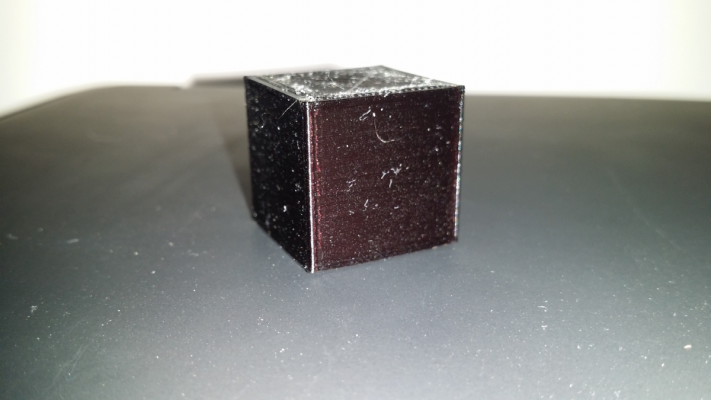
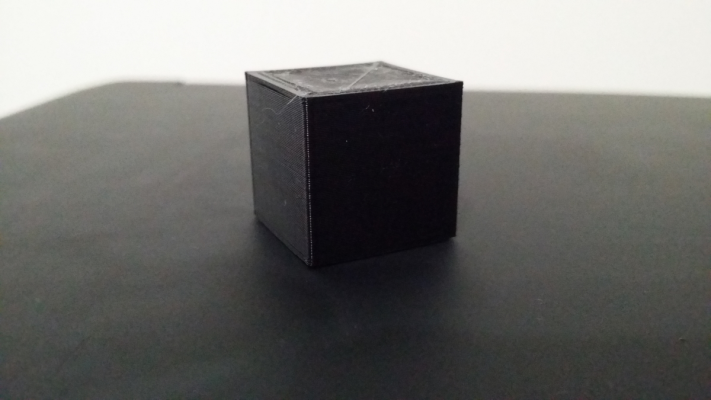
My first print was a 20mm cube:
[www.youtube.com]
final result of the print with and without flash.
The quality for a 1º print was better i expected, not found any artifact and the wall position perfect. I have some warping because i do not have a heated bed, it caused a tiny gap that can be see in the photo without flash. I think i will need to add one in the future.
|
Re: G&C Printer [Metal Upgrade] September 15, 2016 09:30AM |
Registered: 9 years ago Posts: 251 |
|
Re: G&C Printer [Metal Upgrade] September 19, 2016 04:22AM |
Registered: 9 years ago Posts: 104 |
|
Re: G&C Printer [Metal Upgrade] September 22, 2016 07:39AM |
Registered: 8 years ago Posts: 346 |
Hi,
Done more testing, found some problems and was result made more changes.
mains problems:
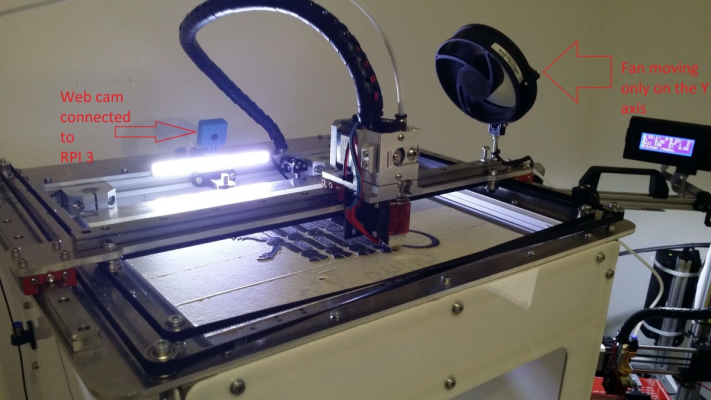
1) was using a 40mm x 40mm turbine fan and it was directly attached on the hotend. The fan was not enough powerful and on tiny print i have lots of heating pla problems. Removed the fan and added a new one that is connected one the X rail, the fan move only in the Y axis. The new fan it was 12mm and 2A power, is was savaged from a busted xbox 360.
2) The printer still do not have a heated bed and on big print i have lots of warping problems. Ordered a 200x200 (140W) silicone heater to attach to my aluminum (5mm) bed plate. This is to print pla only, so planning to get only 70ºC, this is the reason i ordered a small heater.
3) get pretty bad result on the first layer, need to reduce the pla flow to 60% to not get over extrusion on the 1º layer and them put again at 100%. using paint tape... using cura and it was not this option, any suggestion?
I have added a raspberry pi camera too. I was using before
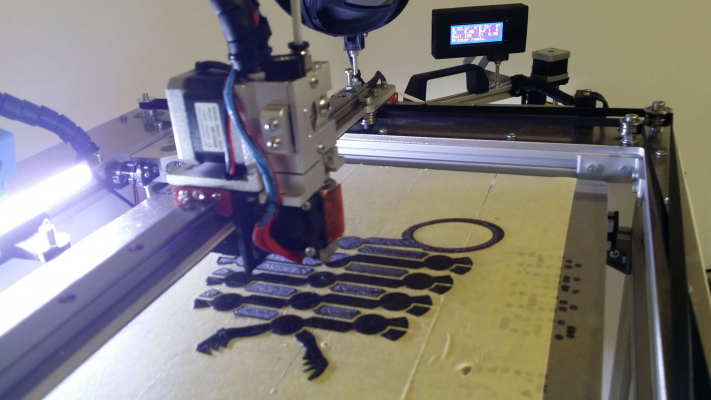
Was print quality i getting good result, but i still have some issue to solve. The movement of the hotend is spot-on, but the problem is more related with retractions, wraping and jerks/accelerations that are still giving some tiny blobs.
Camera and pla cooling fan:
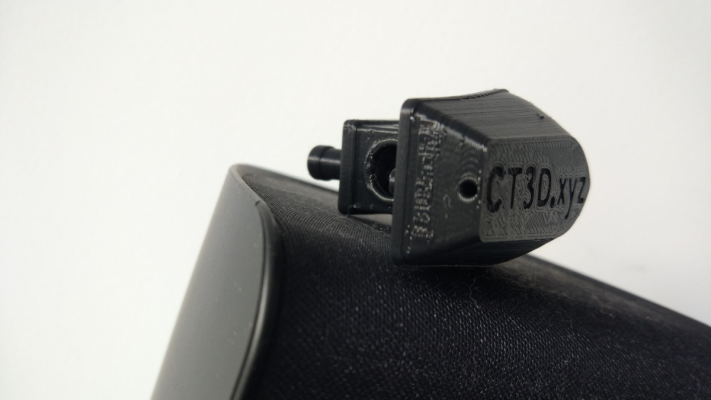
The raspberry pi 3 inside a printed case and with a big cooling fan.
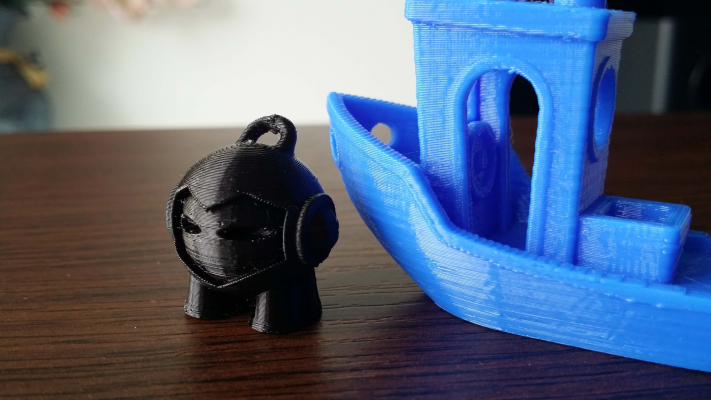
some prints up close:
|
Re: G&C Printer [Metal Upgrade] September 22, 2016 09:07AM |
Registered: 9 years ago Posts: 251 |
|
Re: G&C Printer [Metal Upgrade] September 23, 2016 12:49PM |
Registered: 8 years ago Posts: 601 |
Why not use Z-offset instead of lowering flow rate? I'm assuming your first layer is being too squished.
Using the large fan seems a bad solution to me as well, the extruder carriage and X axis are blocking most of the air from getting to the just printed PLA. It might mess with your bed heater once it is installed as well.
Other than that, prints look great. Hard to tell from the pictures, but possibly some Z-banding going on though?
|
Re: G&C Printer [Metal Upgrade] September 23, 2016 02:27PM |
Registered: 9 years ago Posts: 251 |
|
Re: G&C Printer [Metal Upgrade] September 23, 2016 02:33PM |
Registered: 8 years ago Posts: 346 |
z offset, i will try. repetier was this option on the firmware but never used before.
the big fan for know is working well, pretty powerfull and cooldown a big area, but i pretty sure it will messup with the heating of the bed like you say. my main problem i do not have espace to put a fan diretly on the carriage. after i installed the heating bed i will see what happens and if necessary to remake a new solution. i was think maybe to put a fan on top of the carriage and them use a tube to redirect the cold air to the print.
you have a good eye.. but is was not z banding. the prints i have posted have some layer not in the correct place. this problem was solve later and is was because the y motor pulley was not well secure one the motor shaft. i found the problem when start increase the speed print and start to have bigger layer missplacement.
Edited 1 time(s). Last edit at 09/23/2016 02:34PM by filipeCampos.
|
Re: G&C Printer [Metal Upgrade] September 23, 2016 02:44PM |
Registered: 8 years ago Posts: 346 |
|
Re: G&C Printer [Metal Upgrade] September 23, 2016 03:59PM |
Registered: 8 years ago Posts: 601 |
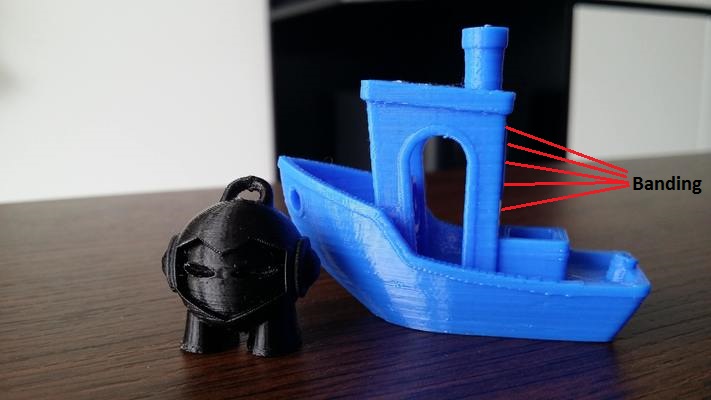
Usually you can measure the repeatability of the banding, and measure this against components in your set up.
For example, the bands on your 3Dbenchy seem to happen every 8mm?? It's very hard to say from the pictures. But if it is 8mm, is the pitch of your leadscrew 8mm? I've uploaded a picture of the banding I can see.
For example, the bands on your 3Dbenchy seem to happen every 8mm?? It's very hard to say from the pictures. But if it is 8mm, is the pitch of your leadscrew 8mm? I've uploaded a picture of the banding I can see.
|
Re: G&C Printer [Metal Upgrade] September 23, 2016 04:10PM |
Registered: 8 years ago Posts: 346 |
the pitch is 1.5mm. but a checked the print and it really looks like z banding issue. i can see a small parten that was the same spacing of the pitch. is small, but is there...
i have checked my z axis i have forget to setup the anti-backlash darlin nuts, maybe will fix it.
i doing this print test
[www.thingiverse.com]
i will post same close photo later.
my bed is supported on two 16mm rods, i always knew there are a possibilty to not work perfectly.. after the print will see..
anyway, thanks for the post indicating the issue
Edited 2 time(s). Last edit at 09/23/2016 04:13PM by filipeCampos.
|
Re: G&C Printer [Metal Upgrade] September 24, 2016 05:05AM |
Registered: 8 years ago Posts: 346 |
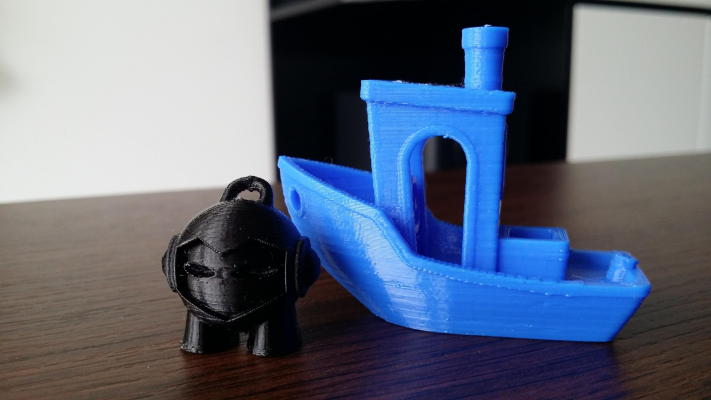
printed 2 tests, one in black and other in blue:
If i put the print is direct light and in some directions is easy to see there is a small z banding, it was printed at 0.20mm each layer.
No sure how to fix it, the problem is probably related with the big cantilever beg.
but the photos are very upclose and the z banding is very small, only noticed when examined more on close the prints tests i have done.
I think the problem is the bed design and solving this small issue it will be to expensive for the gain.
Any sugestion on what is can be gone to solve this?
The bed is a heavy almost 2kg, use two good quality 16mm rods, thread screw 8mm with 1.5 pitch. I was thinking maybe a ballscrew, but they have big pitch values and i afraid the mena17 will not have enough power to move the bed.
Edited 4 time(s). Last edit at 09/24/2016 06:10AM by filipeCampos.
|
Re: G&C Printer [Metal Upgrade] September 24, 2016 09:54AM |
Registered: 9 years ago Posts: 125 |
|
Re: G&C Printer [Metal Upgrade] September 24, 2016 10:09AM |
Registered: 8 years ago Posts: 346 |
|
Re: G&C Printer [Metal Upgrade] September 25, 2016 04:18AM |
Registered: 8 years ago Posts: 346 |
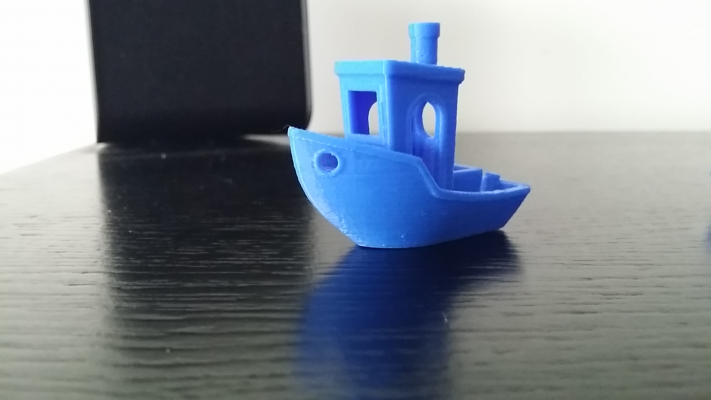
Removed the top mount and the z banding was reduced a lot, but is still where, barley noticeable. Fun fact my first test i done like the 20mm cube i do not have this top mount installed yet and noticed zero z banding.
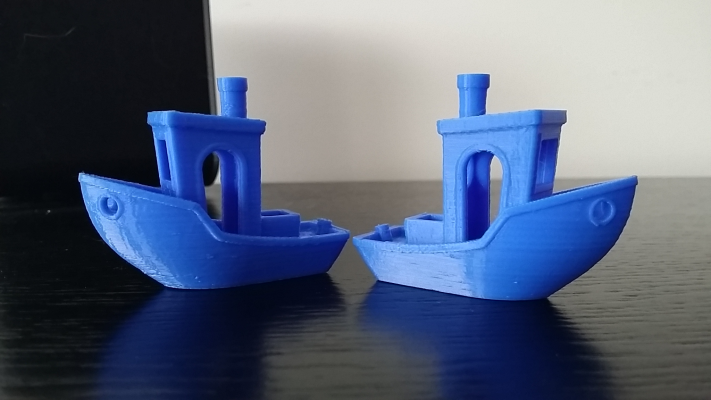
Any way where some photos of the benchy print i have done, one of the photos was the old benchy to be morr easy to compare.
The benchy test after removed the top mount
The right benchy is the old one.
I was expecting a better quality on the z axis, but is ok. At least for know... the big bed with only 2 rods was a bold move and from the results it was not the best option. When i was using a small 200x200 bed never have this problems before.
Ps: thanks mikk36...
Edited 2 time(s). Last edit at 09/25/2016 04:22AM by filipeCampos.
|
Re: G&C Printer [Metal Upgrade] September 26, 2016 05:44AM |
Registered: 8 years ago Posts: 346 |
after lots of prints and made some modifications i reduced the problem but no fixed, the z banding is still visible and is turning to be my major problem in term of print quality.
trying to build a printer with a very good print quality and my priority is to udentifty what causing the problem and fix it.
I think the problem is related with the height of the table is to high (+/- 2kg). The Mena17 motor is bellow and support all, using a 5mm aluminum plate on horizontal to secure the motor and all the height of the bed and i think the problem is where.
By hand is easy to move 1 or 2mm or more up and down the mena17 motor because the aluminum plate is too weak.
Was solution i planning to use the next items:
[www.ebay.com]
One installed on top and the other just after the motor coupling shaft. The pillow will lock the thread screw in all direction and them i planning replacing the rigid coupler with a flexible one. the main idea is to transfer all the weight of the table to this 2 pillow and the flexible coupler will allow to absorve tiny lateral movements.
Any suggestions or better plan?
Edited 1 time(s). Last edit at 09/26/2016 05:44AM by filipeCampos.
|
Re: G&C Printer [Metal Upgrade] September 26, 2016 07:15AM |
Registered: 11 years ago Posts: 5,780 |
Your bed is quite heavy. The screw (and motor bearings) are the only thing that supports that weight. The screw wants to bow because of all that weight. Here's an experiment- move the Z motor up close to the top of the machine and try another print. The Z screw length between the bed and motor will be shorter and less likely to bow. If the print comes out better, you may need a larger diameter screw.
The lead screw is the only thing that supports all the weight of the bed and all that weight is being transferred to the bearings in the poor little Z motor. You might consider looking into a motor mount that has a thrust bearing to relieve the motor's bearings of all that axial load.
Are you using z lift on retraction? With a cantilevered bed you may have to turn the Z axis acceleration quite low to prevent the bed from bouncing when you make Z moves of any kind.
With the screw removed, does the Z axis glide smoothly up and down without binding or "walking"? Is there any detectable lateral play in the bed?
Can you print something besides a tugboat? The vertical edges of a cube can be very revealing of printer motion problems- look at all four vertical edges, preferrably under a microscope, and note any differences...
Ultra MegaMax Dominator 3D printer: [drmrehorst.blogspot.com]
|
Re: G&C Printer [Metal Upgrade] September 26, 2016 10:36AM |
Registered: 8 years ago Posts: 346 |
Not sure if i have the space to put the motor on top, i need to check if can be done without big notification.Quote
the_digital_dentist
Your bed is quite heavy. The screw (and motor bearings) are the only thing that supports that weight. The screw wants to bow because of all that weight. Here's an experiment- move the Z motor up close to the top of the machine and try another print. The Z screw length between the bed and motor will be shorter and less likely to bow. If the print comes out better, you may need a larger diameter screw.
I try to avoid a bigger diameter screw because of the pitch, afraid i bigger pitch and the motor is not powerful to move up the bed.
already try the z lift on retraction and used a cura addon to move on each layer, get zero improvement. My acceleration of the z bed is 10mm/s for both printing and moving, with a top speed of 30mm/s.Quote
the_digital_dentist
Are you using z lift on retraction? With a cantilevered bed you may have to turn the Z axis acceleration quite low to prevent the bed from bouncing when you make Z moves of any kind.
without the screw the bed move smoothly without any noticeable stops, only with the 2060 bar installed (without the bed) the bearing will move from top to down almost was there are following. There is zero lateral play on the side where is the bearings and z screw, on the other side is possible by hand move up/down or left/right some mm, but i think is because of the union of the two 2020 bar to the bigger 2060 bar.when printing i never noticed any vibration transmitted in the bed, printing close of the bearings or the other edge i get the same print results.Quote
the_digital_dentist
With the screw removed, does the Z axis glide smoothly up and down without binding or "walking"? Is there any detectable lateral play in the bed?
sure, can do the cube. I printing blue pla because is more easy to see the problems.Quote
the_digital_dentist
Can you print something besides a tugboat? The vertical edges of a cube can be very revealing of printer motion problems- look at all four vertical edges, preferably under a microscope, and note any differences...
I have other aluminum bed that was 310x200x3mm, is less of half the weight i using at the moment. I was thinking to try to use this one later.
But i think my best shot is to find a way to lock the z screw and remove all the weight from the motor bearings, the bed is way to heavy for the motor... The pillow block i have indicate was to small lateral screw that allow to lock on the z screw, they are 4 in total. it can be enough to achieve this, what do you think?
Edited 3 time(s). Last edit at 09/26/2016 10:40AM by filipeCampos.
|
Re: G&C Printer [Metal Upgrade] September 26, 2016 10:58AM |
Registered: 11 years ago Posts: 5,780 |
You can screw a ferrule on the drive screw on the opposite side of the bearing block as the motor. That will force the bearing block to take the axial load.
If you invert the Z axis drive so that the bed is hanging from the Z axis drive screw instead of being held up by it from below you may get a better result because you're putting the screw in tension instead of compression.
Ultra MegaMax Dominator 3D printer: [drmrehorst.blogspot.com]
If you invert the Z axis drive so that the bed is hanging from the Z axis drive screw instead of being held up by it from below you may get a better result because you're putting the screw in tension instead of compression.
Ultra MegaMax Dominator 3D printer: [drmrehorst.blogspot.com]
|
Re: G&C Printer [Metal Upgrade] December 10, 2016 05:31AM |
Registered: 8 years ago Posts: 346 |
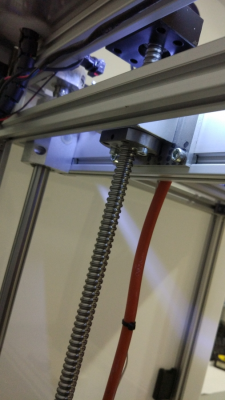
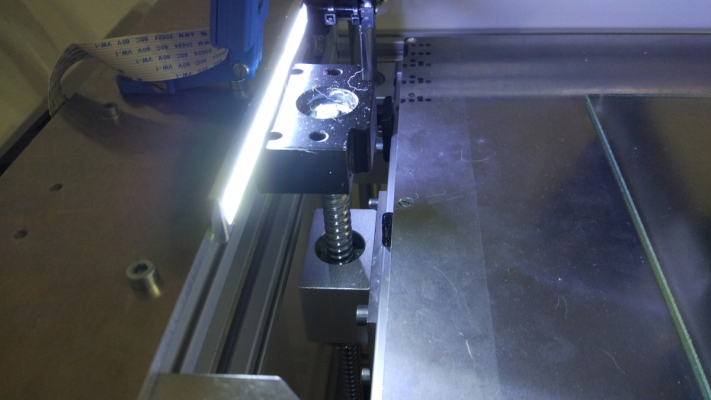
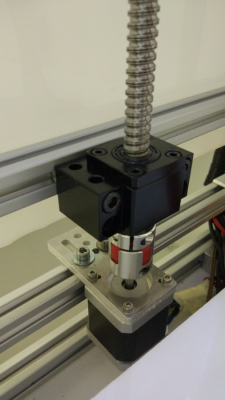
To try to solve the Z bending problem I have replace the 8mm threaded Z screw with a 12mm ball screw that is fixed in the main structure on top and bellow.
done some new small upgrades:
-added big glass 320x290mm to the bed, the printing using paint tape was not good enough for me
-added the new E3D heating block and is new sock.
-added a new fan that blow directly to the nozzle, it work great with the sock. without the sock it give some problems of temperature variation and the final print was weak.
-added a big fan that start at the end of the print to cool down fast the bed. The fan can be turn on during the print in case i see is necessary.
-added 200mmx200mm silicone heater of 140W
where some photos after the replacemente complete:
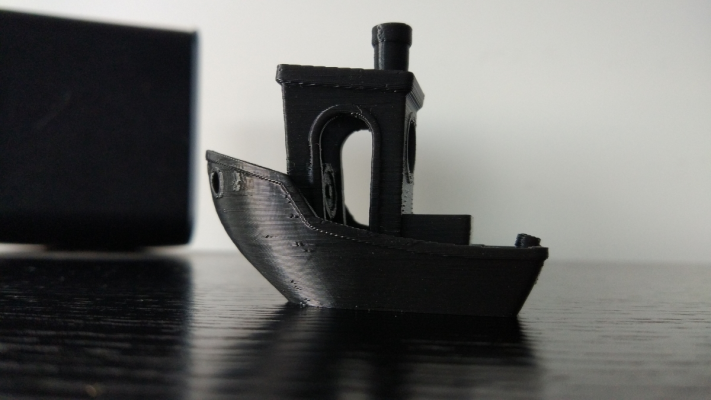
Some photos of the benchy i normally print to check the print quality:
printed at 60mm/s, 0.2 resolution, 0.4 nozzle.
The z bending problem was solved and i geting a good print quality.
Only problems i have found are some tiny blobs maybe that can be solved with some more fine tunning on the retrations values. And there are very little artefacts that i need to sovlve reducing z gerk and maybe print acelerations
Edited 3 time(s). Last edit at 12/10/2016 05:41AM by filipeCampos.
|
Re: G&C Printer [Metal Upgrade] December 10, 2016 07:18AM |
Registered: 11 years ago Posts: 5,780 |
|
Re: G&C Printer [Metal Upgrade] December 10, 2016 11:43AM |
Registered: 9 years ago Posts: 893 |
|
Re: G&C Printer [Metal Upgrade] December 11, 2016 04:50AM |
Registered: 8 years ago Posts: 346 |
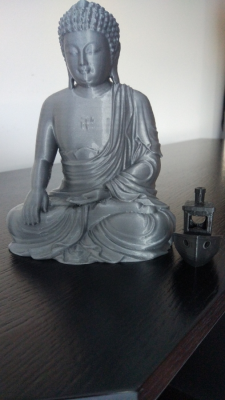
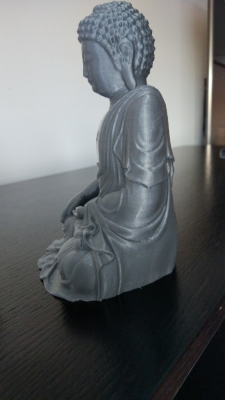
reduced the jerk from 20 to 15 and done a more serious print of a buda, 0.2mm, 80mm/s, no infill and 3 layer wall
Well.. for me this printer is finished, need to start tinking about the next one..
Well.. for me this printer is finished, need to start tinking about the next one..
|
Re: G&C Printer [Metal Upgrade] December 11, 2016 07:13AM |
Registered: 9 years ago Posts: 893 |
Sorry, only registered users may post in this forum.
