My CoreXYU Printer project
Posted by lars.arvidson
|
Re: My CoreXYU Printer project July 18, 2017 07:47AM |
Registered: 11 years ago Posts: 5,780 |
That motor has phosphor bronze brushes like a cheap toy. It isn't designed to operate for more than a few hours because the brushes wear out and can't be replaced. I'd also be surprised if it can operate for more than a few minutes at "rated voltage" without burning itself up. OTOH, maybe the bronze bushings will wear out before the brushes.
If you expect long operating life, look for something that has a brushless DC or AC motor, or at least a motor with replaceable brushes, and preferably ball bearings. Yes, these features will add to cost.
Ultra MegaMax Dominator 3D printer: [drmrehorst.blogspot.com]
|
Re: My CoreXYU Printer project July 18, 2017 10:01AM |
Registered: 6 years ago Posts: 86 |
|
Re: My CoreXYU Printer project July 19, 2017 02:59AM |
Registered: 8 years ago Posts: 5,232 |
The easiest diaphragm pump I've seen has a mains voltage solenoid instead of a motor. Not sure about the noise level, but it has no brushes and the hinge doesn't see any sideload, like the bearings of a motor would. And there are less moving parts, so there's less chance to create extra noise over time.
|
Re: My CoreXYU Printer project July 19, 2017 04:22AM |
Registered: 6 years ago Posts: 86 |
What do you mean with "easiest"? Do you have a link for such a pump?Quote
o_lampe
The easiest diaphragm pump I've seen has a mains voltage solenoid instead of a motor. Not sure about the noise level, but it has no brushes and the hinge doesn't see any sideload, like the bearings of a motor would. And there are less moving parts, so there's less chance to create extra noise over time.
Could this be a solenoid air pump? It even has 24V versions... claiming to be <35DB and have versions up to 25L, the preassure 10-30kpa is a bit lower than the pumps I have claim (70kpa)
One problem with mains voltage pumps are that it will either be on or off, at least if you control them with a ssr (the switch frequency is not high enough for PWM in my limited experience).
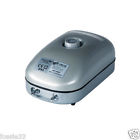
If I’ll go with mains voltage pump I could maybe find aquarium air pump. Should be cheap, quiet and designed to run for extended periods.
|
Re: My CoreXYU Printer project July 19, 2017 02:56PM |
Registered: 7 years ago Posts: 270 |
I wonder how much output would be sufficient? Ultimaker (for example) has two fans 9L/min (2.2cfm) each - therefore I suppose 1/4 of that output should be sufficient when using air nozzle which would be 4.5-9L pump. Probably would be good to get 15L and turn it down with a valve.
I don't think DC pump could be regulated with PWM like DC motor pumps can be (maybe it would be possible to plug in solenoid directly to PWM signal?).
Since not much pressure is needed, and variable cooling rate is nice to have, maybe few fans in series would be a better solution.
Edited 1 time(s). Last edit at 07/19/2017 03:21PM by newbob.
|
Re: My CoreXYU Printer project July 19, 2017 03:50PM |
Registered: 7 years ago Posts: 249 |
|
Re: My CoreXYU Printer project July 19, 2017 09:26PM |
Registered: 7 years ago Posts: 270 |
Only 1.3L / min. I don't know what it should be but it seems rather low.
|
Re: My CoreXYU Printer project July 20, 2017 01:31AM |
Registered: 8 years ago Posts: 776 |
Quote
dc42
The other way to prevent ooze is to use set the standby temperature lower than the active temperature and retract a significant amount of filament when a hot end goes to standby. This works extremely well on my dual-nozzle Ormerod, using a standby temperature of 150C and 10mm retraction (less retraction might work but I haven't tried). However, all-metal hot ends don't take kindly to large amounts of retraction, so you would probably need to use en E3D Lite 6 with this technique rather than the E3DV6.
dc42, lars: have you investigated the mutley3d dual-filament hot-ends at all? two filaments come in, mix *inside* the hot-end, filaments comes out of a *single nozzle*. you can therefore do *blending* of two colours. yes i believe jason may actually be considering a triple so that it's possible to do virtually any kind of colour-mix you desire. awesome stuff as it saves a considerable amount of space. also all the problems with "active" and "standby" temperatures, and associated delays in changeovers - all those problems go away. selecting which filament you want is give-or-take immediate (small latency due to there being a small amount of the previous filament still in the hot-end).
p.s. lars your design looks really good. love the bright red. brace those open faces (all six) and you'll be able to increase the speed without getting artefacts from frame-shaking. [reprap.org]
|
Re: My CoreXYU Printer project July 20, 2017 03:01AM |
Registered: 6 years ago Posts: 86 |
Quote
newbob
I wonder how much output would be sufficient? Ultimaker (for example) has two fans 9L/min (2.2cfm) each - therefore I suppose 1/4 of that output should be sufficient when using air nozzle which would be 4.5-9L pump. Probably would be good to get 15L and turn it down with a valve.
I don't think DC pump could be regulated with PWM like DC motor pumps can be (maybe it would be possible to plug in solenoid directly to PWM signal?).
Since not much pressure is needed, and variable cooling rate is nice to have, maybe few fans in series would be a better solution.
Getting a number on this would be very useful. I do know the pumps I have do a good job and are probably a bit overkill.
I do believe actual air flow is not only dependent on specified L/min but also on tube length, inner diameter and maximum pressure the pump can produce. I would guess the L/min spec is what the pump can do with no tube attached… Dunno how to do the math on this so I guess I’ll have to wing it
 .
.I do believe that fans are not that good for driving air through a narrow tube, blower fans might be slightly better but I do believe an air pump is the best solution. I have a somewhat hazy memory of this been discussed on this forum before…
Quote
newbob
Only 1.3L / min. I don't know what it should be but it seems rather low.
Yep, found that one too but as newbob says the air flow spec is a bit low. Pressure of 90kPa is a bit surprising as that’s more than the pumps I have (70kPa).
|
Re: My CoreXYU Printer project July 20, 2017 03:26AM |
Registered: 6 years ago Posts: 86 |
Quote
lkcl
Quote
dc42
The other way to prevent ooze is to use set the standby temperature lower than the active temperature and retract a significant amount of filament when a hot end goes to standby. This works extremely well on my dual-nozzle Ormerod, using a standby temperature of 150C and 10mm retraction (less retraction might work but I haven't tried). However, all-metal hot ends don't take kindly to large amounts of retraction, so you would probably need to use en E3D Lite 6 with this technique rather than the E3DV6.
dc42, lars: have you investigated the mutley3d dual-filament hot-ends at all? two filaments come in, mix *inside* the hot-end, filaments comes out of a *single nozzle*. you can therefore do *blending* of two colours. yes i believe jason may actually be considering a triple so that it's possible to do virtually any kind of colour-mix you desire. awesome stuff as it saves a considerable amount of space. also all the problems with "active" and "standby" temperatures, and associated delays in changeovers - all those problems go away. selecting which filament you want is give-or-take immediate (small latency due to there being a small amount of the previous filament still in the hot-end).
p.s. lars your design looks really good. love the bright red. brace those open faces (all six) and you'll be able to increase the speed without getting artefacts from frame-shaking. [reprap.org]
Thanks for the kind words! I do like the red myself.
I do not think the flex3drive 2in1 duo was available when I looked at remote direct drives. It looks interesting. I use 3mm filaments atm so it might take some time for it to be available. I do have one spare stepper driver (using 9 of 10 on the duet wifi/duex5 combo) so I might replace one nimble and try it out
 .
.I would like to use an aluminum sheet for the bottom. I think I’ll wait with bracing the sides until I have enclosed it. I’ll probably use PC sheets. These might provide some bracing in themselves depending on how thick sheets I use.
|
Re: My CoreXYU Printer project July 20, 2017 04:07AM |
Registered: 10 years ago Posts: 14,672 |
Quote
lkcl
Quote
dc42
The other way to prevent ooze is to use set the standby temperature lower than the active temperature and retract a significant amount of filament when a hot end goes to standby. This works extremely well on my dual-nozzle Ormerod, using a standby temperature of 150C and 10mm retraction (less retraction might work but I haven't tried). However, all-metal hot ends don't take kindly to large amounts of retraction, so you would probably need to use en E3D Lite 6 with this technique rather than the E3DV6.
dc42, lars: have you investigated the mutley3d dual-filament hot-ends at all? two filaments come in, mix *inside* the hot-end, filaments comes out of a *single nozzle*. you can therefore do *blending* of two colours. yes i believe jason may actually be considering a triple so that it's possible to do virtually any kind of colour-mix you desire. awesome stuff as it saves a considerable amount of space. also all the problems with "active" and "standby" temperatures, and associated delays in changeovers - all those problems go away. selecting which filament you want is give-or-take immediate (small latency due to there being a small amount of the previous filament still in the hot-end).
I agree, mixing hot ends avoid the problems of multi-nozzle machines as long as the filaments you are using are compatible (so no good if you want to use a separate support filament). They have a few problems of their own, but nothing that can't be overcome. There is a good write-up here [somei3deas.wordpress.com].
You can avoid the latency on switching filaments by preprocessing the gcode as described here [somei3deas.wordpress.com]. We're planning to do this automatically in RepRapFirmware in the future so that preprocessing won't be needed.
Large delta printer [miscsolutions.wordpress.com], E3D tool changer, Robotdigg SCARA printer, Crane Quad and Ormerod
Disclosure: I design Duet electronics and work on RepRapFirmware, [duet3d.com].
|
Re: My CoreXYU Printer project July 21, 2017 03:50AM |
Registered: 8 years ago Posts: 5,232 |
|
Re: My CoreXYU Printer project July 21, 2017 12:49PM |
Registered: 6 years ago Posts: 86 |
Once you have managed to bend the pipe and positioned it a normal pipe works. I guess a gooseneck pipe would be easier to bend and position but it would be a bit bulkier. I might be knocked out of position easier...?Quote
o_lampe
I wonder if gooseneck pipe is any good for air cooling with a pump? You could aim it anywhere you want.
|
Re: My CoreXYU Printer project July 30, 2017 04:32PM |
Registered: 6 years ago Posts: 86 |
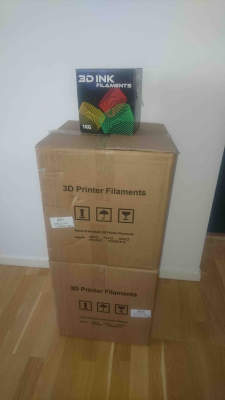
I love the smell of coffee and melting abs in the morning! Been printing new stepper mounts in abs. Got me some (24kg) cheap abs, enough for the foreseeable future, but just to be sure I ordered some more!
Might have to design a ventilation system for the planned enclosure.
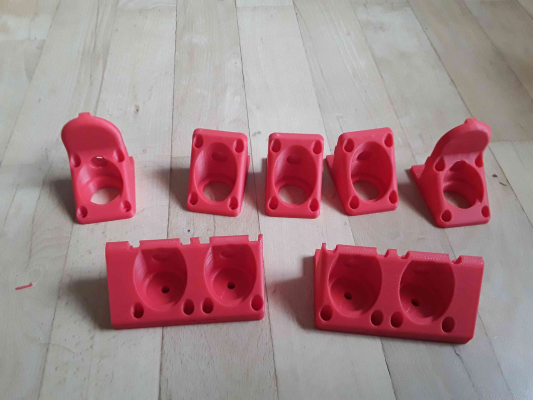
The abs printed ok and the mounts turned out good. Unfortunately, the abs did not turn out as deep red as the PLA I printed with originally, it is a tad more pinkish but it will have to do.
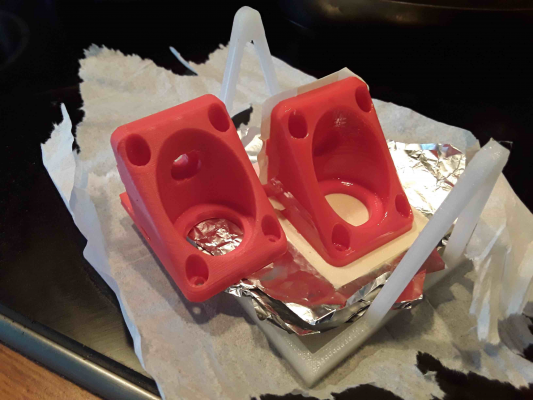
I did test to acetone smoothing one mount and it turned out great. Masked the parts that attached to the stepper and the frame with some painter tape. I might do that on some visible parts later.
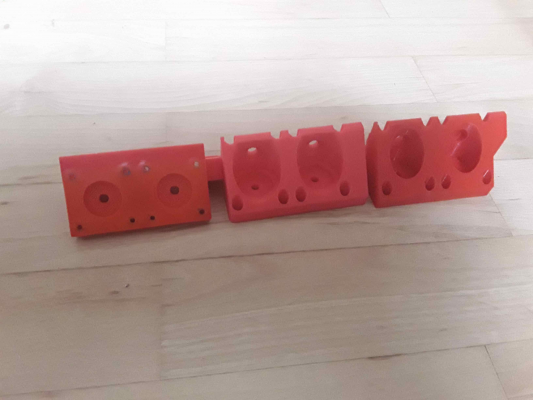
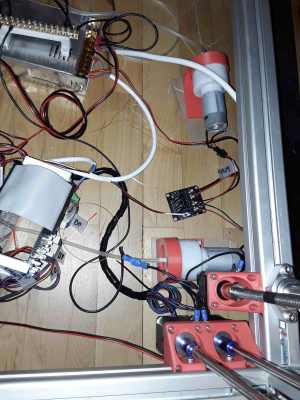
The old PLA xyu mounts had discoloration and slight warping where steppers was in contact with them. Old mount to the left and right of the new mount on the picture below.
I have also helped test the new bed levelling feature (“Bed levelling using multiple independent Z motors”) in duet firmware 1.19 beta 10. I do believe it took 4 or 5 version but now I think it works as intended. Very nice feature! Will be very useful releveling the bed after its been tilted at the end of a print.
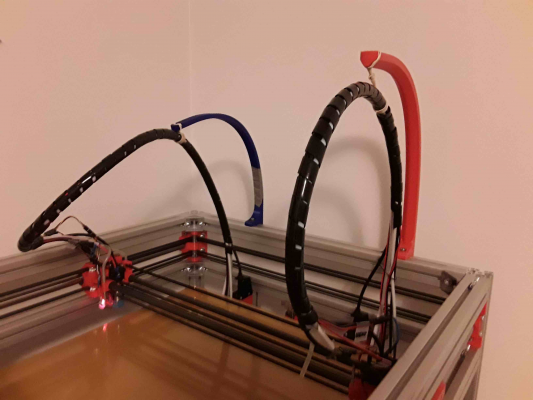
The cable management arms broke. One broke when the cables got stuck on the other carriage when doing a mesh bed probing. The other I don’t know what happened…
I designed new one, a bit beefier and higher than the old one. It stretched from one end of the bed to the other. A bit tricky to get it to sick even with mesh bed compensation. First print failed mid print as the PT100 sensor cables had been rubbing against the carriage and cut off. Had to enable Z-hop on retraction as the hotend was bumping into the infill when doing moves. This do unfortunately add a lot of time to the print time. The finished part was not pretty. The infill created artefacts on the skin.
I switched out all the stepper mounts and organized the cables a bit better. Turned out to be a lot of work but in the end, I must have tightened down something better than before because the infill no longer shows through the walls when printing. Printed another cable management arm with 0.6 nozzle and 0.3 layer height and it printed a lot faster and turned out pretty good. I think I’ll keep using the 0.6 nozzle for big parts.
I have been looking for new air pumps. Need something that’s not as loud as the current pumps. I ordered 24V DC 15L/min version of these: air pumps , they were on 50% discount. They will probably take some time to arrive. In the mean time, I printed some holders for my current pumps and they reduced the noise quite a bit. I also connected the pumps to a mosfet board and can now use PWM to control them.
Been printing two colour benchys. I do have a problem with stringing of the doorframe. It feels like it’s too small a detail to print with 0.4 nozzle and 0.2 layer height. Anyone have experience with this? Might be my esun PLA that’s a bit stringy. First batch of zesty nimble drive shafts was faulty, bad retraction might be caused by that. I’ll try a 0.4/0.25 nozzle combo with 0.1 layer height while waiting for new cables to arrive. If that don’t work I’ll try with some other filament, got a reel of colorfab ngen somewhere.
|
Re: My CoreXYU Printer project August 01, 2017 06:47PM |
Registered: 8 years ago Posts: 338 |
Quote
That motor has phosphor bronze brushes like a cheap toy. It isn't designed to operate for more than a few hours because the brushes wear out and can't be replaced. I'd also be surprised if it can operate for more than a few minutes at "rated voltage" without burning itself up. OTOH, maybe the bronze bushings will wear out before the brushes.
The berdAir uses that same motor and I've had no problem running it for 24hrs at a time... I've probably put overly 200 hrs on it and the thing still chooches. It is LOUD though. I did put heat sink and fan on it though cause it was getting hot....
Edited 2 time(s). Last edit at 08/01/2017 06:50PM by Qdeathstar.
|
Re: My CoreXYU Printer project August 02, 2017 02:13AM |
Registered: 6 years ago Posts: 86 |
Quote
Qdeathstar
The berdAir uses that same motor and I've had no problem running it for 24hrs at a time... I've probably put overly 200 hrs on it and the thing still chooches. It is LOUD though. I did put heat sink and fan on it though cause it was getting hot....
Good to hear! I too have run it for quite some time now (not 24h in one go tho) and is confident it will not explode in flames any time soon
 . I have set up a big temporary fan producing quite a bit of air flow cooling it, the steppers and the duet but will need to design something more permanent later. Any chance you could post a pic of your pump? Would be nice to see your heatsink/fan arrangement.
Edited 1 time(s). Last edit at 08/02/2017 02:13AM by lars.arvidson.
|
Re: My CoreXYU Printer project August 02, 2017 11:10PM |
Registered: 8 years ago Posts: 338 |
Nothing too fancy... i used some thermal epoxy to glue the heat sink to the motor housing. It's surprising how well it works despite the small contact surface area. The motor was hot to the touch without the heat sink and fan, with it it is barely warm.
|
Re: My CoreXYU Printer project August 03, 2017 03:07AM |
Registered: 6 years ago Posts: 86 |
I would not have thought that would be effective! Good to know. I have been looking at possibly getting a RC motor heatsink. Somehing like this or this. They should fit on a 36mm diameter motor. Will have to check if the metal piece attached to the motor that I guess is a heatsink can be removed (the one with the model text on it).Quote
Qdeathstar
It's surprising how well it works despite the small contact surface area. The motor was hot to the touch without the heat sink and fan, with it it is barely warm.
Do you use water cooling on your printer?
|
Re: My CoreXYU Printer project August 03, 2017 07:39AM |
Registered: 8 years ago Posts: 338 |
|
Re: My CoreXYU Printer project August 03, 2017 07:09PM |
Registered: 8 years ago Posts: 1,671 |
what about these, anyone tried, quie
t?
[i.ebayimg.com]
[www.ebay.co.uk]
Edited 1 time(s). Last edit at 08/03/2017 07:09PM by MechaBits.
[i.ebayimg.com]
[www.ebay.co.uk]
Edited 1 time(s). Last edit at 08/03/2017 07:09PM by MechaBits.
|
Re: My CoreXYU Printer project August 04, 2017 02:36AM |
Registered: 8 years ago Posts: 5,232 |
Quote
Will have to check if the metal piece attached to the motor that I guess is a heatsink can be removed (the one with the model text on it).
This extra metal shield wrapped around the motor housing is there to increase torque. It improves the magnetic field path between the two magnets inside.
Removing it will make the motor spin faster at same voltage, but it'll be a bit weaker too.
|
Re: My CoreXYU Printer project August 04, 2017 03:15AM |
Registered: 6 years ago Posts: 86 |
Quote
o_lampe
This extra metal shield wrapped around the motor housing is there to increase torque. It improves the magnetic field path between the two magnets inside.
Removing it will make the motor spin faster at same voltage, but it'll be a bit weaker too.
Thanks for the info! Might be best to leave it be then.
|
Re: My CoreXYU Printer project August 05, 2017 03:19AM |
Registered: 8 years ago Posts: 5,232 |
You can remove it and give it a try. AFAIK, they are only clamped on and fixed in position by a small notch.
You could then wrap some small aluminum or copper tubing around the motor and cool it by it's own compressed air.
But the real deal is cooling the brushes. I've seen high performance brushed motors with watercooled brush-holders.
Link
Edited 1 time(s). Last edit at 08/05/2017 03:20AM by o_lampe.
You could then wrap some small aluminum or copper tubing around the motor and cool it by it's own compressed air.
But the real deal is cooling the brushes. I've seen high performance brushed motors with watercooled brush-holders.
Link
Edited 1 time(s). Last edit at 08/05/2017 03:20AM by o_lampe.
|
Re: My CoreXYU Printer project August 05, 2017 03:27PM |
Registered: 6 years ago Posts: 86 |
Been doing some soldering today.
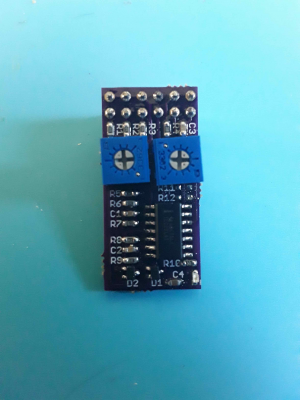
This is the v1.1 of Moriquendis piezo probe board. Those 0603 smd components are small but I'm happy it wasn't 0402...
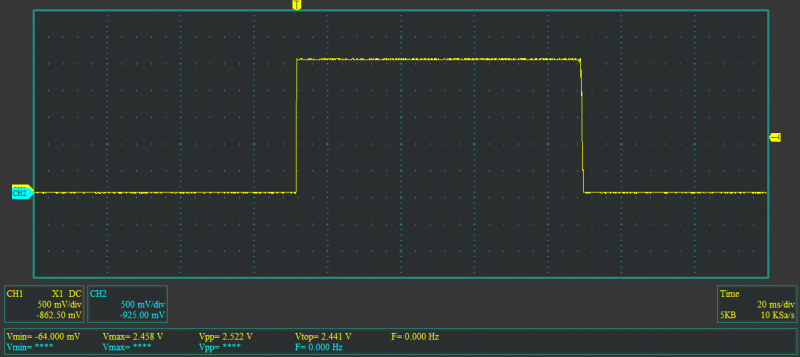
This is signal output when using 3.3V voltage supply.
Pretty happy with the BLTouce atm but ordered the piezo stuff a while back an thought I assemble one board to see if I could make it work.
|
Re: My CoreXYU Printer project August 08, 2017 02:47PM |
Registered: 6 years ago Posts: 86 |
Been testing duet firmware 1.19 RC1-RC4 this weekend. There was some problems with homing and tool switch that made the carriage crash but looks like it was solved in RC4.
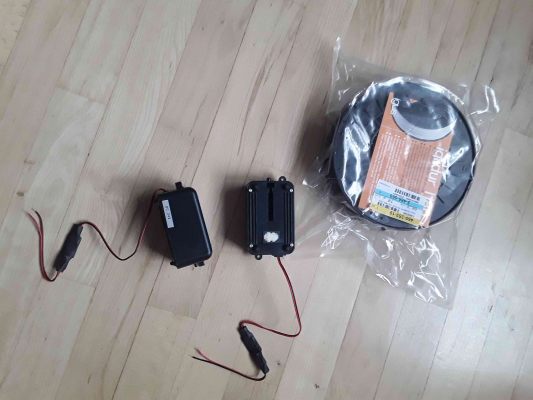
Igus (I180-PF) filament and air pumps arrived today. I plan to try to print bushings for the printer. There was a small tear in the vacuum sealed bag though. Will check with Igus if water absorption is a problem. Might need to return if it is...
The pumps look like they are possibly salvaged and not new… They work and pump a decent amount of air. PWM control did not work, at least not with the default frequency and the mosfet driver board I used. It’s somewhat less noisy than the old air pumps but not much. Still too noisy me think.
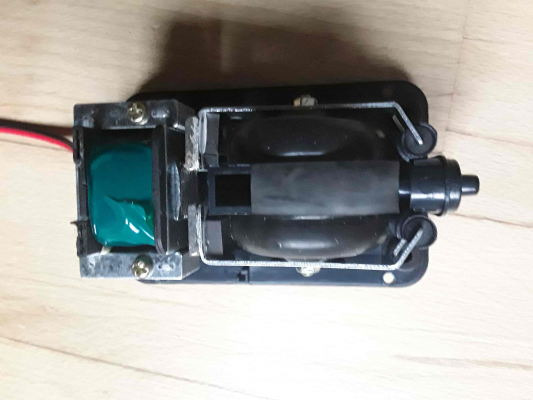
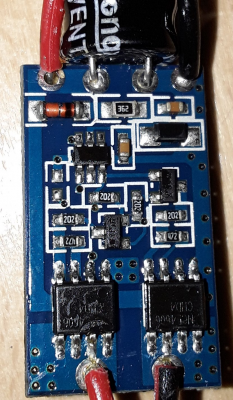
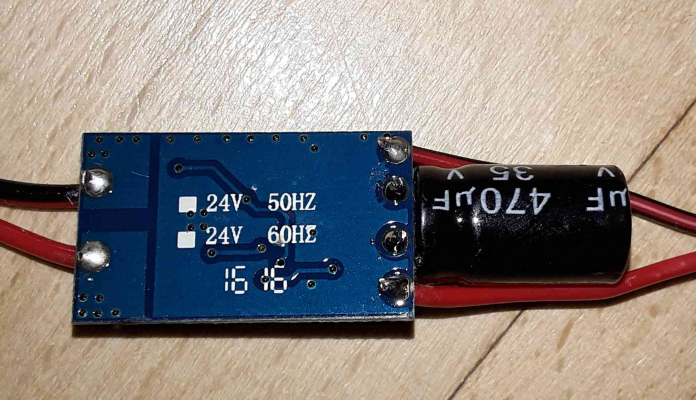
Looking inside there are an electromagnet attracting two arms squeezing a bellows. Looking on the cable there appears to be some kind of control circuit in heat shrink tubing. I can see what looks like the top of a capacitor from one end. Maybe the circuit could be replaced so that pwm can be used to control the electromagnet…
|
Re: My CoreXYU Printer project August 09, 2017 03:27AM |
Registered: 8 years ago Posts: 5,232 |
Would be interesting to see the circuit.
I doubt you will change much with PWM control. The duty cycle would have to be 50:50 and a lower frequency could overheat the coil. The best you can try is to lower the input voltage ( fast PWM with a large capacitor in parallel ) and keep the circuit as is.
Bad news is, there are two valves inside the bellows, which might need some "bang-bang" to open/close effectively.
|
Re: My CoreXYU Printer project August 09, 2017 05:15AM |
Registered: 6 years ago Posts: 86 |
Quote
o_lampe
Would be interesting to see the circuit.
I doubt you will change much with PWM control. The duty cycle would have to be 50:50 and a lower frequency could overheat the coil. The best you can try is to lower the input voltage ( fast PWM with a large capacitor in parallel ) and keep the circuit as is.
Bad news is, there are two valves inside the bellows, which might need some "bang-bang" to open/close effectively.
I'll try increasing pwm freq and see if that has any effect. I do believe the default frequency is 250Hz. If that don’t work I’ll take a picture of the circuit and see if you or anyone else have any suggestions on how to proceed.
Thanks for the input o_lampe, always appreciated!
|
Re: My CoreXYU Printer project August 10, 2017 04:22AM |
Registered: 8 years ago Posts: 5,232 |
|
Re: My CoreXYU Printer project August 10, 2017 04:47AM |
Registered: 6 years ago Posts: 86 |
|
Re: My CoreXYU Printer project August 11, 2017 01:50AM |
Registered: 8 years ago Posts: 5,232 |
Sorry, only registered users may post in this forum.
