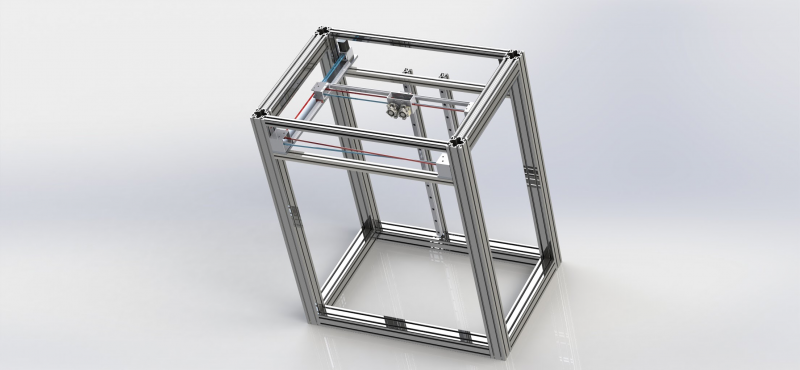
Zasquatch's CoreXY Design/Build
Posted by Zasquatch
|
Zasquatch's CoreXY Design/Build August 15, 2017 10:22AM |
Registered: 6 years ago Posts: 54 |
I have started to grow my business and have come to the point where potential jobs on the horizon will require larger and more reliable equipment! I started by researching the large format "heavy duty" printers currently on the market, but then I stumbled upon the many build threads on the various forums. Since my business is design/engineering and 3d printing/prototyping, why the heck wouldn't I design and build my own?! This also allows to build a machine to the exact specs I want, with the components I want, and not have to settle for shortcuts that many "boxes" printers have.
Requirements were straightforward. Reliable, robust, large build plate, dual direct drive extrusion, ability to transport through common household doors.
After reviewing many many builds I settled on a CoreXY machine... and ended up using the digital dentist build as my bible.
I will post updates as I progress but it will probably be prettt sporadic - I have a 2 month old son that is rather distracting
I have settled on the following components so far:
Duet wifi + meanwell 24v power supply
Dual titan aero extruders
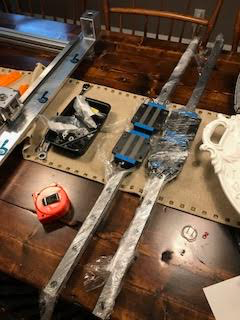
Hiwin AG20 series linear guides for x/y plane (thanks to automationoverstock.com!)
IKO 30 series rails/guides for z-axis - in the mail, receiving Friday
MIC6 build plate - current plan is to use a single ball screw for z axis and cantilever the bed
NEMA 17 steppers for x/y, single NEMA23 for z-axis
More details to follow!
Edited 1 time(s). Last edit at 08/15/2017 10:31AM by Zasquatch.
Requirements were straightforward. Reliable, robust, large build plate, dual direct drive extrusion, ability to transport through common household doors.
After reviewing many many builds I settled on a CoreXY machine... and ended up using the digital dentist build as my bible.

I will post updates as I progress but it will probably be prettt sporadic - I have a 2 month old son that is rather distracting

I have settled on the following components so far:
Duet wifi + meanwell 24v power supply
Dual titan aero extruders
Hiwin AG20 series linear guides for x/y plane (thanks to automationoverstock.com!)
IKO 30 series rails/guides for z-axis - in the mail, receiving Friday
MIC6 build plate - current plan is to use a single ball screw for z axis and cantilever the bed
NEMA 17 steppers for x/y, single NEMA23 for z-axis
More details to follow!
Edited 1 time(s). Last edit at 08/15/2017 10:31AM by Zasquatch.
|
Re: Zasquatch's CoreXY Design/Build August 15, 2017 10:28AM |
Registered: 6 years ago Posts: 54 |
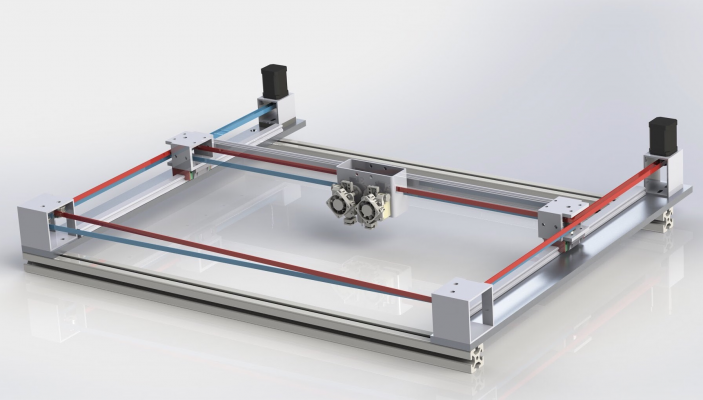
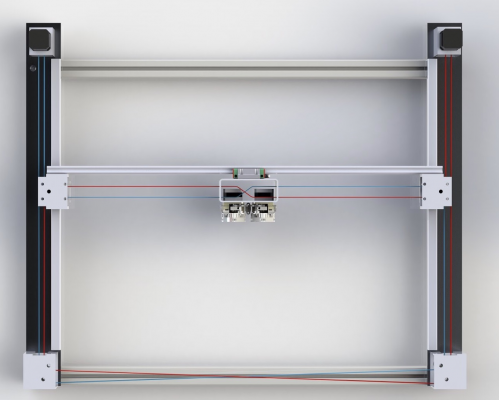
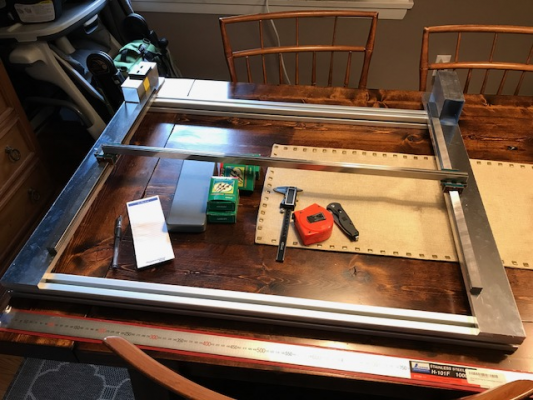
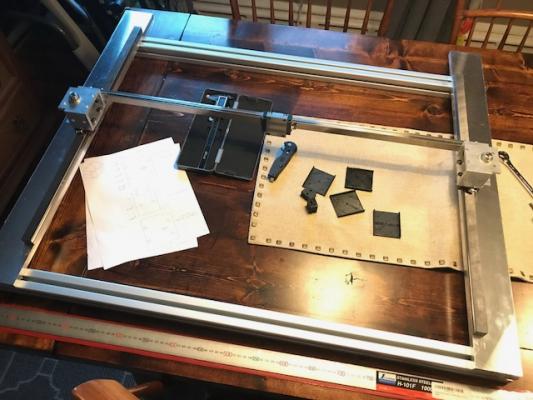
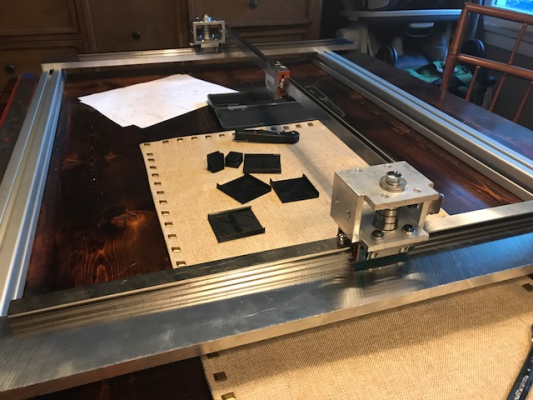
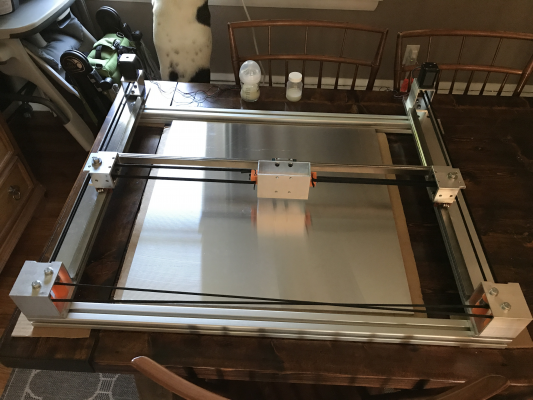
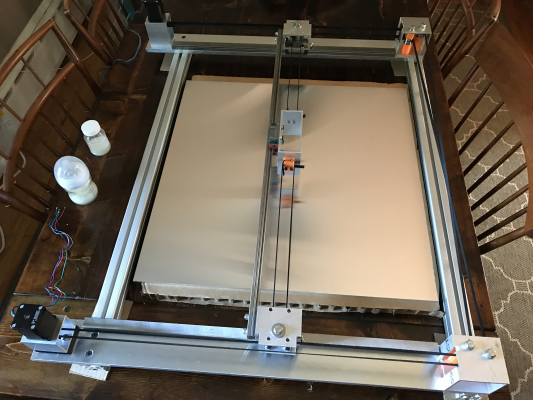
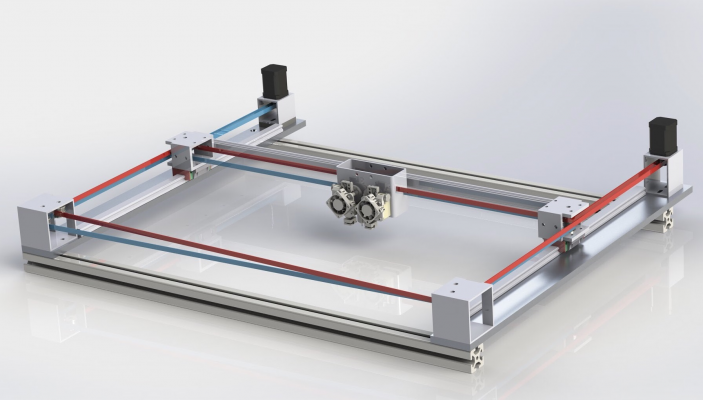
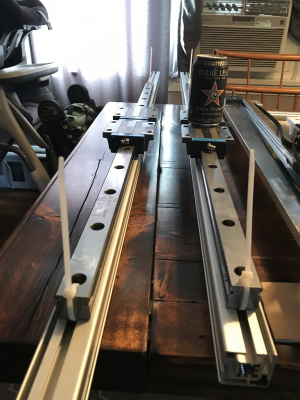
Here is a screenshot of the x/y subassembly design, and progress to date on assembly. Game plan is to assemble the x/y subassembly and test it out as a draw-bot. Once everything is confirmed working, I will move on to the z-axis and frame construction.
Edited 1 time(s). Last edit at 08/15/2017 10:29AM by Zasquatch.
Edited 1 time(s). Last edit at 08/15/2017 10:29AM by Zasquatch.
|
Re: Zasquatch's CoreXY Design/Build August 15, 2017 10:40AM |
Registered: 6 years ago Posts: 54 |
|
Re: Zasquatch's CoreXY Design/Build August 15, 2017 10:42AM |
Registered: 6 years ago Posts: 54 |
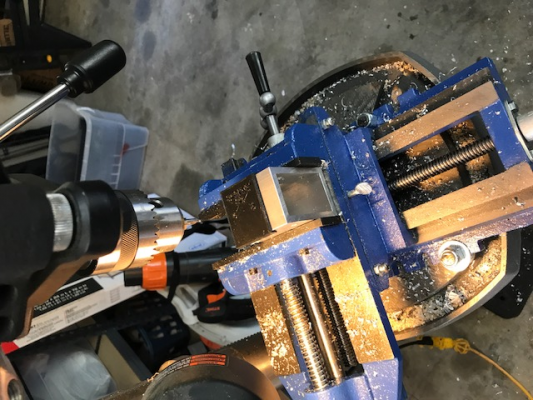
I do not have a milling machine yet... still working on convincing my wife 
To get around that, I print drill guides for my center drill in the drill press. Works great and tolerances have not been a problem yet.

To get around that, I print drill guides for my center drill in the drill press. Works great and tolerances have not been a problem yet.
|
Re: Zasquatch's CoreXY Design/Build August 21, 2017 01:36PM |
Registered: 6 years ago Posts: 54 |
Had a very productive weekend! XY mechanicals are done, just need to spot in the limit switches. Up next is wiring and configuring the duet wifi. Any tips are appreciated! I am coming from a RAMBO on my other printer.
|
Re: Zasquatch's CoreXY Design/Build August 21, 2017 02:04PM |
Registered: 11 years ago Posts: 5,780 |
Looks nice! What is the build envelope?
It is pretty hard to make a cantilevered bed whose free edge doesn't bounce due to motion of the XY mechanism. I have a CubeX Duo that has a cantilevered bed and if I try to print above 40 mm/sec the bouncing really wrecks the print quality.
Ultra MegaMax Dominator 3D printer: [drmrehorst.blogspot.com]
|
Re: Zasquatch's CoreXY Design/Build August 21, 2017 02:28PM |
Registered: 6 years ago Posts: 54 |
Thank you! Your build threads have been extrememely valuable!
Right now the build plate will be 24" x 22", but I haven't designed the z axis yet. The rails are 1000mm, and if I use 2 carriages per rail then travel about 780mm.
The IKO rails are 35mm so I don't think the plate will be bouncing lol. A bit overkill.
Is the cantilevered design always a bad idea or should an over engineered version be good? 40-series 80/20 structure on those giant IKO carriages... should be solid as a rock.
Sorry for the low res pics, the file size limit is killing me....
Edited 2 time(s). Last edit at 08/21/2017 03:20PM by Zasquatch.
|
Re: Zasquatch's CoreXY Design/Build August 21, 2017 03:59PM |
Registered: 8 years ago Posts: 338 |
|
Re: Zasquatch's CoreXY Design/Build August 21, 2017 04:41PM |
Registered: 6 years ago Posts: 54 |
2" x 5" x .125" thk
Not sure if my nozzle leveling idea is the best, if there are suggestions I'd like to hear them. Right now just planning to machine ovals for the stepper and mounting holes... loosen the whole titan, drop to a spacer on the bed, and tighten. Repeat for second extruder. Simple but not sure how it will work practically.
Not sure if my nozzle leveling idea is the best, if there are suggestions I'd like to hear them. Right now just planning to machine ovals for the stepper and mounting holes... loosen the whole titan, drop to a spacer on the bed, and tighten. Repeat for second extruder. Simple but not sure how it will work practically.
|
Re: Zasquatch's CoreXY Design/Build August 22, 2017 02:33PM |
Registered: 8 years ago Posts: 601 |
Quote
Zasquatch
2" x 5" x .125" thk
Not sure if my nozzle leveling idea is the best, if there are suggestions I'd like to hear them. Right now just planning to machine ovals for the stepper and mounting holes... loosen the whole titan, drop to a spacer on the bed, and tighten. Repeat for second extruder. Simple but not sure how it will work practically.
One of the screws for the motor on the titan is actually behind the hotend, so it would be unpractial to use it for levelling.
My preferred method would be an e3d Kraken heat break that is secured with a set screw (non threaded [e3d-online.com]). Could be quite easily made just by drilling a heatsink, or perhaps ask e3d for a non threaded heatsink? China does quite a few variations of heatsinks so may be possible to use one of those
Edited 1 time(s). Last edit at 08/22/2017 02:35PM by Origamib.
|
Re: Zasquatch's CoreXY Design/Build August 22, 2017 03:33PM |
Registered: 6 years ago Posts: 54 |
It may not be that easy, these are the titan aeros, which have the heat sink built into the extruder.
I will reach out to e3d for ideas, hadn't thought of that!!
I will reach out to e3d for ideas, hadn't thought of that!!
Quote
Origamib
Quote
Zasquatch
2" x 5" x .125" thk
Not sure if my nozzle leveling idea is the best, if there are suggestions I'd like to hear them. Right now just planning to machine ovals for the stepper and mounting holes... loosen the whole titan, drop to a spacer on the bed, and tighten. Repeat for second extruder. Simple but not sure how it will work practically.
One of the screws for the motor on the titan is actually behind the hotend, so it would be unpractial to use it for levelling.
My preferred method would be an e3d Kraken heat break that is secured with a set screw (non threaded [e3d-online.com]). Could be quite easily made just by drilling a heatsink, or perhaps ask e3d for a non threaded heatsink? China does quite a few variations of heatsinks so may be possible to use one of those
|
Re: Zasquatch's CoreXY Design/Build August 24, 2017 05:40AM |
Registered: 8 years ago Posts: 601 |
Quote
Zasquatch
It may not be that easy, these are the titan aeros, which have the heat sink built into the extruder.
I will reach out to e3d for ideas, hadn't thought of that!!
Quote
Origamib
Quote
Zasquatch
2" x 5" x .125" thk
Not sure if my nozzle leveling idea is the best, if there are suggestions I'd like to hear them. Right now just planning to machine ovals for the stepper and mounting holes... loosen the whole titan, drop to a spacer on the bed, and tighten. Repeat for second extruder. Simple but not sure how it will work practically.
One of the screws for the motor on the titan is actually behind the hotend, so it would be unpractial to use it for levelling.
My preferred method would be an e3d Kraken heat break that is secured with a set screw (non threaded [e3d-online.com]). Could be quite easily made just by drilling a heatsink, or perhaps ask e3d for a non threaded heatsink? China does quite a few variations of heatsinks so may be possible to use one of those
Hmmm... If e3d could supply an aero heatsink that is not threaded, then you may be able to drill your own holes in the side for the m3 set screws and still use a Kraken heat break?
|
Re: Zasquatch's CoreXY Design/Build August 24, 2017 05:50AM |
Registered: 6 years ago Posts: 54 |
Yes I am in contact with e3d, asked if they could provide one to fit with the kraken which they declined, not surprisingly. The thread is an m7, and the kraken heatbrake needs a 7mm hole, so in theory you could just drill out the threads- that doesn't leave much allowance for misalignment though.
My original option still seems like the most likely, and I will just bypass using that 3rd screw in one of the extruders. In parallel i will continue this pursuit with e3d. Very nice guys, I'm just asking some pretty out of the ordinary requests
Had a set back last night.... both my stepper motors are DoA! Both motors have loose and stripped screws on the back. One has very difficult mechanical movement, which must be a misalignment.
I got them at stepperonline which I think is an offshoot of oriental motor. They get pretty decent reviews online so I am surprised. Does anyone know of a more reliable supplier for steppers?
I did get my power wiring done, and configured the duet wifi. What a great piece of gear! So far I am thoroughly impressed with it.
Edited 1 time(s). Last edit at 08/24/2017 04:43PM by Zasquatch.
My original option still seems like the most likely, and I will just bypass using that 3rd screw in one of the extruders. In parallel i will continue this pursuit with e3d. Very nice guys, I'm just asking some pretty out of the ordinary requests

Had a set back last night.... both my stepper motors are DoA! Both motors have loose and stripped screws on the back. One has very difficult mechanical movement, which must be a misalignment.
I got them at stepperonline which I think is an offshoot of oriental motor. They get pretty decent reviews online so I am surprised. Does anyone know of a more reliable supplier for steppers?
I did get my power wiring done, and configured the duet wifi. What a great piece of gear! So far I am thoroughly impressed with it.
Edited 1 time(s). Last edit at 08/24/2017 04:43PM by Zasquatch.
|
Re: Zasquatch's CoreXY Design/Build August 24, 2017 04:50PM |
Registered: 6 years ago Posts: 54 |
|
Re: Zasquatch's CoreXY Design/Build August 24, 2017 04:52PM |
Registered: 6 years ago Posts: 54 |
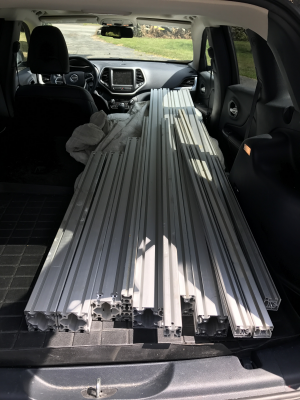
Hit the jackpot today! Picked up 200lbs of T-slot at the scrap yard for $1.30 per lb!!!!!
Now I can start design of the frame.... this thing is going to be A BEAST!
Now I can start design of the frame.... this thing is going to be A BEAST!
|
Re: Zasquatch's CoreXY Design/Build August 24, 2017 07:53PM |
Registered: 11 years ago Posts: 5,780 |
Wow! What a haul! I'm glad to see I'm not the only one who buys that stuff at scrap yards.
Ultra MegaMax Dominator 3D printer: [drmrehorst.blogspot.com]
Ultra MegaMax Dominator 3D printer: [drmrehorst.blogspot.com]
|
Re: Zasquatch's CoreXY Design/Build August 24, 2017 08:10PM |
Registered: 6 years ago Posts: 54 |
|
Re: Zasquatch's CoreXY Design/Build August 24, 2017 09:36PM |
Registered: 11 years ago Posts: 5,780 |
You would have paid 10X for new stuff. There's no kill like overkill!
Ultra MegaMax Dominator 3D printer: [drmrehorst.blogspot.com]
Ultra MegaMax Dominator 3D printer: [drmrehorst.blogspot.com]
|
Re: Zasquatch's CoreXY Design/Build August 25, 2017 03:01PM |
Registered: 6 years ago Posts: 54 |
|
Re: Zasquatch's CoreXY Design/Build August 25, 2017 03:18PM |
Registered: 8 years ago Posts: 1,671 |
|
Re: Zasquatch's CoreXY Design/Build August 26, 2017 08:54AM |
Registered: 6 years ago Posts: 54 |
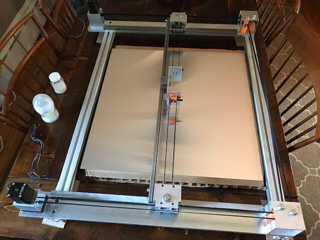
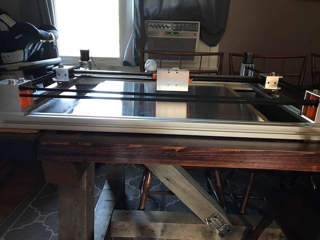
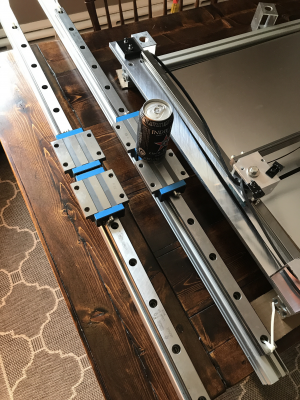
Started layout of the z axis to get some ideas for the frame design. This is why I think I can make a reliable cantilevered bed - continuing with the theme of overkill.....
Excuse the baby supplies in the corner... I've hijacked our dining room table and my wife hasn't kicked me out to the garage just yet!
Excuse the baby supplies in the corner... I've hijacked our dining room table and my wife hasn't kicked me out to the garage just yet!
|
Re: Zasquatch's CoreXY Design/Build August 27, 2017 03:22AM |
Registered: 6 years ago Posts: 14 |
|
Re: Zasquatch's CoreXY Design/Build August 27, 2017 06:40AM |
Registered: 6 years ago Posts: 54 |
|
Re: Zasquatch's CoreXY Design/Build August 27, 2017 09:45AM |
Registered: 11 years ago Posts: 5,780 |
Over a long span the weight of the belt will cause it to shift down the wide, flat pulley surface. Also, any flex in the pulley supports and motor mounts that allow the axles to tilt slightly (and they will tilt slightly) will be enough to cause them to mistrack. Cheapo belt isn't very accurately slit and its edges aren't necessarily parallel everywhere along the length of the belt. Finally, cheapo belt reinforcement fibers are not necessarily arranged for even response to tension forces on the belt which can cause mistracking, especially over long belt runs. Pulleys on long belt runs should really have flanges.
Ultra MegaMax Dominator 3D printer: [drmrehorst.blogspot.com]
Ultra MegaMax Dominator 3D printer: [drmrehorst.blogspot.com]
|
Re: Zasquatch's CoreXY Design/Build August 27, 2017 09:56AM |
Registered: 6 years ago Posts: 54 |
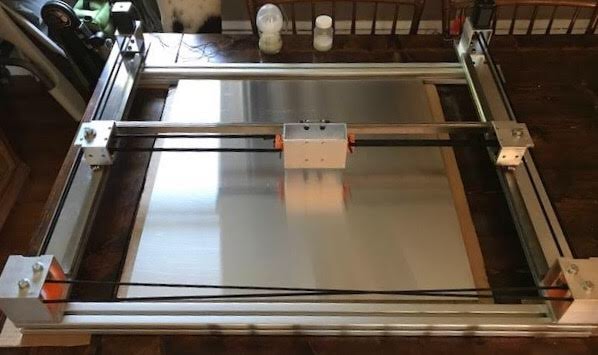
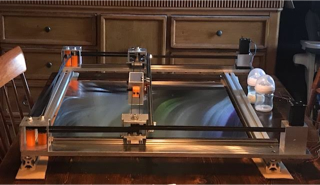
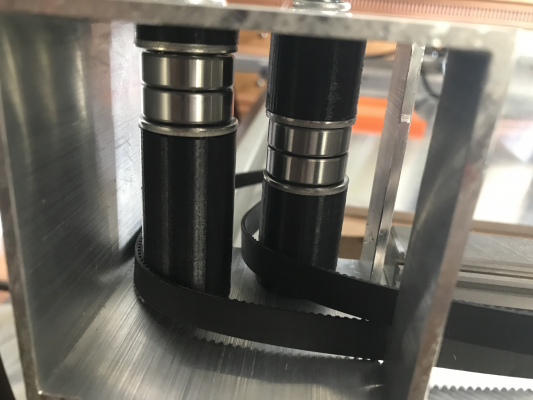
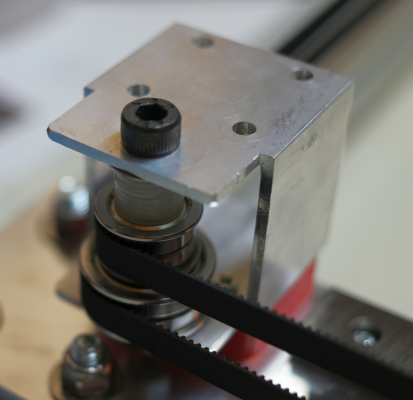
Here's a closer pic of the idler block, you can see I used a fender washer top and bottom to create a small flange, we will see if it's enough to keep the belts in check.
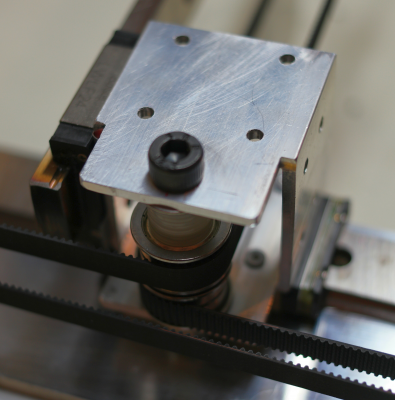
For the x-axis bearing stack I did not include fender washers-this is the area I am worried about but am willing to see how it goes. If it's bad I will source some flanged F608 bearings to swap out.
You can see I also swapped out the prototype orange PLA parts for black taulman alloy 910 nylon
For the x-axis bearing stack I did not include fender washers-this is the area I am worried about but am willing to see how it goes. If it's bad I will source some flanged F608 bearings to swap out.
You can see I also swapped out the prototype orange PLA parts for black taulman alloy 910 nylon

|
Re: Zasquatch's CoreXY Design/Build August 27, 2017 10:14AM |
Registered: 11 years ago Posts: 5,780 |
Do the fender washers rotate with the pulleys, or are they fixed? If they don't rotate with the pulleys, it might cause the edges of the belt to wear.
Ultra MegaMax Dominator 3D printer: [drmrehorst.blogspot.com]
Ultra MegaMax Dominator 3D printer: [drmrehorst.blogspot.com]
|
Re: Zasquatch's CoreXY Design/Build August 27, 2017 10:35AM |
Registered: 6 years ago Posts: 54 |
Damn, didn't think of that  they are fixed....
Something like this should be a drop in replacement i think:
F608-ZZ Flange Ball Bearing Dual Sided Metal Shielded Deep Groove (20PCS) https://www.amazon.com/dp/B06X9Z4P5M/ref=cm_sw_r_cp_api_cFTOzbP50AQSR
 they are fixed....
Something like this should be a drop in replacement i think:
F608-ZZ Flange Ball Bearing Dual Sided Metal Shielded Deep Groove (20PCS) https://www.amazon.com/dp/B06X9Z4P5M/ref=cm_sw_r_cp_api_cFTOzbP50AQSR
|
Re: Zasquatch's CoreXY Design/Build August 27, 2017 10:43AM |
Registered: 11 years ago Posts: 5,780 |
I used F608zzs and they work fine. You need 8mm bolts for the axles. 2 pulleys stacked makes an 11 mm wide/long pulley, exactly the same a the drive pulley for a 9 mm wide belt. F608zz bearings are 22 mm in diameter at the belt surface.
Make sure the spacers only contact the inner rings of the pulleys and don't rub against the outer rings. I used nylon washers that are about 16 mm diameter and about 1.5 mm thick.
This is one of the corner pulley blocks. The larger pulley is made from F6902 bearings- I used it to provide more clearance for the belt coming off the X axis end bearing. The other corner is the same, with the larger pulley on top. The F6902s have a larger bore so I printed (yellow ABS) a bushing to reduce the bore to 8mm.
Here's the block on the other side- you can see the bushing:
Here's one of the X axis pulley blocks:
Edited 4 time(s). Last edit at 08/27/2017 11:02AM by the_digital_dentist.
Ultra MegaMax Dominator 3D printer: [drmrehorst.blogspot.com]
|
Re: Zasquatch's CoreXY Design/Build August 27, 2017 11:19AM |
Registered: 6 years ago Posts: 54 |
Awesome, thanks for the catch! I just ordered the F608zz- should be a drop in replacement with no mods necessary.
I am using precision shims from McMaster between the bearings and washers so they only contact the inner race of the bearing - there's a 0.5mm clearance for everything to spin nice and smooth
Edited 1 time(s). Last edit at 08/27/2017 11:21AM by Zasquatch.
I am using precision shims from McMaster between the bearings and washers so they only contact the inner race of the bearing - there's a 0.5mm clearance for everything to spin nice and smooth
Edited 1 time(s). Last edit at 08/27/2017 11:21AM by Zasquatch.
|
Re: Zasquatch's CoreXY Design/Build August 27, 2017 11:36AM |
Registered: 6 years ago Posts: 54 |
Sorry, only registered users may post in this forum.
