Belt tensioning ideas?
Posted by hedeon
|
Belt tensioning ideas? May 16, 2018 05:06PM |
Registered: 5 years ago Posts: 18 |
I need some advice. Again 
I am in the middle of the process of designing and building my CoreXY printer. I started out wanting to build Hypercube Evolution, with linear rails mgn12h style instead of smooth rods, but in the process of making adaptations, entire design has changed a lot from HEVO. I don't think I should call it HEVO anymore. Anyway, I digress.
One of the biggest challenges for me was to come up with some nice belt tensioning system on my carriage. Because I was really determined to fit maximum build volume into the smallest possible frame, I do not have to much space to play with. And obviously wanted to keep X/Y gantry as light as possible.
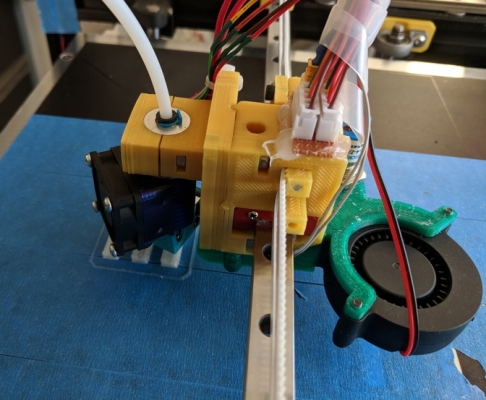
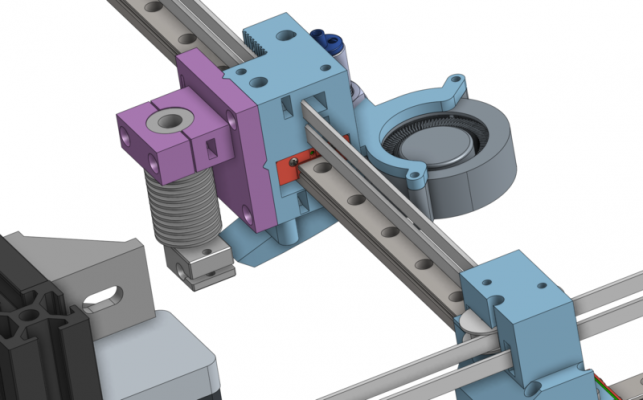
So, this is what I came up with:
So, the concept is, that as I turn the screw on the other side of the carriage, that screw pulls teethed block inside, alongside with the belt.
Now, this solution is neither elegant nor particularly effective.
Care to give some tips? How did you do it? Any ideas?
Thanks
|
Re: Belt tensioning ideas? May 16, 2018 05:50PM |
Registered: 11 years ago Posts: 335 |
I've found that moving the tension adjustment mechanism to the stepper motor(s) makes sense. If your carriage is sufficiently compact its very hard to design an accessible adjustment/locking mechanism, and there is no real reason why it has to be part of the carriage.
You no longer need to worry about weight/compactness, but your motor mounts will either be asymmetrical (one adjustable, one non-adjustable) or have an extra degree of freedom (two adjustable motor mounts).
You no longer need to worry about weight/compactness, but your motor mounts will either be asymmetrical (one adjustable, one non-adjustable) or have an extra degree of freedom (two adjustable motor mounts).
|
Re: Belt tensioning ideas? May 17, 2018 12:04AM |
Registered: 11 years ago Posts: 5,780 |
You really need to be able to adjust tension on both belts. When you tension the second belt, the first belt tension increases, so when you tension the first belt, you want to leave it a little looser than you want it to end up. Ultimately you want equal tensions in the two belts, otherwise you're liable to tilt the X axis out of square with the Y axis. You can make an adjustable tensioner for the extruder carriage, but it usually requires turning screws that are parallel and close to the belts, making it a little difficult to make adjustments. I do the tensioning at the motor mounts.
Edited 1 time(s). Last edit at 05/17/2018 12:08AM by the_digital_dentist.
Ultra MegaMax Dominator 3D printer: [drmrehorst.blogspot.com]
Edited 1 time(s). Last edit at 05/17/2018 12:08AM by the_digital_dentist.
Ultra MegaMax Dominator 3D printer: [drmrehorst.blogspot.com]
|
Re: Belt tensioning ideas? May 17, 2018 08:52AM |
Registered: 5 years ago Posts: 18 |
I have to say I really like the idea to adjust tension through motors, but it might not be as easy. I am planning for full enclosure so there can not be any sting out parts, and don't really have access to the milling machine to make such nice metal brackets. Limited to 3D printed parts, so chunky brackets. But it is a good idea worth exploring...
|
Re: Belt tensioning ideas? May 17, 2018 09:28AM |
Registered: 11 years ago Posts: 5,780 |
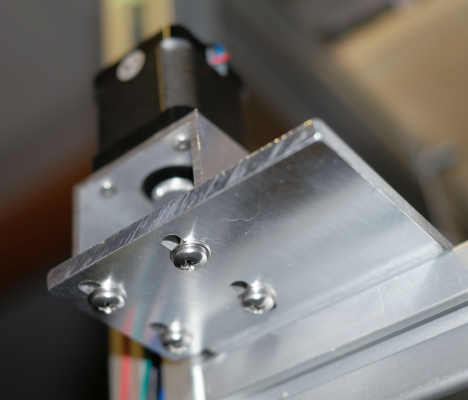
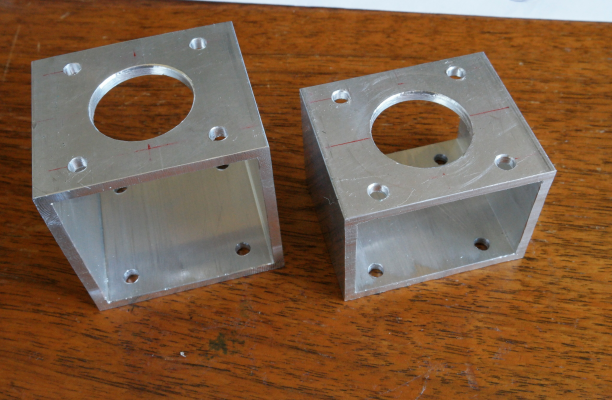
Metal motor mounts can be made of rectangular aluminum tubing, easily and cheaply. You can cut aluminum with a hack saw and drill it with any drill. High accuracy is not required. You can mount from the side, bottom, or top of the mount just by drilling appropriate holes.
If you're planning full enclosure, you will want to avoid plastic motor mounts. The combo of motor heat and belt tension will distort the mounts over time. Metal mounts will help dissipate motor heat and will not flex under belt tension or distort because of heat/tension/time.
You can put the motors outside the enclosure by making holes for the belts to pass through the walls.
Ultra MegaMax Dominator 3D printer: [drmrehorst.blogspot.com]
|
Re: Belt tensioning ideas? May 17, 2018 09:25PM |
Registered: 8 years ago Posts: 338 |
The aluminum tubing works great! I stole that idea from the digital dentist and It gives you the perfect spacing. I just wish I had of taken more of his advice and planned a bit better. My build size is a little less that I was hoping for (345 x 380 vs 400x400mm). And my steppers are stuck inside the chamber. Surely the next build can’t be too far away
Edited 2 time(s). Last edit at 05/17/2018 09:53PM by Qdeathstar.
Edited 2 time(s). Last edit at 05/17/2018 09:53PM by Qdeathstar.
|
Re: Belt tensioning ideas? May 18, 2018 11:20AM |
Registered: 5 years ago Posts: 18 |
|
Re: Belt tensioning ideas? May 18, 2018 02:55PM |
Registered: 8 years ago Posts: 338 |
|
Re: Belt tensioning ideas? May 18, 2018 03:15PM |
Registered: 6 years ago Posts: 63 |
|
Re: Belt tensioning ideas? May 18, 2018 05:28PM |
Registered: 8 years ago Posts: 338 |
|
Re: Belt tensioning ideas? May 20, 2018 12:22AM |
Registered: 6 years ago Posts: 63 |
|
Re: Belt tensioning ideas? May 22, 2018 04:01AM |
Registered: 5 years ago Posts: 18 |
Quote
warbunniex
Ya a drill press and a saw/ angle grinder is all that is really needed but plenty of people only have a printer for a tool (i have access to a great metal lab but i try to give suggestions that give wider options for people. this is reprap afterall)
Yet, that is true. I own 2 3D printers, angle grinder and mitre saw, that's it really. I am building a nice workshop for my self in the garden this summer, and I hope the range of tools will get extended eventually.
I have been playing with the idea of those aluminium tubings, but not sure if I can come up with a useful design. Not in this frame anyway, it is too compact. Maybe once the workshop is up and I will lay my hands on some used milling machine I would be able to come up with some cool little brackets....
|
Re: Belt tensioning ideas? May 22, 2018 08:38AM |
Registered: 11 years ago Posts: 5,780 |
You don't need a grinder for anything aluminum. In fact, unless you really like to replace your grinding disc, it's a good idea not to use a grinder on aluminum. Friction with the disc/stone heats up the aluminum which melts and get stuck in the pores of the disc. That will be the end of your grinding disc. It only takes a few seconds.
Hacksaw, band saw, jig saw with a non ferrous cutting blade, or carbide blade on a table saw or miter saw- all will cut aluminum quickly and easily, but don't expect square cuts. If you want square, you need a mill.
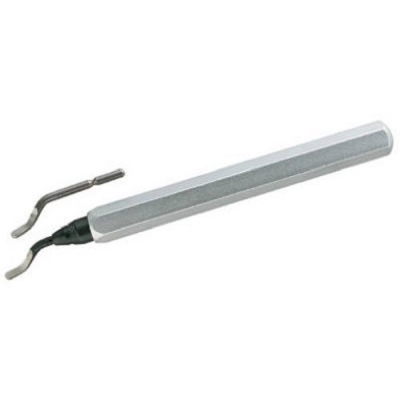
Cleaning up after cutting/drilling is quick and easy with a deburring tool with a swiveling blade. It's also great for shaving off the edges of prints that used brims for bed adhesion. The first time you use one of these tools you'll ask why you didn't know about it before. They are great for straight edges and inside curves and holes, not so great for outside curves.
A good one will set you back about $10.
Ultra MegaMax Dominator 3D printer: [drmrehorst.blogspot.com]
Sorry, only registered users may post in this forum.
