Questions about TronXY X5SA
Posted by dlc60
|
Re: Questions about TronXY X5SA June 17, 2020 11:34AM |
Registered: 6 years ago Posts: 10 |
|
Re: Questions about TronXY X5SA June 23, 2020 05:32AM |
Registered: 3 years ago Posts: 11 |
To quote the OP - " Problem is, this journey is in a hurry with the bad stuff happening all around and kinda need a quick solution to a Z bed that has to be leveled and bed-zeroed after practically every print, which is not terribly convenient..."
This is my first post here and I am not much into the tecky stuff but if it helps.....I am the new owner of a TronxyXY X5SA Pro and have just finished the build of it. After an initial bad start I decided to print up a couple of Z end blocks at 46mm height to help with the problem. Picture attached I hope...
This is my first post here and I am not much into the tecky stuff but if it helps.....I am the new owner of a TronxyXY X5SA Pro and have just finished the build of it. After an initial bad start I decided to print up a couple of Z end blocks at 46mm height to help with the problem. Picture attached I hope...
|
Re: Questions about TronXY X5SA June 23, 2020 10:36PM |
Registered: 7 years ago Posts: 619 |
Because of this I printed one of the Z bed sync projects for the TronXY XS5A Pro. It worked great, never had to re-level the two screws again. There are a few that work great. It picked one that had lots of adjustment room and no custom metal hardware. Then I ditched the bed auto-level hardware and disabled the auto-level code. Then I attached the extra endstop they gave me in the kit to the Y/Z arm, all set up to take it, then printed a plastic "tongue" to hold an adjustment screw and moved on. You need to plug the Z endstop switch directly onto the controller board, you cannot use the connection that the ribbon cable uses. Fortunately, that connector is labeled on the board. Look for the guy's Thingiverse thing that explains the native code so you can configure the printer to not use auto level and mine worked great. Until the cheesy hot end melted itself (HINT: You can NOT take this hotend to 260C for long, it is NOT an all metal hotend.
I ended up printing up plastic to retro fit an E3Dv6 on, and that has worked great for over a month now.
DLC
Kits: Folgertech Kossel 2020 upgraded E3Dv6, Anet A8 upgraded E3Dv6, Tevo Tarantula enhanced parts and dual-head, TronXY X5SA Pro(E3DHemera).
Scratch: Large bed Cartesian, exchangeable heads, Linear slide Delta, Maker-Beam XL Micro Delta, 220x220CoreXY.
|
Re: Questions about TronXY X5SA June 24, 2020 07:19PM |
Registered: 3 years ago Posts: 11 |
Quote
dlc60
Because of this I printed one of the Z bed sync projects for the TronXY XS5A Pro. It worked great, never had to re-level the two screws again. There are a few that work great. It picked one that had lots of adjustment room and no custom metal hardware. Then I ditched the bed auto-level hardware and disabled the auto-level code. Then I attached the extra endstop they gave me in the kit to the Y/Z arm, all set up to take it, then printed a plastic "tongue" to hold an adjustment screw and moved on. You need to plug the Z endstop switch directly onto the controller board, you cannot use the connection that the ribbon cable uses. Fortunately, that connector is labeled on the board. Look for the guy's Thingiverse thing that explains the native code so you can configure the printer to not use auto level and mine worked great. Until the cheesy hot end melted itself (HINT: You can NOT take this hotend to 260C for long, it is NOT an all metal hotend.
I ended up printing up plastic to retro fit an E3Dv6 on, and that has worked great for over a month now.
DLC
Sounds good.Some pictures would be great.I am still planning on setting up a belt connection with both motors and a tension adjuster at the front bottom 20/20 rail. Glass bed going in after that. I will think about getting the auto level out after the belt connection. So far I have put in heavy corner braces, clips to make the belt adjustments quick and easy, swivelling mounts for the cable chain so as to not have it droop nor go back behind the frame and an extruder mount to enable me to get the filament to change from the side etc. I think I will go for a up and over extruder mount to shorten the bowden tube as well. I will attach a couple of pics that should show most of this including my first print.
|
Re: Questions about TronXY X5SA June 24, 2020 11:21PM |
Registered: 7 years ago Posts: 619 |
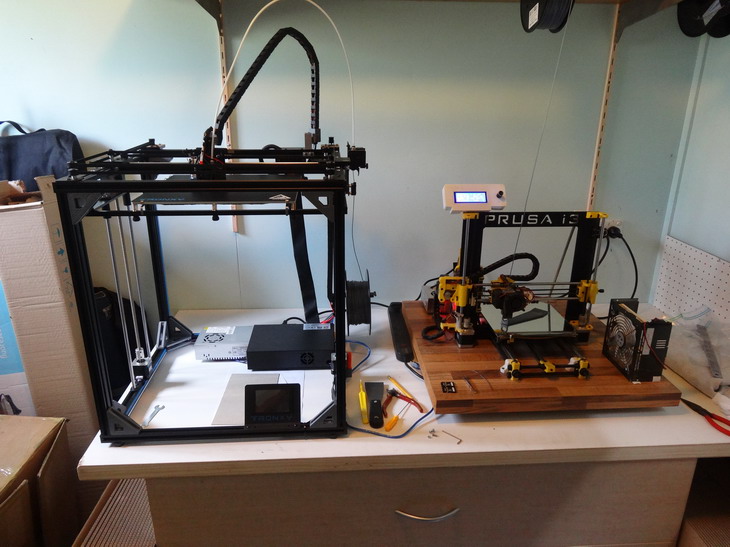
Pictures requested, so here they are, in no particular order.Quote
dlc60
Because of this I printed one of the Z bed sync projects for the TronXY XS5A Pro. It worked great, never had to re-level the two screws again. There are a few that work great. It picked one that had lots of adjustment room and no custom metal hardware. Then I ditched the bed auto-level hardware and disabled the auto-level code. Then I attached the extra endstop they gave me in the kit to the Y/Z arm, all set up to take it, then printed a plastic "tongue" to hold an adjustment screw and moved on. You need to plug the Z endstop switch directly onto the controller board, you cannot use the connection that the ribbon cable uses. Fortunately, that connector is labeled on the board. Look for the guy's Thingiverse thing that explains the native code so you can configure the printer to not use auto level and mine worked great. Until the cheesy hot end melted itself (HINT: You can NOT take this hotend to 260C for long, it is NOT an all metal hotend.
I ended up printing up plastic to retro fit an E3Dv6 on, and that has worked great for over a month now.
DLC
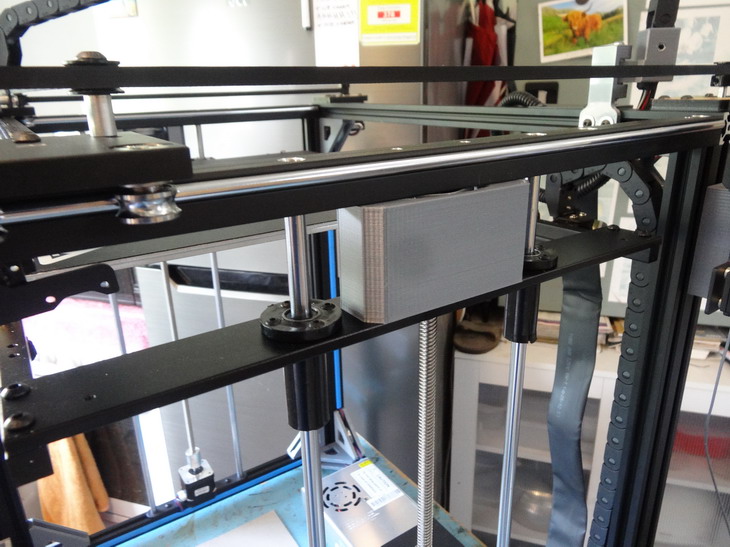
These are of
[www.thingiverse.com] which is the Z sync system that I used.
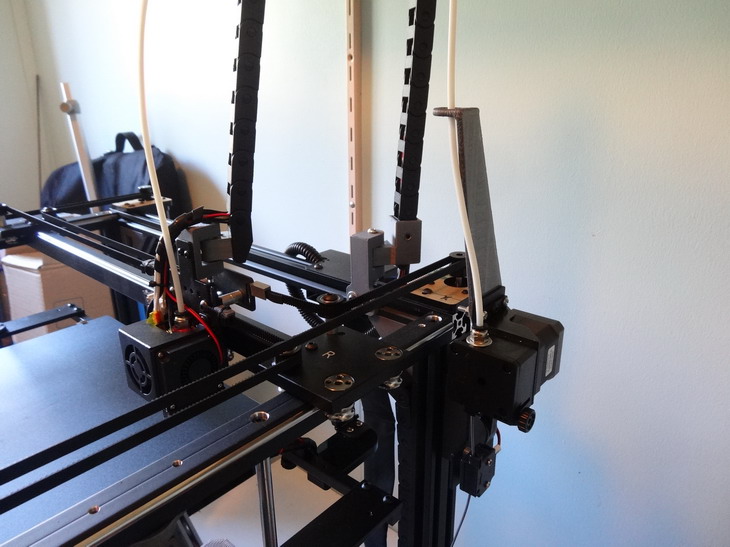
[www.thingiverse.com] which is the E3Dv6 mount that reuses much of the current TronXY x5SA system.
and of my quick hack making a Z limit switch adjustment and where I mounted the extra end stop they included with the kit.


If you go here: [tronxy-3d.org]
it will explain how to configure your TronXY X5SA to use the Z limit switch. NOTE: you must use the same type of cable wire order on the z limit switch as the other limit switches use any you must connect it to the main board, you cannot use the connector that the inductive level sensor uses. I discovered this by searching on the main board for a connector labeled something like Z Limit.
Have fun,
DLC
Kits: Folgertech Kossel 2020 upgraded E3Dv6, Anet A8 upgraded E3Dv6, Tevo Tarantula enhanced parts and dual-head, TronXY X5SA Pro(E3DHemera).
Scratch: Large bed Cartesian, exchangeable heads, Linear slide Delta, Maker-Beam XL Micro Delta, 220x220CoreXY.
|
Re: Questions about TronXY X5SA June 25, 2020 05:42AM |
Registered: 3 years ago Posts: 11 |
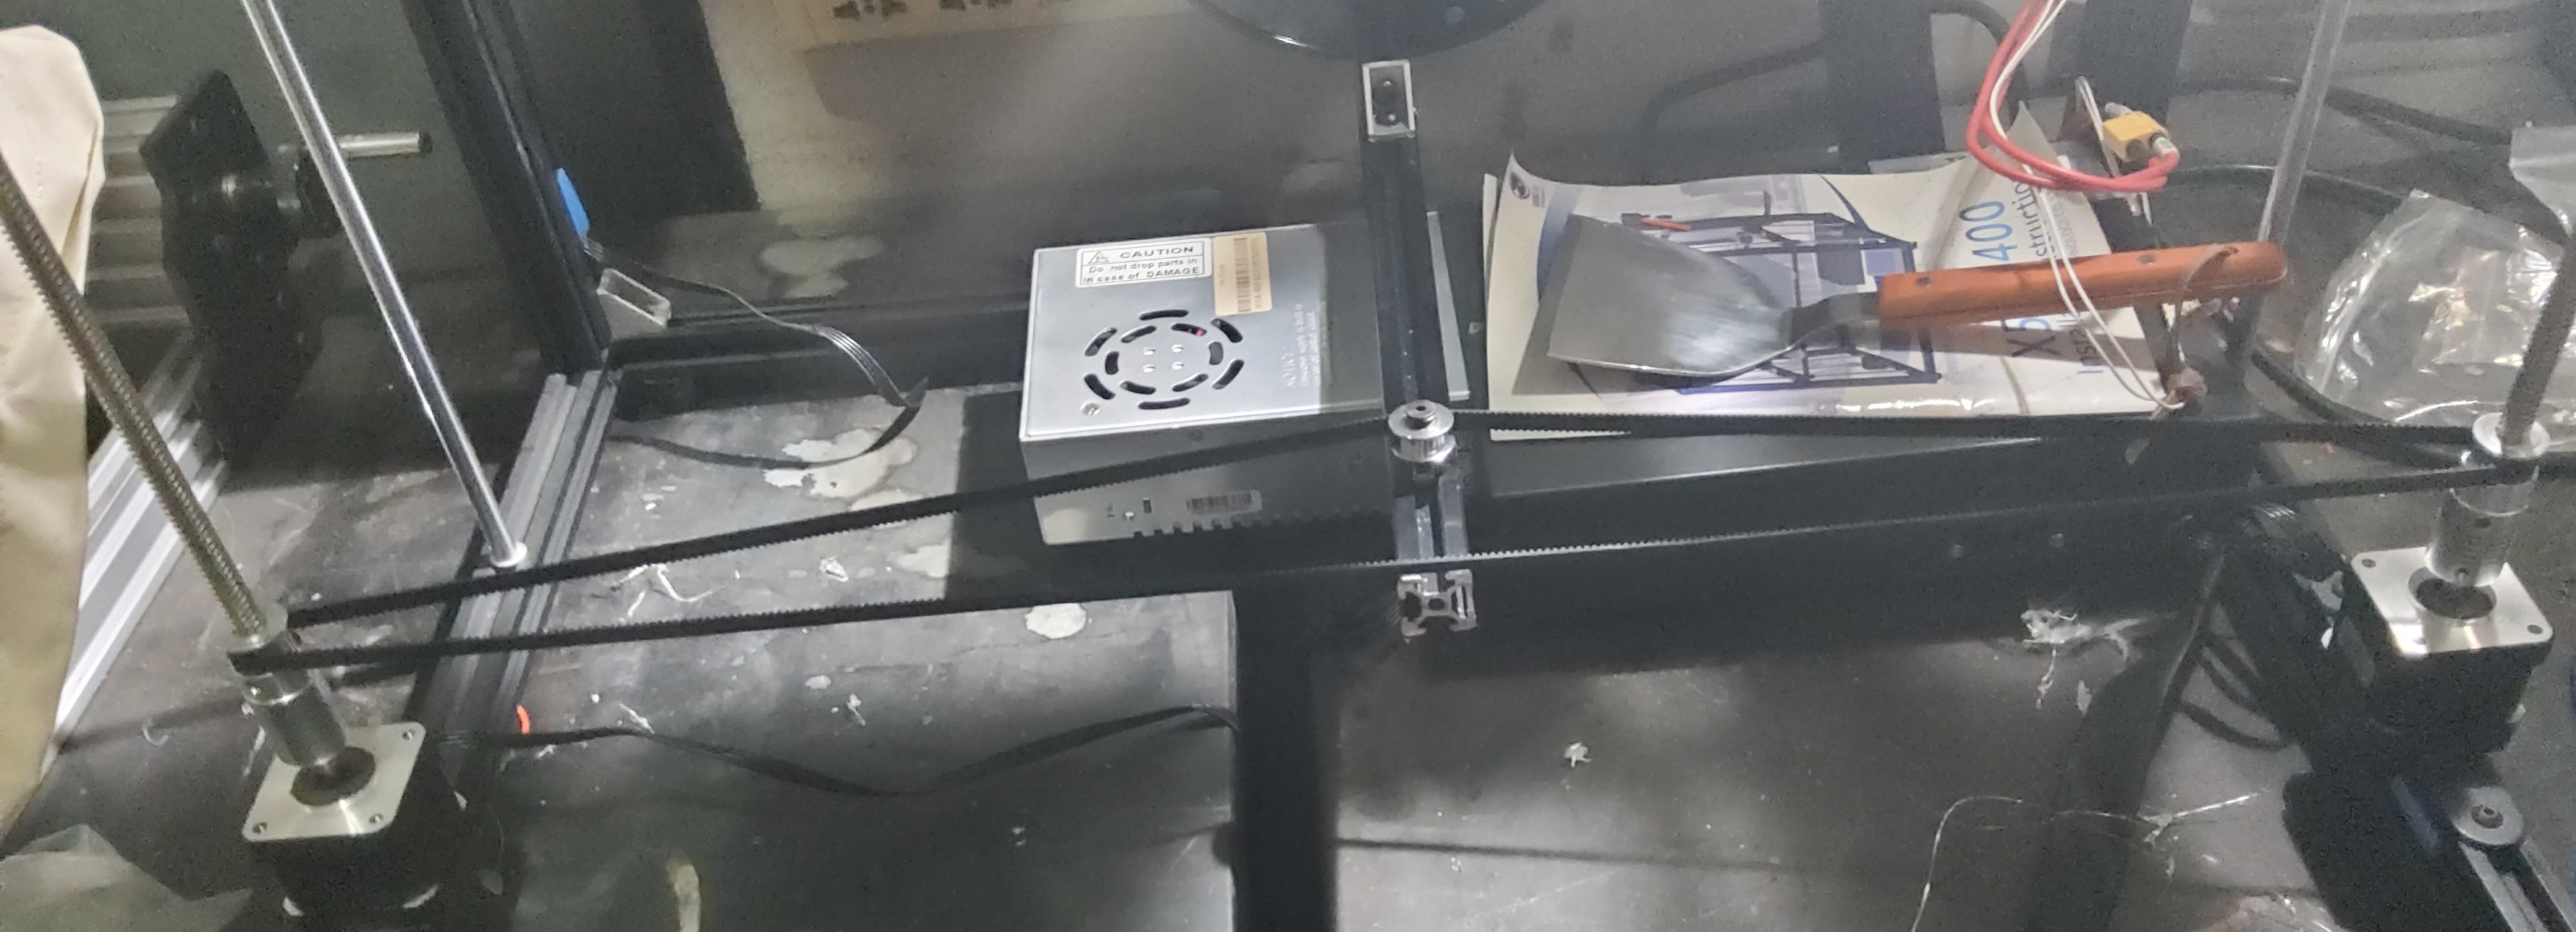
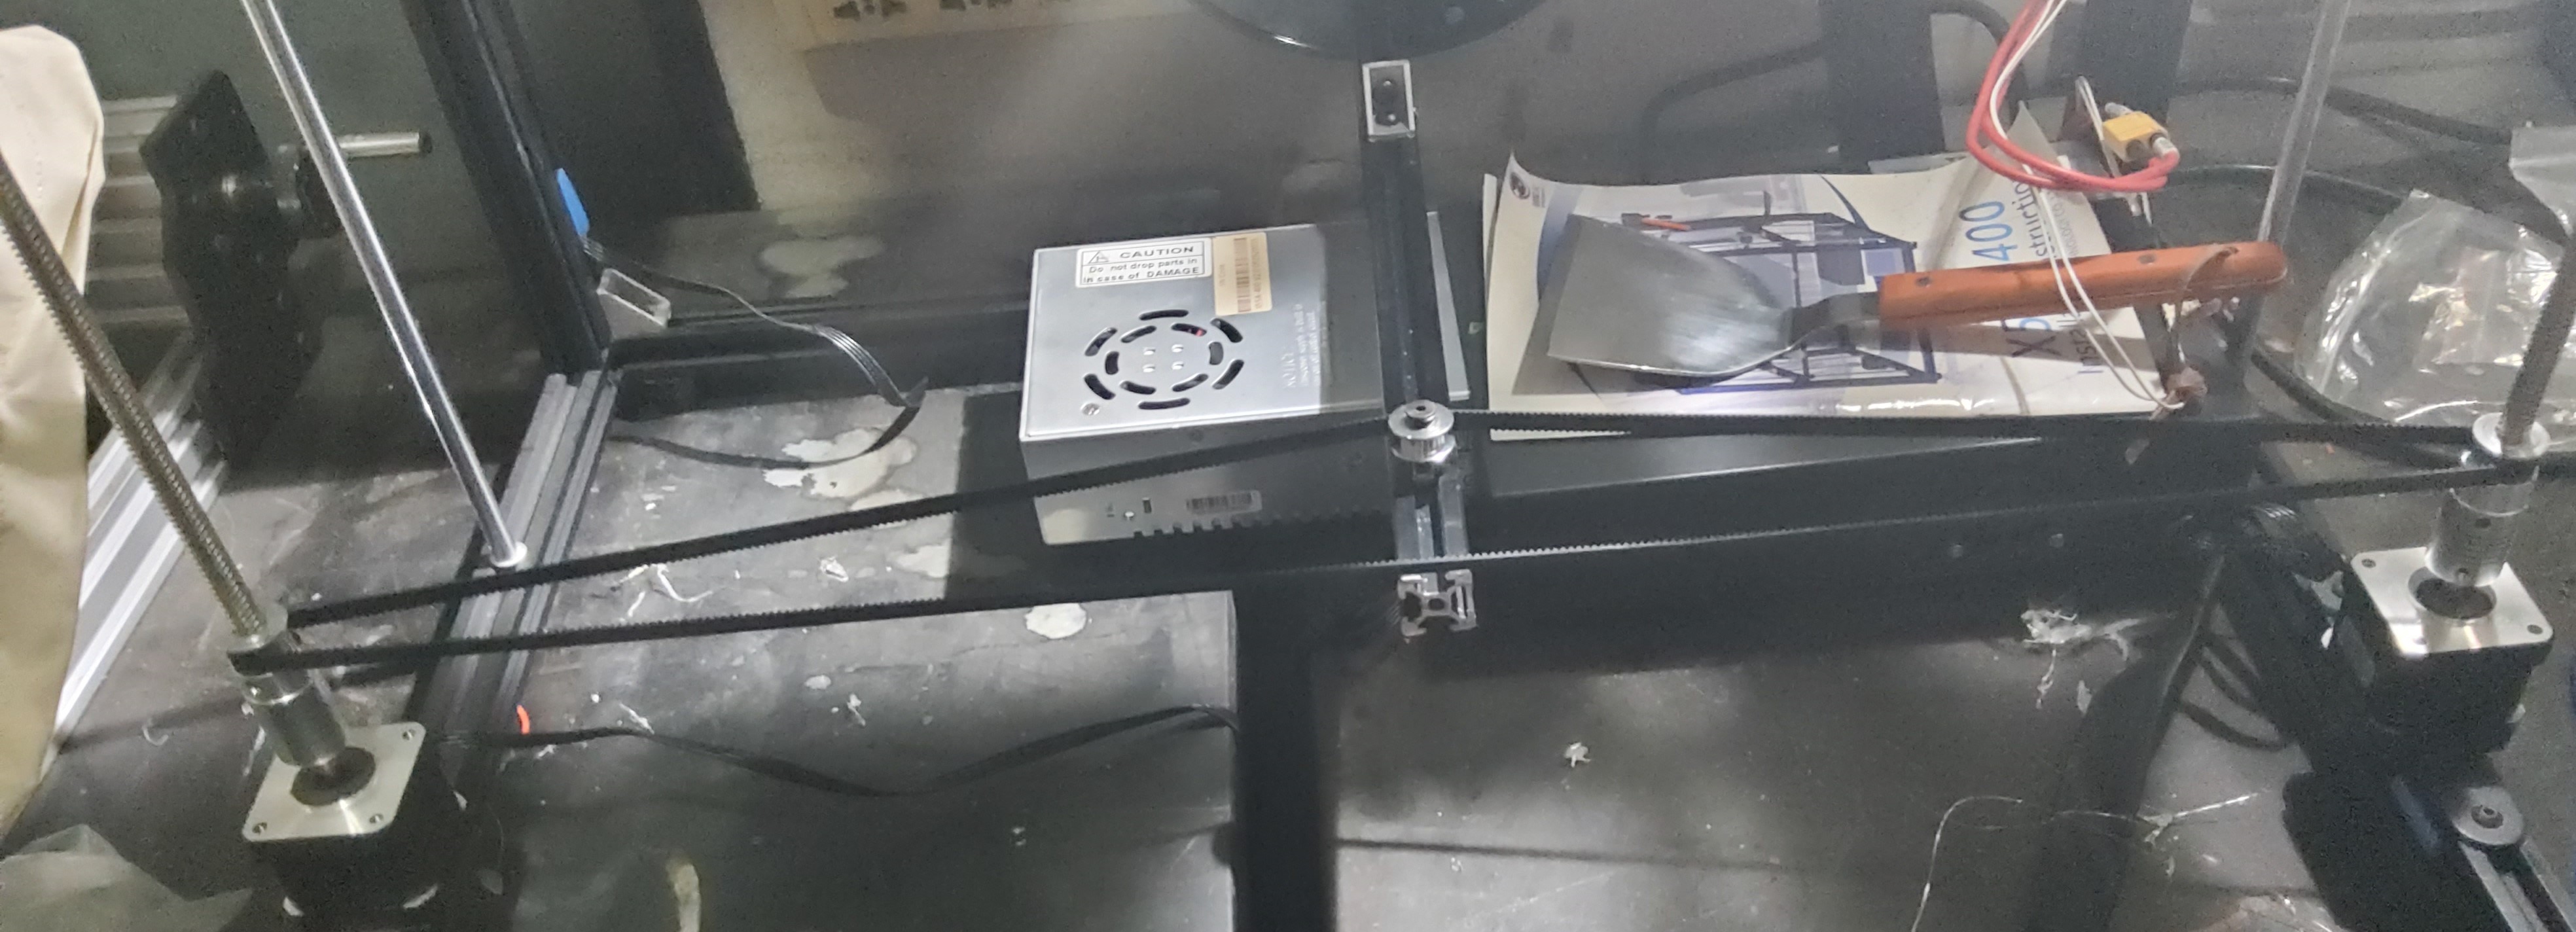
Thanks for the quick and helpful reply dlc60 .... I am wondering if there is a good reason for the belt path to go in such a way as shown? I was about to put in 2 x 40 teeth belt pulleys tensioned at the mid front with a plain pulley at the front to tension the GT2 1220mm long belt. I have attached a picture to show what I mean. I hope to be able to lathe down into the smooth side of the 40 teeth pulleys to allow the flexable coupler to sit down into it a few mm which I think will have the pulley against the motor and allow enough shaft for the coupling to take the lead screws. This if it works alright will keep my Z travel from being lessened as much. I can not see any reason that the belt would not work alright in this way but I would like to get any other opinions as to why I should not.???
Edited 1 time(s). Last edit at 06/25/2020 05:43AM by RockyAussie.
Edited 1 time(s). Last edit at 06/25/2020 05:43AM by RockyAussie.
|
Re: Questions about TronXY X5SA June 25, 2020 07:47AM |
Registered: 6 years ago Posts: 1,007 |
Quote
RockyAussie
Thanks for the quick and helpful reply dlc60 .... I am wondering if there is a good reason for the belt path to go in such a way as shown? I was about to put in 2 x 40 teeth belt pulleys tensioned at the mid front with a plain pulley at the front to tension the GT2 1220mm long belt. I have attached a picture to show what I mean. I hope to be able to lathe down into the smooth side of the 40 teeth pulleys to allow the flexable coupler to sit down into it a few mm which I think will have the pulley against the motor and allow enough shaft for the coupling to take the lead screws. This if it works alright will keep my Z travel from being lessened as much. I can not see any reason that the belt would not work alright in this way but I would like to get any other opinions as to why I should not.???
What you plan to do is the right way. Replace your fingers
 with ONE motor mounted on a plate with slots for the screws, to adjust the belt tension, or a moving plate. One bearing, one pulley per lead screw, no coupler. Simple, cheap, effective, trouble free. A century ago, they knew that already. Seems the art of "pulleys and belts" has been lost
 I prefer not to comment on what is shown above.
LAst year I visited the Upper Canada Village in Ontario. Plenty of belts and pulleys bt just one motor ! I recommend !
[3.bp.blogspot.com]
Edited 4 time(s). Last edit at 06/25/2020 11:09AM by MKSA.
"A comical prototype doesn't mean a dumb idea is possible" (Thunderf00t)
|
Re: Questions about TronXY X5SA June 25, 2020 08:48PM |
Registered: 3 years ago Posts: 11 |
Quote
MKSA
Quote
RockyAussie
Thanks for the quick and helpful reply dlc60 .... I am wondering if there is a good reason for the belt path to go in such a way as shown? I was about to put in 2 x 40 teeth belt pulleys tensioned at the mid front with a plain pulley at the front to tension the GT2 1220mm long belt. I have attached a picture to show what I mean. I hope to be able to lathe down into the smooth side of the 40 teeth pulleys to allow the flexable coupler to sit down into it a few mm which I think will have the pulley against the motor and allow enough shaft for the coupling to take the lead screws. This if it works alright will keep my Z travel from being lessened as much. I can not see any reason that the belt would not work alright in this way but I would like to get any other opinions as to why I should not.???
What you plan to do is the right way. Replace your fingers
I prefer not to comment on what is shown above.
LAst year I visited the Upper Canada Village in Ontario. Plenty of belts and pulleys bt just one motor ! I recommend !
[3.bp.blogspot.com]
Thanks for that MKSA, I was thinking I must be missing something there but just could not see what. Being that my main business is producing leather goods I love the long belt use in your attachment and can only add that I have never been requested to make one of those up in 30+ years.

Question ...... should I consider putting in a 3rd lead screw while I am at this? The bed frame is pretty flexible and getting the parts off can be difficult sometimes.I will be changing over to a glass plate as soon as I get better control of the Z lift which would help I am sure. With my Prusa i3 and all of the bracing I have done on it I have not had to level the bed in 6 months or so at a time and I use it almost daily.
|
Re: Questions about TronXY X5SA June 25, 2020 11:09PM |
Registered: 7 years ago Posts: 619 |
MKSA is absolutely correct. One stepper, a couple of pulleys and a belt loop. The lead screws on the printer work well enough with a single stepper and you won't lose any Z height. My scratch built CoreXY is done this way. With some careful measurement, you can get the loop exactly the length you need.
I hacked my X5SA Pro with its screw sync because I was short on time and busy. I chose to spend a day on a quick hack instead of a week on a good design. I am part of a group called Make4Covid and spent the last couple of months printing PPE as fast as I could with as many printers as I could get going. When I have time to breath, I will be doing a couple of proper updates to the platform. With the Z-stop and E3Dv6, the printer works quite well.
DLC
Kits: Folgertech Kossel 2020 upgraded E3Dv6, Anet A8 upgraded E3Dv6, Tevo Tarantula enhanced parts and dual-head, TronXY X5SA Pro(E3DHemera).
Scratch: Large bed Cartesian, exchangeable heads, Linear slide Delta, Maker-Beam XL Micro Delta, 220x220CoreXY.
|
Re: Questions about TronXY X5SA March 14, 2021 09:05AM |
Registered: 11 years ago Posts: 17 |
that is exactly what I did, i had already inserted a central 2020 strut, so i could shorten the filament path in the bowden tube, so i used a little 2020 stock left over to create a bar with a post on it that is used to tension the belt. Works really well. The only caution is that the motors are not very rigidly mounted and will rotate around the plate they are sat on. so if the tension is too high it pulls the motor over, and the flexible coupling allows the drive path from the motor to the screw to bend. So its a matter of balance.
Its also a good idea to add anti backlash nuts as it stops the bed from dropping under gravity when the motors are off, and also helps with autoleveling, as it takes the slop out when the z-axis is moving up and down rapidly.
Edited 1 time(s). Last edit at 03/14/2021 09:08AM by Tshawkins.
Its also a good idea to add anti backlash nuts as it stops the bed from dropping under gravity when the motors are off, and also helps with autoleveling, as it takes the slop out when the z-axis is moving up and down rapidly.
Edited 1 time(s). Last edit at 03/14/2021 09:08AM by Tshawkins.
|
Re: Questions about TronXY X5SA March 14, 2021 05:13PM |
Registered: 7 years ago Posts: 619 |
Quote
Tshawkins
that is exactly what I did, i had already inserted a central 2020 strut, so i could shorten the filament path in the bowden tube, so i used a little 2020 stock left over to create a bar with a post on it that is used to tension the belt. Works really well. The only caution is that the motors are not very rigidly mounted and will rotate around the plate they are sat on. so if the tension is too high it pulls the motor over, and the flexible coupling allows the drive path from the motor to the screw to bend. So its a matter of balance.
Its also a good idea to add anti backlash nuts as it stops the bed from dropping under gravity when the motors are off, and also helps with autoleveling, as it takes the slop out when the z-axis is moving up and down rapidly.
I don't see any value to anti-backlash nuts. My bed doesn't seem to overcome the static friction of the system, and I don't see how anti-backlash would stop that anyway. The Z axis is pretty slow compared to the other axes, and because gravity pulls the bearings down on the threads at all times eliminates any slop that might otherwise occur. I have no print artifacts that give me concern about the Z-axis.
I am considering a Hemera as the next update, after that, replacing the oddball TRONXY controller with a Duet, where I have a LOT more control over what goes on.
Currently I run an OctoPi setup on my TRONXY X5SA to give it network ability, and that works really well, so there is not TOO much pressure to replace the controller other than to get rid of the bizarre quirks in the current controller.
In general, the bones of this printer are good, and there is ALWAYS room to improve any kit printer (tinkering makes me happy.)
Be well,
DLC
Kits: Folgertech Kossel 2020 upgraded E3Dv6, Anet A8 upgraded E3Dv6, Tevo Tarantula enhanced parts and dual-head, TronXY X5SA Pro(E3DHemera).
Scratch: Large bed Cartesian, exchangeable heads, Linear slide Delta, Maker-Beam XL Micro Delta, 220x220CoreXY.
|
Re: Questions about TronXY X5SA April 24, 2021 06:57PM |
Registered: 7 years ago Posts: 619 |
Well, I added the Hemera to my X5SA, and it is a joy.
When setting the bizarre Chitu extruder rate, it did not do what I expected. E3D says the steps/mm are 409, I assumed the Chitu M8011 command to use 1/409 as the movement rate. Nope. I had to use 1/409*2. Why? Who knows. Getting information out of TronXY on these boards is like pulling teeth.
I will run this controller for a little while longer until I can get the time to re-wire it for a Duet Maestro board. I really like the Duet boards. Unlike all the other 32bit board firmware options, this one does not require the user to custom build an IDE to compile intermediate forms of code to work with it. And Duet networks well with a nice UI and the Maestro will work with the RepRap full graphics smart display.
DLC
Kits: Folgertech Kossel 2020 upgraded E3Dv6, Anet A8 upgraded E3Dv6, Tevo Tarantula enhanced parts and dual-head, TronXY X5SA Pro(E3DHemera).
Scratch: Large bed Cartesian, exchangeable heads, Linear slide Delta, Maker-Beam XL Micro Delta, 220x220CoreXY.

Sorry, only registered users may post in this forum.