Tronxy X5SA Pro - Marlin settings, removing auto level sensor and adding limit switch
Posted by Recoil1980
|
Tronxy X5SA Pro - Marlin settings, removing auto level sensor and adding limit switch October 09, 2020 08:35PM |
Registered: 5 years ago Posts: 9 |
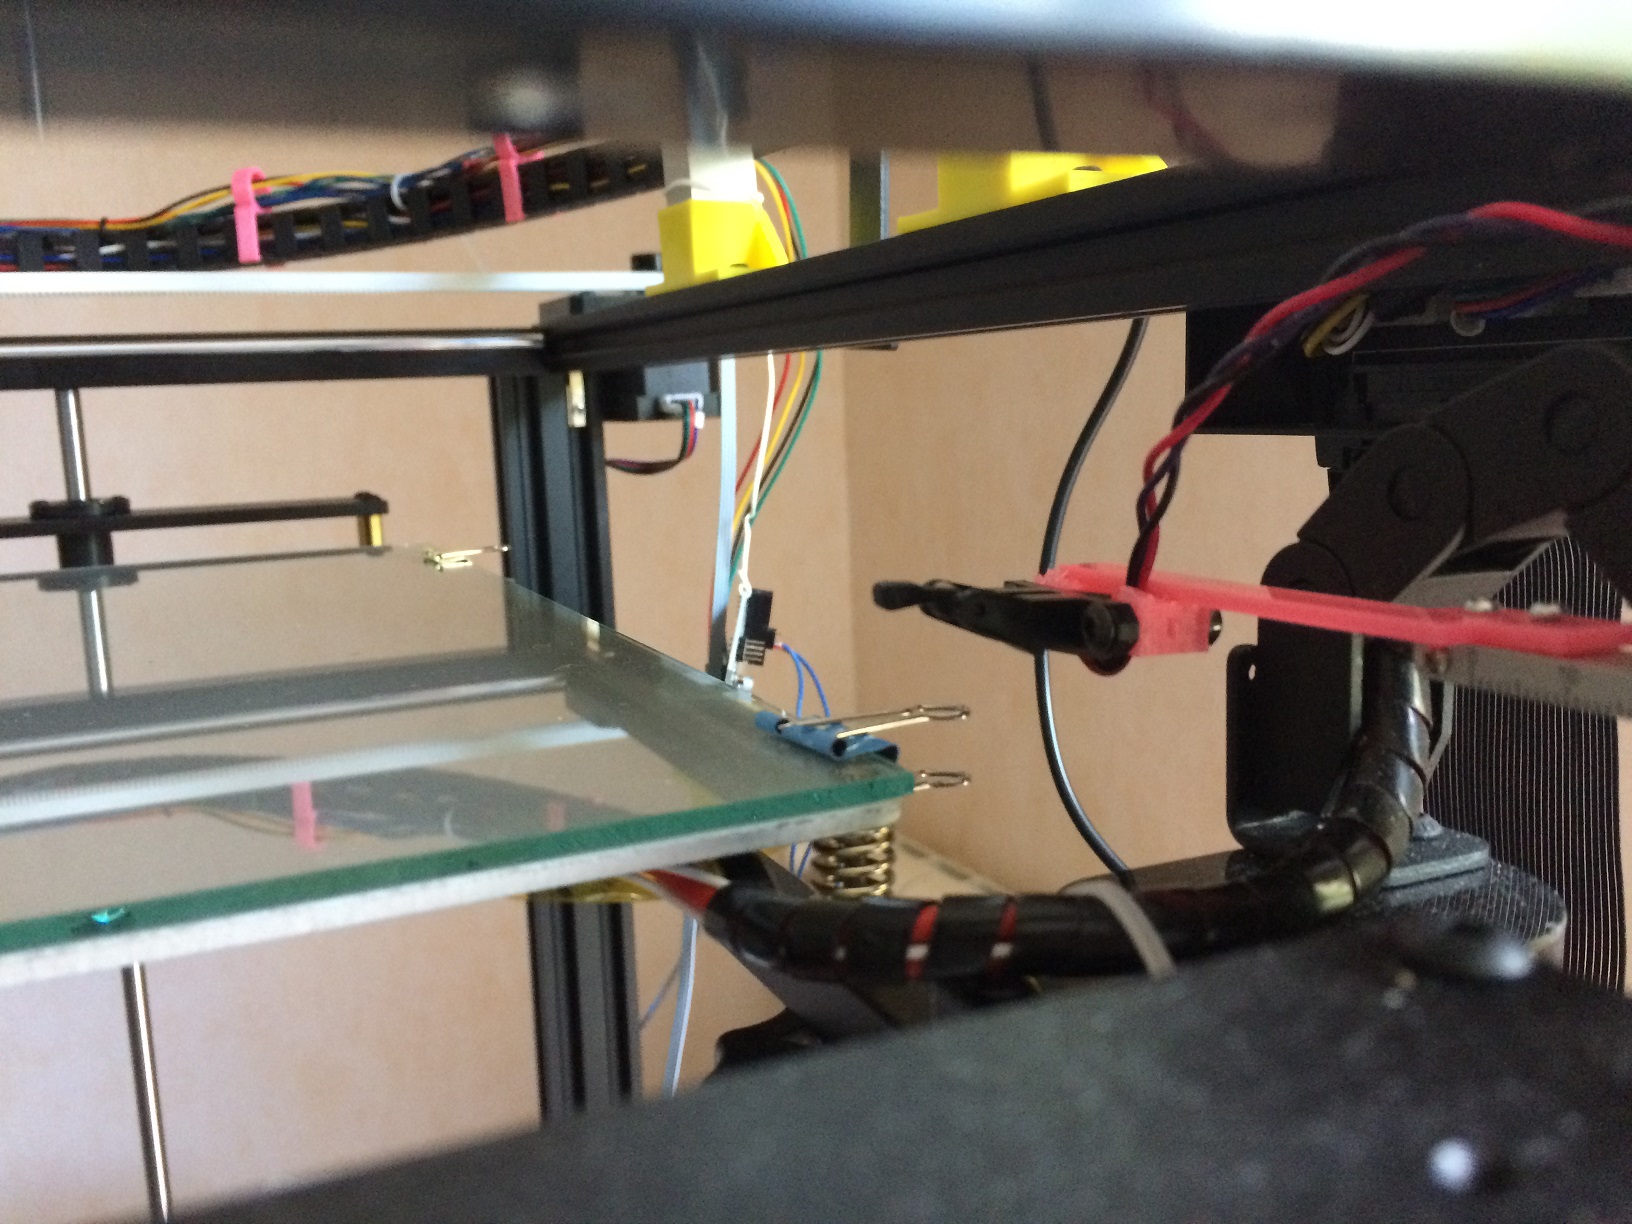
Currently I am having some issues with the proximity sensor that came with the printer (see here), so I have hooked up the extra limit switch that it came with and wired it to the board.
Does anyone know what settings to change in Marlin to remove the proximity sensor and just use the limit switch instead? I am not clear on what I am supposed to comment and uncomment.
Does anyone know what settings to change in Marlin to remove the proximity sensor and just use the limit switch instead? I am not clear on what I am supposed to comment and uncomment.
|
Re: Tronxy X5SA Pro - Marlin settings, removing auto level sensor and adding limit switch October 12, 2020 03:58PM |
Registered: 7 years ago Posts: 619 |
Are you still using the Chitu board? I am still running the TronXY firmware on the board after removing the prox sensor, adding a borosilicate glass bed and the Z-stop sensor. I also moved to an E3Dv6 hot end and am considering a move to a Hemera.
I got my X5SA Pro in March 2020, and they are known for changing controller hardware on a whim. So I am going to bug you with a lot of questions!
What is your board, is it still a Chitu 32 board?
Can it still use the touch screen with Marlin?
What flavor of Marlin? I assume 2.x so it supports the 32 bit boards?
1.x Marlin only requires that you comment out the auto bed level sections, like these:
//#define AUTO_BED_LEVELING_ in the Configuration.h file.
Do not know about Marlin 2.x
DLC
Kits: Folgertech Kossel 2020 upgraded E3Dv6, Anet A8 upgraded E3Dv6, Tevo Tarantula enhanced parts and dual-head, TronXY X5SA Pro(E3DHemera).
Scratch: Large bed Cartesian, exchangeable heads, Linear slide Delta, Maker-Beam XL Micro Delta, 220x220CoreXY.
|
Re: Tronxy X5SA Pro - Marlin settings, removing auto level sensor and adding limit switch November 03, 2020 08:46AM |
Registered: 5 years ago Posts: 9 |
Sorry I am just getting back around to responding.
I eventually sent the printer back. I think the sensor was just bad, then the LCD screen went white and I was unable to use it at all. I spend the extra money and got an Ender 5 Plus. So far the new one is running, but there are still a few issues with it.
I eventually sent the printer back. I think the sensor was just bad, then the LCD screen went white and I was unable to use it at all. I spend the extra money and got an Ender 5 Plus. So far the new one is running, but there are still a few issues with it.
|
Re: Tronxy X5SA Pro - Marlin settings, removing auto level sensor and adding limit switch November 03, 2020 02:05PM |
Registered: 7 years ago Posts: 619 |
Quote
Recoil1980
Sorry I am just getting back around to responding.
I eventually sent the printer back. I think the sensor was just bad, then the LCD screen went white and I was unable to use it at all. I spend the extra money and got an Ender 5 Plus. So far the new one is running, but there are still a few issues with it.
No big. I figured it out.
I have never liked the inductive sensors and this one is no different. I have modified my X5SA Pro and am happy with it.
Removed bed sensor
Added borosilicate glass bed
Added Z-stop sensor
Lined the two Z steppers with a belt, so they never go out of sync
Removed stock hot end and replaced it with a E3Dv6 and modified fan duct
Boosted the acceleration and jerk specs to speed up the printer
The filament out detector failed a couple of months from when I turned the printer on. So I disabled that in firmware too.
Now the printer is consistent and reliable. It isn't an awesome printer, but it is pretty decent for $400 (plus the new hot end). And a 330x330mm bed is quite useful.
DLC
Kits: Folgertech Kossel 2020 upgraded E3Dv6, Anet A8 upgraded E3Dv6, Tevo Tarantula enhanced parts and dual-head, TronXY X5SA Pro(E3DHemera).
Scratch: Large bed Cartesian, exchangeable heads, Linear slide Delta, Maker-Beam XL Micro Delta, 220x220CoreXY.
|
Re: Tronxy X5SA Pro - Marlin settings, removing auto level sensor and adding limit switch February 10, 2021 08:31AM |
Registered: 3 years ago Posts: 3 |
Quote
dlc60
No big. I figured it out.
I have never liked the inductive sensors and this one is no different. I have modified my X5SA Pro and am happy with it.
Removed bed sensor
Added borosilicate glass bed
Added Z-stop sensor
Lined the two Z steppers with a belt, so they never go out of sync
Removed stock hot end and replaced it with a E3Dv6 and modified fan duct
Boosted the acceleration and jerk specs to speed up the printer
The filament out detector failed a couple of months from when I turned the printer on. So I disabled that in firmware too.
Now the printer is consistent and reliable. It isn't an awesome printer, but it is pretty decent for $400 (plus the new hot end). And a 330x330mm bed is quite useful.
DLC
Hi there ! I have purchased a Tronxy x5sa pro and like you, I want to remove the proximity sensor. I already have the Z limit switch installed but how did you manage to wire it? Have you done something special in the chitu gcode?
I have also installed a direct drive with e3dv6 extruder and homemade fan duct. Do you have cad files of your setup?
Thanks
|
Re: Tronxy X5SA Pro - Marlin settings, removing auto level sensor and adding limit switch April 01, 2021 09:36PM |
Registered: 3 years ago Posts: 1 |
Quote
dlc60
Quote
Recoil1980
Sorry I am just getting back around to responding.
I eventually sent the printer back. I think the sensor was just bad, then the LCD screen went white and I was unable to use it at all. I spend the extra money and got an Ender 5 Plus. So far the new one is running, but there are still a few issues with it.
No big. I figured it out.
I have never liked the inductive sensors and this one is no different. I have modified my X5SA Pro and am happy with it.
Removed bed sensor
Added borosilicate glass bed
Added Z-stop sensor
Lined the two Z steppers with a belt, so they never go out of sync
Removed stock hot end and replaced it with a E3Dv6 and modified fan duct
Boosted the acceleration and jerk specs to speed up the printer
The filament out detector failed a couple of months from when I turned the printer on. So I disabled that in firmware too.
Now the printer is consistent and reliable. It isn't an awesome printer, but it is pretty decent for $400 (plus the new hot end). And a 330x330mm bed is quite useful.
DLC
I too am interested on how you achieved this.
However, I am on Marlin 2.0 firmware, and no more hotends-into-bed ever since!
BPD
|
Re: Tronxy X5SA Pro - Marlin settings, removing auto level sensor and adding limit switch April 08, 2021 12:38PM |
Registered: 3 years ago Posts: 13 |
I have a X5SA-Pro with the Chitu v6 board.
Like most here initially thought there was something weird with the sensor... crashed the nozzle into the bed several times and having lost lotsa hair trying to figure out what was the issue.
The main problem with this printer is the implementation of marlin on the software side and the fact that the double Z aren't synch'd, hardware wise.
I ended up going to marlin 2.0 bug fix because I really wanted to see if there would be a difference and indeed it was pretty impressive...
got better speeds, better quality, better movement and will state that printer is quieter.
BUT, marlin is buggy AF and that's using the bugfix lol... it's actually so buggy that I could run the same config twice, one would succeed, the other would fail.
Most recently, yesterday's bf download won't even compile with the config that I'm actually running on the printer LOL!
For those who are asking about the Z fixed endstop, it's relatively simple; disable the probe and make sure your Z endstop is enabled. Compile, flash
VSCode, creates a cbd, just pop this on an SD and start printer with SD inserted... it'll beep a few times and start.
HTH
|
Re: Tronxy X5SA Pro - Marlin settings, removing auto level sensor and adding limit switch April 24, 2021 07:08PM |
Registered: 7 years ago Posts: 619 |
Quote
lenigma1
Quote
dlc60
Quote
Recoil1980
Sorry I am just getting back around to responding.
I eventually sent the printer back. I think the sensor was just bad, then the LCD screen went white and I was unable to use it at all. I spend the extra money and got an Ender 5 Plus. So far the new one is running, but there are still a few issues with it.
No big. I figured it out.
I have never liked the inductive sensors and this one is no different. I have modified my X5SA Pro and am happy with it.
Removed bed sensor
Added borosilicate glass bed
Added Z-stop sensor
Lined the two Z steppers with a belt, so they never go out of sync
Removed stock hot end and replaced it with a E3Dv6 and modified fan duct
Boosted the acceleration and jerk specs to speed up the printer
The filament out detector failed a couple of months from when I turned the printer on. So I disabled that in firmware too.
Now the printer is consistent and reliable. It isn't an awesome printer, but it is pretty decent for $400 (plus the new hot end). And a 330x330mm bed is quite useful.
DLC
I too am interested on how you achieved this.
However, I am on Marlin 2.0 firmware, and no more hotends-into-bed ever since!
BPD
Sorry for the long delay - In case you haven't already figured this out.
You cannot use the same connector for the Z stop as you use for the inductive sensor. You have to go to the main board for that connector. When looking at the board you you can read the silkscreen designators, in the upper right corner (of my board at least) is a connector labeled Z-stop. My X5SA came with another end stop switch. You mount that switch on the plate where you mounted the Y-stop switch, in the obvious way. Look at how the other end stop switches are wired and wire you cable to match. You only need ground and signal, you don't need power. Connect you cable to that connector on the main board and run a new code script that disables the leveling firmware. For example:
M8083 I0; 			  disable auto-leveling, I now use the Z min limit switch.
M8500;				  Save the changes, you MUST use this line.
Store this code on your micro-SD card as "disableautolevel.gcode".
Run the code by using the Print menu. After the printer beeps and throws up a message window that makes no sense, hit "OK" and power the printer off (make sure it beeps when it shuts off) and then back on. You are then set up to use the Z-stop. Test it by telling the printer to home Z and click the switch with your finger - don't risk a bed collision by assuming you did it all correctly the first time.

Be well,
DLC
Kits: Folgertech Kossel 2020 upgraded E3Dv6, Anet A8 upgraded E3Dv6, Tevo Tarantula enhanced parts and dual-head, TronXY X5SA Pro(E3DHemera).
Scratch: Large bed Cartesian, exchangeable heads, Linear slide Delta, Maker-Beam XL Micro Delta, 220x220CoreXY.
|
Re: Tronxy X5SA Pro - Marlin settings, removing auto level sensor and adding limit switch April 30, 2021 02:04PM |
Registered: 3 years ago Posts: 3 |
|
Re: Tronxy X5SA Pro - Marlin settings, removing auto level sensor and adding limit switch April 30, 2021 07:38PM |
Registered: 7 years ago Posts: 619 |
Quote
panch47
I just wanted to share my experience, I have changed the firmware with marlin and it works very well !
I have installed a direct drive and kept the proximity sensor with autoleveling. It's wonderfull how it works, no more nozzle in the bed
I have looked at the Marlin 2 (32 bit) build process and it looks like they took a giant step backward in usability and upgradability, multiple compilers, special libraries and IDE. It looks very alpha-level development. Did something change recently? Besides that, is there a way to even figure out what the board is to install firmware on it?
So, what process did you use to change the firmware on your Chitu controller? I really don't like the firmware that is on it now, except for the ability to easily change controller parameters by running gcode - of course, now that I think about it, you could use this very same method with Marlin firmware by storing changes in the EEPROM, all from within a gcode file.
...Very interested...
DLC
Kits: Folgertech Kossel 2020 upgraded E3Dv6, Anet A8 upgraded E3Dv6, Tevo Tarantula enhanced parts and dual-head, TronXY X5SA Pro(E3DHemera).
Scratch: Large bed Cartesian, exchangeable heads, Linear slide Delta, Maker-Beam XL Micro Delta, 220x220CoreXY.
|
Re: Tronxy X5SA Pro - Marlin settings, removing auto level sensor and adding limit switch May 06, 2021 04:29PM |
Registered: 3 years ago Posts: 3 |
The procedure to change from chitu to marlin is quite simple now.
You can see the board version on itself, it is written, mine is a V6. You also have to check if you have TMC.
To change from chitu to marlin I have just followed a youtuber who explain how to do it. You need Visual code studio with plateform IO, you have a file named "configuration.h" that you have to edit according your printer. then you build and it generate a file named "updated.cbd" you just have to put it on the sd card and the printer recognize it if there is any change and load it.
you have to pay attention the first time with the probe offset to avoid a bed contact.
here is the link : [www.youtube.com].
I have not the exactly same printer with the guy on the video and I did not have the PIN issue.
the only thing bad is that after the bed leveling, there is no grid generation with all the points and the height of each point. You can only see the point's height when it is probing. if anyone have a solution to show the grid I would love to know how !
Hope it helps you
|
Re: Tronxy X5SA Pro - Marlin settings, removing auto level sensor and adding limit switch July 05, 2021 07:40AM |
Registered: 2 years ago Posts: 3 |
Bonjour,
Capteur sur vernier. Voir les fichiers joint
j'ai mis une résistance de 2K2 (pour les 24V d'alim du capteur Tronxy) en série avec l'émetteur du capteur optique. Un inter me permet de passé du capteur tronxy au capteur optique
pour le vernier c'est moins de 10€ ici
[fr.aliexpress.com]
Capteur sur vernier. Voir les fichiers joint
j'ai mis une résistance de 2K2 (pour les 24V d'alim du capteur Tronxy) en série avec l'émetteur du capteur optique. Un inter me permet de passé du capteur tronxy au capteur optique
pour le vernier c'est moins de 10€ ici
[fr.aliexpress.com]
|
Re: Tronxy X5SA Pro - Marlin settings, removing auto level sensor and adding limit switch December 06, 2021 10:14AM |
Registered: 2 years ago Posts: 1 |
Late to dinner on this one, but does anyone have a good configuration.h file for a X5SAPRO 2E? Running a V6 2 extractor board. The config in BugFix2.0 is for a different size and I don't know enough to figure the differences calculating the sizes.
I do know that the V6 has to run the "maple" environment not the regular Chitu103 or whatever it is.
I fought the process for 2 days but finally got the right combination to get it to compile, but it is way off. But it's on there....
Thanks in advance
Guido988
I do know that the V6 has to run the "maple" environment not the regular Chitu103 or whatever it is.
I fought the process for 2 days but finally got the right combination to get it to compile, but it is way off. But it's on there....
Thanks in advance
Guido988
|
Re: Tronxy X5SA Pro - Marlin settings, removing auto level sensor and adding limit switch April 08, 2022 05:58AM |
Registered: 2 years ago Posts: 2 |
I got it for the 500-2E, as far as I know, they are suitable. Write to me, if it still actual or probably someone else will want itQuote
Yeti988
Late to dinner on this one, but does anyone have a good configuration.h file for a X5SA(this)? Running a V6 2 extractor board. The config in BugFix2.0 is for a different size and I don't know enough to figure the differences calculating the sizes.
I do know that the V6 has to run the "maple" environment not the regular Chitu103 or whatever it is.
I fought the process for 2 days but finally got the right combination to get it to compile, but it is way off. But it's on there....
Thanks in advance
Guido988
|
Re: Tronxy X5SA Pro - Marlin settings, removing auto level sensor and adding limit switch September 03, 2022 11:54PM |
Registered: 8 years ago Posts: 165 |
Quote
dlc60
Quote
lenigma1
Quote
dlc60
Quote
Recoil1980
Sorry I am just getting back around to responding.
I eventually sent the printer back. I think the sensor was just bad, then the LCD screen went white and I was unable to use it at all. I spend the extra money and got an Ender 5 Plus. So far the new one is running, but there are still a few issues with it.
No big. I figured it out.
I have never liked the inductive sensors and this one is no different. I have modified my X5SA Pro and am happy with it.
Removed bed sensor
Added borosilicate glass bed
Added Z-stop sensor
Lined the two Z steppers with a belt, so they never go out of sync
Removed stock hot end and replaced it with a E3Dv6 and modified fan duct
Boosted the acceleration and jerk specs to speed up the printer
The filament out detector failed a couple of months from when I turned the printer on. So I disabled that in firmware too.
Now the printer is consistent and reliable. It isn't an awesome printer, but it is pretty decent for $400 (plus the new hot end). And a 330x330mm bed is quite useful.
DLC
I too am interested on how you achieved this.
However, I am on Marlin 2.0 firmware, and no more hotends-into-bed ever since!
BPD
Sorry for the long delay - In case you haven't already figured this out.
You cannot use the same connector for the Z stop as you use for the inductive sensor. You have to go to the main board for that connector. When looking at the board you you can read the silkscreen designators, in the upper right corner (of my board at least) is a connector labeled Z-stop. My X5SA came with another end stop switch. You mount that switch on the plate where you mounted the Y-stop switch, in the obvious way. Look at how the other end stop switches are wired and wire you cable to match. You only need ground and signal, you don't need power. Connect you cable to that connector on the main board and run a new code script that disables the leveling firmware. For example:
M8083 I0; 			  disable auto-leveling, I now use the Z min limit switch.
M8500;				  Save the changes, you MUST use this line.
Store this code on your micro-SD card as "disableautolevel.gcode".
Run the code by using the Print menu. After the printer beeps and throws up a message window that makes no sense, hit "OK" and power the printer off (make sure it beeps when it shuts off) and then back on. You are then set up to use the Z-stop. Test it by telling the printer to home Z and click the switch with your finger - don't risk a bed collision by assuming you did it all correctly the first time.
Be well,
DLC
Hi, I have the X5SA-Pro, and have been trying to add the Z end stop, with no success at all. I tried to enter your little code and nothing happened. I wired the switsh and again nothing worked I trie continuity on the swith it seems to be triggering ok. Is there another way to disable the sensor.. I know it's abit late just hope someone can help. There does not seem to be a config file. I have the 130 board and V1.32 firmware..
.
|
Re: Tronxy X5SA Pro - Marlin settings, removing auto level sensor and adding limit switch September 04, 2022 01:41PM |
Registered: 7 years ago Posts: 619 |
You have to do everything exactly right to get this to work. If you do not have your current settings file, then you will not be doing everything right.
I have attached a file that explains all of the gcode settings and how to set and change them. This is your TronXY bible.
First rule of programming ALWAYS save your current configuration so that you can get it back when you mess something up.
As for the wiring of the switch. Look at how the other switches are wired, wire it that way. That is my best advice. If the other switches are all wire with the ground wire to the edge of the board, wire this switch the same as that. A switch will almost always be wired as a pull-up with the switch open and a short to ground when closed. My TronXY came with an extra end-stop switch PCB in the box, that is what I used for the Z limit. If yours didn't then you will have to create one yourself. It isn't hard and you can just buy one from any of a thousand vendors.
gcode explained:
Tronxy_Firmware_Configuration_Manual_-_Revision_2.txt
One thing that I learned is that the new gcode will not take affect until the printer is properly power-cycled.
In my case, "properly" means this:
When you flip off the switch, you VERY briefly see a power down message and the controller beeps before power shuts off. If that does not happen, turn it back on and power it down again.
good luck,
DLC
P.S.
Many of my TronXY links that I used in 2020 are no longer valid, so I am glad I downloaded all the information when I found it!
Kits: Folgertech Kossel 2020 upgraded E3Dv6, Anet A8 upgraded E3Dv6, Tevo Tarantula enhanced parts and dual-head, TronXY X5SA Pro(E3DHemera).
Scratch: Large bed Cartesian, exchangeable heads, Linear slide Delta, Maker-Beam XL Micro Delta, 220x220CoreXY.
|
Re: Tronxy X5SA Pro - Marlin settings, removing auto level sensor and adding limit switch September 04, 2022 09:36PM |
Registered: 8 years ago Posts: 165 |
Thank you my Friend.
I must say you put a lot of work into that file, But I have a question, probably a stupid one in many an eye But how do I load this into tronxy, I tried one by printing it and it did just that, went through the motion of printing. OK yes a stupid question, just read it is not a flashable file. So where can I get one. aon switch off I see no message or signal. I mentioned above that the firmware I have is V1.32 which is a Marlin.. Just a thought should I use M500 insread of M8500.
Edited 3 time(s). Last edit at 09/05/2022 07:29PM by erniehatt.
I must say you put a lot of work into that file, But I have a question, probably a stupid one in many an eye
But how do I load this into tronxy, I tried one by printing it and it did just that, went through the motion of printing. OK yes a stupid question, just read it is not a flashable file. So where can I get one. aon switch off I see no message or signal. I mentioned above that the firmware I have is V1.32 which is a Marlin.. Just a thought should I use M500 insread of M8500.Edited 3 time(s). Last edit at 09/05/2022 07:29PM by erniehatt.
|
Re: Tronxy X5SA Pro - Marlin settings, removing auto level sensor and adding limit switch September 05, 2022 07:32PM |
Registered: 7 years ago Posts: 619 |
Quote
erniehatt
Thank you my Friend.
I must say you put a lot of work into that file, But I have a question, probably a stupid one in many an eye
I didn't compile that, someone who's web pages are now gone did.
You do not load that file into your printer. Read it carefully. I repeat, read it carefully. Everything that you need to know is there, I added some nuance above about having to reboot and what a proper shutdown sounds like.
First off, do what he says at the top.
Create a file called "savesettings.gcode"
In that file put these two commands:
M6046 ;sdcard access
M8512 "currentconfig.gcode" ;save settings to file
Save this file on the SD card and put the card into your TronXY.
"print" this file.
NOTE: like he says, it will not say "complete", just wait about 15 seconds, stop the print and exit.
You will now have a file called "currentconfig.gcode" on that SD card - Save it as a backup, or "respawn point" if you will.
I disabled the auto-leveling using this file, I called it "disableautolevel.gcode"
M8083 I0; disable auto-leveling, believe the z limit switch.
M8500
NOTE: As he says, m8500 MUST be the last command in the file, this saves the settings, otherwise the settings will go away after a power cycle.
MORE NOTE: everything after a ';' is a comment
EVEN MORE NOTE: Whenever you do this kind of a configuration "print", you won't see a "complete" message and you just have to wait 15 seconds and stop the print.
You can fiddle to your hearts content with other settings, the defaults make the printer pitifully slow.
Here is an example file I did after I installed an E3D Hemera to my TronXY-X5SA Pro printer:
"TronXYCompleteSetup.gcode"
;
; Make this printer go FASTER
; Full list of changes to the TronXY, this for Hemera head (heavier than E3dv6)
;
; Speeds are mm/speed;
M8006 I120; Starting speed, go this speed from the start if speed > this speed.
M8007 I5; Jerk, speeds lower than this assume instant acceleration, was 15
M8008 I700; Acceleration, was 1500
M8007 E10; Extruder jerk speed
M8008 E700; Extruder acceleration
M8012 I200; Maximum X and Y axis speed in mm/s
M8013 I16.7; Maximum Z axis speed in mm/s
M8014 I120; Maximum Extruder speed in mm/s
M8029 D0; Filament runout detection functionality 0: Disabled 1: Enabled (My sensor broke)
M8020 S0; Filament retraction distance, defaults to 1.5, 0 allows slicer to select, but really it seems to just set it to 3
M8022 I270; max hot end temperature
M8023 I100; max bed temperature
M8083 I0; disable auto-leveling, I now use the Z min limit switch.
M8011 S0.001326635 ;0.00122249388 ;0.00244498777; E3D Hemera 1/stepsPerMM*2, then tweaked (1/793.46) then to 1/753.79
M8500; Save the changes, you MUST use this line.
Read the firmware config file a couple of times and try some simple experiments, STARTING WITH getting and saving your current config file.
be well,
DLC
Kits: Folgertech Kossel 2020 upgraded E3Dv6, Anet A8 upgraded E3Dv6, Tevo Tarantula enhanced parts and dual-head, TronXY X5SA Pro(E3DHemera).
Scratch: Large bed Cartesian, exchangeable heads, Linear slide Delta, Maker-Beam XL Micro Delta, 220x220CoreXY.
|
Re: Tronxy X5SA Pro - Marlin settings, removing auto level sensor and adding limit switch September 06, 2022 12:35AM |
Registered: 8 years ago Posts: 165 |
|
Re: Tronxy X5SA Pro - Marlin settings, removing auto level sensor and adding limit switch September 06, 2022 01:00AM |
Registered: 7 years ago Posts: 619 |
Gotta read it all.
NOTE: like he says, it will not say "complete", just wait about 15 seconds, stop the print and exit.
NOTE: like he says, it will not say "complete", just wait about 15 seconds, stop the print and exit.
NOTE: like he says, it will not say "complete", just wait about 15 seconds, stop the print and exit.
NOTE: like he says, it will not say "complete", just wait about 15 seconds, stop the print and exit.
NOTE: like he says, it will not say "complete", just wait about 15 seconds, stop the print and exit.
be well,
DLC
Kits: Folgertech Kossel 2020 upgraded E3Dv6, Anet A8 upgraded E3Dv6, Tevo Tarantula enhanced parts and dual-head, TronXY X5SA Pro(E3DHemera).
Scratch: Large bed Cartesian, exchangeable heads, Linear slide Delta, Maker-Beam XL Micro Delta, 220x220CoreXY.
NOTE: like he says, it will not say "complete", just wait about 15 seconds, stop the print and exit.
NOTE: like he says, it will not say "complete", just wait about 15 seconds, stop the print and exit.
NOTE: like he says, it will not say "complete", just wait about 15 seconds, stop the print and exit.
NOTE: like he says, it will not say "complete", just wait about 15 seconds, stop the print and exit.
NOTE: like he says, it will not say "complete", just wait about 15 seconds, stop the print and exit.
be well,
DLC
Kits: Folgertech Kossel 2020 upgraded E3Dv6, Anet A8 upgraded E3Dv6, Tevo Tarantula enhanced parts and dual-head, TronXY X5SA Pro(E3DHemera).
Scratch: Large bed Cartesian, exchangeable heads, Linear slide Delta, Maker-Beam XL Micro Delta, 220x220CoreXY.
|
Re: Tronxy X5SA Pro - Marlin settings, removing auto level sensor and adding limit switch September 30, 2022 04:03AM |
Registered: 8 years ago Posts: 165 |
|
Re: Tronxy X5SA Pro - Marlin settings, removing auto level sensor and adding limit switch November 22, 2022 05:13PM |
Registered: 1 year ago Posts: 3 |
dlc60
so to disable the sensor these 2 lines need putting on to a sd card like doing a update etc.
M8083 I0; disable auto-leveling, I now use the Z min limit switch.
M8500; Save the changes, you MUST use this line.
only ask as i have been having trouble like many others with the sensor.
and had to update firmware because it would not boot up correctly yesterday.
apart from it's small problems it is a great printer.
|
Re: Tronxy X5SA Pro - Marlin settings, removing auto level sensor and adding limit switch November 24, 2022 01:55PM |
Registered: 7 years ago Posts: 619 |
Quote
isitworksnow
dlc60
so to disable the sensor these 2 lines need putting on to a sd card like doing a update etc.
M8083 I0; disable auto-leveling, I now use the Z min limit switch.
M8500; Save the changes, you MUST use this line.
only ask as i have been having trouble like many others with the sensor.
and had to update firmware because it would not boot up correctly yesterday.
apart from it's small problems it is a great printer.
Put the M8500 at the end of the config file you write.
You do not have to include every configuration command to change only one thing. You can run a small one to do a single change. I like to keep a backup of the pre-change command set so that I can back out a change if I need to. The instructions are further up this chain for how to get the current config file.
You then have to find a way to put a Z min limit switch on your system. I printed up some pieces to handle that and my X5SA came with an extra limit switch, which I used on my printer. Mount it next to the Y-min switch, there are holes there already to do that for a Z-min switch. Perfect, the correct wiring and all TronXY took care of that.
You will need to find the connector for the Z min switch on your controller. I can't help you with that since they seem to change controller boards more often than some people change socks. You can find it on the controller board by looking where the other limit switches plug onto your board, the Z min will be in that area.I think inductive sensors stink, only contact switches seem to work well in my experience. They must be really cheap since all the kit makers seem to include them.
be well,
DLC
|
Re: Tronxy X5SA Pro - Marlin settings, removing auto level sensor and adding limit switch November 27, 2022 11:13AM |
Registered: 1 year ago Posts: 3 |
|
Re: Tronxy X5SA Pro - Marlin settings, removing auto level sensor and adding limit switch November 27, 2022 03:33PM |
Registered: 1 year ago Posts: 3 |
Quote
dlc60
Quote
isitworksnow
dlc60
so to disable the sensor these 2 lines need putting on to a sd card like doing a update etc.
M8083 I0; disable auto-leveling, I now use the Z min limit switch.
M8500; Save the changes, you MUST use this line.
only ask as i have been having trouble like many others with the sensor.
and had to update firmware because it would not boot up correctly yesterday.
apart from it's small problems it is a great printer.
Put the M8500 at the end of the config file you write.
You do not have to include every configuration command to change only one thing. You can run a small one to do a single change. I like to keep a backup of the pre-change command set so that I can back out a change if I need to. The instructions are further up this chain for how to get the current config file.
You then have to find a way to put a Z min limit switch on your system. I printed up some pieces to handle that and my X5SA came with an extra limit switch, which I used on my printer. Mount it next to the Y-min switch, there are holes there already to do that for a Z-min switch. Perfect, the correct wiring and all TronXY took care of that.
I think inductive sensors stink, only contact switches seem to work well in my experience. They must be really cheap since all the kit makers seem to include them.
be well,
DLC
been watching some videos doing this code things looks a bit much for me. very new to this code stuff.
i will look at some more videos but don't hold up much hope of it working. lol
as for wiring and mounting that is the easy part for me.
martin
Sorry, only registered users may post in this forum.