Cable management for the X-Y axis
Posted by David J
|
Cable management for the X-Y axis January 28, 2021 11:04AM |
Registered: 9 years ago Posts: 893 |
This is a minor annoyance - but it's really getting on my nerves, and also my wife's!
My CoreXY printer has a bundle of wires that go to the X/Y carriage - it's inevitable, they're required. Originally I had a cable chain to keep them under control, but the chain's minimum radius meant that when the carriage was at X-max and Y-max the chain had to close right up and also hang off the right-hand side. Not a major issue, but eventually the chain broke due to wear.
I replaced it with a length of split conduit fastened with cable ties which works - but the edges of the split keeps clicking as it moves and it's really annoying!
I would be really interested to know how others have managed the cables to the X/Y carriage - a few pictures would be nice - just to give me some ideas on how to sort it out.
tia,
David
|
Re: Cable management for the X-Y axis January 29, 2021 01:23AM |
Registered: 11 years ago Posts: 5,780 |
I use a "lateral" drag chain with a large loop to prevent flexing the wires excessively. It droops because of the weight and the small size of the drag chain, but works fine.
I try to minimize wires going to the extruder carriage because moving wires are always less reliable than fixed wires. All that runs to the extruder carriage in my printer is the motor leads, heater and PT100 leads, and hot-end fan leads. I currently have unused print cooling fan wires in there too, and may remove them. I used to have the X axis endstop switch mounted on the extruder carriage, but it isn't necessary to do that, so I was able to remove the leads for it from the cable. The X axis endstop now resides on the printer's frame and the machine was easily programmed to always home the Y axis before it attempts to home the X axis. I haven't had any need to home the X axis at every possible Y position, so it works fine.
You can see the drag chain in this video: [vimeo.com]
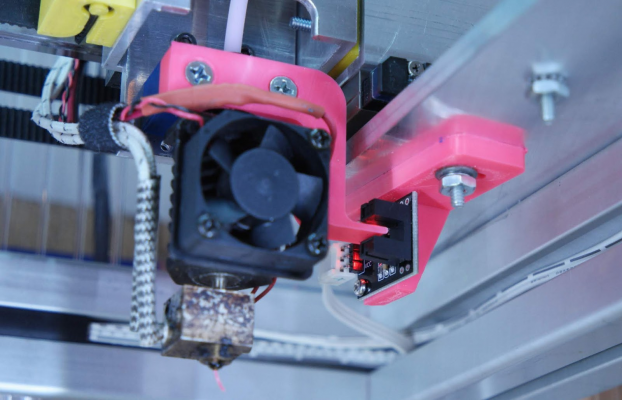
Here's the X axis optical endstop mounted on the printer's frame:
Edited 1 time(s). Last edit at 01/29/2021 01:26AM by the_digital_dentist.
Ultra MegaMax Dominator 3D printer: [drmrehorst.blogspot.com]
|
Re: Cable management for the X-Y axis January 29, 2021 05:26AM |
Registered: 9 years ago Posts: 893 |
That's roughly what I had previously, although my chain was home-made and the PLA got fragile after a year or so (as it will tend to!). The main difference with yours is the loop around the top of the carriage: mine started in the back-right corner, and the other end attached to the left of the carriage - this meant that the severe bend when at the extreme right strained the chain somewhat.
Taking the chain round to the back of the carriage would allow it more flexibility when fully over to the right.
I now have a length of tough nylon commercially-made cable chain to replace the old home-made one, so time for some experimentation, I think...
Thanks for the inspirational video!
Edited 1 time(s). Last edit at 01/29/2021 05:27AM by David J.
Taking the chain round to the back of the carriage would allow it more flexibility when fully over to the right.
I now have a length of tough nylon commercially-made cable chain to replace the old home-made one, so time for some experimentation, I think...

Thanks for the inspirational video!
Edited 1 time(s). Last edit at 01/29/2021 05:27AM by David J.
|
Re: Cable management for the X-Y axis January 29, 2021 05:29AM |
Registered: 12 years ago Posts: 1,450 |
A method that I use on one of my printers started as a temporary kludge until I worked out a drag chain arrangement has proven to be exceptionally light. I don't know how applicable this may be to a coreXY printer as it is the print carriage that moves in the XY plane on my printer, not the printing head.
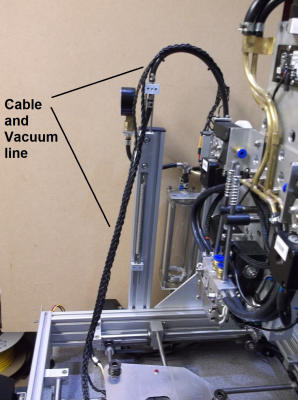
To explain the photograph, there are cables for the bed heater and thermistor as well as various sensors and a vacuum line for the vacuum hold-down. A hollow tube serves to convey the vacuum to the bed with lengths of silicone vacuum tube on either end: This tube also keeps the cables from whipping about The top end is connected to a sliding block with a very light spring giving a helping hand to keep everything under a slight tension - this prevents any juddering.
I will admit that this is very ugly but it is simple and technically does a better job than any other arrangement I have tried out.
Mike
Sorry, only registered users may post in this forum.

