Home
>
Reprappers
>
Topic
McWire 1.2 rail measurements: where do the holes go?
Posted by Anonymous User
|
Anonymous User
McWire 1.2 rail measurements: where do the holes go? November 03, 2008 01:16PM |
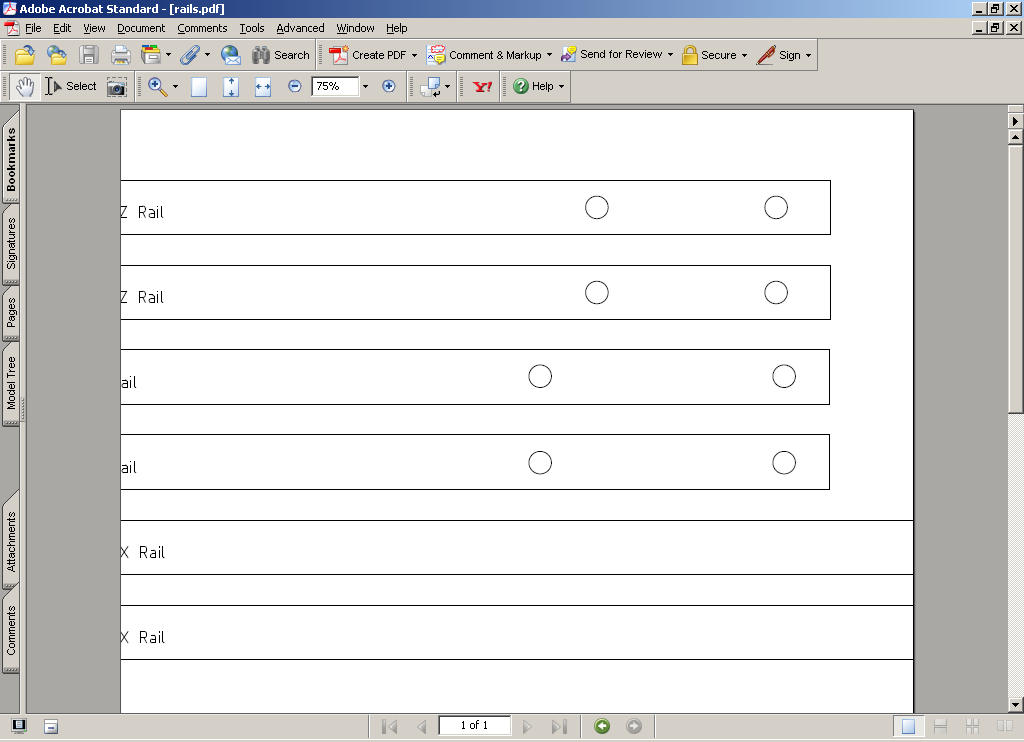
I've been trying to put together a McWire cartesian bot, except I've been stymied by the PDF of the rails that I'm supposed to print out on sticker paper. When I open it using Acrobat on Windows (versions 7 and 9), I get the following on my screen; as you can see, the hole placement for some of the rails are completely cut off. I opened the DXF files and did some measurements from there, which seem to have worked for the X rails, but now I'm trying to attache the Y rails to the X stage and find that I completely miscalculated. Does anyone have measurements for how far from each end the holes should be placed for the Y and Z rails?
(Yes, yes, I know I could just take the platforms with the pre-drilled holes and make marks using those--I'm worried that centering will be an issue, though.)
Thanks, all! Hope to have my RepStrap up and running before too much longer.
(Yes, yes, I know I could just take the platforms with the pre-drilled holes and make marks using those--I'm worried that centering will be an issue, though.)
Thanks, all! Hope to have my RepStrap up and running before too much longer.
|
Re: McWire 1.2 rail measurements: where do the holes go? November 05, 2008 11:25AM |
Registered: 16 years ago Posts: 622 |
Use transfer punches to center the holes...a set can be had at Harbor Freight for like $12-$20 US and they are immensely useful. You pick the punch to fit the hole size you have, put it in the hole and line the part up on the part to be drilled. Tap the punch with a hammer to make a dimple and then drill on the dimple...center drilling first might be advisable depending on how accurate you want to get but it is not strictly necessary.
I've had problems with the PDFs from sourceforge being truncated on one side or another...specifically the board schematics for the PIC chips...don't know what's doing that.
Demented
I've had problems with the PDFs from sourceforge being truncated on one side or another...specifically the board schematics for the PIC chips...don't know what's doing that.
Demented
|
Anonymous User
Re: McWire 1.2 rail measurements: where do the holes go? November 05, 2008 11:38AM |
I'd never heard of transfer punches before, but a quick Google search reveals them to be an incredibly useful thing which I've wanted for so many projects. I'll definitely pick up a set.
I'd still love an answer to the question of how far in from the rail ends each hole should be placed, if anybody has the measurements handy. Like I said, I tried going from the DXF files (assuming 1 unit = 1 mm), but clearly I screwed something up because the rail holes aren't even close to being aligned with the X stage holes.
I'd still love an answer to the question of how far in from the rail ends each hole should be placed, if anybody has the measurements handy. Like I said, I tried going from the DXF files (assuming 1 unit = 1 mm), but clearly I screwed something up because the rail holes aren't even close to being aligned with the X stage holes.
|
Re: McWire 1.2 rail measurements: where do the holes go? November 28, 2008 07:47PM |
Registered: 15 years ago Posts: 70 |
Hi Cygnil,
The link below containes the v1.2.1 stickers (5th down from top of list), which I haven't looked at but I had the same prob as you and was using the v1.2 stickers which have some incorrectly placed holes. I'm done with the mechanical building and am trying to get the electronics to control the robot.
[sourceforge.net]
But I think what's most helpful is you get it mostly set up and then go, "oh, the holes should have gone here". That's what I did. It'll become more obvious as you progress. Because of calibrations you later do, you don't need to worry about the holes being perfect as long as they are symmetrical (aligned) with each other. Someone correct me if I'm wrong about the last point.
Now if I can only get the electronics and the robot working together ;O
Arthur
|
Anonymous User
Re: McWire 1.2 rail measurements: where do the holes go? December 05, 2008 12:53PM |
Thanks, Arthur--I found out that my mistake was classic user error, and I seem to have transferred the same pattern to both ends of the rails. Oops. (The original answer I was looking for was 48mm from the end of one of the Y rails to the center of the hole, which the software I had showed me and I just failed to measure correctly.)
Being a little further into the project (X and Y stages built and motorized, Z stage mostly built), I'm seeing what you mean about setting things up and saying "Oh, that goes there". I did the measurements and drilled the holes in the rails all in one go like the wiki suggested, but that was before I had a clear idea of how everything really fit together. Now, some weekends later, I'm really thankful that the holes don't need to be perfect. I think so far I've had to use a file to make sometimes substantial corrections to almost everything I've done!
Still, the end is in sight. I just need to find pieces for an extruder and then I should be able to piece everything together.
Sorry, only registered users may post in this forum.