Home
>
Reprappers
>
Topic
Rambling Richards's Ready to Rumble (almost ...)
Posted by Joost
|
Rambling Richards's Ready to Rumble (almost ...) May 06, 2007 01:49PM |
Registered: 17 years ago Posts: 79 |
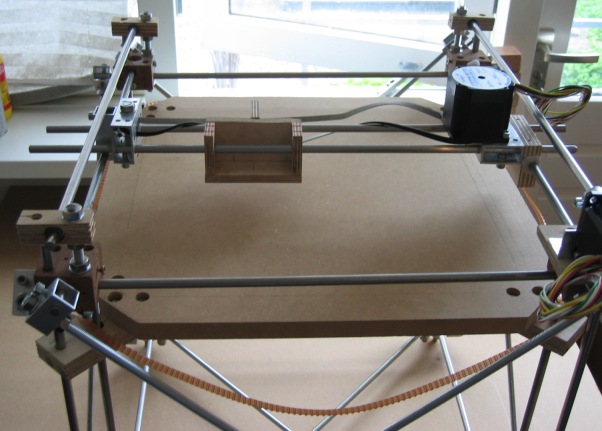
Well, it seems that the structural parts are done. Attached you find some images of the current status of Rambling Richard. Today I mounted the table, and to my surprise it actually fitted nicely. I have been able to stick to the original Darwin dimensions pretty much, even though the tools and materials used were not that precise. What is left are the belts and pulleys (need to put in a order for those after last weekends gear-mess) and some "out-lining" - make sure things are perpendicular, parallel and leveled. I also used some CAPA to fix some issues and make some sort of slide bearings for the XY assembly.
Next step are the boards and see if it can be fired up and actually moves.
Joost
ps. for those that wonder about the use of "rambling", it has a very similar sound to the dutch word "rammelen", which means sort of the same as Clanking ;-)

Next step are the boards and see if it can be fired up and actually moves.
Joost
ps. for those that wonder about the use of "rambling", it has a very similar sound to the dutch word "rammelen", which means sort of the same as Clanking ;-)
|
Re: Rambling Richards's Ready to Rumble (almost ...) May 06, 2007 02:48PM |
Admin Registered: 17 years ago Posts: 1,487 |
|
Re: Rambling Richards's Ready to Rumble (almost ...) May 06, 2007 02:49PM |
Admin Registered: 17 years ago Posts: 7,879 |
|
Re: Rambling Richards's Ready to Rumble (almost ...) May 06, 2007 03:05PM |
Admin Registered: 17 years ago Posts: 1,915 |

|
Re: Rambling Richards's Ready to Rumble (almost ...) May 06, 2007 07:56PM |
Registered: 17 years ago Posts: 225 |
|
Re: Rambling Richards's Ready to Rumble (almost ...) May 07, 2007 02:19AM |
Registered: 17 years ago Posts: 79 |
Hey Bruce,
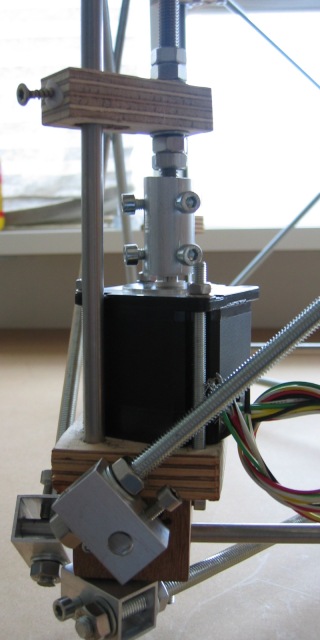
The table bracket is made out of 19mm plywood and there are 2 types (as in the Darwin design). One contains 2 8.5MM holes (one for the vertical rod, one for the studding) and the other only one for the studding. I think the attached marked up image tells you all and shows the hammer bush/press-in nut used for the studding. Due to some inaccuraces, the hole at the top side (where the studding comes out) is made 10MM to prevent to much friction if there is a slight angle between hole and nut. Hopes this helps ...
Joost
The table bracket is made out of 19mm plywood and there are 2 types (as in the Darwin design). One contains 2 8.5MM holes (one for the vertical rod, one for the studding) and the other only one for the studding. I think the attached marked up image tells you all and shows the hammer bush/press-in nut used for the studding. Due to some inaccuraces, the hole at the top side (where the studding comes out) is made 10MM to prevent to much friction if there is a slight angle between hole and nut. Hopes this helps ...

Joost
Sorry, only registered users may post in this forum.