Home
>
Reprappers
>
Topic
Y Axis not moving
Posted by MD2013
|
Y Axis not moving May 13, 2013 07:40PM |
Registered: 10 years ago Posts: 27 |
Hi, could use a little help with troubleshooting my Y Axis. X, Zs, and Extruder work perfectly and hot end heats up great but I can't get my Y axis to do anything, not even a humm or buzz.
I've done the following:
1. Swapped the stepper drivers from working motor to Y axis but same thing. The others still work but nothing for Y motor. This pretty much rules out the stepper drivers.
2. Checked the motor and stepper connections/soldering and everythign looks fine don't think that's the problem. I also took the wire from my X motor and put it into Y and vice-versa. When I do that and hit X in pronterface the Y Axis motor moves perfectly so the motor itself is OK. When I hit Y during the same test the X motor does nothing. That's when I checked the cables but they look OK.
3. I also tried using the E1 pins instead of Y by changing pins.h in sprinter but no dice. Not sure I did this right I just changed the Y pin numbers to the E1 pin numbers and commented out E1.
I have the stepper driver turned about half way for Y maybe just over half figured it should at least buzz or get something out of it if i was working. All the other stepper drivers are only turned about 1/4 to 1/3 clockwise from 0 and they all work great. Also since the Y motor moves when I coonect it to X that current seems to be OK to turn the actual motor.
Not sure if there might be something else I can check but I'm thinking that it may be something with the Ramps board? I don't see any bridges or anything out of the ordinary by eye but I'm far from an expert I actually never even soldered before trying this project and bought the ramps board already together, wasn't ready to try that just yet
I suppose it could also be something with the mech end stop for Y but I checked the connections and they look good. If I press the end stop flap with my finger to trigger it the red light goes on like the other two. I guess I could unscrew and swap the Y end stop with one of the working axis to completly rule that out.
I'm using: Ramps 1.4, Arduino Mega 2560, sprinter, pronterface.
Any help would be appreciated!
Thanks.
Marc
|
Re: Y Axis not moving May 13, 2013 08:55PM |
Registered: 11 years ago Posts: 77 |
|
Re: Y Axis not moving May 13, 2013 09:59PM |
Registered: 11 years ago Posts: 187 |
|
Re: Y Axis not moving May 13, 2013 10:15PM |
Registered: 10 years ago Posts: 27 |
|
Re: Y Axis not moving May 13, 2013 10:25PM |
Registered: 10 years ago Posts: 27 |
BTW I also swapped the X and Y end stops at the board with the same results, the X still works fine but nothing with Y. not sure if it's related but after swaping the end stop cables at the board my extruder motor didn't run as smoothly, made the type of noise it was making when I first tried before I got the driver current and e mm/min in pronterface "dialed in". After swapping the cabes back and powering things back up the extruder initialy still made the same slight shuttering then after a few seconds started running nice and smoothly again.
|
Re: Y Axis not moving May 14, 2013 09:00AM |
Registered: 11 years ago Posts: 265 |
MD2013 Wrote:
-------------------------------------------------------
> Thanks guys. I swapped the end stops and any
> combination of the three work with X and Z. Y
> doesn't do anything with any of them conneted.
>
> M119 returns:
>
> x_min:L y_min:L z_min:L
So no matter what physical endstop you have plugged into the Ymin, you can't get the Y Endstop to toggle?
|
Re: Y Axis not moving May 14, 2013 09:58AM |
Registered: 10 years ago Posts: 27 |
Right no matter which physical endstops I have connected to any of the motors X and Z always move fine and Y never moves.
If I physically trigger the Y endstop (with any of the three connected to it) with my finger, the red light on the endstop itself goes on but the Y doesn't move regardless if I leave the endstop normal like the others or manually press to activate, no movement at all with Y motor.
When I get home I'm going to try running the ramps 1.4 test code and see if that shows any life in that axis.
|
Re: Y Axis not moving May 14, 2013 01:59PM |
Registered: 11 years ago Posts: 265 |
|
Re: Y Axis not moving May 14, 2013 02:21PM |
Registered: 10 years ago Posts: 27 |
I actually didn't try homing in Y, man would I be both embarrassed and thrilled if that was the problem! I haven't homed any of my axis. For that do I just start pronterface with all the axis to the farthest they go just before tripping the end stops, or do I go all the way to the endstops ... or the opposite way completly?
Below is the Y_MAX_LENGTH whixh is set to 200 same as for X. Don't find a MIN_LENGTH
//-----------------------------------------------------------------------
//Max Length for Prusa Mendel, check the ways of your axis and set this Values
//-----------------------------------------------------------------------
const int X_MAX_LENGTH = 200;
const int Y_MAX_LENGTH = 200;
const int Z_MAX_LENGTH = 100;
Here is my whole configuration.h
#ifndef CONFIGURATION_H
#define CONFIGURATION_H
// BASIC SETTINGS: select your board type, thermistor type, axis scaling, and endstop configuration
//// The following define selects which electronics board you have. Please choose the one that matches your setup
// MEGA/RAMPS up to 1.2 = 3,
// RAMPS 1.3/1.4 = 33
// Gen6 = 5,
// Gen6 deluxe = 51
// Sanguinololu up to 1.1 = 6
// Sanguinololu 1.2 and above = 62
// Gen 7 @ 16MHZ only= 7
// Gen 7 @ 20MHZ only= 71
// Teensylu (at90usb) = 8
// Printrboard Rev. B (ATMEGA90USB1286) = 9
// Gen 3 Plus = 21
// gen 3 Monolithic Electronics = 22
// Gen3 PLUS for TechZone Gen3 Remix Motherboard = 23
#define MOTHERBOARD 33
//// Thermistor settings:
// 1 is 100k thermistor
// 2 is 200k thermistor
// 3 is mendel-parts thermistor
// 4 is 10k thermistor
// 5 is ParCan supplied 104GT-2 100K
// 6 is EPCOS 100k
// 7 is 100k Honeywell thermistor 135-104LAG-J01
#define THERMISTORHEATER 1
#define THERMISTORBED 1
//// Calibration variables
// X, Y, Z, E steps per unit - Metric Prusa Mendel with Wade extruder:
#define _AXIS_STEP_PER_UNIT {80, 80, 3200/1.25, 700}
// Metric Prusa Mendel with Makergear geared stepper extruder:
//#define _AXIS_STEP_PER_UNIT {80,80,3200/1.25,1380}
// MakerGear Hybrid Prusa Mendel:
// Z axis value is for .9 stepper(if you have 1.8 steppers for Z, you need to use 2272.7272)
//#define _AXIS_STEP_PER_UNIT {104.987, 104.987, 4545.4544, 1487}
//// Endstop Settings
#define ENDSTOPPULLUPS // Comment this out (using // at the start of the line) to disable the endstop pullup resistors
// The pullups are needed if you directly connect a mechanical endswitch between the signal and ground pins.
//If your axes are only moving in one direction, make sure the endstops are connected properly.
//If your axes move in one direction ONLY when the endstops are triggered, set [XYZ]_ENDSTOP_INVERT to true here:
const bool X_ENDSTOP_INVERT = true;
const bool Y_ENDSTOP_INVERT = true;
const bool Z_ENDSTOP_INVERT = true;
// This determines the communication speed of the printer
#define BAUDRATE 115200
//#define BAUDRATE 250000
// Comment out (using // at the start of the line) to disable SD support:
//#define SDSUPPORT
// Uncomment to make run init.g from SD on boot
//#define SDINITFILE
//Only work with Atmega1284 you need +1 kb ram
//#define SD_FAST_XFER_AKTIV
//-----------------------------------------------------------------------
//// STORE SETTINGS TO EEPROM
//-----------------------------------------------------------------------
// the microcontroller can store settings in the EEPROM
// M500 - stores paramters in EEPROM
// M501 - reads parameters from EEPROM (if you need reset them after you changed them temporarily).
// M502 - reverts to the default "factory settings". You still need to store them in EEPROM afterwards if you want to.
// M503 - Print settings
// define this to enable eeprom support
//#define USE_EEPROM_SETTINGS
// to disable EEPROM Serial responses and decrease program space by ~1000 byte: comment this out:
// please keep turned on if you can.
//#define PRINT_EEPROM_SETTING
//-----------------------------------------------------------------------
//// ARC Function (G2/G3 Command)
//-----------------------------------------------------------------------
//Uncomment to aktivate the arc (circle) function (G2/G3 Command)
//Without SD function an ARC function the used Flash is smaller 31 kb
#define USE_ARC_FUNCTION
//-----------------------------------------------------------------------
//// ADVANCED SETTINGS - to tweak parameters
//-----------------------------------------------------------------------
#ifdef SDSUPPORT
#ifdef SD_FAST_XFER_AKTIV
//Fast transfer chunk size (> 1024 is unstable, change at your own risk).
#define SD_FAST_XFER_CHUNK_SIZE 1024
#endif
#endif
//-----------------------------------------------------------------------
// For Inverting Stepper Enable Pins (Active Low) use 0, Non Inverting (Active High) use 1
//-----------------------------------------------------------------------
#define X_ENABLE_ON 0
#define Y_ENABLE_ON 0
#define Z_ENABLE_ON 0
#define E_ENABLE_ON 0
//Uncomment if you have problems with a stepper driver enabeling too late, this will also set how many microseconds delay there will be after enabeling the driver
//#define DELAY_ENABLE 15
//-----------------------------------------------------------------------
// Disables axis when it's not being used.
//-----------------------------------------------------------------------
const bool DISABLE_X = false;
const bool DISABLE_Y = false;
const bool DISABLE_Z = true;
const bool DISABLE_E = false;
//-----------------------------------------------------------------------
// Inverting axis direction
//-----------------------------------------------------------------------
const bool INVERT_X_DIR = false;
const bool INVERT_Y_DIR = false;
const bool INVERT_Z_DIR = true;
const bool INVERT_E_DIR = false;
//-----------------------------------------------------------------------
//// ENDSTOP SETTINGS:
//-----------------------------------------------------------------------
// Sets direction of endstops when homing; 1=MAX, -1=MIN
#define X_HOME_DIR -1
#define Y_HOME_DIR -1
#define Z_HOME_DIR -1
//#define ENDSTOPS_ONLY_FOR_HOMING // If defined the endstops will only be used for homing
const bool min_software_endstops = false; //If true, axis won't move to coordinates less than zero.
const bool max_software_endstops = true; //If true, axis won't move to coordinates greater than the defined lengths below.
//-----------------------------------------------------------------------
//Max Length for Prusa Mendel, check the ways of your axis and set this Values
//-----------------------------------------------------------------------
const int X_MAX_LENGTH = 200;
const int Y_MAX_LENGTH = 200;
const int Z_MAX_LENGTH = 100;
//-----------------------------------------------------------------------
//// MOVEMENT SETTINGS
//-----------------------------------------------------------------------
const int NUM_AXIS = 4; // The axis order in all axis related arrays is X, Y, Z, E
#define _MAX_FEEDRATE {400, 400, 2, 45} // (mm/sec)
#define _HOMING_FEEDRATE {1500,1500,120} // (mm/min) !!
#define _AXIS_RELATIVE_MODES {false, false, false, false}
#define MAX_STEP_FREQUENCY 30000 // Max step frequency
//For the retract (negative Extruder) move this maxiumum Limit of Feedrate is used
//The next positive Extruder move use also this Limit,
//then for the next (second after retract) move the original Maximum (_MAX_FEEDRATE) Limit is used
#define MAX_RETRACT_FEEDRATE 100 //mm/sec
//-----------------------------------------------------------------------
//// Not used at the Moment
//-----------------------------------------------------------------------
// Min step delay in microseconds. If you are experiencing missing steps, try to raise the delay microseconds, but be aware this
// If you enable this, make sure STEP_DELAY_RATIO is disabled.
//#define STEP_DELAY_MICROS 1
// Step delay over interval ratio. If you are still experiencing missing steps, try to uncomment the following line, but be aware this
// If you enable this, make sure STEP_DELAY_MICROS is disabled. (except for Gen6: both need to be enabled.)
//#define STEP_DELAY_RATIO 0.25
///Oscillation reduction. Forces x,y,or z axis to be stationary for ## ms before allowing axis to switch direcitons. Alternative method to prevent skipping steps. Uncomment the line below to activate.
// At this Version with Planner this Function ist not used
//#define RAPID_OSCILLATION_REDUCTION
#ifdef RAPID_OSCILLATION_REDUCTION
const long min_time_before_dir_change = 30; //milliseconds
#endif
//-----------------------------------------------------------------------
//// Acceleration settings
//-----------------------------------------------------------------------
// X, Y, Z, E maximum start speed for accelerated moves. E default values are good for skeinforge 40+, for older versions raise them a lot.
#define _ACCELERATION 1000 // Axis Normal acceleration mm/s^2
#define _RETRACT_ACCELERATION 2000 // Extruder Normal acceleration mm/s^2
#define _MAX_XY_JERK 20.0
#define _MAX_Z_JERK 0.4
#define _MAX_E_JERK 5.0 // (mm/sec)
//#define _MAX_START_SPEED_UNITS_PER_SECOND {25.0,25.0,0.2,10.0}
#define _MAX_ACCELERATION_UNITS_PER_SQ_SECOND {5000,5000,50,5000} // X, Y, Z and E max acceleration in mm/s^2 for printing moves or retracts
// Minimum planner junction speed. Sets the default minimum speed the planner plans for at the end
// of the buffer and all stops. This should not be much greater than zero and should only be changed
// if unwanted behavior is observed on a user's machine when running at very slow speeds.
#define MINIMUM_PLANNER_SPEED 0.05 // (mm/sec)
#define DEFAULT_MINIMUMFEEDRATE 0.0 // minimum feedrate
#define DEFAULT_MINTRAVELFEEDRATE 0.0
#define _MIN_SEG_TIME 20000
// If defined the movements slow down when the look ahead buffer is only half full
#define SLOWDOWN
const int dropsegments=5; //everything with less than this number of steps will be ignored as move and joined with the next movement
//-----------------------------------------------------------------------
// Machine UUID
//-----------------------------------------------------------------------
// This may be useful if you have multiple machines and wish to identify them by using the M115 command.
// By default we set it to zeros.
#define _DEF_CHAR_UUID "00000000-0000-0000-0000-000000000000"
//-----------------------------------------------------------------------
//// Planner buffer Size
//-----------------------------------------------------------------------
// The number of linear motions that can be in the plan at any give time
// if the SD Card need to much memory reduce the Values for Plannerpuffer (base of 2)
#ifdef SDSUPPORT
#define BLOCK_BUFFER_SIZE 16
#define BLOCK_BUFFER_MASK 0x0f
#else
#define BLOCK_BUFFER_SIZE 16
#define BLOCK_BUFFER_MASK 0x0f
#endif
//-----------------------------------------------------------------------
//// SETTINGS FOR ARC FUNCTION (Command G2/G2)
//-----------------------------------------------------------------------
// Arc interpretation settings:
//Step to split a cirrcle in small Lines
#define MM_PER_ARC_SEGMENT 1
//After this count of steps a new SIN / COS caluclation is startet to correct the circle interpolation
#define N_ARC_CORRECTION 25
//-----------------------------------------------------------------------
//// FANCONTROL WITH SOFT PWM
//-----------------------------------------------------------------------
//With this option its possible to drive the fan with SOFT PWM (500hz) and use
//every Digital output for it, main usage for Sanguinololu
#define FAN_SOFT_PWM
//-----------------------------------------------------------------------
//// MINIMUM START SPEED FOR FAN
//-----------------------------------------------------------------------
//Minimum start speed for FAN when the last speed was zero
//Set to 0 to deaktivate
//If value is set the fan will drive with this minimum speed for MINIMUM_FAN_START_TIME
#define MINIMUM_FAN_START_SPEED 0
//This is the time how long the minimum FAN speed is set
#define MINIMUM_FAN_START_TIME 6000 //6sec
//-----------------------------------------------------------------------
//// HEATERCONTROL AND PID PARAMETERS
//-----------------------------------------------------------------------
//Testfunction to adjust the Hotend temperatur in case of Printingspeed
//If the Printer print slow the Temp is going to AUTO_TEMP_MIN
//At the moment this Value dont change the targettemp from the Hotend
//The result of this function is only send with the Temperaturerequest to the host
//#define AUTOTEMP
#ifdef AUTOTEMP
#define AUTO_TEMP_MAX 240
#define AUTO_TEMP_MIN 205
#define AUTO_TEMP_FACTOR 0.025
#define AUTOTEMP_OLDWEIGHT 0.98
#endif
//// AD595 THERMOCOUPLE SUPPORT UNTESTED... USE WITH CAUTION!!!!
//// PID settings:
// Uncomment the following line to enable PID support. This is untested and could be disastrous. Be careful.
#define PIDTEMP 1
#ifdef PIDTEMP
//Sanguinololu 1.2 and above, the PWM Output Hotend Timer 1 is used for the Hardware PWM
//but in this Software use Timer1 for the Stepperfunction so it is not possible to use the "analogWrite" function.
//This Soft PWM use Timer 2 with 400 Hz to drive the PWM for the hotend
#define PID_SOFT_PWM
//Measure the MIN/MAX Value of the Hotend Temp and show it with
//Command M601 / Command M602 Reset the MIN/MAX Value
//#define DEBUG_HEATER_TEMP
// M303 - PID relay autotune S sets the target temperature.
// (default target temperature = 150C)
#define PID_AUTOTUNE
//PID Controler Settings
#define PID_INTEGRAL_DRIVE_MAX 80 // too big, and heater will lag after changing temperature, too small and it might not compensate enough for long-term errors
#define PID_PGAIN 2560 //256 is 1.0 // value of X means that error of 1 degree is changing PWM duty by X, probably no need to go over 25
#define PID_IGAIN 64 //256 is 1.0 // value of X (e.g 0.25) means that each degree error over 1 sec (2 measurements) changes duty cycle by 2X (=0.5) units (verify?)
#define PID_DGAIN 4096 //256 is 1.0 // value of X means that around reached setpoint, each degree change over one measurement (half second) adjusts PWM by X units to compensate
// magic formula 1, to get approximate "zero error" PWM duty. Take few measurements with low PWM duty and make linear fit to get the formula
// for my makergear hot-end: linear fit {50,10},{60,20},{80,30},{105,50},{176,100},{128,64},{208,128}
#define HEATER_DUTY_FOR_SETPOINT(setpoint) ((int)((187L*(long)setpoint)>>8)-27)
// magic formula 2, to make led brightness approximately linear
#define LED_PWM_FOR_BRIGHTNESS(brightness) ((64*brightness-1384)/(300-brightness))
#endif
// Change this value (range 30-255) to limit the current to the nozzle
#define HEATER_CURRENT 255
// How often should the heater check for new temp readings, in milliseconds
#define HEATER_CHECK_INTERVAL 500
#define BED_CHECK_INTERVAL 5000
// Comment the following line to enable heat management during acceleration
#define DISABLE_CHECK_DURING_ACC
#ifndef DISABLE_CHECK_DURING_ACC
// Uncomment the following line to disable heat management during moves
//#define DISABLE_CHECK_DURING_MOVE
#endif
// Uncomment the following line to disable heat management during travel moves (and extruder-only moves, eg: retracts), strongly recommended if you are missing steps mid print.
// Probably this should remain commented if are using PID.
// It also defines the max milliseconds interval after which a travel move is not considered so for the sake of this feature.
#define DISABLE_CHECK_DURING_TRAVEL 1000
//// Temperature smoothing - only uncomment this if your temp readings are noisy (Gen6 without EvdZ's 5V hack)
//#define SMOOTHING
//#define SMOOTHFACTOR 16 //best to use a power of two here - determines how many values are averaged together by the smoothing algorithm
//// Experimental watchdog and minimal temp
// The watchdog waits for the watchperiod in milliseconds whenever an M104 or M109 increases the target temperature
// If the temperature has not increased at the end of that period, the target temperature is set to zero. It can be reset with another M104/M109
//#define WATCHPERIOD 5000 //5 seconds
// Actual temperature must be close to target for this long before M109 returns success
//#define TEMP_RESIDENCY_TIME 20 // (seconds)
//#define TEMP_HYSTERESIS 5 // (C°) range of +/- temperatures considered "close" to the target one
//// The minimal temperature defines the temperature below which the heater will not be enabled
#define MINTEMP 5
//// Experimental max temp
// When temperature exceeds max temp, your heater will be switched off.
// This feature exists to protect your hotend from overheating accidentally, but *NOT* from thermistor short/failure!
// You should use MINTEMP for thermistor short/failure protection.
#define MAXTEMP 275
// Select one of these only to define how the nozzle temp is read.
#define HEATER_USES_THERMISTOR
//#define HEATER_USES_AD595
//#define HEATER_USES_MAX6675
// Select one of these only to define how the bed temp is read.
#define BED_USES_THERMISTOR
//#define BED_USES_AD595
//This is for controlling a fan to cool down the stepper drivers
//it will turn on when any driver is enabled
//and turn off after the set amount of seconds from last driver being disabled again
//#define CONTROLLERFAN_PIN 23 //Pin used for the fan to cool controller, comment out to disable this function
#define CONTROLLERFAN_SEC 60 //How many seconds, after all motors were disabled, the fan should run
//This is for controlling a fan that will keep the extruder cool.
//#define EXTRUDERFAN_PIN 66 //Pin used to control the fan, comment out to disable this function
#define EXTRUDERFAN_DEC 50 //Hotend temperature from where the fan will be turned on
//#define CHAIN_OF_COMMAND 1 //Finish buffered moves before executing M42, fan speed, heater target, and so...
//-----------------------------------------------------------------------
// DEBUGING
//-----------------------------------------------------------------------
//Uncomment this to see on the host if a wrong or unknown Command is recived
//Only for Testing !!!
//#define SEND_WRONG_CMD_INFO
// Uncomment the following line to enable debugging. You can better control debugging below the following line
//#define DEBUG
#ifdef DEBUG
//#define DEBUG_PREPARE_MOVE //Enable this to debug prepare_move() function
//#define DEBUG_MOVE_TIME //Enable this to time each move and print the result
//#define DEBUG_HEAT_MGMT //Enable this to debug heat management. WARNING, this will cause axes to jitter!
//#define DEBUG_DISABLE_CHECK_DURING_TRAVEL //Debug the namesake feature, see above in this file
#endif
#endif
|
Re: Y Axis not moving May 14, 2013 04:27PM |
Registered: 11 years ago Posts: 265 |
Throw the RAMPS 1.4 test code firmware into it.
http://reprap.org/wiki/File:RAMPS14_test.zip
It will make all axis move back and forth a little bit.
This will confirm if the Y-Axis motor and Y-Stepper Driver is 100% functional from a wiring, current setting and power supply aspect.
If it works, then the issue must be a sprinter configuration problem or a pronterface problem. (Most likely Endstop, and we can keep troubleshooting down that road)
Don't forget to reset the Arduino once in a while. I noticed that when Sprinter 'thinks' it hit a limit in direction, an axis would not function in one direction, until I reset the Arduino. (basically thinking it's back at 0,0,0)
Edited 1 time(s). Last edit at 05/14/2013 04:29PM by ShadowRam.
|
Re: Y Axis not moving May 14, 2013 06:31PM |
Registered: 10 years ago Posts: 27 |
Just loaded the test code and get the same results, everything works fine except for the Y which does nothing. The guy on ebay I got the Ramps board from said to try and replace the Mega 2560 and if that didn't work he would replace the ramps board ... which was the first thing I ordered and one of the last to come took almost 6 weeks and I'm not waiting another month and a half so going to order another from somewhere closer if the new Mega I ordered doesn't help.
Is there a way I can check that the related connections on the Ramps and/or Arduino boards are right using the multimeter? Sure you can but not sure where to check or what to look for exactly.
I really appreciate the help thanks!
Is there a way I can check that the related connections on the Ramps and/or Arduino boards are right using the multimeter? Sure you can but not sure where to check or what to look for exactly.
I really appreciate the help thanks!
|
Re: Y Axis not moving May 14, 2013 08:28PM |
Registered: 11 years ago Posts: 265 |
Well, there's definitely an electrical issue,
Check out the schematic
[reprap.org]
You can 'repurpose' the second extruder port to be used as your Y-Axis.
All you need to do is drop your Y-Stepper Driver onto the second extruder port, and change the pins around in the firm ware. (Pin.h I think)
Swap
Y-Step for E1-Step
Y-Dir for E1-Dir
Y-ENable for E1-ENable
This may get you up and running.
If you want to troubleshoot out the issue,
Power it up and see if you can move the Y-Axis by hand.
If yes,
I'd start with making sure the Stepper Driver is getting power. (again consult the schematic, and look at the pinout for the stepper driver.)
After that, I'd then check the Y-EN (Enable Pin) and see if the Stepper Driver is getting the signal to be enabled.
If you can't move it by hand,
Stepper is getting power, and holding itself in place.
You will have to check the Y-Step pin and see if it is actually pulsing or not. This might be really hard to do without a oscilloscope. You could try setting the steps/mm in the firmware really low, and set the speed in pronterface to be very low, and see if your multimeter picks up the steps.
Edited 3 time(s). Last edit at 05/14/2013 08:53PM by ShadowRam.
|
Re: Y Axis not moving May 14, 2013 09:48PM |
Registered: 10 years ago Posts: 27 |
Thanks I'll try messing around with the steps/mm and pronterface speed.
I had tried using E1 for Y by changind pins.h and just tried it again but still get nothing. I read something about having to set EXTRUDERS>1 somewhere but I didn't find it in sprinter maybe they were talking about marlin or one of the others ....or I missed it. Think I'm going to give a couple of the other firmware a try can't hurt.
Also I was checking and and all the motors were locking when it was connected including Y even though it didnt move so I assume it was getting power ... but just now I checked again when you mentioned that and Y doesn't lock I can spin it by hand when the printer is connected so now doesn't appear to be getting power.
I mentioned my hot end heats up quick and stays right at the temp set but I haven't gotten the mk2 heat bed to heat up at all yet. The thermastore reads properly and when I first ran the Ramps test code a week or so ago I saw the heat bed leds light up but that was the last and only time it did anyting. The resistor and two small ass surface mount leds were literally the first things I ever tired to solder so there is a very good chance I screwed something up nd maybe blew the leds. I'm getting about 3R for the MK2 when I check from the connections at the heat bed.
I'll try disconnecting the heat bed from the ramps boar and see if that does anything. I have the power supply set to 12.05V and also have a small 12v fan mouted over the board and connected to D9 with the two buttons in pronterface to turn them on and off, haven't had any problems with the fan but maybe I should try disconnecting it and the heat bed and just leaving the motors and hot end.
|
Re: Y Axis not moving May 16, 2013 02:38PM |
Registered: 10 years ago Posts: 27 |
I tried disconnecting everything except for the motors but same thing.
Strange though I decided to try swapping around the drivers again and (powered everything off before doing anything) and I noticed that if I swap the one that I was using for Y with any of the other axis those axis no longer work, if I switch them back they work again. That was the same for all the axis and the extruder. However even when I swapped the Y with one from a working axis the Y still didn't move so I think I may have a combination of problems.
New Mega board should be here any minute I see it's in town and out for delivery. I'll try swapping that out as soon as it gets here and can at least help rule that out and go from there. Checking if I can get the one driver replaced and if the new Arduino board doesn't make a difference I'll try replacing the Ramps.
Let you know how it works out and thanks again for the help!
|
Re: Y Axis not moving May 16, 2013 09:11PM |
Registered: 10 years ago Posts: 27 |
OK making some progress I htink ... my cousin wants to try and build one so I wet through and ordered all the parts with him and his ramps board came in today. I already tired replacing the Arduino which didn't help so he brought over his ramps bord just now and I swapped it out with mine. Now the Y axis is at least trying to move. It's getting power and trying to turn but the belt just shakes a little and it doesn't actualy move the bed.
This leads me to what I think may be my second problem with one bad driver. I mentioned on both boards if I swap the one driver to any of the axis those axis no longer worked ... that was with the old board where the Y didn't move regardless of which driver was installed.
Now with the new board if I swap out that driver I'm using for Y with any of the others the Y moves just fine but which ever one I move it to struggles to move. I set the current to the same on all of them and without adjusting it three of the drivers move all the motors and the one driver just stutters them. I did try tuning up the current on the one that I think may be bad and got about 3/4 of the way with no change. I'm assuming I had two problems 1. bad ramps board or at least something wrong with whatever is related to the Y axis pins/connections and 2. possibly one bad stepped driver.
My cousin's stepper drivers will be in tomorrow so I'll be able to try those out and confirm wheither or not that's the problem.
Thanks and at least making some headway.
|
Re: Y Axis not moving May 17, 2013 09:10AM |
Registered: 11 years ago Posts: 265 |
|
Re: Y Axis not moving May 17, 2013 09:42AM |
Registered: 10 years ago Posts: 27 |
I originally did have two of the motor wires reveresed on all of them when I first connected everything up. After correcting the wires they started working.
I think it's the stepper since if I use any of the other stepper drivers with the Y .. or any other axis ... they all move just fine. It's just this one stepper driver that causes any motor it's connected to stutter (doesn't even really stutter just barely wiggles the belt a little when I try to move it in any direction), if I switch any of the axis with any of the other drivers they move perfectly.
Should have a new stepper driver to try later today and can confirm wheither that's causing the problem.
Edited 1 time(s). Last edit at 05/17/2013 09:43AM by MD2013.
|
Re: Y Axis not moving May 21, 2013 12:09AM |
Registered: 10 years ago Posts: 27 |
Man making one of these will sure toil with your emotions! Went from elated to basically right back to where I was in about 15 minute span 
So I got new stepper drivers in today (actually my cousin's finally came still haven't got mine yet) and swapped out the Y driver that I thought wasn't working for a new one. All the axis were moving perfectly, AWESOME ... except the extruder wasn't working anymore ???
It was moving fine until I changed the Y stepper then not sure why but it just stopped working. That's the only thing I did was swap the one driver (power off), no firmware or other changes of any kind. I have spare Ramps and Mega boards now since I bought new ones of each to rule those out maybe I can try those but doesn't make any sense.
I decided to try using E1 and after changing pins.h it started working! So at that point everything was working and I I was able to home all my axis without any problem, was working great and I was going to start calibrating all th axis but first I wanted to change the X idler and motor mounts since both had cracked slightly and I still had PLA bushings on them which I wanted to change to metal. I removed everything for the X axis and swapped out the parts with the two new replacement X plastic pieces I was sent along with the metal bushings, was actually not as bad as I thought guess I've taken it apart so many times by now it's getting easy .. not sure if that's a good or bad thing.
Anyway I put it back together and reconnected exactly how it was. All my axis worked great and move really nicely but now the extruder isn't moving again. Doesn't lock the motor or anything like it's not getting power. I tried going back to E0 but same thing nothing with the extruder like it has no power. Again doesn't make sense .. to me at least.
The only other thing I have connected besides the motors is the hot end and therm both of which seem to be working fine.
Not sure what I to do at this point, I check the voltage from the power supply and it's always right at 12.01-12.02 doesn't really fluctuate regardless what moving.
|
Re: Y Axis not moving May 21, 2013 01:09AM |
Registered: 11 years ago Posts: 187 |
Does the extruder work if you connect it to another axis and move that? Did you try wiggling the motor connector? It's very easy to screw things up when crimping the molex connectors to where it works sometimes but not always. I had to practice quite a bit before I could make a reliable connection. I'm glad I bought way more extra pins than I thought I would need. Also, did you buy your stepper drivers with the pins pre-solderded or did you solder them yourself? In either case, make sure they are soldered correctly and there are no loose connections. Bad connections or solder joints are a very likely cause of your problems.
|
Re: Y Axis not moving May 21, 2013 02:21AM |
Registered: 10 years ago Posts: 27 |
Thanks!! That was the problem I had a crappy solder job on one of the wires and it came a little loose when I took things apart. Resoldered it and not it's working. Does what it was doing sometime sin the past where it can't seem to decide if it wants to go forward or backwards but I'm going to just redo that whole connection tomorrow which shuld fix the problem since if I just swap the cable that I'm using for one of the other axis it runs perfectly.
Thanks again for everyone's help!
Thanks again for everyone's help!
|
Re: Y Axis not moving May 21, 2013 03:00AM |
Registered: 10 years ago Posts: 27 |
|
Re: Y Axis not moving -SOLVED- May 22, 2013 06:56PM |
Registered: 10 years ago Posts: 27 |
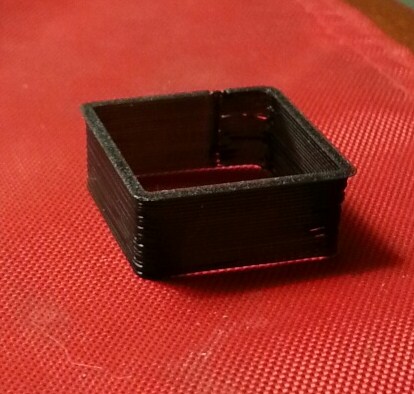
It's alive!!
Can't thank everyone enough for all the help!! Got everything leveled up and calibrated and the extruder all set and just ran the first thin wall test print, I guess by this point I figured something would go wrong but it came out a hundred times better than I expected!
I have the heat bed connected but didn't power it on wanted to try without heating it. I used blue painters tape over the glass over the "cold" heatbed. Have two layers of cork board under the heatbed. The piece stuck perfectly and popped right off with a little pressure on one corner.
Man I'm happy!! Can't wait to get everything else dialed in and start printing for real!
I think I'm going to put this thing on a necklace or something, can't believe how proud I am of a little plastic square
THANKS AGAIN!!!!!
Edited 2 time(s). Last edit at 05/22/2013 06:58PM by MD2013.
|
Re: Y Axis not moving May 23, 2013 09:50AM |
Registered: 11 years ago Posts: 265 |
|
Re: Y Axis not moving May 23, 2013 11:33PM |
Registered: 10 years ago Posts: 27 |
So far so good I'm loving this thing now! 
Printed the second calibration cube and since it came out well and my kid wanted to watch something print I tried the Mr. Shark Clip from thingiverse, he loved it.
My cousin who wants to build one now ordered the Prusa i3 parts by mistake but turned out better to me since I'd rather try something different than another of the same. He was looking for 5mm couples to use instead of tubing so figured try and print some. Printed a pair of the i3 flex couplers from thingiverse and they came out pretty good. I think I may have had the hot end temp a little too high but for the fourth thing printed they came out really well and we installed them on his i3 tonight .. they work .
.
Edited 1 time(s). Last edit at 05/23/2013 11:34PM by MD2013.
Printed the second calibration cube and since it came out well and my kid wanted to watch something print I tried the Mr. Shark Clip from thingiverse, he loved it.

My cousin who wants to build one now ordered the Prusa i3 parts by mistake but turned out better to me since I'd rather try something different than another of the same. He was looking for 5mm couples to use instead of tubing so figured try and print some. Printed a pair of the i3 flex couplers from thingiverse and they came out pretty good. I think I may have had the hot end temp a little too high but for the fourth thing printed they came out really well and we installed them on his i3 tonight .. they work
.
Edited 1 time(s). Last edit at 05/23/2013 11:34PM by MD2013.
|
Re: Y Axis not moving March 14, 2019 03:13PM |
Registered: 5 years ago Posts: 2 |
Hello,
I recently tried to build a CNC drawing machine by using CNC sheild v3, a4988 stepper drivers with loaded grbl firmware in Arduino UNO.
when I tried to axis control by using grbl controller, only x-axis steppr will move, y- axis stepper doesn't moves but when I unplug the x-axis stepper, then y-axis stepper starts moving , both steppers not moving together, only x-axis stepper moves when both steppers are in connected with cnc shield.
Can anybody tell what problem is this....?
|
Re: Y Axis not moving March 15, 2019 04:01AM |
Registered: 5 years ago Posts: 2 |
Hello,
I recently tried to build a CNC drawing machine by using CNC sheild v3, a4988 stepper drivers with loaded grbl firmware in Arduino UNO.
when I tried to axis control by using grbl controller, only x-axis steppr will move, y- axis stepper doesn't moves but when I unplug the x-axis stepper, then y-axis stepper starts moving , both steppers not moving together, only x-axis stepper moves when both steppers are in connected with cnc shield.
Can anybody tell what problem is this....?
I recently tried to build a CNC drawing machine by using CNC sheild v3, a4988 stepper drivers with loaded grbl firmware in Arduino UNO.
when I tried to axis control by using grbl controller, only x-axis steppr will move, y- axis stepper doesn't moves but when I unplug the x-axis stepper, then y-axis stepper starts moving , both steppers not moving together, only x-axis stepper moves when both steppers are in connected with cnc shield.
Can anybody tell what problem is this....?
Sorry, only registered users may post in this forum.