Home
>
Reprappers
>
Topic
QuadRap
Posted by shauki
Hello dear RepRapers!
I am new to building 3D printers, but looks like going to introduce something new:
The frame, just started blogging [quadrap-3d-printer.blogspot.de]
Very optimistic to introduce soon a multicolor extruder compatible with RAMPS 1.4
Hope to be interesting and gather warnings from experts before falling into mud
Shauki
|
Re: QuadRap May 21, 2013 04:02PM |
Registered: 11 years ago Posts: 265 |
I think you are going to get a lot of unintended flexing of that small aluminum tubing over that length.
Also, I've read that it's hard to get the steppers up to a high enough speed for threaded rod instead of using a belt to get any kind of meaningful print speed.
Good luck though, and keep us posted.
Also, I've read that it's hard to get the steppers up to a high enough speed for threaded rod instead of using a belt to get any kind of meaningful print speed.
Good luck though, and keep us posted.
|
Re: flexing & speed May 22, 2013 03:19AM |
Registered: 10 years ago Posts: 45 |
Two factors I count on regarding flexing:
I will test the fact of flexing by letting the head scan the complete printable volume several times. (By "printing" a huge cube without filament).
Regarding speed, as far as I saw, the stepper driver is being often used with resolution of 1/16 step and it is mainly used for the Z axis. I shall use a full step for the horizontal directions and hope the printing speed will then be acceptable.
Thanks!
Edited 1 time(s). Last edit at 05/22/2013 03:19AM by shauki.
- 1) The bearing setup allows easy adjusting of the gap
2) Heavy flex can take place in three beams (horizontal guides) of total 13 used in the structure. The beams are compatible and can be swapped: the warn two horisontal guides can be replaced with the horizontal upper ties. When all four are warn out, then all four can be used for the legs and the legs come into the horizontal structure elements, then the ones in the bottom of the frame and so on.
I will test the fact of flexing by letting the head scan the complete printable volume several times. (By "printing" a huge cube without filament).
Regarding speed, as far as I saw, the stepper driver is being often used with resolution of 1/16 step and it is mainly used for the Z axis. I shall use a full step for the horizontal directions and hope the printing speed will then be acceptable.
Thanks!
Edited 1 time(s). Last edit at 05/22/2013 03:19AM by shauki.
|
Re: QuadRap May 22, 2013 08:46AM |
Registered: 11 years ago Posts: 265 |
I'm not talking about permanent flexing. The mass and movement of your system will cause major inaccuracies at your hotend tip.
For a frame that larger you should be using Structure Framing
So the fact you can swap out parts of the frame is irrelevant.
The reason full step isn't used on stepper motors is because they create a lot of vibration.
Since your frame isn't very rigid, that vibration will be astronomical.
If you are limited by the materials that you currently have, I would recommend chopping all of that down to at least a 1/4 of the work-envelope you have there.
|
Re: Structure Framing & Chopping Down May 22, 2013 10:19AM |
Registered: 10 years ago Posts: 45 |
My plan is to use the most available affordable profiles.
The structure rigidity in static mode is very impressive due to the self-alignment of the profiles in the corner nodes.
Soon I will see how it vibrates when the steppers run and inform you with a posted video.
Before chopping down it is possible to do two things to increase regidity:
a) add cross bars
b) pin couple corners of the frame to the wall
Chopping down will be done in any case for producing the smaller versions of the QuadRap having the same drive setup and firmware.
|
Re: QuadRap May 24, 2013 06:11PM |
Registered: 12 years ago Posts: 1,236 |
I think everyone who uses threaded rod for X-Y always ends up replacing with belts. You could use high-lead leadscrews, at extra cost and more powerful motors.
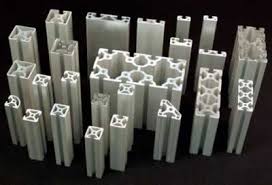
The frame looks too light given the volume. I think I would be using at least 40mm profiles.
I like the carriage idea, simple and compact. What type of bearings are those?
The frame looks too light given the volume. I think I would be using at least 40mm profiles.
I like the carriage idea, simple and compact. What type of bearings are those?
|
Re: Bearings for Carriages May 25, 2013 10:37AM |
Registered: 10 years ago Posts: 45 |
Where can I find belts, that will satisfy my need of printing parts 800x800x800mm?
If no such belts are available I will use rods. I am giving the standard M8 rod a try first.
If the used 20mm profiles appear to be not rigid enough for normal operation then I will part them into two smaller QuadRaps (700mm³&300mm³), test each and use 30mm profile cross section for the next 1m³ QuadRap attempt.
I bought the bearings from here:
www.pollin.de/shop/suchergebnis.html?S_TEXT=Kleinstkugellager&log=internal&recommend=true
I reduced the total number of bearings now per carriage to 6 and it looks lighter and shorter than the first version with 8 bearings per carriage.
Edited 1 time(s). Last edit at 05/25/2013 10:38AM by shauki.
|
Re: Bearings for Carriages May 25, 2013 03:34PM |
Registered: 12 years ago Posts: 1,236 |
shauki Wrote:
-------------------------------------------------------
> Where can I find belts, that will satisfy my need
> of printing parts 800x800x800mm?
Anywhere? I don't see the problem. You seem to have some unstated requirements behind this. There are some large format printers using belts (at least for X and Y) e.g. [www.kickstarter.com] and I don't think there is any special requirements.
>
> If no such belts are available I will use rods. I
> am giving the standard M8 rod a try first.
Well, in your OP you said you wanted warnings from experts. Sounds like you actually want to learn by making your own mistakes. That is fine, but the consensus is pretty much avoid threaded rod for X and Y (it's just about OK for Z). The quality and lead of standard rod is quite poor. People usually spend some time trying to work around that before abandoning them.
> If the used 20mm profiles appear to be not rigid
> enough for normal operation then I will part them
> into two smaller QuadRaps (700mm³&300mm³), test
> each and use 30mm profile cross section for the
> next 1m³ QuadRap attempt.
Yes, you could do that. Or just start with something appropriate for the size. Again, feel free to ignore advice from others who have been there before. I guess if you bolt the frame to the floor and two walls it might be OK
|
Re: QuadRap May 25, 2013 07:46PM |
Registered: 11 years ago Posts: 256 |
I too am building a large format printer, through not quite as large as the design you have presented. If I may offer some advice, it is as follows. The larger your printer is going to be, the more critical is rigidity to it's ability to function in any satisfactory way. The requirements to achieve this rigidity increase exponentially with size, this requirement is reflected in the stiffness of the material used, as well as the method of attachment. I will concur wholeheartedly with Shadowram that structural aluminum extrusions would be a better choice, and I would go rather large on those. A good static test would be to see how much you can flex your frame members by simply applying slight pressure to them, as well as pushing on a corner and seeing if there is any deflection. The amount of deflection you get will be the typical error you can expect while printing as a minimum, so is you are able to deflect your corners by say 3/8 of an inch ( around 10 mm) then you should not expect to typically be able to stack layers of filament vertically. One consideration is that in operation, you have dynamic weight which will cause a great deal of flex in the corners, which may be bolted tightly, however are not reinforced sufficiently to counteract the flexing that will be caused by the weight of your motors. You can get aluminum extrusions and corner braces and not need to use printed parts. My printer which will print approx 14"x, 27"y, 15"z is built in a steel frame, with thicknesses ranging from 1/8" (which is 1" thick tubing) to 3/8" angle for the legs. Is is a single weldment which when finished id made up from 48 individual machined pieces of steel. It looks like the final weight will be 225 - 250 lbs. It will not flex. Trust me. But I am not necessarily recommending this building method for most people because it requires a machine shop, multiple welding disciplines and about a month to do, and that excludes the rest of the parts. The material is not much more expensive than say the frame for a mendelmax 1.5, the point is, you are going to have to buy the electronics, motors and everything else regardless. You ask for help, and we are here to help. Is does not matter if you have yet to print or have been at it for a while, we all have questions from time to time, and chances are when one of us has a question, someone else has just worked through or researched the same issue. So I recommend you ask yourself what sort of objects you really are looking to print, and then move forward to achieve those goals successfully. I think that if you want to do size for it's own sake on a shoestring, you are more likely to end up in frustration, than if you start by scaling back on the size, for now, and give yourself more of an opportunity to get a printer going that will allow you a better chance of success. You can always scale up later, and transfer many of your parts to a bigger printer once you get a feel for the way it all works.
|
Re: Heads Up June 05, 2013 03:57PM |
Registered: 10 years ago Posts: 45 |
Gentlemen,
Thanks for the head ups!
Your considerations I have understood and shall go on risking nailing two corners of the frame to the walls (if needed): still an attractive option for a RepRap of a 1mx1mx1m size with cost less than $100 in mechanical parts
Was busy putting up together RAMPS1.4 with Arduino and Pololu A4988. Surprised that often get Pololus with broken pots or SMD components and cannot return them back because unpackaged.
Could you please advice, where is it possible to get these components separately without spending again min $10 for an A4988?
By having already three damaged Pololus A4988 (Black Edition) I could probably swap the components to get (hopefully) one running...
|
Re: what sort of objects I really am looking to print June 05, 2013 04:06PM |
Registered: 10 years ago Posts: 45 |
Well, a standard descendant of RepRap I could buy, but really need large printouts for preparing curvatured concrete forming.
The printed forming will be covered with reinforcement and protection materials. Available printers (if any) will cost a fortune, right?
The smaller version (obviously more rigid without nailing) I will build when writing and debugging the firmware for the multi-color extruder I hope to present soon.
|
Cooling Pololus June 06, 2013 04:46PM |
Registered: 10 years ago Posts: 45 |
Have just posted Pololu Heat Sinks Comparison
Perhaps interesting, or valuable ideas before I glue the sinks to the final board...
Perhaps interesting, or valuable ideas before I glue the sinks to the final board...
|
Re: QuadRap June 06, 2013 08:00PM |
Registered: 10 years ago Posts: 24 |
|
Re: QuadRap June 09, 2013 02:38PM |
Registered: 10 years ago Posts: 45 |
|
Second Vibration Test June 10, 2013 04:38PM |
Registered: 10 years ago Posts: 45 |
|
Final Vibration test June 11, 2013 03:03PM |
Registered: 10 years ago Posts: 45 |
|
Re: Final Vibration test June 11, 2013 04:53PM |
Registered: 12 years ago Posts: 1,236 |
I guess it would be pretty bad if the frame showed vibration in that test. The frame will vibrate most at a particular resonant frequency, it is unlikely that testing with a fixed stepper speed will hit that frequency. I think you would need to sweep the steppers through a range of speed in order to find it.
However, that is a minor point. The real test is what happens when you are moving the Y and X axis with an extruder attached.
However, that is a minor point. The real test is what happens when you are moving the Y and X axis with an extruder attached.
|
Re: Final Vibration test June 11, 2013 09:40PM |
|
QuadRap Reconfiguration June 12, 2013 04:39PM |
Registered: 10 years ago Posts: 45 |
Gentlemen,
I appreciate you following this thread!
I counted your considerations but since I've already had the components on-hand, I wanted to go throught the experience and document it. You knew already that the threaded rods are not good for the horizontal movement and I've recorded that it is the case.
Today I made an enquiry to igus.de abot rods with 10mm step rods (10 times more speed): each rod cost 10 times more than a regular one PLUS about 35 Euro for each nut!
I am switching to belt drive for speed/cost/time winn.
Can anyone recommend a supplier for an endless toothed blet longer than two mters?
Please remember my task: light big cheap RepRap(RepStrap???)!
The regidity of the frame is not the problem as long as it is possible to anker to walls. The frame alone cost less than 50 Euro, bearings and accessories - less than 40 Euro. Precision of compleetion and assembly is "natular simple and effective".
I think it is an interesting task to make the 3D jet printing as cheap and available as possible and I am gifing it my flame.
Most of your impressive projects require high level of skills and/or supply.
Please think with me of a plan, that each kid in the school (parents) could afford a 3D printer! Then when kids go through:
1) Mechanical works (cutting, drilling), etc.
2) Assembly
3) Electrical (at least wiring)
4) Electronic (at least soldering)
5) Programming (at least loading the Firmware and calibrating)
6) Modelling (at least downloading a ready 3D model)
7) Design - using the printer as a normal regular instrument and presenting ideas in solid of (houses, product, etc.)
Then she/he can better decide for the future which of those directions to choose for the profession
I am working on building the 3D printer that kids of our town could build in a week of time and enjoy the results.
Personally interested in large area printouts for concrete forms and trying to combine both interests (affordable easy to build AND big).
I could go on with the threaded rods as the last video reported, but I agree that speed is important for idle traverse and I think so for the case of attended 3D printing: I could leave the printer working days and nights, but it is more relaiable to watch it finishing the job while I'm finishinfg my third beer, right? The quality of the filament still a big deall or?
Perhaps for educational purposes the demonstrated speed is okay?...
I am searching for long belts available for "school price". I could buy golden ones, but that is not interesting at all. Any helpfull ideas?
Edited 1 time(s). Last edit at 06/12/2013 04:42PM by shauki.
|
Re: moving the Y and X axis with an extruder attached June 12, 2013 04:48PM |
Registered: 10 years ago Posts: 45 |
|
Faster, Lighter, Cheaper June 13, 2013 02:14PM |
Registered: 10 years ago Posts: 45 |
|
Re: Faster, Lighter, Cheaper June 13, 2013 09:07PM |
Registered: 10 years ago Posts: 24 |

|
Re: Totorial to Reproduce June 14, 2013 02:52AM |
Registered: 10 years ago Posts: 45 |
|
Re: Totorial to Reproduce June 14, 2013 11:56AM |
Registered: 10 years ago Posts: 24 |
|
First Packing Tape Drive June 14, 2013 03:24PM |
Registered: 10 years ago Posts: 45 |
|
X-drive with Packing Tape June 15, 2013 03:43PM |
Registered: 10 years ago Posts: 45 |
|
First QuadRap Drawing June 16, 2013 12:38PM |
Registered: 10 years ago Posts: 45 |
|
Re: First QuadRap Drawing June 16, 2013 01:13PM |
Registered: 10 years ago Posts: 24 |
|
DirectDrive Extruder with Spark Wheel - Lift Test 3 June 21, 2013 02:39PM |
Registered: 10 years ago Posts: 45 |
First I would like to thank erickwill for his moral support that definitively has positively influenced me going further with my plan!
Dear "RapHeads", I invite you to have a look at DirectDrive Extruder with Spark Wheel - Lift Test 3 and kindly ask you to share your experimental findings with extruders on your hands.
Dear "RapHeads", I invite you to have a look at DirectDrive Extruder with Spark Wheel - Lift Test 3 and kindly ask you to share your experimental findings with extruders on your hands.
|
Re: DirectDrive Extruder with Spark Wheel - Lift Test 3 June 21, 2013 06:50PM |
Registered: 10 years ago Posts: 24 |

Sorry, only registered users may post in this forum.