Home
>
Reprappers
>
Topic
Z-corp Powder to Filament Retofit
Posted by Schultz
|
Z-corp Powder to Filament Retofit April 29, 2014 11:24PM |
Registered: 15 years ago Posts: 49 |
I figured I would start with some background to the project:
This is a printer that we have at work and it's been in operation for the last 10 years. It's gotten cost prohibitive to maintain and last year the HP inkjet print heads have become obsolete. Back in December we bought all we could find on the net, which was only 15. It used about 6-9 print heads ($40/ea) on each build along with about $400-800 in materials depending on part size. Then having a powder model required post processing in order to use the brittle parts.
In January we purchased an Airwolf 3d HD. When we first got it we had three projects that needed parts. It was being used for small stuff during the day and larger/longer prints at night continuously for about 3 weeks. Now it's used about 4 times a week. The big restriction is the small size 8x12x10". We needed something like the Z-corp but a filament printer. Since the Z-corp is still very solid and very tight on all it's ways we decided to retro fit it.
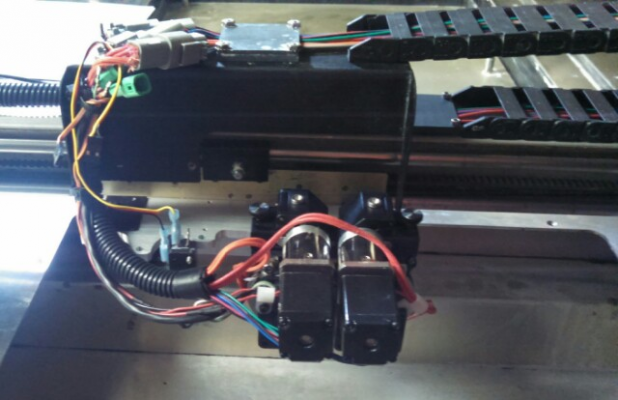
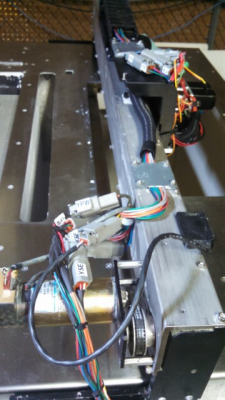
If you've every worked with a powder printer they are very messy. There was powder coating every part on the machine and the surrounding area. We must have vacuumed 10lbs of powder out of it, not to mention removing all the powder in the hopper. After that we began removing all the control boards and wires, then the powder feeder, and other powder items on the x - y carriage. Below are some pics of the machine as it is today.
This printer is very large and heavy. With the lid up it's nearly 10' tall. I had to use the panoramic shot on my phone camera to get it all in.
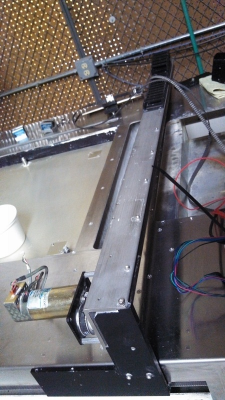
The X-Y carriage is about 3' wide and allows print head to fully retract to one side off the platen. We removed about 20lbs of powder printing parts from this and will be adding back about 2lbs for the new print heads. It should run a lot smoother, maybe faster too.
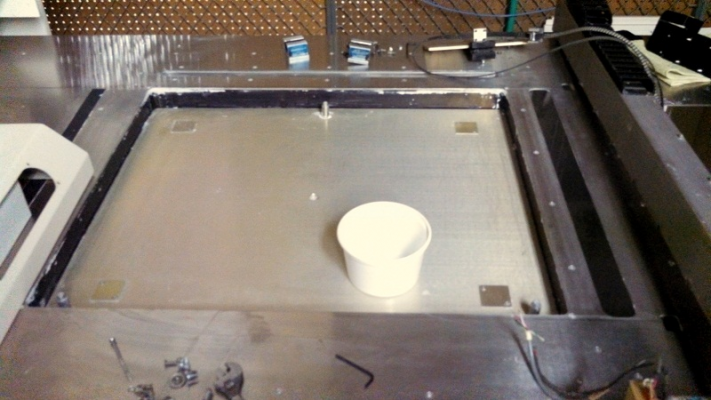
The platen is 24x30" The actual platen will be a heated aluminum plate that sits on the three pins in the picture. More on that later.
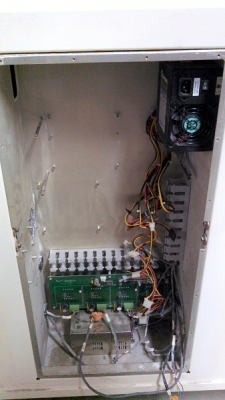
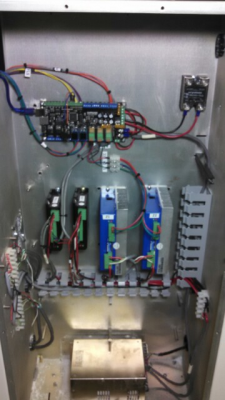
The control box with most of the stuff removed. We need to remove the stepper driver yet. We will reuse the 12 & 24 vdc power supplies. We will be mounting the Azteege X3 Pro, along with 2 servo drives, and 2 stepper drives. The z-axis uses 4 four amp steppers. X and Y use DC servos.
Recently we have bench tested the Azteeg with the extruders, and all the motor drivers. We were able to get everything to home, jog, heat, and extrude.
In the next couple weeks we plan to move it to a better lit and temperature controlled room, Add the Micron EME dual print heads, mount the controls and begin wiring the unit. This has been a side project for me and one other guy at work. We work on it at lunch and here and there throughout the week.
Edited 1 time(s). Last edit at 04/29/2014 11:24PM by Schultz.
|
Re: Z-corp Powder to Filament Retofit April 29, 2014 11:32PM |
Registered: 10 years ago Posts: 474 |
|
Re: Z-corp Powder to Filament Retofit May 23, 2014 01:57PM |
Registered: 15 years ago Posts: 49 |
We made some progress the week. We have almost everything wired. We need to wire the heated bed, and the thermistors from the hot ends.
So far we have gotten it to home and move around, however I need to figure out how to use the z-probe for auto bed leveling for the z home switch. I'll be playing with that section of the firmware next.
Machine basics:
Marlin firmware
Azteeg X3 Pro controller
The machine uses all the same stepper motors for the z and servo motors for the x and y that it originally came with.
For the Z-axis: Two stepper drivers wired in parallel for step/direction and each is running running two 4 amp steppers that are wired in series. There is a screw drive at each corner of the build plate.
For x and y axis there are two servo drives with encoders that are operating off step and direction form the Azteeg controller. The encoders feedback to the driver to keep position. Both axis are on ball bearing guides and belt driven.
The extruders/hot end are Micron.
|
Re: Z-corp Powder to Filament Retofit May 23, 2014 03:47PM |
Registered: 10 years ago Posts: 474 |
|
Re: Z-corp Powder to Filament Retofit May 23, 2014 05:54PM |
Registered: 10 years ago Posts: 1,381 |
Looking forward to following your build.
Screw drive = lead screw, or worm gear/wheel?
I'm thinking of wiring together 2 NEMA 23, what size steppers are you using?
Tks.
Edited 1 time(s). Last edit at 05/23/2014 06:41PM by A2.
Quote
Schultz
For the Z-axis: Two stepper drivers wired in parallel for step/direction and each is running running two 4 amp steppers that are wired in series. There is a screw drive at each corner of the build plate.
Screw drive = lead screw, or worm gear/wheel?
I'm thinking of wiring together 2 NEMA 23, what size steppers are you using?
Tks.
Edited 1 time(s). Last edit at 05/23/2014 06:41PM by A2.
|
Re: Z-corp Powder to Filament Retofit May 23, 2014 06:40PM |
Registered: 15 years ago Posts: 49 |
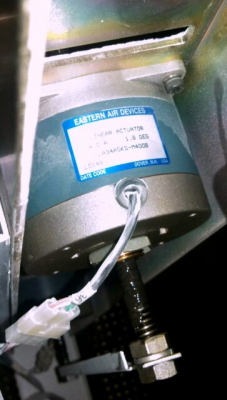
On Tuesday I can get a pic of the z motors. They are 4 amp, NEMA 34, steppers with lead screws through the center. The steppers were already on the powder printer, I was just using what was there. I think Z-corp used large motors because it would get quite heavy when it was loaded with powder.
|
Re: Z-corp Powder to Filament Retofit May 23, 2014 06:42PM |
Registered: 10 years ago Posts: 1,381 |
|
Re: Z-corp Powder to Filament Retofit May 24, 2014 05:49PM |
Registered: 15 years ago Posts: 49 |
|
Re: Z-corp Powder to Filament Retofit October 02, 2016 01:10PM |
Registered: 7 years ago Posts: 1 |
This looks like some really great work here! We are just starting a Z510 retrofit for a bioprinting project. We are keeping it powder-based, but opening up the materials and processes by converting it to syringe-based printing and moving to an open-source control platform.
The first challenge that is stumping me seems to be one that you solved - controlling the servos. Can you provide some more info on the servo drivers you are using and how all of that works with the firmware.
Thanks!
Ryan
The first challenge that is stumping me seems to be one that you solved - controlling the servos. Can you provide some more info on the servo drivers you are using and how all of that works with the firmware.
Thanks!
Ryan
Sorry, only registered users may post in this forum.

