Home
>
Reprappers
>
Topic
Wilson TS build log
Posted by TheHackerArtist
|
Wilson TS build log June 02, 2014 08:28PM |
Registered: 9 years ago Posts: 67 |
Hello RepRap community.
I'm happy to say I'll soon be hopping on the RepRap ship. I've learned a lot from this forum and the RepRap wiki ( Thanks to the awesome community!) and am about to attempt my first build.
I decided to build a Wilson TS, designed by mjrice. It seemed like a sturdier design the the i3.
I sourced the plastic pieces and mechanical components through ebay, directly from mjrice! Great guy! Everything arrived well ordered and safely packaged.
I ordered my bipolar nema 17 steppers from automation technologies
For the J-head I went for the Geeetech all metal j-head. Got it off ebay
Here's a link to the other components if you're curious, all through ebay Canada ( I'm in Montreal):
RAMPS + 5 x Stepsticks
100K ohm thermistor
Mechanical end-stops
5 x 5mm couplers
Mk2 Heatbed
12864 LCD display
Hobbed bolt
I already had the Arduino Mega. All I'm waiting for now are the end-stops and the precision rods and aluminium extrusions, which I ordered from Misumi!
I'll start fiddling with the electronics and keep you posted with the build! I'll certainly have questions and issues along the way and I'll gladly share my concerns and discoveries with you!
Till then.
Edited 3 time(s). Last edit at 06/02/2014 08:32PM by TheHackerArtist.
TheHackerArtist
|
Re: Wilson TS build log June 06, 2014 03:06AM |
Registered: 9 years ago Posts: 67 |
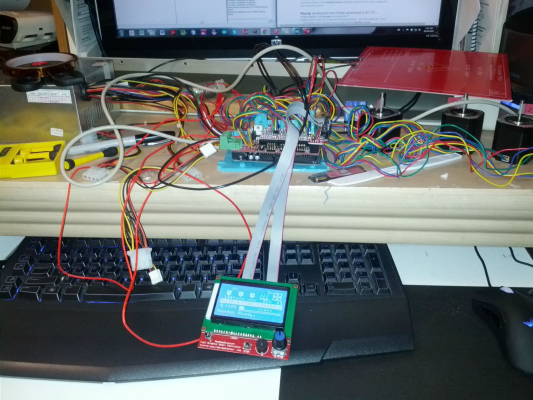
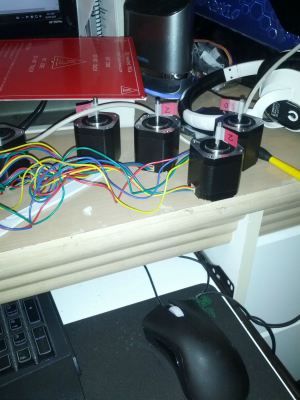
I've finally found some time to get all the electronics wired up and tested. The process went smoothly.
Everything seems to work like a charm, although I`m not sure about setting the stepper motors amperage. The steppers are remarkably silent, a lot more then what I expected after watching related YouTube video. I guess automation technologies have high quality steppers? I based myself off of this video to set them up. (See 14:26) If you know of a better way to go about determining the amperage for the steppers, I`d be glad to check any links out.
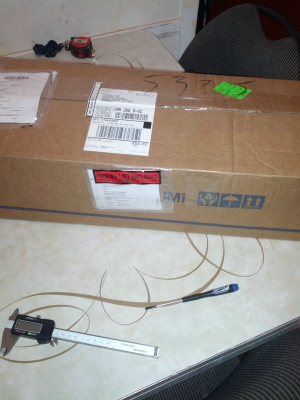
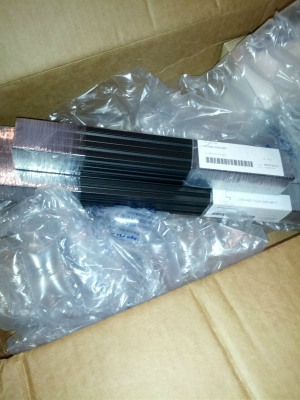
Apparently the box from MiSUMi had been sitting under the table of my patio for a while and I only acknowledged that today! The mail men must have put it there seeing I was not home
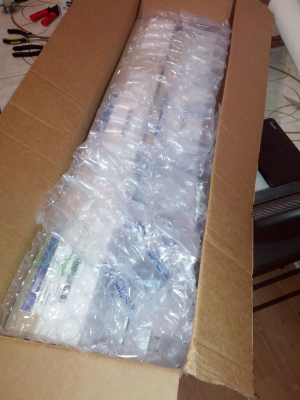
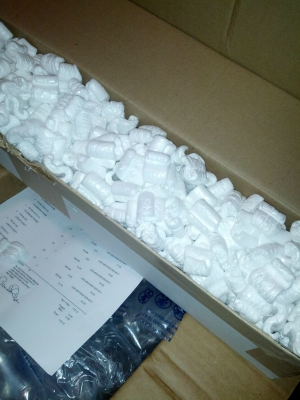
Here`s a couple of pics. I was impressed by the packaging quality! MiSUMi
Box in a box
So all I`m missing now is a MDF board, a glass sheet, filament and some way to hold fishing line on the steppers.
That`s right, fishing line. I decided to go that route because It was cheaper and apparently more accurate then pulleys. I would like something like the dual spool used on the rostock 3D printer I`ll need to do a couple of mods to the mechanics here and there put nothing I can't handle
I`ll keep you updated with the mechanical build!
TheHackerArtist
Everything seems to work like a charm, although I`m not sure about setting the stepper motors amperage. The steppers are remarkably silent, a lot more then what I expected after watching related YouTube video. I guess automation technologies have high quality steppers? I based myself off of this video to set them up. (See 14:26) If you know of a better way to go about determining the amperage for the steppers, I`d be glad to check any links out.
Apparently the box from MiSUMi had been sitting under the table of my patio for a while and I only acknowledged that today! The mail men must have put it there seeing I was not home

Here`s a couple of pics. I was impressed by the packaging quality!
 MiSUMi
Box in a box
So all I`m missing now is a MDF board, a glass sheet, filament and some way to hold fishing line on the steppers.
That`s right, fishing line. I decided to go that route because It was cheaper and apparently more accurate then pulleys. I would like something like the dual spool used on the rostock 3D printer I`ll need to do a couple of mods to the mechanics here and there put nothing I can't handle

I`ll keep you updated with the mechanical build!
TheHackerArtist
|
Re: Wilson TS build log June 08, 2014 12:05AM |
Registered: 9 years ago Posts: 67 |
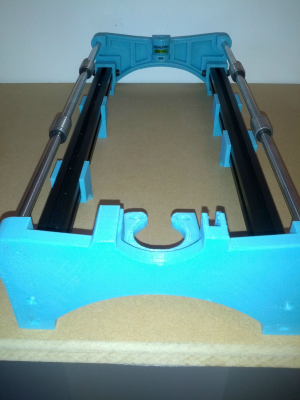
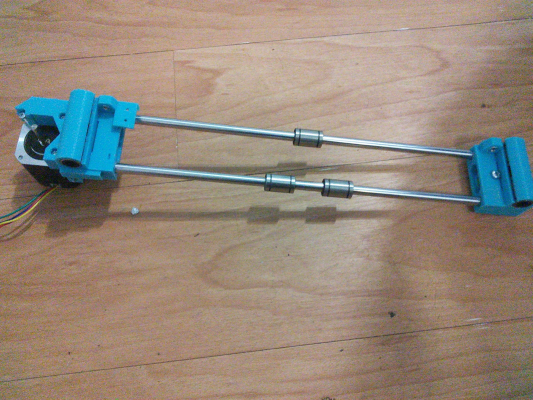
I've completed the X axis, following the build instruction video ( Thanks for that Marty!)
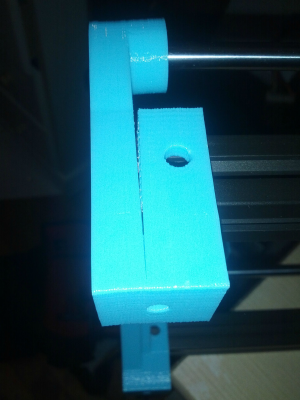
I unfortunately cracked one of the end plastic pieces. I'll partly blame the design, partly blame the fact that obviously put way too much force on there. Maybe adding a curved section at the joint where the failure initiated would allow for better resistance against propagation of cracks caused by poor layer-layer adhesion or small gaps which are likely to be present on a printed part ? ( thoughts?) (Once I'll be done I'll update the part in sketch up before I print another set of printed parts and I'll share the files if you want)
Here are the pics:
Fortunately, after everything is bolted in place the extrusion are of the same length and everything is parallel so the crack should not affect anything.
Things I learned :
Don't flip the extrusion upside down to push them into the second plastic end piece. The T-nuts will fall out...
Next up : The upright frame!
Edited 2 time(s). Last edit at 06/08/2014 03:44AM by TheHackerArtist.
I unfortunately cracked one of the end plastic pieces. I'll partly blame the design, partly blame the fact that obviously put way too much force on there. Maybe adding a curved section at the joint where the failure initiated would allow for better resistance against propagation of cracks caused by poor layer-layer adhesion or small gaps which are likely to be present on a printed part ? ( thoughts?) (Once I'll be done I'll update the part in sketch up before I print another set of printed parts and I'll share the files if you want)
Here are the pics:
Fortunately, after everything is bolted in place the extrusion are of the same length and everything is parallel so the crack should not affect anything.
Things I learned :
Don't flip the extrusion upside down to push them into the second plastic end piece. The T-nuts will fall out...

Next up : The upright frame!
Edited 2 time(s). Last edit at 06/08/2014 03:44AM by TheHackerArtist.
|
Re: Wilson TS build log June 09, 2014 06:48PM |
Registered: 11 years ago Posts: 89 |
|
Re: Wilson TS build log June 09, 2014 09:11PM |
Registered: 9 years ago Posts: 67 |
Ya I could have done that put didn't have crazy glue on hand. But, as I said, everything is parallel and the lengths match up so I'll live with the crack.
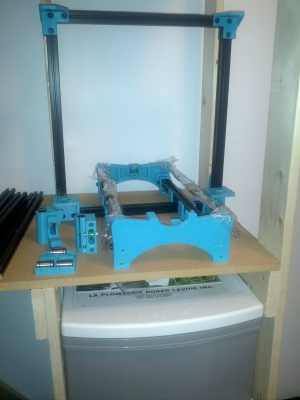
I've put the upright frame together
Now i'm having issues with getting the x axis smooth rods to fit into their holes. I have to find a way to drill it straight but I don't have a drill press or any for of fancy equipment...
Edited 1 time(s). Last edit at 06/10/2014 01:02AM by TheHackerArtist.
I've put the upright frame together
Now i'm having issues with getting the x axis smooth rods to fit into their holes. I have to find a way to drill it straight but I don't have a drill press or any for of fancy equipment...
Edited 1 time(s). Last edit at 06/10/2014 01:02AM by TheHackerArtist.
|
Re: Wilson TS build log June 15, 2014 11:48AM |
Registered: 13 years ago Posts: 134 |
Keep at it TheHackerArtist. I, too, plan to build a TS. Following this thread.
What is your power supply plans?
Have you seen RichRap's filament spool post.
Edited 1 time(s). Last edit at 06/15/2014 11:55AM by BoriSpider.
__________________________________________________________________________
"I like to be, what I like to see, in you and me.
I am the Stallion, Mang."
ISTAR Scope Club
|
Re: Wilson TS build log June 15, 2014 01:36PM |
Registered: 9 years ago Posts: 67 |
Hey BoriSpider! thanks for the interest. Nice to hear you're also planning on building a Wilson.
Sorry for the lack of updates. What's been setting me back is that all the parts I received are too small so I had tolerances issue with rods, nuts, and the extruder idler peices. I didn't have a drill press and didnt want to drill holes that weren't straight. So tried building one my self. That was a failure so I just ended up hand drilling the holes for the X axis, which turned out fine! there's no play in the rods so I'm happy with that.
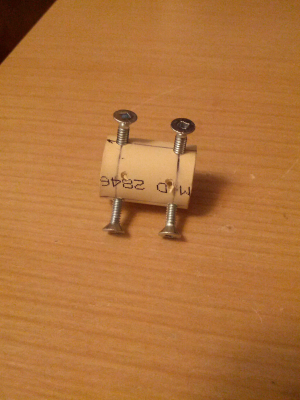
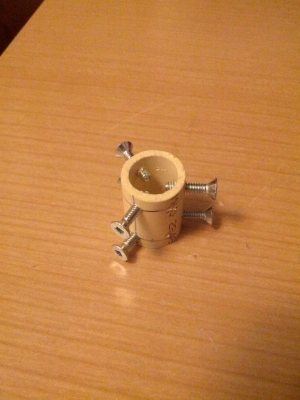
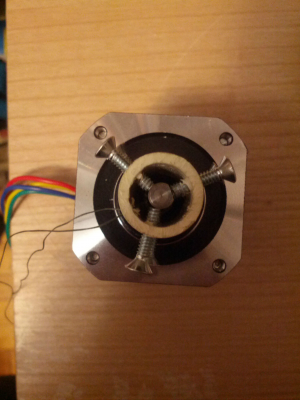
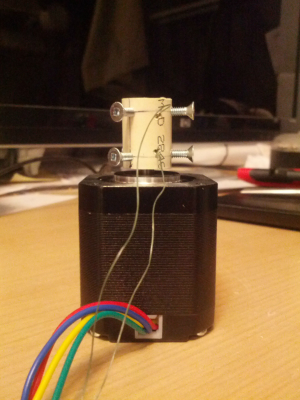
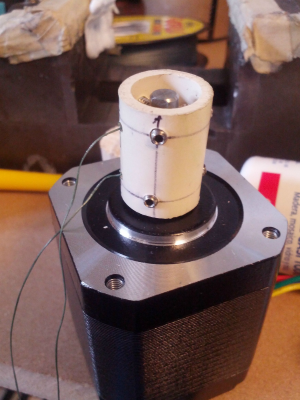
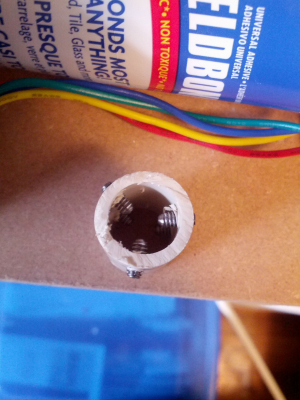
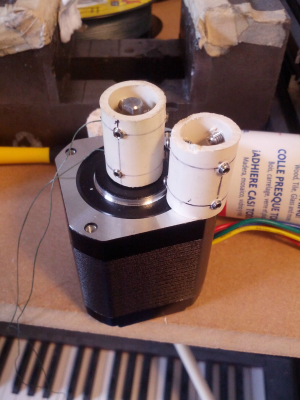
Also, I've been trying to find a solution for the spool and couldn't find anything that fitted my needs but I finaly had the idea of just using 6 srews and a PVC tubing. I'll be working on that today. Thanks for the link to the RichRap filament spool, that's pretty close to what I'll be doing. I don't have a 3D printer though so I can't build that spool!
I'll post pics along the way.
P.S For the power supply, I just used a 450W ATX switching power supply.
Edited 2 time(s). Last edit at 06/15/2014 03:21PM by TheHackerArtist.
TheHackerArtist
|
Re: Wilson TS build log June 15, 2014 07:23PM |
Registered: 9 years ago Posts: 67 |
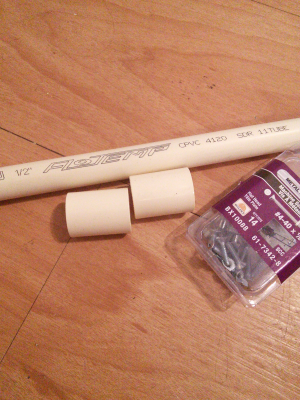
Got myself a few things at Canadian Tire
Here some pics of the build
Next up : Building the spool and guetting all the mechanical componenets assembled
Edited 1 time(s). Last edit at 06/15/2014 07:26PM by TheHackerArtist.
| 1/2`` cpvc tubing, 2 fittings, #4-40 - 1/2`` screws | |
| 30 Lbs braided fishing line | |
| white glue, for the glass bed |
Here some pics of the build
Next up : Building the spool and guetting all the mechanical componenets assembled
Edited 1 time(s). Last edit at 06/15/2014 07:26PM by TheHackerArtist.
|
Re: Wilson TS build log June 16, 2014 01:16AM |
Registered: 9 years ago Posts: 67 |
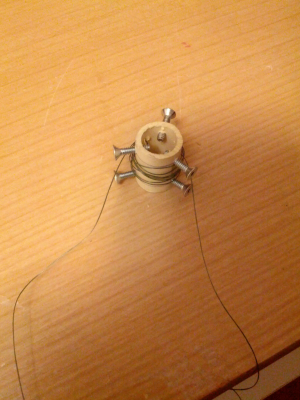
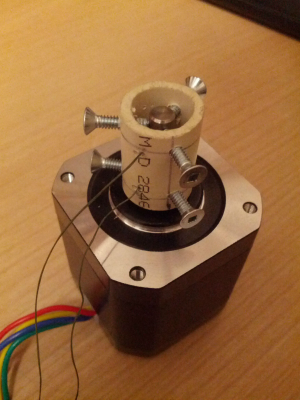
Alright, here's the spool I've managed to put together. Seems pretty coaxial and concentric to me, although I should probably use better measurement tools then my eyes!
Cost : less than a dollar!
The screws are slightly too long, so I'll cut those off after having secured everything in place.
Edited 2 time(s). Last edit at 06/16/2014 01:40AM by TheHackerArtist.
Cost : less than a dollar!
The screws are slightly
 too long, so I'll cut those off after having secured everything in place.
Edited 2 time(s). Last edit at 06/16/2014 01:40AM by TheHackerArtist.
|
Re: Wilson TS build log June 16, 2014 01:58AM |
Registered: 11 years ago Posts: 364 |
|
Re: Wilson TS build log June 16, 2014 07:52AM |
Registered: 9 years ago Posts: 67 |
|
Re: Wilson TS build log June 16, 2014 09:27AM |
Registered: 11 years ago Posts: 364 |
you can get them here
amazon
i got my made at the local machine shop ... i have 7 spare ones but i dont know if i can mail it to you ,,,
besides ... belts dont have so bad backlash specially gt2 belts .. other wise reprap printers wont exist...i have a mendelmax with gt2 belts and a 3dr with filament drive,. the print quality is similar... So i think the simplest way is to use belts...
|
Re: Wilson TS build log June 16, 2014 08:55PM |
Registered: 9 years ago Posts: 67 |
Thanks for the link ekaggrat. I might get some of those for my next build, ( which will probably be something closer to the simpson) but for the time being I`m quite happy with my pvc tubings.
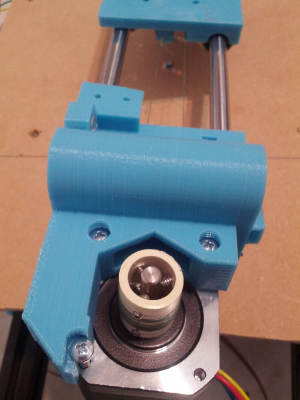
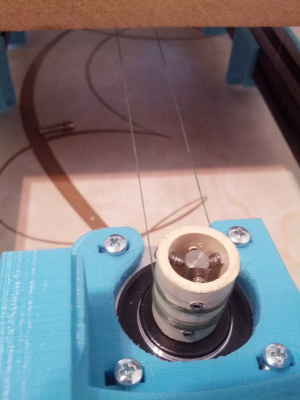
The whole machine screw thing was a bit ridiculous so I hopped on my bike and went to a bigger hardware store to grab some 4-40 1/4`` set screws. Much neater now:
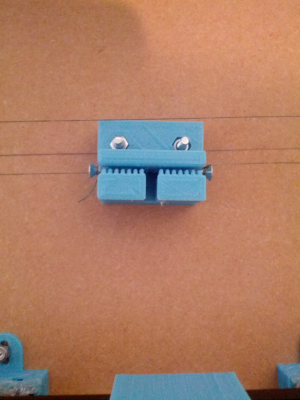
I used screws to tension the fishing line and given the holee where the zip ties were supposed to fit were clogged I just hot glued the bearings in place, which is probably better actually... that way I'm certain nothing will move left or right
Edited 2 time(s). Last edit at 06/16/2014 08:59PM by TheHackerArtist.
|
Re: Wilson TS build log June 16, 2014 09:35PM |
Registered: 11 years ago Posts: 364 |
|
Re: Wilson TS build log June 16, 2014 10:41PM |
Registered: 9 years ago Posts: 67 |
Alright, we'll see who facepalms :p
As sketchy as the spool is though. I think the problem will arise from the idler if anything...because it was printed with very bad quality. I probably should have just used the bearing straight up and sandwiched it with two washers or something...
Edited 1 time(s). Last edit at 06/16/2014 10:42PM by TheHackerArtist.
|
Re: Wilson TS build log June 17, 2014 06:23AM |
Registered: 10 years ago Posts: 1,381 |
|
Re: Wilson TS build log June 17, 2014 09:53AM |
Registered: 13 years ago Posts: 134 |
I just finished that series A2, good one.
Looking good TheHackerArtist, can't wait to see it running. I guess that makes the idler the 1st thing you print then.
__________________________________________________________________________
"I like to be, what I like to see, in you and me.
I am the Stallion, Mang."
ISTAR Scope Club
Looking good TheHackerArtist, can't wait to see it running. I guess that makes the idler the 1st thing you print then.
__________________________________________________________________________
"I like to be, what I like to see, in you and me.
I am the Stallion, Mang."
ISTAR Scope Club
|
Re: Wilson TS build log June 26, 2014 01:40AM |
Registered: 9 years ago Posts: 67 |
A quick update
I've been having trouble finding time to work on the printer lately.
I'm almost done but I need to fix the following issues:
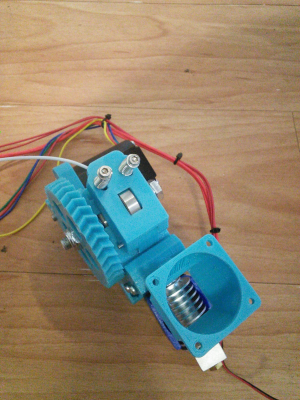
- The All metal J-head does not fit well in the hole of the cold end. It wobbles.
- I either lost a M3x30mm screw or one was missing in the kit so I can't get the bed fixed to the MDF board. Further, my MDF board is too thick so the spring is almost entirely contracted when the MK2 to the MDF board.
- The end stop mounts were not designed for the reprap discount endstops so I need to find a way to fix the Z-axis end stop. ( X,Y are under control)
- I need to find an intelligent way to re-tighten the fishing line and ensure coaxiality and concentricicty between my spool and the motor shaft.
- I need to wait for a 40mm fan to arrive from china,
- Three T-Slot nuts were missing from the kit so I need to find some other way to fix the LCD screen and the Filament spool to the frame or get t-slot nuts I don't know where.
- I need to find a better idler solution
How's your build coming along BoriSpider?
|
Re: Wilson TS build log June 26, 2014 09:50AM |
Registered: 13 years ago Posts: 134 |
No $$ to start any builds now. Summer is brutal here in S.W. FL.
About the T-nut, I was going to suggest Adafruit.com but you're in Canada
so there should be a better place to get them from.
__________________________________________________________________________
"I like to be, what I like to see, in you and me.
I am the Stallion, Mang."
ISTAR Scope Club
About the T-nut, I was going to suggest Adafruit.com but you're in Canada
so there should be a better place to get them from.
__________________________________________________________________________
"I like to be, what I like to see, in you and me.
I am the Stallion, Mang."
ISTAR Scope Club
|
Re: Wilson TS build log June 26, 2014 01:57PM |
Registered: 10 years ago Posts: 439 |
That looks like a cheap rip off from the E3D design. It isn't a j-head.Quote
TheHackerArtist
For the J-head I went for the Geeetech all metal j-head.
A 4.7 ohm resistor with 12 volts across it puts out 30 watts. An 8 watt resistor is way under-rated.
I think it is fair that suppliers of cheap rip-offs be exposed as such.
|
Re: Wilson TS build log June 26, 2014 02:14PM |
Registered: 10 years ago Posts: 439 |
I found that too. I substituted an arrangement that clamps from the side:Quote
TheHackerArtist
I'm almost done but I need to fix the following issues:
- The All metal J-head does not fit well in the hole of the cold end. It wobbles.
[www.thingiverse.com]
|
Re: Wilson TS build log June 27, 2014 09:16AM |
Registered: 9 years ago Posts: 67 |
Oh, that's unfortunate BoriSpider.
For the t-nuts I'll have to just look around I'm sure I can source them somewhere in Montreal.
Ralph, you think the hot end is a rip off...hmm I hope not but I guess I'll know soon enough! It attained 160 without any problem though....I'll let you know for sure if I have issues.
And keep in mind I don't have a 3D printer so I can't print components like that clamp you suggested
TheHackerArtist
For the t-nuts I'll have to just look around I'm sure I can source them somewhere in Montreal.
Ralph, you think the hot end is a rip off...hmm I hope not but I guess I'll know soon enough! It attained 160 without any problem though....I'll let you know for sure if I have issues.
And keep in mind I don't have a 3D printer so I can't print components like that clamp you suggested

TheHackerArtist
|
Re: Wilson TS build log June 27, 2014 02:31PM |
Registered: 13 years ago Posts: 134 |
TheHackerArtist , the Helios hackerspace in Montreal might be able to print something for you.
That's IF they are still there.
And I believe I heard if you buy a J-Head off ebay you are buying a fake. I don't think they sell on ebay just from here.
Oh and that ^^ hakerspace ^^ might have the nuts you want, too.
__________________________________________________________________________
"I like to be, what I like to see, in you and me.
I am the Stallion, Mang."
ISTAR Scope Club
|
Re: Wilson TS build log June 27, 2014 03:40PM |
Registered: 10 years ago Posts: 439 |
I meant the design was a rip-off. It is listed on the E3D site:
[e3d-online.com]
which also shows where to get a genuine E3D.
You can put a thin washer above the hotend as a temporary measure to get a tighter clamping.
[e3d-online.com]
which also shows where to get a genuine E3D.
You can put a thin washer above the hotend as a temporary measure to get a tighter clamping.
|
Re: Wilson TS build log June 27, 2014 04:20PM |
Registered: 10 years ago Posts: 439 |
|
Re: Wilson TS build log June 27, 2014 04:43PM |
Registered: 10 years ago Posts: 439 |
|
Re: Wilson TS build log July 02, 2014 01:20PM |
Registered: 9 years ago Posts: 67 |
Oh ok Ralph, hmm, potentially. I let you know if I have issues.
Ok, thanks for the reference to the hacker space,Borispider, might go there some day!
Lol what? balsamic vinegar, who would have thought. I guess I'll give that a try.
I ended up using a piece of Popsicle stick I drilled in the middle to get the extruder to stop wobbling. Works like a charm, that things isn't going to bulge.
I just used the m3x30 screw from the extruder fan hinge to replace the missing one on the bed so that's all good.
All the mechanical part was assembled and I had tested the electronics ( except for fans!) before and everything was good so I figured once I got the electronics on the TS, everything would just work.
Then...bad things happened. I'm not sure in what order or what caused what.
Things I acknowledged:
I fixed the electronics cooling fan that connects directly on the board upside down apparently ( I thought the direction wouldn't matter given its a DC fan), when I turn it right side up it, it turned, but only sporadically
The light on my RAMPS board does not turn on, I'm pretty sure it did initially though, when I plugged in the Arduino
After testing the voltage from my ATX PSU it reads 16V, not 12V ( why? It says 12 V on the box!??)
The LCD screen stays blue
Pronterface initially detected that the temperature was at 175C for both the extruder and the heated bed ( non sense!)
Then, next time I tried plugging it in, it couldn't detect the printer.
The led on the MEGA is on, just not on the ramps.
The steppers makes no noise ( they should emit a small humming sound , no?)
Couple other things : The Mega I have is a cheap copy and the header weren't perfectly aligned ( but it still worked when I initially tested the electronics)
You think something blew up just because I plugged the fan in upside down? I let the electronics on for like, 10 seconds. The fan's motor sure was hot...
Ok, thanks for the reference to the hacker space,Borispider, might go there some day!
Lol what? balsamic vinegar, who would have thought. I guess I'll give that a try.

I ended up using a piece of Popsicle stick I drilled in the middle to get the extruder to stop wobbling. Works like a charm, that things isn't going to bulge.
I just used the m3x30 screw from the extruder fan hinge to replace the missing one on the bed so that's all good.
All the mechanical part was assembled and I had tested the electronics ( except for fans!) before and everything was good so I figured once I got the electronics on the TS, everything would just work.
Then...bad things happened. I'm not sure in what order or what caused what.
Things I acknowledged:
I fixed the electronics cooling fan that connects directly on the board upside down apparently ( I thought the direction wouldn't matter given its a DC fan), when I turn it right side up it, it turned, but only sporadically
The light on my RAMPS board does not turn on, I'm pretty sure it did initially though, when I plugged in the Arduino
After testing the voltage from my ATX PSU it reads 16V, not 12V ( why? It says 12 V on the box!??)
The LCD screen stays blue
Pronterface initially detected that the temperature was at 175C for both the extruder and the heated bed ( non sense!)
Then, next time I tried plugging it in, it couldn't detect the printer.
The led on the MEGA is on, just not on the ramps.
The steppers makes no noise ( they should emit a small humming sound , no?)
Couple other things : The Mega I have is a cheap copy and the header weren't perfectly aligned ( but it still worked when I initially tested the electronics)
You think something blew up just because I plugged the fan in upside down? I let the electronics on for like, 10 seconds. The fan's motor sure was hot...
|
Re: Wilson TS build log July 03, 2014 09:47AM |
Registered: 9 years ago Posts: 67 |
|
Re: Wilson TS build log July 03, 2014 10:20AM |
Registered: 13 years ago Posts: 134 |
Glad to hear everything is working out so far.
__________________________________________________________________________
"I like to be, what I like to see, in you and me.
I am the Stallion, Mang."
ISTAR Scope Club
__________________________________________________________________________
"I like to be, what I like to see, in you and me.
I am the Stallion, Mang."
ISTAR Scope Club
|
Re: Wilson TS build log July 04, 2014 12:40PM |
Registered: 10 years ago Posts: 18 |
I can't wait to hear how the fishing line works out for you; it seems like the smartrap people have been moving away from that and back toward belts, but maybe your solution will work. For people using standard GT2, I've altered the design of the Y belt holder slightly to include a tensioner, and also just testing a new belt tensioner for the X axis that fits in the existing X end. I'll make a video this weekend to show off the changes for anybody interested. Cheers!
Sorry, only registered users may post in this forum.
