Home
>
Reprappers
>
Topic
You name it.
Posted by wednesday
|
You name it. November 30, 2014 05:52PM |
Registered: 9 years ago Posts: 46 |
I have spent the better part of a year now dedicated to building/using my 3D printer (as referenced here Newbie Repstrap ) Like most everyone else I have experienced great joy and utter frustration at the feet of this not so little project; often at the same time.
Blown control boards, crashed PC's, and blind confusion over configuring firmware are common occurrences in this endeavour so I am glad to have not missed out on any of that.
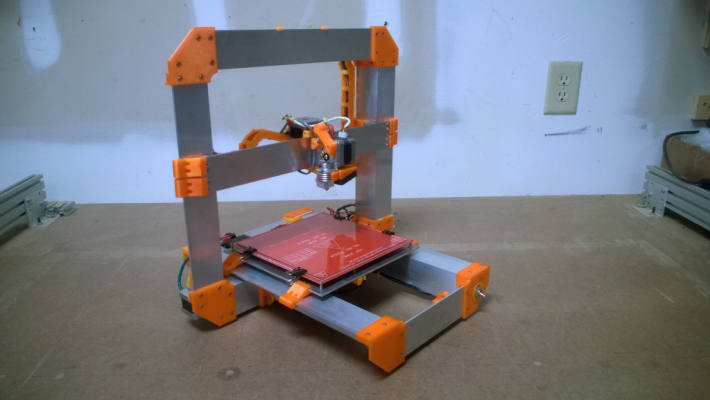
The ultimate goal of my build of course was to get the jumble of components and stuff working just enough to create it's own replacement. In the past nine weeks or so I have been modeling what that upgrade will look like while striving to adhere to the roots of the RepRap project.
To further keep in the spirit of things this post is to meant to share the design and enlist help for it's further development. Starting with a name. Is this just another I3? Or is it something else? If it is something else I am asking the community to help name it.
Again the base mechanical frame is heavily influenced by the Prusa I3 design that is so popular but this takes a step back toward more self replicating components. The vast majority of this designs' components are to be printed leaving only the electronics, wiring, metal framework, and hardware as outside produced items.
At this time I am still working through the X/Z axis drive systems and will continue to post updates as I work toward a wiki and build log but I hope that folks will chime in and offer up their thoughts and opinions.
Cheers,
MC
Admin: Apologies if this post needs moved.
Edited 1 time(s). Last edit at 11/30/2014 05:53PM by wednesday.
{[www.bearcnc.com]} {[www.facebook.com]}
|
Re: You name it. December 01, 2014 06:01PM |
Admin Registered: 11 years ago Posts: 3,096 |
It sure looks a lot like based on the i3, however, it is clearly not. I would coin the name 'Octoid v1' inspired by the eight-sided shape of the vertical frame 
Edited 1 time(s). Last edit at 12/01/2014 06:01PM by Ohmarinus.
http://www.marinusdebeer.nl/

Edited 1 time(s). Last edit at 12/01/2014 06:01PM by Ohmarinus.
http://www.marinusdebeer.nl/
|
Re: You name it. December 01, 2014 09:42PM |
Admin Registered: 13 years ago Posts: 7,001 |
|
Re: You name it. December 04, 2014 06:57PM |
Registered: 9 years ago Posts: 46 |
Thanks for the replies guys, I do like the suggestions so far. The slide approach is a good direction to pursue possibly. The working title was PI-4 at the start because of the Prusa influence but I felt it should really be open to others opinions.
Ultimately I wish to explore the correct protocol when posting to a wiki. Whether this be an add on to an existing page or if it needs to be a new one was somewhat of a question and I thought it would be fun to see what others would like to call it.
Very excited to have found this project and community, and I look forward to getting this upgrade design out there, open source, for folks to pick apart and hopefully add to. I'm striving for a design that is incredibly simple and economical to build yet flat out performs. IMO the only way to achieve that is to enlist the thoughts of other great and frustrated minds as found here lol.
I'll post some rough specs on the design a bit later on.
MC
{[www.bearcnc.com]} {[www.facebook.com]}
|
Re: You name it. December 28, 2014 12:13AM |
Registered: 9 years ago Posts: 46 |
Component (& toy) production is underway. Getting the mech frame parts made up while finalizing the design. The goal is to have the files ready to download in a few more weeks.
Will have some component kits too if all stays on course. What's the barter scene like around here?
MC
[youtu.be]
{[www.bearcnc.com]} {[www.facebook.com]}
|
Re: You name it. December 30, 2014 07:04PM |
Registered: 9 years ago Posts: 46 |
I know many of you have already experienced this but; I cannot express how completely cool it is to need a custom part for a project at work then come home draw it out and just MAKE it up. 
**(admin please delete this part if innappropriate)
I would like to trade full printed parts kits for this machine design for decent rolls of PLA. Is that reasonable?
Interested in black, white, and olive green for this month.
MC
{[www.bearcnc.com]} {[www.facebook.com]}

**(admin please delete this part if innappropriate)
I would like to trade full printed parts kits for this machine design for decent rolls of PLA. Is that reasonable?
Interested in black, white, and olive green for this month.
MC
{[www.bearcnc.com]} {[www.facebook.com]}
|
Re: You name it. December 31, 2014 08:47AM |
Admin Registered: 11 years ago Posts: 3,096 |
Hey wednesday, we have a special trade subforum for trading  It's not illegal!
Let us know when you finish the printer, I'm curious how it looks when you receive the machined parts
http://www.marinusdebeer.nl/
 It's not illegal!
Let us know when you finish the printer, I'm curious how it looks when you receive the machined parts

http://www.marinusdebeer.nl/
|
Re: You name it. February 15, 2015 12:11PM |
Registered: 9 years ago Posts: 46 |
Hi everyone,
Its been awhile since posting last, but the printer design is finally complete. I am still flushing out the last few printed parts files however. I have been putting the ready to go STL's on my webpage for folks to look over and will be adding more documentation soon.
There's still a lot more to do yet but I hope y'all like the progress so far, thanks for looking.
(edit: wasn't able to add pictures the other day so here they are)
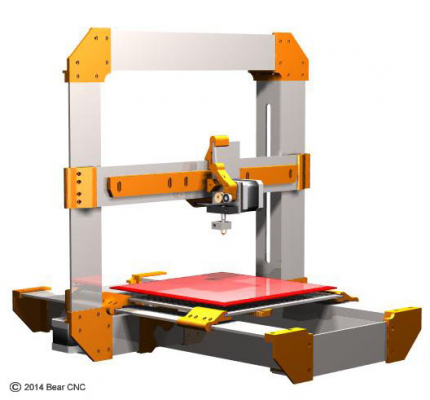
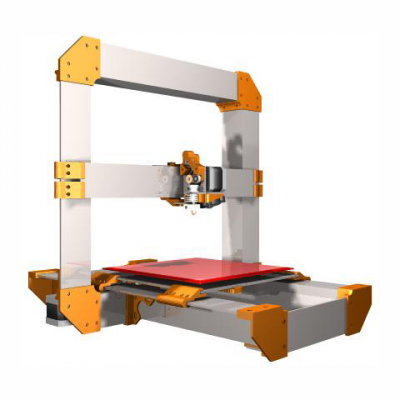
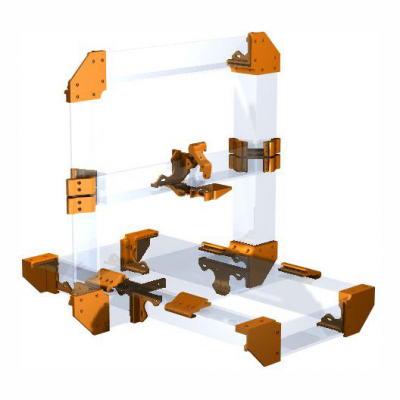
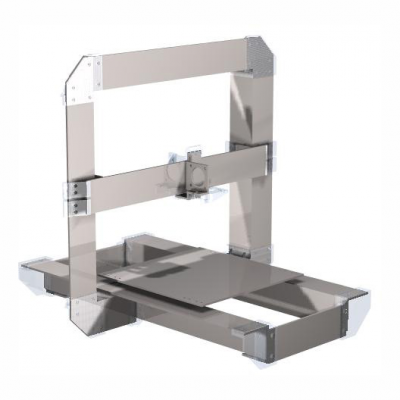
Completed printer rendering.
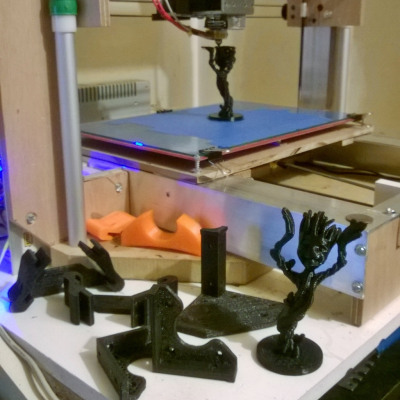
Just printed parts in their orientation. (not shown are the rack and pinion parts or the shaft couplers)
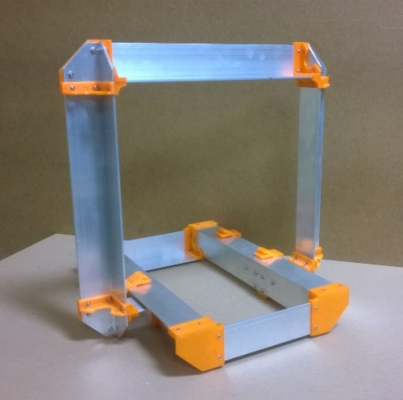
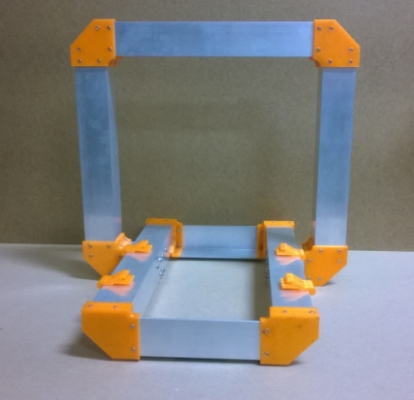
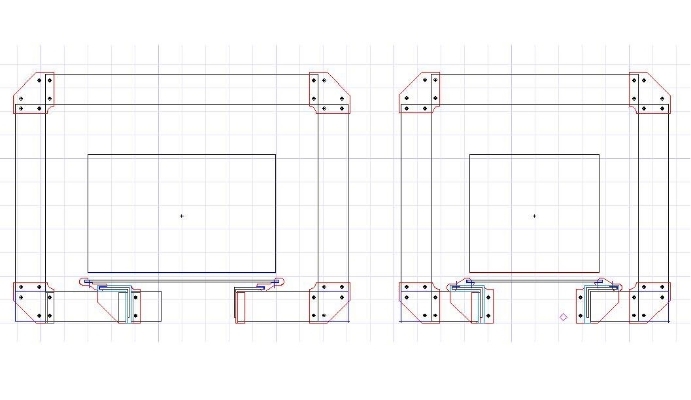
The 2" x 2" aluminum angle parts.
Edited 1 time(s). Last edit at 02/16/2015 05:33PM by wednesday.
{[www.bearcnc.com]} {[www.facebook.com]}
|
Re: You name it. February 18, 2015 05:53PM |
Registered: 9 years ago Posts: 46 |
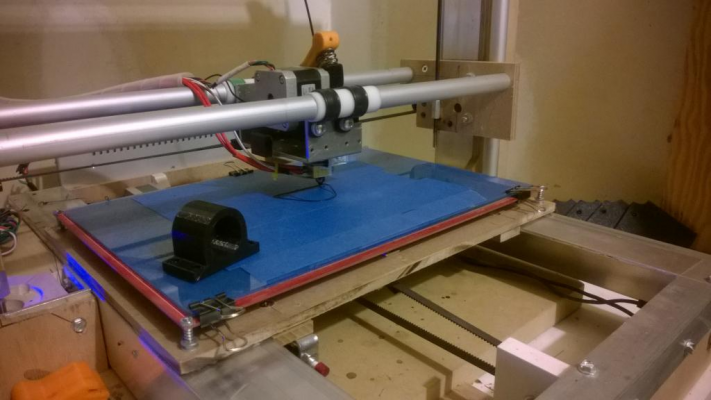
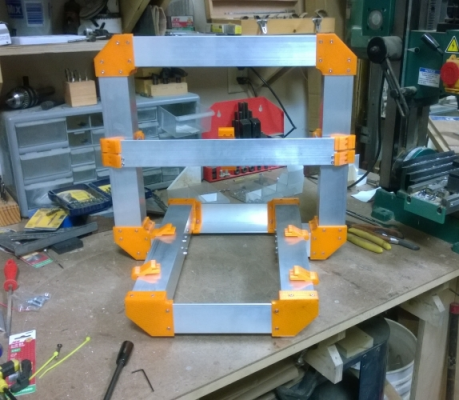
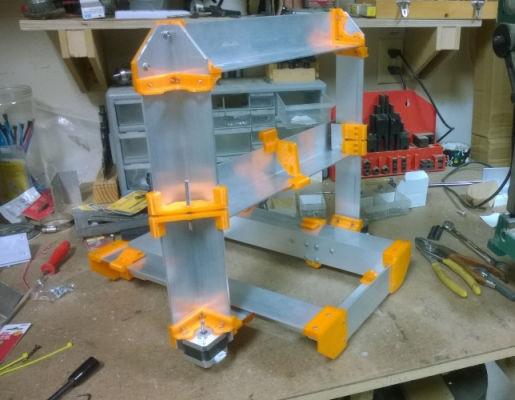
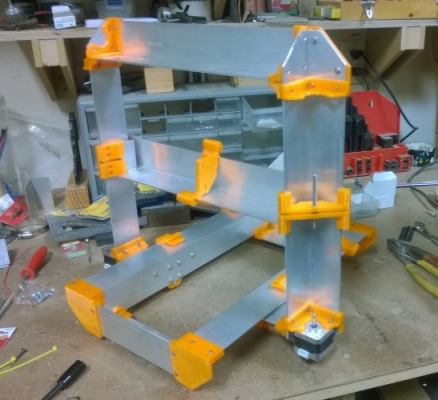
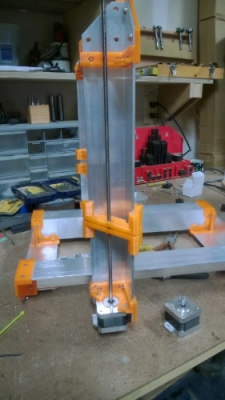
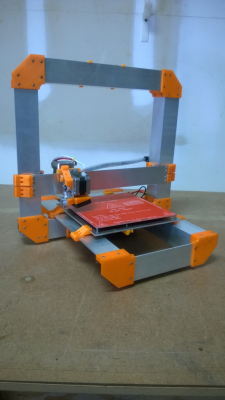
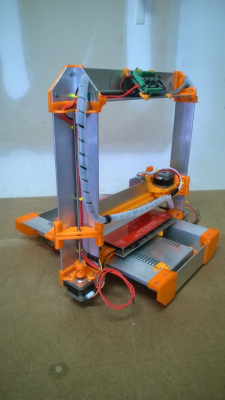
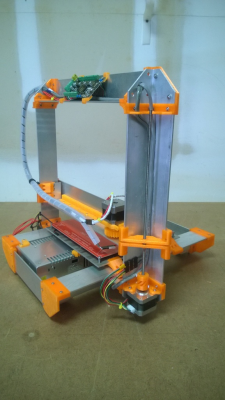
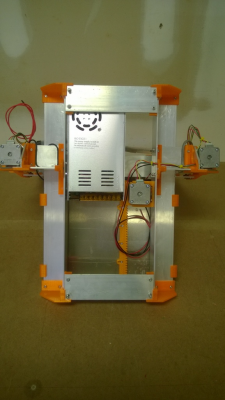
 Machine build numero uno: mostly assembled mech frame so far. Once the aluminum parts are cut and bored the assembly rolls really quick!
I need to tweak a hole placement or two on the printed part files, but otherwise the build has gone as hassle free as anticipated. The joints
are strong and the frame is lightweight and rugged.
I'm Uber excited to get this far in the project and hope to put up more progress pics soon. However it's back to the real world (day job) tomorrow lol,
so it may be a few days for an update.
Again I have placed the STL files for this build on the SKAT page of my website found in my sig. Thanks for looking everyone, hope to hear from you.

MC
{[www.bearcnc.com]} {[www.facebook.com]}
|
Re: You name it. February 23, 2015 01:51AM |
Registered: 9 years ago Posts: 105 |
This is a really nice design. As you mentioned this is influanced by the i3 Prusa but it's not a copy. I like that it requires nothing other than a saw to cut the alluminum and a 3D printer to print out the parts. Laser/waterjet cut parts are awesome but unless you happen to know someone who is willing to do you a favor they are expensive to obtain.
Thanks Mike
Thanks Mike
|
Re: You name it. February 23, 2015 10:47PM |
Registered: 9 years ago Posts: 46 |
Thanks Miertam,
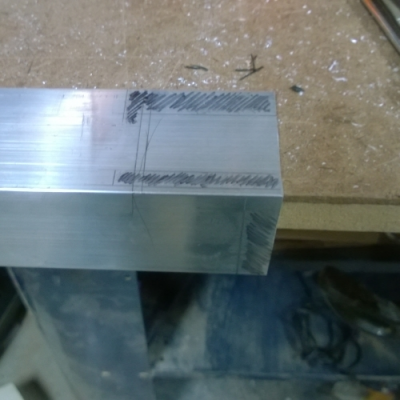
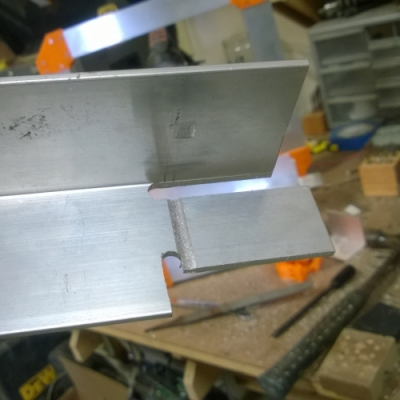
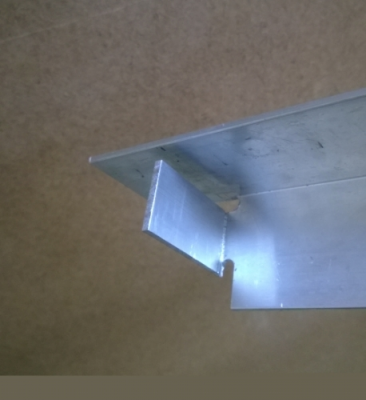
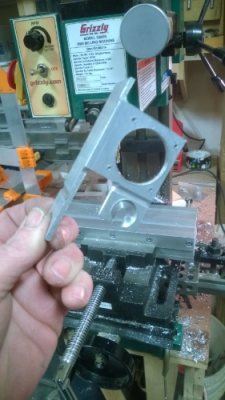
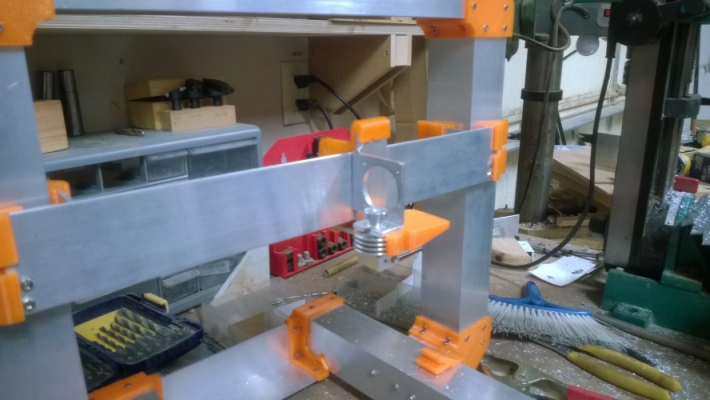
Yeah the aluminum frame (for the most part) is all saw cuts. Then of course holes drilled for mounting the printed parts. I did however go a bit funky on the X axis and extruder mount. Those parts require a little more prep to get them ready. Here is the X beam so far;
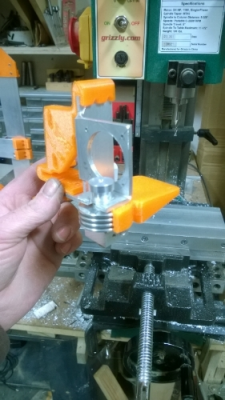
After laying out the cuts to make, I use a 1/4" ball nose end-mill to remove the shaded areas and expose the "legs".
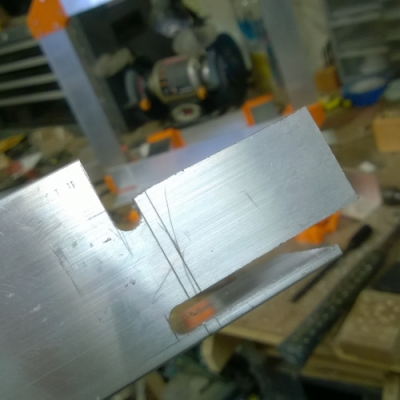
As a cheat for making close tolerance bends in aluminum, I use the same ball mill to make a shallow relief cut on what will be the inside of the bend.
The relief cut is roughly 1/3 the thickness of the aluminum. It allows more of a fold to happen than a bend, which keeps the leg in the right spot to mount the bearings correctly.
I'm sure a lot of folks may not like this part of the design or DIY fabrication so there are plans to draw up a standard I3 style X axis setup to work with the existing Z bearings. If anyone has the specs for the rod diameters and spacing on those and wish to help with the adaptation; much obliged.
MC
{[www.bearcnc.com]} {[www.facebook.com]}
|
Re: You name it. February 24, 2015 02:46AM |
Registered: 9 years ago Posts: 105 |
Tricky but not impossible to do with hand tools. How I would solve the home production issue is use another piece of aluminum angle cut to the right size and bolted to the bottom of the X carriage beam. Not as pretty or light as your design but much simpler for the typical maker to replicate.
Thanks Mike
Thanks Mike
|
Re: You name it. February 26, 2015 10:11PM |
Registered: 9 years ago Posts: 46 |
|
Re: You name it. February 26, 2015 11:43PM |
Registered: 10 years ago Posts: 1,401 |
Hey,
I love the design and it's simplicity, but I'm little concern about not using any kind of bushings or bearings, sliding bare plastic on aluminum angle might reduce a lot precision and quality of the prints and can either lock itself or cut into the plastic quite easily, maybe if you use nylon parts or inserts?
Keep pictures and updates coming, I wanna see how it ends.
Good Luck.
|
Re: You name it. February 28, 2015 01:29PM |
Registered: 9 years ago Posts: 46 |
Hey GG,
Yeah I should have touched on the bearings sooner. (Pun intended)
The printed "bearings" on this design can more aptly be called slide housings as the contact areas on the parts are lined with a slippery thermoplastic film. In this case that film is UHMW High Bond Tape but Rulon, PTFE, and other varieties of tape are also available to accomplish the same goal.
The parts as printed call for a film with a final thickness of .012" total with the film and adhesive thicknesses combined. I prefer to line the printed part itself however that is pretty time consuming so DIY'ers can apply it directly to the aluminum frame parts if that makes things easier.
The biggest drawback with slide bearings is that they are usually made with built in "slop" to account for thermal expansion. Using them on a printer design in conjunction with a heated build platform can compound the issue greatly. However I am a fan and have been using slide bearings of my own design for years on larger CNC builds and shop jigs. Currently my RepStrap printer uses all slide bearings without a problem.
The Y slide bearings on this machine design are also the build platform supports. Their profile raises the build platform away and inside of the contact surfaces to allow greater airflow and heat dispersal.
The aluminum sub-platform and base frame help to further channel the heat buildup away by serving as a heatsink/shield and cool air return respectively. The printer sits on leveling feet leaving a gap between it and the table surface it's placed on letting in cooler air from outside. An additional cooling fan can also be used to draw in and force air up to the underside of the sub-platform for better heat management and cooler running slides. The printer has grown around this slide housing profile from the start and all other slide parts have attempted to keep the continuity.
In addition to the reason of it's profile mentioned above it is also reversible. In the so-far-displayed renderings the bearings are setup to show a standard MKII heatbed, however if you were to flip them upside down you can grow to a 300mm x 200mm heatbed and sub-platform like the one I use on the RepStrap. The upright frame would need a longer top bar and bottom spacers but otherwise the base stays the same.
I'm back in my shop for the weekend so it's off to make up the extruder mount to finish this frame build and start outfitting the drive components. More pics and all to come as soon as I can. Thanks to all for the feedback and replies.
MC
{[www.bearcnc.com]} {[www.facebook.com]}
|
Re: You name it. February 28, 2015 01:50PM |
Registered: 11 years ago Posts: 110 |
|
Re: You name it. March 01, 2015 05:18PM |
Registered: 9 years ago Posts: 13 |
|
Re: You name it. March 01, 2015 05:41PM |
Registered: 9 years ago Posts: 251 |
|
Re: You name it. March 01, 2015 09:32PM |
Registered: 9 years ago Posts: 46 |
Ok had to do it twice (of course) but got the extruder mount milled and formed. Last post for a few while the day job resumes....
Have a good week all.
MC
{[www.bearcnc.com]} {[www.facebook.com]}
Have a good week all.
MC
{[www.bearcnc.com]} {[www.facebook.com]}
|
Re: You name it. May 25, 2015 06:34PM |
Registered: 9 years ago Posts: 46 |
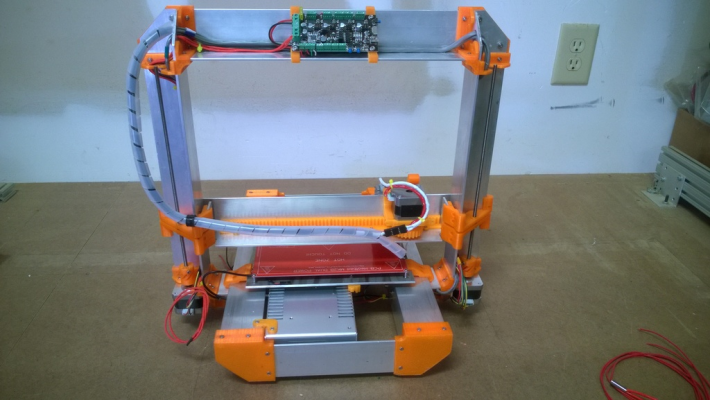
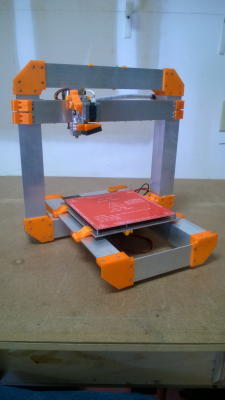
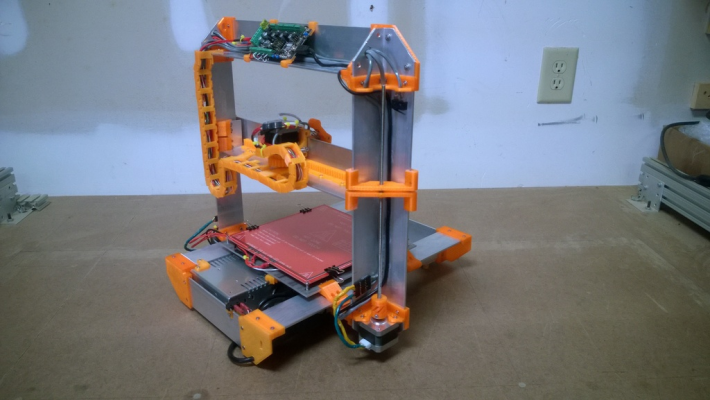
Well it's been nearly 3 months since last posting any word on this printer project of mine. I am very happy to finally have an update for the reprap community first. Here is about 7000 words worth of what has been going on.
There is sooo much more to come info wise but the cliff notes are as such;
- The Alpha design prototype (as displayed here) is better than 85% complete. There is a little bit of final wiring left to do which should be done this week. And there are several last parts that need drawn and printed. Not everything is to my exact liking just yet but I am focusing on what works first then worrying about issuing the prettier part files later. Sorry no immediate updates to the website are due just yet.
- I have also partnered with a local makerspace to help complete the programming and information archives on this thing for a more finished end result. ALL profits from kit and turnkeys of the PAW printer advertised on my website will be going to the tooling and outfitting of this new and growing community workspace. I am really excited to be a part of it all right now.
Thanks all for taking a look. I hope to not be as long till the next update.
MC
{[www.bearcnc.com]} {[www.facebook.com]}
|
Re: You name it. May 26, 2015 02:29AM |
Registered: 8 years ago Posts: 5,232 |
If you are still looking for a name, my suggestion is: The Expandable,
because with a bigger heated bed, we only have to replace a few straight aluminum bars to get a bigger print area.
The gear of the x-carrier looks like it is straight geared, no slackfree gears?
I like the wide y-table rails,but they would now have more lever to make the table wobble with only one gear under the table. ( off center is probably not the best decision? )
A real step forward would be a double gear design. Put the PSU elsewhere.
-Olaf
Edited 1 time(s). Last edit at 05/26/2015 02:38AM by o_lampe.
|
Re: You name it. July 04, 2015 11:56AM |
Registered: 9 years ago Posts: 46 |
Hey there folks. Wanted to share a couple of short videos of the new machine going through it's first print.
Paw first print 1
Paw first print 2
There is still a lot of fine tuning to do but right out of the gate I am really really pleased with how she runs.
Since the last photo update I wound up adding a custom cable chain to the design (an entire project in itself). And also had to switch out the Azteeg x5 due to a bad Mosfet.
In the vids the printer is being run with an Azteeg x3. I'll have to do another with the x5 board later when I get it back from repair.
@ o_lampe; Thanks for the comments. I like to incorporate modular expand-ability into all my machine designs in some way and strive to keep things easy to maintain and operate.
The gear rack system is indeed a straight forward design. The teeth are deep with a full mesh bite and have a smooth travel. And both spur gear/motor combos are spring tension-ed to the gear rack at all times throughout the extents of each axis of motion. The setup reacts much the same way a wear-compensating (or anti-backlash) nut would on a lead screw drive system. In truth it's not the first gear configuration I have tested on this design, this one just meets the need for function and reliability better than the others have IMO.
As for the Y motor offset and placement of the power supply; I feel it's one of the cooler parts of the design really and so far it proves to be a workhorse so no plans to alter it. Future machine builds however will see the control boards moved down into that area also. Maybe the second video will sway you some.
Going to spend the next few days dialing in the alpha I some more and hope to have other videos to share soon. Thanks for checking in all. Have a great weekend.
-MC
{[www.bearcnc.com]} {[www.facebook.com]}
|
Re: You name it. September 27, 2015 05:34PM |
Registered: 9 years ago Posts: 46 |
Wow! What a summer. Sorry for not posting any updates lately folks there's been a lot going on this season.
The PAW prototype is humming! I've been putting her through many test and addressing what hasn't worked and strengthening what does. As a proof of concept she absolutely rocks!
Despite my initial optimism and championing; I have reverted back to belt drive over the gear racks that were developed. Had trouble with maintaining quality prints over the long term
but hope to re-visit the idea later on. Otherwise my only complaint is the final cost and effort to the customer on building one for themselves. Even with 85% printed parts the metal for
the frame eats up a large chunk plus requires a lot of assembly hardware and constant checking of the same.
In the next few weeks the Beta model will be online however. It features a lower cost framework and reduced quantity of printed parts and hardware for assembly. Have also been teaming
up with several brilliant talented and motivated individuals that can help things happen a bit faster than I can alone.
Am also undergoing a new CNC router build/design in the coming weeks. I'll post those results also when things get running. In the meantime here are a couple of videos for y'all to look over.
#1; PAW prototype printing a proof of concept slide bearing for 80/20 extrusions Video
#2; Machine I get to run at my new day job. I'm pretty stoked about it. MultiCAM 5000
{[www.bearcnc.com]} {[www.facebook.com]}
Sorry, only registered users may post in this forum.
