Home
>
Reprappers
>
Topic
scratch built rep rap in progress
Posted by Red040281
|
scratch built rep rap in progress March 10, 2015 04:17PM |
Registered: 9 years ago Posts: 3 |
|
Re: scratch built rep rap in progress March 10, 2015 05:54PM |
Registered: 11 years ago Posts: 76 |
|
Re: scratch built rep rap in progress March 10, 2015 06:21PM |
Registered: 9 years ago Posts: 3 |
|
Re: scratch built rep rap in progress March 11, 2015 01:10AM |
Registered: 11 years ago Posts: 5,780 |
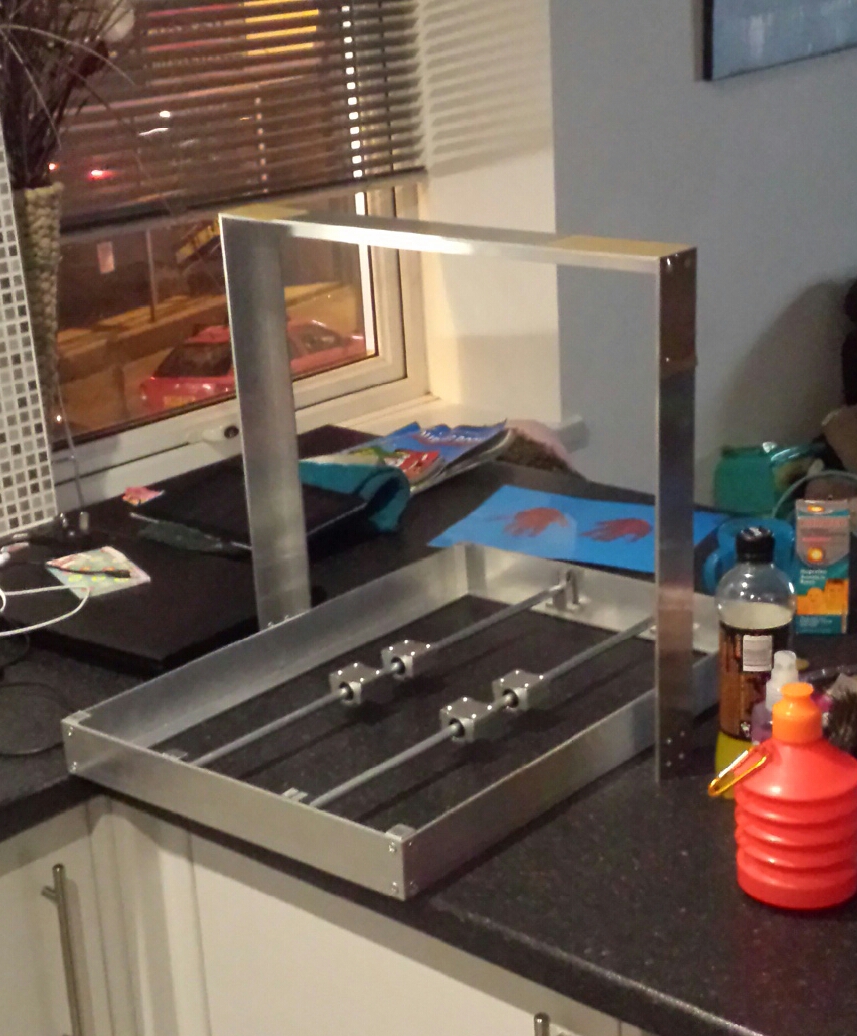
If you're planning on printing with ABS, plan on enclosing it and keeping the electronics out of the enclosure so it can be operated at elevated temperature. I think you've got a good start. Try pushing on the frame. If it flexes perceptibly, make it stiffer. If it flexes when you push on it it will move when a bed or extruder carriage is moving back and forth. If the frame flexes print quality will suffer.
|
Re: scratch built rep rap in progress March 11, 2015 02:35AM |
Registered: 9 years ago Posts: 3 |
|
Re: scratch built rep rap in progress March 11, 2015 12:39PM |
Registered: 11 years ago Posts: 5,780 |
Here is my current X-axis design- very modular and scalable. I uses a linear guide screwed to a 1" square aluminum tube and NEMA-23 motor- you can probably use a NEMA-17 motor. The X-min limit switch is on the motor mount and is bumped by the linear guide bearing block. The belt tensioner/idler has a mount for an X-max switch if you want to use one. This assembly bolts to the Z axis screws in my printer. I had a little delam in the motor mount because it was printed without an enclosure on the printer- I'll probably replace it with an all aluminum version soon.
Linear guides provide a very compact and very precise means of moving the extruder carriage. You can often find good deals on used ones on ebay.
Linear guides provide a very compact and very precise means of moving the extruder carriage. You can often find good deals on used ones on ebay.

|
Re: scratch built rep rap in progress March 11, 2015 10:55PM |
Registered: 9 years ago Posts: 109 |
|
Re: scratch built rep rap in progress March 12, 2015 12:04AM |
Registered: 11 years ago Posts: 5,780 |
Linear guide has a single rail that has grooves for balls on two sides. The bearing blocks have two loops of recirculating balls on each side. Here's an example: [www.ebay.com]
These things are usually precisely machined and ground and there is very little play (as in undetectable without good measurement instruments) in the motion of the bearing block that rides on the rail. I used NSK LS-15 linear guide. The square tube is probably not necessary because of the short run in my printer- the guide wouldn't sag enough to affect print quality if it were unsupported, but the square tube makes it easy to mount the whole thing and add other parts like motor mount, belt tensioner/idler, and Z axis zero screw (the thumb wheel on the left)..
I had to use a grinder with a cut-off disc to cut the rail to length- the steel is so hard I could barely scratch it with a hack saw or band saw.
|
Re: scratch built rep rap in progress June 15, 2018 12:53AM |
Registered: 5 years ago Posts: 11 |
Sorry, only registered users may post in this forum.