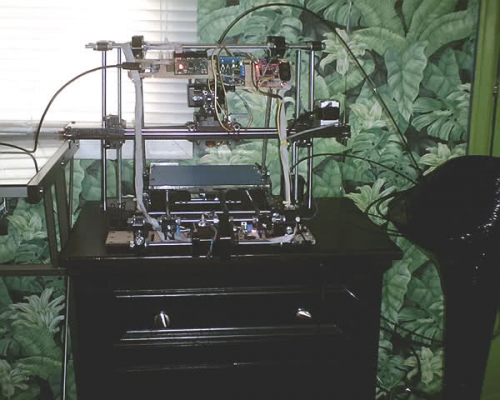
Isaac Mendel build
Posted by jkelso
|
Re: Isaac Mendel build October 12, 2010 02:46PM |
Registered: 13 years ago Posts: 418 |
For some reason I've become addicted to watching this music video over and over. Just now, I finally realized that the shapes in the background form the letters "laroux". I had never noticed this before. I thought of repraps when I saw this because the answers never seem to be there until suddenly you figure it out and the answer was there all the time.
|
Re: Isaac Mendel build October 13, 2010 12:50PM |
Registered: 13 years ago Posts: 418 |
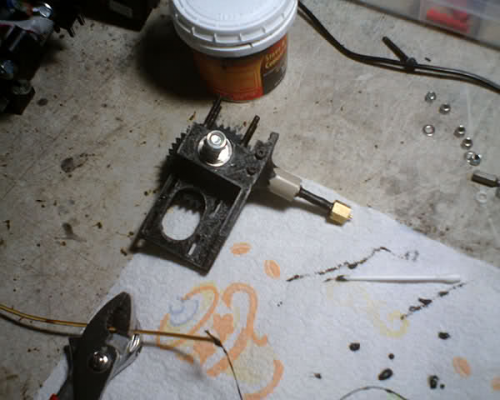
Now with all systems go, I've been trying for the last hour to get the filament to move through the nozzle again. Finally, I had to take a hacksaw blade and cut off a bolt that was coming through too long to allow me to take off the bearing cap from the extruder. With the cap removed, I could see that there was a bent piece of chewed up filament stuck in there. Now I'm going to put it all back together and have another go at it.
|
Re: Isaac Mendel build October 13, 2010 01:12PM |
Registered: 13 years ago Posts: 418 |
|
Re: Isaac Mendel build October 13, 2010 01:21PM |
Registered: 13 years ago Posts: 23 |
Do yop have a piece of rod going through the bearing in your idler block? I can't tell from the picture. Initially i didn't use one, but when I did it worked much, much better.
jkelso Wrote:
-------------------------------------------------------
> What I'm realizing now is that it's never going to
> feed the filament through the hole underneath
> where the bearing meets the hobbed bolt unless I
> take off the bearing cap and get the filament
> through that inner hole before putting it back
> together.
|
Re: Isaac Mendel build October 13, 2010 01:23PM |
Registered: 13 years ago Posts: 418 |
With the bearing cover off, I tried feeding the filament down into the extuder nozzle at 250C. Nothing ever came out the bottom end. Then the extruder started pushing out of the hole I cemented it into last night. I'm thinking that some of the cement may have clogged the hole, I was hoping it didn't when I applied it in there but it possibly could have.
|
Re: Isaac Mendel build October 13, 2010 02:09PM |
Registered: 13 years ago Posts: 418 |
With the extruder now apart, I could find no cement clogging that inner hole. I've got the extruder heat ramping up right now and I'm going to hold the nozzle with some pliers and try to feed some filament down in there to see if it's a clog in the nozzle that's causing the problem.
|
Re: Isaac Mendel build October 13, 2010 04:47PM |
Registered: 13 years ago Posts: 418 |
The thermistor wire came loose so I had to peel off all the tape holding it and resolder the wire on there and retape it. I got it ramped up to about 230C and used one pair of pliers to hold the nozzle and another pair to force the filament in there. It took great pressure and I could only see the slightest extrusion at first, then it jammed and nothing would come through. After looking more closely at the nozzle, the metal tip appears to be bent at an angle to the plastic end. I'm now going to take all the tape completely off and take another look at it. I guess I'll be ordering that other nozzle now, wouldn't be a bad idea to have them around. I'm wondering how long they are supposed to last. Maybe I can still get it working tonight though...
|
Re: Isaac Mendel build October 13, 2010 05:21PM |
Registered: 13 years ago Posts: 418 |
After peeling off the tape, it is evident that the bend is the cause of this problem and that the nozzle is trash. I'll have one here in the next few days and I'm hopeful that this could be the last of my problems to work out and I'm ready to print..
|
Re: Isaac Mendel build October 13, 2010 06:24PM |
Registered: 14 years ago Posts: 689 |
I would advice to mount the barrel on a jig away from the machine and test heating and extruding by hand before mounting it to the carriage. The extruder can easy apply more pressure than the ptfe can withstand, if you don't know if your temperature is right. I've broken the thread on 2 or 3 ptfe insulators so far, and I'm not quite there yet.
--
-Nudel
Blog with RepRap Comic
--
-Nudel
Blog with RepRap Comic
|
Re: Isaac Mendel build October 13, 2010 09:06PM |
Registered: 13 years ago Posts: 117 |
|
Re: Isaac Mendel build October 19, 2010 02:38PM |
Registered: 13 years ago Posts: 418 |
I've decided to try it again this time with the cement more carefully applied and now that it's drying I can see a clear hole through the tube. This apparatus may have gotten very hot for a long period during my testing phase when the temp value was disconnected. I believe that the high temps left on for a long time warped the nozzle. I'm wondering if the bolt that goes through the side is necessary. I've got more copper tube and I'm going to try taping this instead of globbing too much cement. Since I now have a working extruder board that senses temp values I'm hoping this won't warp this time. I'm going to wait until late tonight to start testing it, the cement has just been applied. I'm wondering if that bolt in the side is necessary to hold the nozzle in there.
|
Re: Isaac Mendel build October 19, 2010 10:03PM |
Registered: 13 years ago Posts: 128 |
|
Re: Isaac Mendel build October 20, 2010 12:04AM |
Registered: 13 years ago Posts: 418 |
Well, since my last post I've reconsidered rushing into things, the cement still felt semi pliable. I put the bolt in the side and the nozzle shifted slightly but the hole through looks fine. I've decided that it needed more cement around there to hold the nozzle in better and give it more strength. I've spent more than 10 minutes holding a hair dryer over the cement as it's applied on. I'm going to keep drying the layers and applying more until it seems dry and holding firm in there. I think this could be more reliable and I'll wrap tape around it.
|
Re: Isaac Mendel build October 20, 2010 04:36AM |
Admin Registered: 17 years ago Posts: 7,879 |
Wade's extruder should just have two bolts through the top of the insulator and doesn't need any glue / cement.
[www.hydraraptor.blogspot.com]
[www.hydraraptor.blogspot.com]
|
Re: Isaac Mendel build October 21, 2010 02:30PM |
Registered: 13 years ago Posts: 418 |
It didn't seem to fit with 2 bolts, I'm hoping the fire cement will do the trick. One bolt puts the nozzle in there snug, the second bolt starts to push the nozzle into a bad angle and it seems like things are cracking using the 2nd bolt. I've not applied any more cement and it looks like it's holding very nicely so far. I cut another length of nichrome wire to 12 inches to achieve 6 ohms and I attached it to some lengths of coated wire and twisted them together. Then I bent the twist over one time so it holds better. I didn't use solder because I think it would melt with the heat anyway, the tape should help to hold the wires together.
Edited 1 time(s). Last edit at 10/21/2010 02:30PM by jkelso.
Edited 1 time(s). Last edit at 10/21/2010 02:30PM by jkelso.
|
Re: Isaac Mendel build October 21, 2010 03:28PM |
Admin Registered: 17 years ago Posts: 7,879 |
The bolts go through the insulator (you have to drill it in situ) and should not touch the barrel. This is a major advantage over gluing it because you can unscrew it again if anything goes wrong. It put two M3 bolts through mine but I think Wade intended M2.5.
I am not sure what you have done to make the nozzle lean. Did you drill one hole in the wrong place?
[www.hydraraptor.blogspot.com]
I am not sure what you have done to make the nozzle lean. Did you drill one hole in the wrong place?
[www.hydraraptor.blogspot.com]
|
Re: Isaac Mendel build October 21, 2010 10:21PM |
Registered: 13 years ago Posts: 418 |
that is good advice to know but too late for me to use now. I'll have to try that on the next one. I'm gonna get a new extruder body soon. For now I think this will be OK. I wound the nichrome wire around the nozzle about halfway down from the top and taped it. Then I wrapped the thermistor around and taped it more. I think this will work just as good as having that copper tube but we'll have to see, I've been wrong before. I think it will work this time though, don't see why not.
|
Re: Isaac Mendel build October 22, 2010 12:26AM |
Registered: 14 years ago Posts: 1,092 |
FWIW: Long M2 bolts also work well. I drilled out the insulator in mine using a 1.5mm drill and it made a snug fit, with the bolts actually cutting their thread into the PTFE insulator. Best bit about using M2 is that there is enough PTFE on either side to stop the bolt sliding out sideways in any way. It's also possible to drill a second set at right angles to the first if you botch the first attempt.
|
Re: Isaac Mendel build October 22, 2010 05:42PM |
Registered: 13 years ago Posts: 418 |
With everything bolted up and ready to try again, I now have good motor control but the temp value is showing 158C at room temp and when I try to ramp it starts flashing between 875C and 158C. I think I'll try wrapping another thermistor around there with new wires to the extruder board after I unbolt the extruder body once again.
|
Re: Isaac Mendel build October 22, 2010 09:50PM |
Registered: 13 years ago Posts: 418 |
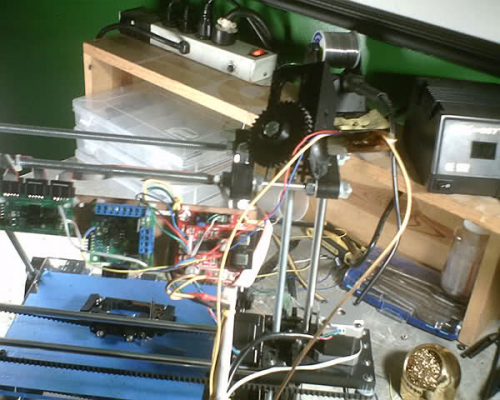
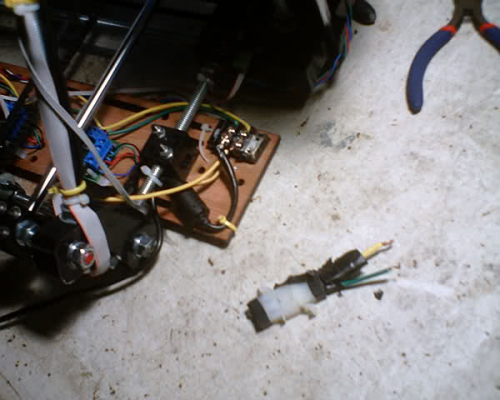
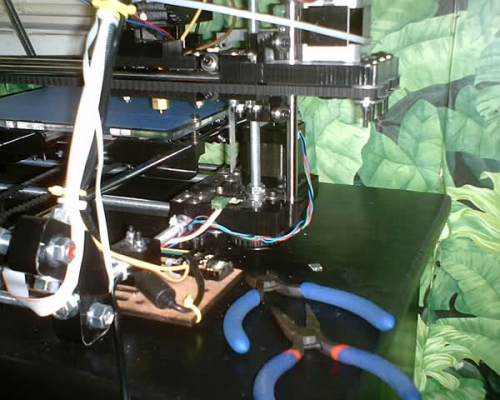
I've got the extruder taken apart and getting ready to try another thermistor. The connect plug for the power supply had been sticking a lot and finally it just stuck together and would not budge apart. After yanking on it a bunch of times one of the wires pulled loose out of there. The whole apparatus was janky so I took out the connector and hardwired the power supply into the terminal connectors. I also zip tied the cord in 2 places so that it will not pull loose. I'm going to put the supply on a power strip with a switch so that I can turn it on and off without unplugging things. This should be more stable. I plugged it in to test it and nothing came on, I feared that I burned the boards accidentally then I tried it again and after a few seconds got the lights but got very worried for a moment.
|
Re: Isaac Mendel build October 22, 2010 10:43PM |
Registered: 13 years ago Posts: 418 |
After tearing down the extruder halfway and getting the thermistor tape off I could see that wires were touching power supply wires that shouldn't have been. I retaped the thermistor on there and finally got an accurate reading. However, the heat would not ramp up so now I took it all apart and with the multimeter I can see that there is a broken connection somewhere in the tape, I'm getting no reading on the meter. This time I'll be more careful to tape everything up so that wires aren't touching and most importantly to test it before putting it back together. No more "oh, man!"
|
Re: Isaac Mendel build October 23, 2010 12:14AM |
Registered: 13 years ago Posts: 418 |
At last, with the wires taped into there more carefully I now have a nozzle that heats up and displays the proper temp value. Now it should just be a matter of bolting things back up and giving it another try.
|
Re: Isaac Mendel build October 23, 2010 06:23PM |
Registered: 13 years ago Posts: 418 |
With the extruder body bolted back on now, I'm finding that the opto endstop for the Z axis is too long so I cut it using a pair of needle nose pliers to hold it just above the cut and a pair of side cutters with a side to side motion until the piece falls off. Now I'm using the Home button in the reprap console to find the 0 for the Z axis. It came down against the platform slightly so now I'll adjust for that by tightening the gap in the bed springs.
|
Re: Isaac Mendel build October 23, 2010 08:32PM |
Registered: 13 years ago Posts: 418 |
Hit another snag tonight, the nichrome wire does not have continuity any more. Somewhere between testing it and bolting it up the wire must have come loose. I'm going to solder them them time, I've been just twisting them together but the nichrome wire often seems to kink and break. It may need a new length of wire cut and rewrapped in there.
|
Re: Isaac Mendel build October 23, 2010 08:52PM |
Registered: 14 years ago Posts: 1,092 |
I used hobby brass tube (1/16") to join the nichrome on my previous design, and will be using it when I do my next one.
Stick one end of the nichrome in a small section of the brass tube, and squeeze with thin needle nose pliers. Do not squeeze the ends flat.
Tin the ends of the standard wire and trim to size. Put on fibreglass insulation and/or some high temp heatshrink, crimp in the wire, then cover with more insulation and/or shrink the heatshrink.
Some of the advantages of doing it this way is that you know the nichrome is working before you crimp, and it also gives you something to hold onto when winding it around your barrel. In fact, When I did mine, I taped one of the brass tubes to the side of the barrel to hold it in place while I wound the rest of the nichrome on the barrel.
|
Re: Isaac Mendel build October 23, 2010 09:34PM |
Registered: 13 years ago Posts: 418 |
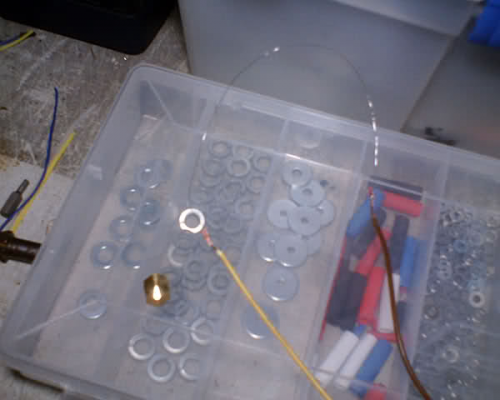
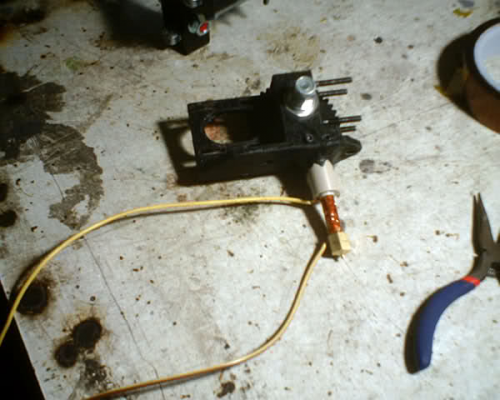
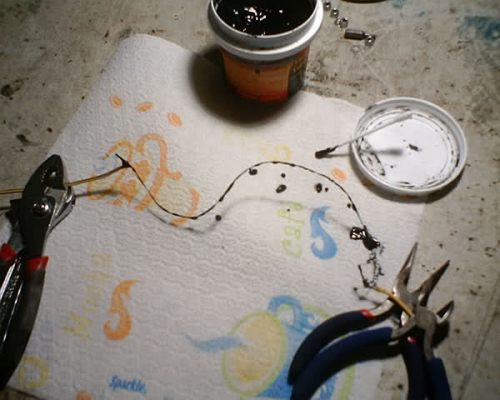
After peeling off the tape I can see that the tape alone is never going to work. The wire needs to be encased in fire cement or done another way. I'm not sure I can get a picture of how you're doing it from the description alone. With the extruder removed I decided to go ahead and drill that 2nd hole to hold in the nozzle and I put the bolt in there. I'm going to try and use a method I saw on youtube to coat the wire with fire cement and then wrap it and apply more coats and heat with a torch or blow dryer between applications. I have copper tube too I may use it and make another nozzle more like the first one I made that warped.
|
Re: Isaac Mendel build October 23, 2010 09:40PM |
Registered: 13 years ago Posts: 643 |
You might have better luck with nopheads heater block design:
[hydraraptor.blogspot.com]
[hydraraptor.blogspot.com]
|
Re: Isaac Mendel build October 23, 2010 09:56PM |
Registered: 13 years ago Posts: 418 |
I started coating the wire and I'm going to put a thin coat around the nozzle and allow to dry for a while before wrapping it together.
|
Re: Isaac Mendel build October 23, 2010 10:16PM |
Registered: 13 years ago Posts: 418 |
I looked at the heater block design A. Smith, it looks pretty good, where can I get one of those? Does it work with Wade's extruder? So the whole thing heats up? Not sure how it works from a quick glance...
I'm going to let this thin coat of cement dry until tomorrow or later tonight and I'll wrap the wire and apply more cement.
I'm going to let this thin coat of cement dry until tomorrow or later tonight and I'll wrap the wire and apply more cement.
|
Re: Isaac Mendel build October 24, 2010 07:26AM |
Registered: 13 years ago Posts: 643 |
They are simple enough to make, and compatible with any extruder with a threaded barrel. None of the alignments are critical so they can be done with a hand drill and a vice. The resistor is the heating element and should be roughly the same resistance as the nichrome heating elements you are building now. You may need to disable PID control in the extruder firmware, you need to find the gain settings and set P to zero.
If you don't want to drill it yourself, then you can buy them from reifsnyderb.
If you don't want to drill it yourself, then you can buy them from reifsnyderb.
Sorry, only registered users may post in this forum.

