Isaac Mendel build
Posted by jkelso
|
Re: Isaac Mendel build October 31, 2010 10:20AM |
Registered: 13 years ago Posts: 418 |
|
Re: Isaac Mendel build October 31, 2010 11:07AM |
Registered: 13 years ago Posts: 418 |
I did look at repsnapper momentarily but I'm still not sure how it all works. For now I'm having success figuring out the quirks to using the reprap host software. I think I'll modify the extruder profile or just download a fresh copy with the defaults. I did want to mention that my X axis grinding to a halt problems were more likely due to a belt that was too tight than not enough oil, although the oil did seem to help things so I would still recommend keeping the bearings greased. I fought with this problem for days until I finally loosened up the belt and it solved the problem completely.
|
Re: Isaac Mendel build October 31, 2010 10:02PM |
Registered: 13 years ago Posts: 26 |
Wow, your story is amazing. I'm building an Isaac as well but am focusing on the electronics first. I haven't tried uploading anything yet, just compiling and am running into a number of errors myself. I too have experienced the frustrations of navigating the wiki. It seems like the mindset is just throw the information out there and hope it sticks. The Isaac page is like a desert wasteland of information. Don't even get me started on the BOM. Could they make that any harder to read? I had to use a spreadsheet to translate a list of mcmaster parts into the reprap list for comparison, that's 4 hours I'll never get back. These simple additions would reduce the entry level curve so much and are easy to implement I don't understand why it isn't there.
Your journey has made me understand that these issues are the norm and not the exception so I'll stick with it.
I agree with your early statement that the world of 3d printing shouldn't be dominated by Makerbot since reprap has much better specs. I also agree that the steep learning curve associated with sourcing and building reprap is one of the reasons more people haven't built them and instead go with makerbot.
|
Re: Isaac Mendel build November 04, 2010 03:56PM |
Registered: 13 years ago Posts: 418 |
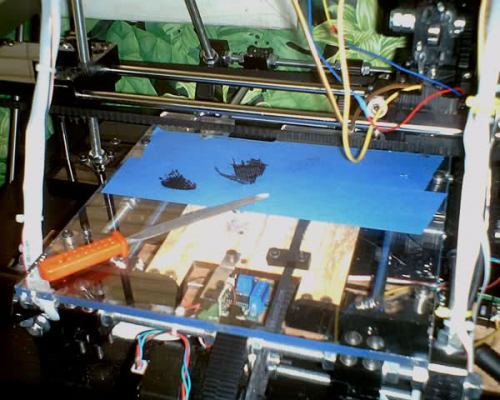
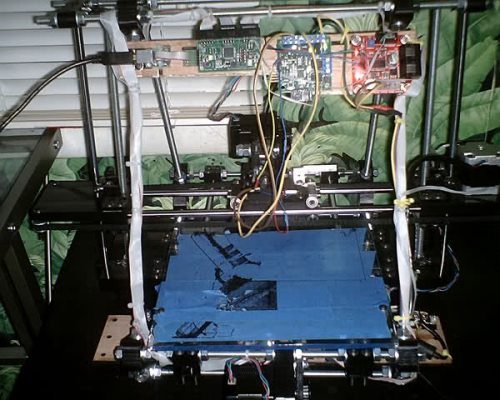
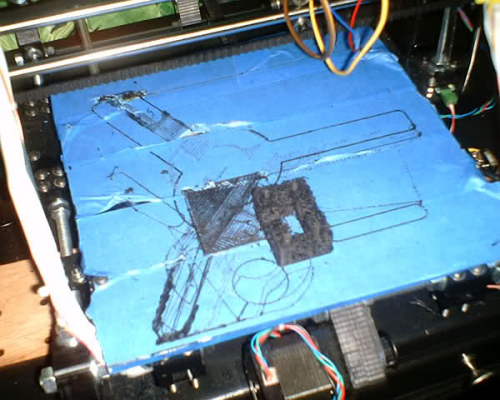
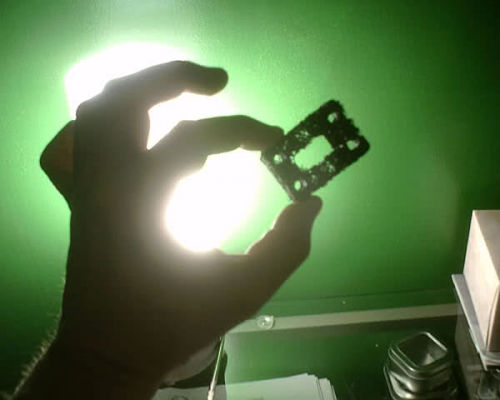
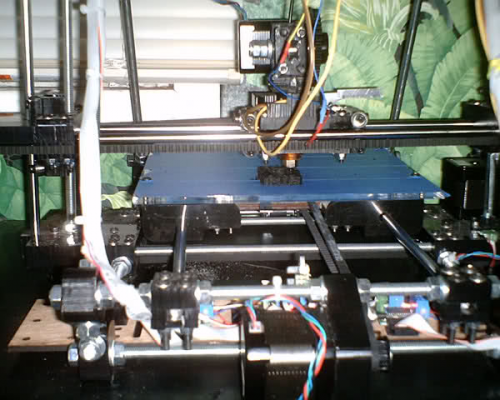
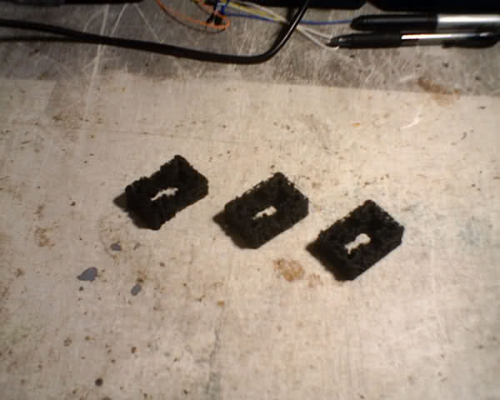
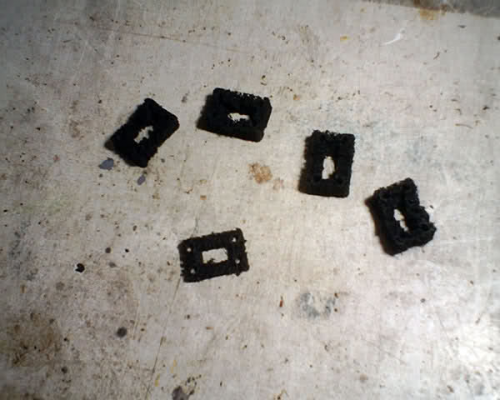
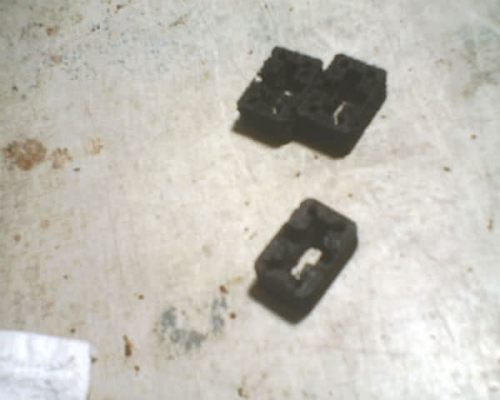
Cool, I'm glad you could find my blog. I've written it with the idea that someone coming along behind me could actually follow along and figure out the major problems and obstacles without having to struggle as much as I have at times. Sometimes it feels almost like I'm engineering the reprap myself. I believe that somebody could publish a book on building the reprap from start to finish and that an actual book that you could reference would be a successful venture for someone with the skills to write it. Or a DVD or just a step by step roadmap on the internet that doesn't leave out a million details. Now that I have my Issac printing for the first time I've been feeling very happy with my success although the first print didn't actually come out solid because I deleted 2 of the extruder profiles within the software. I've been filing off the parts where the plastic melted to the plexiglas and seriously thinking of getting a heated bed going soon too. I saw a youtube video from tesla893 with the Prusa heated bed which looks pretty cool. I've been focusing on school again the last few days but I want to manage working on getting a real solid print of something before getting back into homework. I do have a few shards of plastic that printed from my first try that I can show around as a token of my success so far. Next I need to download a fresh copy of the reprap host software and I'm going to try things out on my newer computer this time and see if it will be more stable. I tried creating an object in Inventor 2010 and exporting it as an .stl file but when I tried opening it in the reprap host software I got a mutated little object of twisted polygons. Not sure why this isn't importing the objects properly.
Edited 1 time(s). Last edit at 11/04/2010 03:59PM by jkelso.
Edited 1 time(s). Last edit at 11/04/2010 03:59PM by jkelso.
|
Re: Isaac Mendel build November 04, 2010 04:31PM |
Registered: 14 years ago Posts: 3,742 |
If the object is not manifold then some software has problems with it.
Do the following:
Download the netfabb Studio Basic software.
Install it.
Double click on an .stl file (netfabb Studio Basic should start and open the file).
Click on the RED PLUS in the TOOL BAR.
On the bottom right click on the "Apply Repair" button.
Click on "YES" when the "Remove old part?" confirmation question appears.
Select from the main menu "Part - Export part - as STL (binary)" and specify the pathname.
NOW you should be able to load the STL file in the RepRap Host Software.
Bob Morrison
Wörth am Rhein, Germany
"Luke, use the source!"
BLOG - PHOTOS - Thingiverse
|
Re: Isaac Mendel build November 04, 2010 06:04PM |
Registered: 13 years ago Posts: 7 |
Gents,
have a 3 axis CNC unit i built and am adding an extruder head instead of cutter and controlling it with EMC and Extruder board. Have waded my way through reams of info and got the geared head built and am now trying to connect everything up. Not using motherboard but just extruderboard and thermocouple board - and now my question...........bought thermocouple board and thermocouple from e-bay and it duly arrived with a 3 pin plug on a flying lead to connect to extruder board.....can you tell me where this plug fits on the extruder board as I am a 'beaten man' at the moment.
I built the CNC unit from scratch and the electronics but am struggling to get any information on basic queries like this. I guess that after getting power to the boards the fun will begin .....does the thermocouple just report temperature or does it control the heater element as well........any advice greatfully received a I was on the verge of junking everything today and just getting on with cnc cutting....but the reprap bug has bitten deep and I really want to finish this.
Regd's
Paul

|
Re: Isaac Mendel build November 05, 2010 08:48PM |
Registered: 13 years ago Posts: 418 |
Thanks for the fix rhmorrison I'm going to try what you said. Inchgreen, I bought one of those boards but didn't have success getting it working. I ended up going back to the cheapie simpler way and it works fine with just a thermistor. If you go back through my blog you can see that I had problems with the board too and where to connect it. Still unresolved. Tonight I started printing a test cube again but the first layer went down with missing areas so I canceled the print. I added the other 2 missing extruder profiles and went back and restored a lot of the defaults. I decided to print a spool to hold the filament as my first good piece instead of a useless cube. I got the spool by searching thingiverse for reprap items.
|
Re: Isaac Mendel build November 05, 2010 09:59PM |
Registered: 13 years ago Posts: 418 |
The first layer of my spool part didn't go down evenly so I abandoned the print and went back to testing the cube. The tape started tearing and I think I may need to continue tweaking the bed height. As I'm writing this I'm watching the printer trying to print the cube yet again but it doesn't seem to be laying down the plastic. I'm adjusting the bearing cap tightness and getting some results which are fleeting.
|
Re: Isaac Mendel build November 06, 2010 01:02AM |
Registered: 13 years ago Posts: 418 |
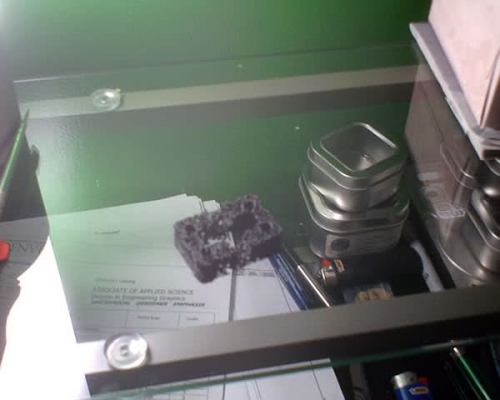
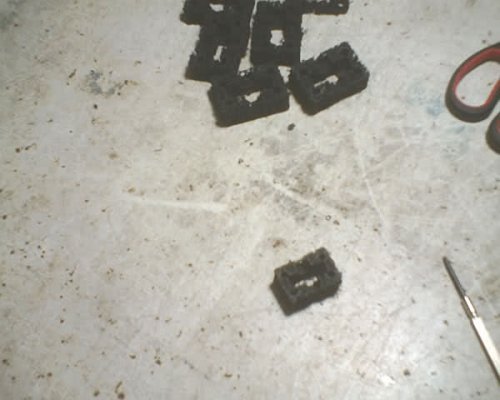
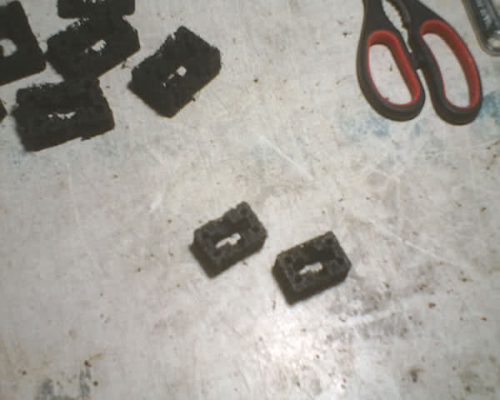
After not having much success with the test cube I decided to try another .stl file. I got an extruder cap file and finally this time I got something to print, although it didn't come out exactly right. The extrusions seem to break up in spots, leaving the object with holes on the inside. It all sticks together but the object is spongy and brittle, I could easily break it in half. This looks like some good progress though, next step is to figure out how to get a better print. Maybe I should slow it down?
|
Re: Isaac Mendel build November 06, 2010 02:04AM |
Registered: 13 years ago Posts: 117 |
|
Re: Isaac Mendel build November 06, 2010 05:00AM |
Admin Registered: 17 years ago Posts: 7,879 |
You mentioned you were adjusting the bearing cap tightness. If it is ever not tight enough, such the the plastic slips then that leaves plastic in the teeth of the pulley and it will never feed evenly again until you clean it out.
What happens is every time it gets to the spot where the teeth are clogged it slips again, which breaks the filament flow and creates an object with both sparse infill and sparse outlines, which is just crumbles as you describe.
[www.hydraraptor.blogspot.com]
What happens is every time it gets to the spot where the teeth are clogged it slips again, which breaks the filament flow and creates an object with both sparse infill and sparse outlines, which is just crumbles as you describe.
[www.hydraraptor.blogspot.com]
|
Re: Isaac Mendel build November 06, 2010 10:41AM |
Registered: 13 years ago Posts: 418 |
Thanks for the advice guys I'm going to give all that a try. I never thought to check the teeth being clogged but it does seem to leave gaps in certain areas where it's traveling in a straight line while going around curves it seems to do just fine. The areas around the corners and around the holes all have solid plastic around them. I got the desk at walmart for under $90. I've been having a problem with the prints dumping a test extrusion out onto the platform right next to the dump area before starting a print. I think this is supposed to be dumping out into the cutout square dump area, correct? I've been having to file off this lump of plastic, the extruder nozzle gets stuck there sometimes. I'm thinking more seriously about getting a heated bed going soon.
|
Re: Isaac Mendel build November 06, 2010 11:37PM |
Registered: 13 years ago Posts: 418 |
I adjusted the extrusion infill width on all 3 extruder profiles to .3, one was 2.5, one was 1.5 and one was .7. I also adjusted the speeds at the bottom where the value is between 0 and 255. I changed the values from 255 to 150. Also I spent time readjusting the bed height to make sure it was even all around. It seems like now the print is coming out more solid. I'm not sure if it's perfect yet but this appears to be a good improvement from what I'm seeing. There wasn't anything apparently clogging the teeth in the bolt. Watching this print a part is very cool.
Edited 1 time(s). Last edit at 11/06/2010 11:43PM by jkelso.
Edited 1 time(s). Last edit at 11/06/2010 11:43PM by jkelso.
|
Re: Isaac Mendel build November 07, 2010 12:00AM |
Registered: 13 years ago Posts: 418 |
Now that the part is finished I can see that it doesn't look much different than the first part. This time the bed was more level so the foundation went on there better but I wouldn't say this is a usable part. There's still flexiblilty and the extrusions along the sides are broken. I'm not sure if I'm adjusting the proper settings or what I need to adjust them to. I guess I'll just keep trying and see what happens. Again, the corners seem to be forming correctly, all of the layers are there lined up on top of each other.
|
Re: Isaac Mendel build November 07, 2010 01:55AM |
Registered: 13 years ago Posts: 418 |
After adjusting all of the extruder speed profiles to 1500 mm/minute and trying it again I didn't notice it going much slower. Not sure if I'm making the right adjustments. The 3rd print of this came out slightly better than the other 2 but still not where it needs to be. How do you up the infill?
|
Re: Isaac Mendel build November 07, 2010 01:32AM |
Registered: 14 years ago Posts: 323 |
|
Re: Isaac Mendel build November 07, 2010 03:13AM |
Registered: 13 years ago Posts: 418 |
good idea. I've been adjusting the extruder profile settings, looking through the wiki, but so far haven't hit on the solution to getting a good solid print. I don't see the movements slowing down. I'm thinking it's still moving too fast. I'm trying again.
|
Re: Isaac Mendel build November 07, 2010 10:35AM |
Registered: 13 years ago Posts: 418 |
|
Re: Isaac Mendel build November 07, 2010 10:58AM |
Admin Registered: 17 years ago Posts: 7,879 |
No a heated bed only cures warping. You should be able to get a solid print without one. It looks to me like your plastic flow is either too low or not constant. When you extrude into mid air do you get a nice steady flow?
[www.hydraraptor.blogspot.com]
[www.hydraraptor.blogspot.com]
|
Re: Isaac Mendel build November 07, 2010 12:45PM |
Registered: 13 years ago Posts: 418 |
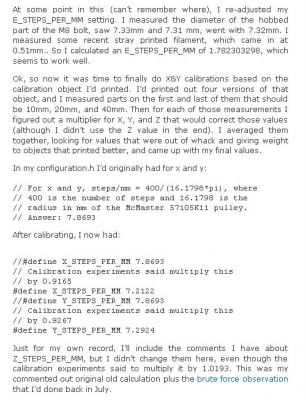
I found the problem. The part that I was trying to print was coming out too large. This shift in scale wasn't laying down the proper amount of plastic for the area it was trying to cover. Somehow I stumbled upon this little tidbit of information in JKeegan's blog:
My factory settings were different than these. As soon as I changed the values in the configuration h. tab of my fiveDgcodeinterpreter.pde file and reuploaded the firmware to the motherboard my part is now printing at the proper scale and it looks like it's going to work this time. I've been really fortunate in that whenever I think I'm stuck and can't find the answer I just look around at others blogs and forum posts and I've somehow stumbled onto what I needed. I would have never figured this one out without Jeff Keegan.
My factory settings were different than these. As soon as I changed the values in the configuration h. tab of my fiveDgcodeinterpreter.pde file and reuploaded the firmware to the motherboard my part is now printing at the proper scale and it looks like it's going to work this time. I've been really fortunate in that whenever I think I'm stuck and can't find the answer I just look around at others blogs and forum posts and I've somehow stumbled onto what I needed. I would have never figured this one out without Jeff Keegan.
|
Re: Isaac Mendel build November 07, 2010 01:18PM |
Registered: 13 years ago Posts: 418 |
At last, I finally have my first usable part. It's the right size, doesn't feel spongy at all. Still, it doesn't have that totally smooth finish I would need to sell the part but I'm hoping that I can fine tune the settings now and get it just a little bit nicer. When I tried to pry the piece off the bed in a hurry I tore one of the corner layers off the bottom. I think a heated bed will help with that problem. Sometimes it felt like I would never get to this point, it's been an amazing journey.
|
Re: Isaac Mendel build November 07, 2010 04:19PM |
Registered: 13 years ago Posts: 418 |
I went back to preferences and slowed the X and Y max feed rate to 500 mm/minute. I didn't notice the printer going noticably slower than before. I did another extruder block and this one came out very strong. I'm comparing the lines along the sides to the one I purchased off ebay and mine looks much rougher. The one I bought has perfect unbroken lines going all the way around the sides of the piece. I'm trying to get something equivalent to the one I bought so I'm going to keep on playing with settings. Next I'm going to try and up the extruder MM/minute and see what happens. The part is strong enough to use though and this time I took more care in prying the part off the bed with a small screwdriver so it didn't break apart like before. I'm wondering if an application of some kind of glue along the sides would strengthen the part and make it look smooth. My next goal is to get that smooth texture going. I tried setting the number of shells in the prefs to 3 but it looks like it's only doing one outer shell line still. I'm making sure to check the box that says "plot using extruder 0" I'm not sure if that is important or not.
|
Re: Isaac Mendel build November 08, 2010 12:10AM |
Registered: 14 years ago Posts: 323 |
|
Re: Isaac Mendel build November 08, 2010 09:09AM |
Registered: 13 years ago Posts: 418 |
no I'm not whoops. I was thinking about that...wondering if I needed to. Each morning now I wake up and see the printer in the room and a real sense of satisfaction hits me. Knowing I could just turn it on now and print something. Not having it working and not knowing what to do feels like a constant bother in the mind. A symbol of failure. Now I can relax and enjoy it. Everyone I know has been asking me about it and giving excuses as to why I can't get things working starts to look like maybe I'm just a liar. I've decided on a final name for this unit: Jinn.
|
Re: Isaac Mendel build November 08, 2010 05:50PM |
Registered: 13 years ago Posts: 418 |
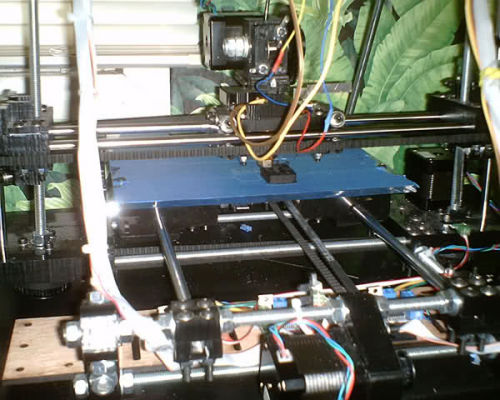
After resending the gcodes to a file from the .stl file, this time with the infill tightened up and the X and Y slowed down to 500mm/minute I am now getting a beautiful high quality part with nice smooth lines all around. This looks like it will take a few more hours to finish and then I'll try finding the sweet spot of best quality with a quicker build time. I'm now very excited about the machine and can't wait to start cranking out parts for another one. This is awesome.
|
Re: Isaac Mendel build November 08, 2010 08:22PM |
Registered: 13 years ago Posts: 128 |
|
Re: Isaac Mendel build November 08, 2010 08:45PM |
Registered: 13 years ago Posts: 418 |
Thank you and cheers
I wouldn't disagree that the task is very complex, however now that the first one is up and running I feel like the next one will be a breeze. I am going to try and help out as many newcomers as I can the way so many people on the forum have taken an interest in my build and offered advice to help me out. As soon as I figure out how to print on SD cards I want to show the machine off to everyone I know and take it down to school again to give a demo. Just now I got the first really good print out of the machine and the quality is excellent. I could easily sell this part on ebay. The extrusions are nearly perfect all around the sides and I'm going to keep experimenting with the settings and make another one of these running at 1500mm/minute and see what happens.

I wouldn't disagree that the task is very complex, however now that the first one is up and running I feel like the next one will be a breeze. I am going to try and help out as many newcomers as I can the way so many people on the forum have taken an interest in my build and offered advice to help me out. As soon as I figure out how to print on SD cards I want to show the machine off to everyone I know and take it down to school again to give a demo. Just now I got the first really good print out of the machine and the quality is excellent. I could easily sell this part on ebay. The extrusions are nearly perfect all around the sides and I'm going to keep experimenting with the settings and make another one of these running at 1500mm/minute and see what happens.
|
Re: Isaac Mendel build November 08, 2010 10:18PM |
Registered: 13 years ago Posts: 418 |
Since I've been using my stool as a filament holder I've decided that the first upgrade I want to make is a spool to hold the filament. I saw one that was mounted on top of the reprap and that's what I want to build. I got this model on thingiverse for a spool piece but I'm not sure it's the one that will mount on top. I'm going to go back to the website again and view the different filament spools available. This is getting really fun.
|
Re: Isaac Mendel build November 09, 2010 10:27AM |
Registered: 13 years ago Posts: 9 |
Great discussion thread! I'm in the process of scoping out a parts buy to put a Mendel together. Was really great to follow your travails in getting the parts together and working. I'll probably start a thread here when I get my initial parts orders figured out and get going on building a machine for real. My background seems to be almost a mirror of yours. I've got an electrical engineering degree and have been doing software/firmware for quite some time, but don't have all that much mechanical background. I guess that the first decision I need to make is whether to start with the mechanical parts as you did or start out putting the electronics and software together.
Currently I'm having a hard time figuring out what to do for the main controller. I like the flexibility and modularity of the Gen 3 electronics with Polulu/Allegro A4938 stepper controllers, but so far haven't found a good source for the Gen 3 boards (although it looks like the Polulu folks have the stepper controller boards back in stock).
Currently I'm having a hard time figuring out what to do for the main controller. I like the flexibility and modularity of the Gen 3 electronics with Polulu/Allegro A4938 stepper controllers, but so far haven't found a good source for the Gen 3 boards (although it looks like the Polulu folks have the stepper controller boards back in stock).
|
Re: Isaac Mendel build November 09, 2010 10:31AM |
Registered: 13 years ago Posts: 418 |
After leaving the part unattended for some time I returned to find that one of the arms of the piece had begun to curl up from the bed during printing and the part was destroyed at the end of that arm. I suppose a heated bed will solve this problem. In the meantime I think I'll pick up some double sided tape and see if that helps keep the part down. I wasn't sure this was the exact part I wanted anyway so I'm going to look around to make sure. The speed was 3 times faster than the last part, this one was set at 1500mm/minute and it seemed to be coming out just as good as before until the warpage.
Sorry, only registered users may post in this forum.
