Isaac Mendel build
Posted by jkelso
|
Re: Isaac Mendel build November 12, 2010 05:13AM |
Registered: 14 years ago Posts: 323 |
|
Re: Isaac Mendel build November 12, 2010 06:14AM |
Admin Registered: 17 years ago Posts: 1,791 |
Going to do it up in the wiki?
-Sebastien, RepRap.org library gnome.
Remember, you're all RepRap developers (once you've joined the super-secret developer mailing list), and the wiki, RepRap.org, [reprap.org] is for everyone and everything!

-Sebastien, RepRap.org library gnome.
Remember, you're all RepRap developers (once you've joined the super-secret developer mailing list), and the wiki, RepRap.org, [reprap.org] is for everyone and everything!

|
Re: Isaac Mendel build November 12, 2010 08:38AM |
Registered: 14 years ago Posts: 323 |
|
Re: Isaac Mendel build November 12, 2010 12:24PM |
Registered: 13 years ago Posts: 418 |
|
Re: Isaac Mendel build November 12, 2010 12:49PM |
Registered: 13 years ago Posts: 9 |
From some of what I've been reading (I think the posting was from nophead) you may need an exhaust duct (to control the temperature inside the cabinet and possibly to extract fumes). It sounded as if his experiments with a closed cabinet wound up needing a separate temperature sensor and a switch fan/vent system to keep the temperature in the box below the plastic transition temperature of the plastics on the RepRap (wish I could remember where I saw this posting). I'd be very careful about monitoring the temp the first time I tried this as you could wind up with your printer in a puddle of plastic  .
.
I will probably (once I've got a working machine and a usable heated bed...many moons from now) look at building an MDF box that I can put my machine inside of. I suspect that a thermistor, some bottom vent slots and a switched fan in a port at the top (probably feeding some dryer duct to the outside) is the best bet. Might want a layer of insulation inside the MDF, but I suspect that the machine puts off enough heat when running that this wouldn't be necessary.
If you do try this, I'll be very interested to hear how it goes.
Kyle Wilson
 .
.I will probably (once I've got a working machine and a usable heated bed...many moons from now) look at building an MDF box that I can put my machine inside of. I suspect that a thermistor, some bottom vent slots and a switched fan in a port at the top (probably feeding some dryer duct to the outside) is the best bet. Might want a layer of insulation inside the MDF, but I suspect that the machine puts off enough heat when running that this wouldn't be necessary.
If you do try this, I'll be very interested to hear how it goes.
Kyle Wilson
|
Re: Isaac Mendel build November 12, 2010 01:39PM |
Registered: 13 years ago Posts: 418 |
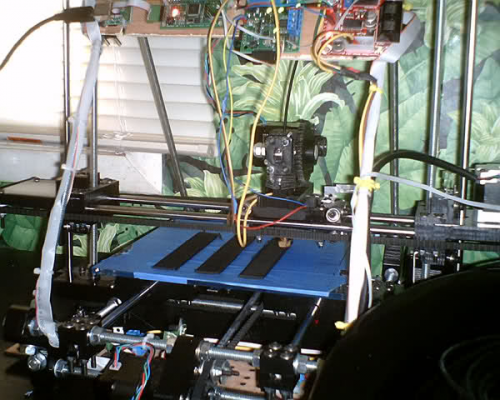
If I do it I would certainly drill a hole in the safe to duct the air to the outside with a fan. I've been printing out more parts for my filament spool and the bearings are fitting very snug so I know I'm getting good results with the steps per MM setting. I have my X and Y values set to 7.869 for both and it seems to be right for my machine. I've been running the space heater on the long arms of this thing as it prints, especially for the first 10 layers or so until I see that it's not peeling up from the plastic. So far I've been getting great results, with just a tiny amount of warpage at the corner of one of the pieces. I think it's important to get the heater running onto the bed for some time before the print starts so that the surface gets hot. I have a blow dryer but I don't like the noise and this seems to be working out pretty good for now.
Edited 1 time(s). Last edit at 11/12/2010 01:39PM by jkelso.
Edited 1 time(s). Last edit at 11/12/2010 01:39PM by jkelso.
|
Re: Isaac Mendel build November 12, 2010 01:41PM |
Registered: 14 years ago Posts: 689 |
A temperature controlled fan does not have to be that advanced. [www.electronicsinfoline.com]
Oh, and I destroyed a dibond fr build plate by applying too much direct heat from a heat gun. It got all bumpy, and that's not a good thing.
Edited 1 time(s). Last edit at 11/12/2010 01:44PM by Nudel.
--
-Nudel
Blog with RepRap Comic
Oh, and I destroyed a dibond fr build plate by applying too much direct heat from a heat gun. It got all bumpy, and that's not a good thing.

Edited 1 time(s). Last edit at 11/12/2010 01:44PM by Nudel.
--
-Nudel
Blog with RepRap Comic
|
Re: Isaac Mendel build November 12, 2010 02:13PM |
Registered: 13 years ago Posts: 601 |
|
Re: Isaac Mendel build November 12, 2010 05:39PM |
Registered: 13 years ago Posts: 418 |
Well the safe idea is a few months away, I'm still trying to get the heated bed going first. On my 1st tray of side arm supports for the filament spool the X carriage got caught up because the filament roll sitting on the chair had tightened up and would not allow the carriage to move. I didn't catch it in time but the parts had already completed 19 of 22 layers so I took them off and decided that they will be fine to use, they are just slightly thinner than they are supposed to be. The direction of the extrusion has been giving me some problems. Sometimes when I start a new print the extruder moves to the dump area and is it's supposed to dump out a small extrusion to get the flow going. At times, however, the extruder moves to the dump area and the extrusion direction begins going the wrong way, pushing the filament back out. When this happens I have to restart everything and unplug the USB to reset. This is an annoying little glitch. I also wanted to mention for new people that when you actually push the print button it is supposed to move to the home positions and then to the dump area. Then it seems like nothing is happening for several minutes until the test extrusion. When this happens, make sure to check that the gear is turning the correct way.
|
Re: Isaac Mendel build November 12, 2010 09:19PM |
Registered: 13 years ago Posts: 418 |
Tonight I've been struggling with trying to get the 2nd tray of 3 side arms printed. It seems like every time it's a different problem ranging from the bed height too low on one side to the extruder reversing direction to opto endstops misalignment and the list goes on. I've been dealing with getting this tray going for 4 hours and I've had to throw away at least 5 bad prints now. It seemed all was going well with all three arms and then the printer suddenly just stopped moving and that was it. Without a heated bed I've decided it's not worth the effort to try and print whole trays full of parts at this point. The Y axis driver board seemed to be overheating with the heat aimed at the machine and getting white hot where the metal part sticks up. After letting it cool down it worked again, there was moment there I thought it was another blown board. Right now I've got a successful print going again with just one piece so I'm going to go back to doing it that way. I've started assembling the arms to the center part of the spool and it's working really nicely with 10mm M4 bolts and the nuts are recessed into hex shaped slots on the back.
|
Re: Isaac Mendel build November 12, 2010 11:31PM |
Registered: 13 years ago Posts: 418 |
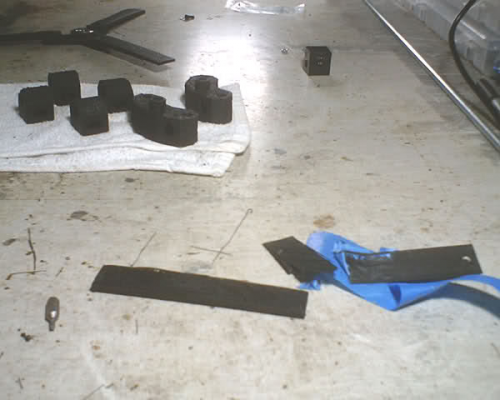
Finally I'm back to cranking out good parts again. This one didn't warp at all but the first 2 layers cracked off when I carelessly pried the part up with a screwdriver. These pieces need to be finessed off the tray or you'll get a rough looking face like the one I just got. It's still a strong usable part though and I can trim off excess plastic.
|
Re: Isaac Mendel build November 13, 2010 03:54AM |
Registered: 14 years ago Posts: 3,742 |
Quote
jkelso
to the extruder reversing direction
I also have this problem if I press the extrude button in the RepRap Host software before starting the print.
Generally, for every print I do the following:
- Exit the RepRap Host software (if running)
- Reset the Motherboard on the Mendel
- Reset the Extruder board on the Mendel
- Start the RepRap Host software
- Turn on the Heater
- Load the Skeinforge generated GCODE
- When the temperature is close to it's final value press PRINT
If I want I can use the RepRap Host software to move the X, Y and Z, BUT if I press the extrude button then it can happen when printing the gcode that the extruder runs backwards!
Bob Morrison
Wörth am Rhein, Germany
"Luke, use the source!"
BLOG - PHOTOS - Thingiverse
|
Re: Isaac Mendel build November 13, 2010 09:42AM |
Registered: 13 years ago Posts: 418 |
Yes, I agree with that advice and anytime I press extrude I reset everything. I've been browsing through stuff with "reprap" tags on thingiverse and I found this heated bed element that I'm going to buy: [reprapsource.com]
I didn't know they were so affordable, should be around $60 US for the PCB and then I'll have to get a power supply and redesign the bed using wood or metal to work with the heating element.
I didn't know they were so affordable, should be around $60 US for the PCB and then I'll have to get a power supply and redesign the bed using wood or metal to work with the heating element.
|
Re: Isaac Mendel build November 13, 2010 01:20PM |
Registered: 13 years ago Posts: 418 |
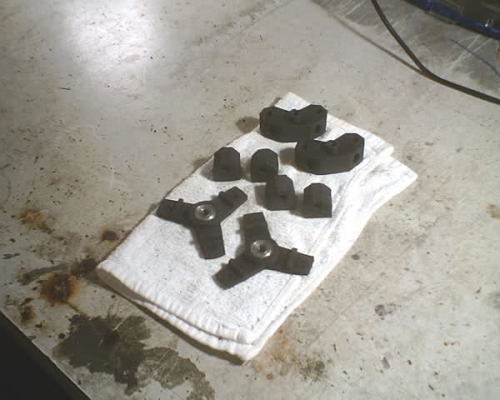
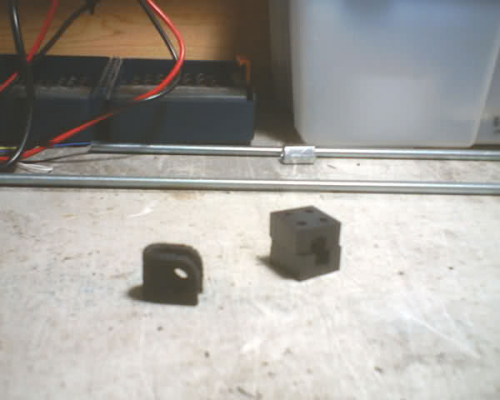
I'm down to the last of my parts that I'll need to complete the filament spool, the Y bar clamps. I went to thingiverse and searched the reprap tags. The clamp on the left is a simplified design that replaces the type of Y bar clamp you see on the right. Instead of 2 parts and a bunch of nuts and bolts, this flexible clamp slides over the rod and tightens down with 5/16" bolts on each side. This is a good example of how the parts for Mendel designs are becoming more efficient and easier to print.
|
Re: Isaac Mendel build November 13, 2010 09:12PM |
Registered: 13 years ago Posts: 418 |
I've got the support structure built for my spool but when I went to assemble it the filament wasn't tied together and everything expanded too much when I was trying to push the center rod through and one of the side pieces broke apart. These pieces really didn't fit well with the plastic tube I got from home depot anyway so I'm going to engineer a new larger part in Inventor to hold the bearing that will fit inside the larger tube and try to get it printed by the morning.
Edited 2 time(s). Last edit at 11/13/2010 09:16PM by jkelso.
Edited 2 time(s). Last edit at 11/13/2010 09:16PM by jkelso.
|
Re: Isaac Mendel build November 13, 2010 11:01PM |
Registered: 13 years ago Posts: 418 |
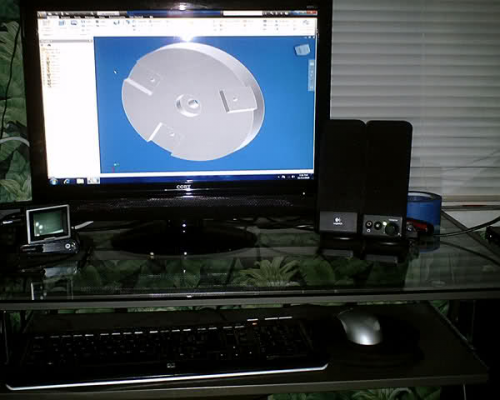
I've got the new part designed and this should be a lot sturdier than the other one and should fit perfectly within the larger tube and go deeper into it.
|
Re: Isaac Mendel build November 14, 2010 02:06AM |
Registered: 13 years ago Posts: 418 |
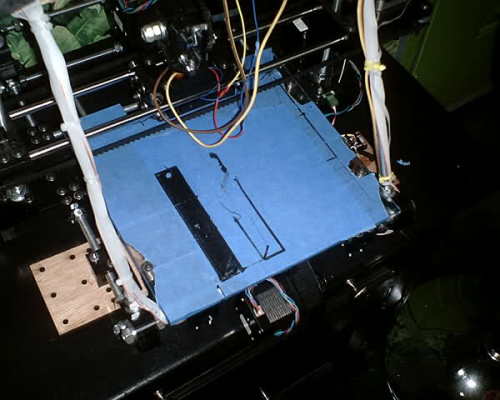
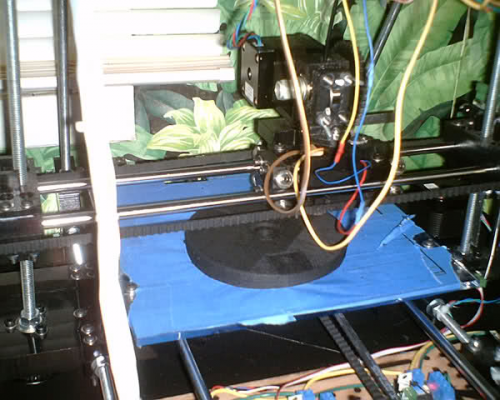
This is the largest part I've attempted so far and you can see from the photo that there are problems with areas on the first few layers. This could possibly be solved with a bed height adjustment but it's also likely that the bed wasn't heated enough with the space heater before starting the print. So far I found a good solution by putting white school glue in the holes to even out the surface and it gets the extrusion flowing over the area again.
|
Re: Isaac Mendel build November 14, 2010 02:24AM |
Registered: 13 years ago Posts: 26 |
|
Re: Isaac Mendel build November 14, 2010 03:27AM |
Registered: 13 years ago Posts: 418 |
I think you should be fine with 3 of the 5 ft rods that sell for around $5.69 each. My glue solution turned out to be just what I've been looking for. I was almost considering throwing the print away and starting over but the glue saved the day and everything leveled right out within a few more layers. I'm wondering if a thin layer of this glue or spray adhesive laid down on the tape beforehand would help prevent this from happening to my prints. The smaller pieces seem to do fine.
|
Re: Isaac Mendel build November 14, 2010 08:08AM |
Registered: 14 years ago Posts: 3,742 |
You forgot the 3/4" PVC!
You don't need to change the part.
See my version in my Picasa Web Mendel album.
Bob Morrison
Wörth am Rhein, Germany
"Luke, use the source!"
BLOG - PHOTOS - Thingiverse
You don't need to change the part.
See my version in my Picasa Web Mendel album.
Bob Morrison
Wörth am Rhein, Germany
"Luke, use the source!"
BLOG - PHOTOS - Thingiverse
|
Re: Isaac Mendel build November 14, 2010 09:22AM |
Registered: 13 years ago Posts: 418 |
|
Re: Isaac Mendel build November 14, 2010 02:23PM |
jkelso,
I wanted to jump in here and thank you for your postings. I just got to the end of the Isaac build documentation on the Fleming website and looking around for guidance. Once I finally assembled all of my parts, the build is going swimmingly. I had the same hiccups that I have read about here (like having to drill out the pullies, which was no big deal) I am at a great advantage in terms of facilities as I am in a sculpture studio with plenty of tools and space at my disposal. I just inserted the smooth z-bars and now it is clear that there's a bit of alignment to do:
Brett, Todd,
Kudos on an excellent kit, beautifully packaged and labeled. More soon!
Molly
|
Re: Isaac Mendel build November 14, 2010 04:36PM |
Registered: 13 years ago Posts: 418 |
|
Re: Isaac Mendel build November 14, 2010 06:20PM |
Registered: 13 years ago Posts: 418 |
This print has been going for 16 hours now and it's coming out nicely. It's on 40 of 58 layers. I've come to realize that I like the printer noises, it sounds like a high tech robot factory in here. I looked online and found that PLA does not have harmful vapors and I no longer notice the slight odor. It's made from corn oil.
Edited 1 time(s). Last edit at 11/14/2010 06:21PM by jkelso.
Edited 1 time(s). Last edit at 11/14/2010 06:21PM by jkelso.
|
Re: Isaac Mendel build November 14, 2010 09:45PM |
Registered: 13 years ago Posts: 128 |
|
Re: Isaac Mendel build November 14, 2010 10:17PM |
Registered: 13 years ago Posts: 418 |
Thank you. I've been creating 3D models for graphics for years but it hasn't been until more recently that I've focused my interest to engineering graphics. I've spent the last year or so learning AutoCad and Inventor in and out and I have a lot of plans to use this printer for my own personal projects and to make a few more printers too. Finally seeing something I modeled myself come to life for the first time has been very fulfilling for me, something I've dreamed about doing for a long time. I'd like to have a few more of these printers and some other fabrication machines eventually too. Tackling this has taught me a lot about electronics and computer science. I remember reading about 3D printers in popular science years ago and thinking how cool it sounded but also thinking that it would never be something I would be able to have or that the technology would ever really be available. It sounded like another "flying car" promise that you read about in that magazine.
|
Re: Isaac Mendel build November 15, 2010 08:27AM |
Registered: 13 years ago Posts: 418 |
After going to bed I awoke to find that the filament roll had once again caught up because it wasn't rolling and caused the X carriage to stop moving during the last 5 layers or so. This only messed up the top of the part and I was able to clean it up and assemble it. Then, I realized that I had made an error in the geometry of this part when I designed it and all the arms aren't symmetrical. AAAGGHHHH!!! Oh, well, I guess it's back to square one on this deal. I could use the part but I would rather have something installed that is perfect and isn't going to bug me every time I look at at. This part did come out very sturdy though and I have an idea for a redesign that won't take as long to print but should be just as sturdy. I deleted the old one off thingiverse.
Edited 1 time(s). Last edit at 11/15/2010 08:28AM by jkelso.
Edited 1 time(s). Last edit at 11/15/2010 08:28AM by jkelso.
|
Re: Isaac Mendel build November 15, 2010 10:29AM |
Registered: 13 years ago Posts: 418 |
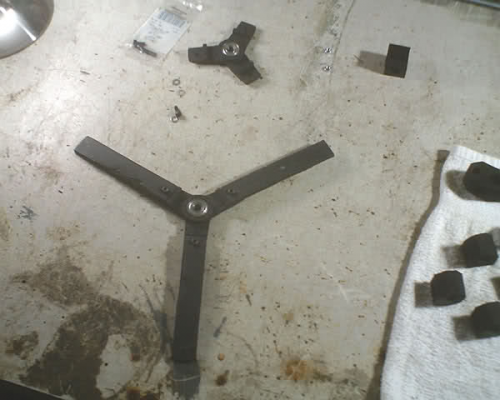
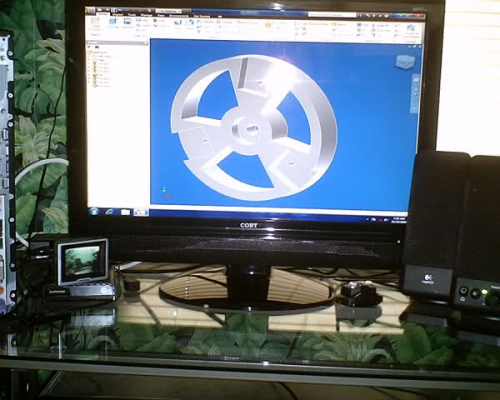
Now I have a newly designed part with symmetrical lines and this time I've taken away a lot of the unnecessary material and this should help it to print up much faster this time.
|
Re: Isaac Mendel build November 15, 2010 10:53AM |
Registered: 14 years ago Posts: 3,742 |
It looks like the hole in the center is only 8mm.
Better would be 20mm.
You only need enough plastic to firmly hold the bearing in place, you don't want the bearing to rub against the plastic making it unable to turn freely.
I changed this in the original SCAD design.
Bob Morrison
Wörth am Rhein, Germany
"Luke, use the source!"
BLOG - PHOTOS - Thingiverse
|
Re: Isaac Mendel build November 15, 2010 12:45PM |
Registered: 13 years ago Posts: 418 |
I've been using 9mm for that small center hole and the rod goes through just fine. The spool was spinning freely on the bearing using 9mm for that inner hole, the rod is 8mm. Now my extra driver board that was running the extruder seems to have failed. The board feels very hot. I am going to try running the extruder from the extruder board terminals now, if it doesn't work out I'll need another driver board.
Sorry, only registered users may post in this forum.
