Home
>
Reprappers
>
Topic
A 3d design technique
Posted by Giantkiller
|
A 3d design technique January 18, 2016 05:28PM |
Registered: 8 years ago Posts: 200 |
Thingyverse object grab
Replikeo Prusa I3 Rework, Ramps 1.4, Marlin, Pronterface, Tinkercad.
Plan B is always to be somebody else.
Replikeo Prusa I3 Rework, Ramps 1.4, Marlin, Pronterface, Tinkercad.
Plan B is always to be somebody else.
|
Re: A 3d design technique January 18, 2016 06:18PM |
Registered: 8 years ago Posts: 1,671 |
|
Re: A 3d design technique January 19, 2016 04:23AM |
Registered: 9 years ago Posts: 1,159 |
Found this on as well
Dual E3d mount for Prusa I3
I don't Actually own the Prusa any More I sold it on about 3-4 months Ago I am now using a large Delta with 350mm diameter bed.
But I have a quad extruder printer under construction which will use a E3D Kraken water cooled hotend
Doug
|
Re: A 3d design technique January 19, 2016 02:38PM |
Registered: 8 years ago Posts: 200 |
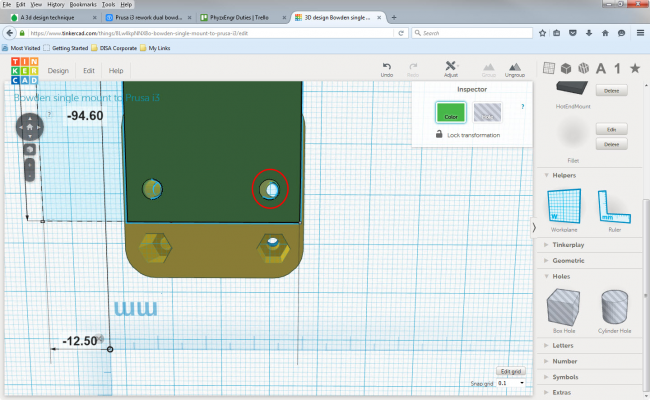
So by modelling I see there is a problem before I can even think about printing.
Two things to remember are that the X axis mount and the extruder head mount are both printed by Replikeo.
The Bowden mount holes do not line up with the X axis mount holes. I am getting other mounts to see who is at fault here.
Edited 1 time(s). Last edit at 01/19/2016 03:08PM by Giantkiller.
Replikeo Prusa I3 Rework, Ramps 1.4, Marlin, Pronterface, Tinkercad.
Plan B is always to be somebody else.
|
Re: A 3d design technique January 19, 2016 04:40PM |
Registered: 8 years ago Posts: 200 |
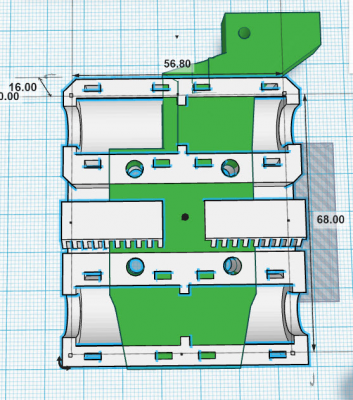
I imported another Bowden holder and found the holes of the Replikeo are misaligned again.
So now I have to actually measure the spacing on my printer to see if the STL file is incorrect or Replikeo has its own.
If Replikeo has its own then there are grounds for a modification to become aligned with the standard.
If the Replikeo x rail mount is off also then I will have to print a Bowden mount to match to print another to get to the standards or I simply print a standard Bowden mount with a new X axis rail mount. Argh.
But better to find out now than after material expenditure.
Edited 1 time(s). Last edit at 01/19/2016 04:41PM by Giantkiller.
|
Re: A 3d design technique January 19, 2016 05:08PM |
Registered: 8 years ago Posts: 200 |
So I import the Replikeo x axis carriage stl and find the hole spacing matches the Replikeo dual hotend mount. This stands to reason.
This points out that the Replikeo are their own standard. I now have to physically measure the parts to be absolutely sure that the files are incorrect or the parts are not standard.
I have a very rare situation here. There is a Microcenter a mile away with which I can just run down there and do a part check. The techs love it when I come in there with 3d internals.
Edited 4 time(s). Last edit at 01/19/2016 05:18PM by Giantkiller.
|
Re: A 3d design technique January 20, 2016 12:00AM |
Registered: 8 years ago Posts: 200 |
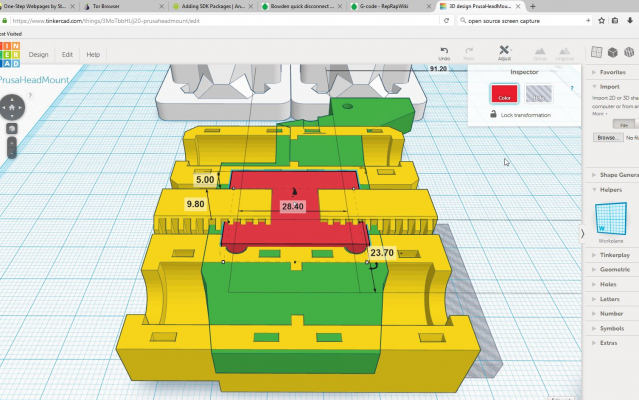
The red block is the standard distance of the bolt holes of a Prusa i3 x axis outside edge to outside edge.
The yellow part is the Replikeo x axis stl.
The green is the Replikeo dual hot end holder stl.
As can be seen the standard spacing is 1.2 mm greater than the Replikeo spacing.
So this exercise commands two things.
1: Replikeo has a wide array of compliance problems.
2. I have to print an X axis rail mount along with my designed Bowden holder to conform to the Prusa standard.
In regards to the X axis I now have to verify the linear bearing spacing to see if the dual X axis rails conform to the Prusa standard distance apart.
I now have a course of action to request and receive something that will work. I have to munge some stls together that I have into a printable submission.
Off I go.
Edited 5 time(s). Last edit at 01/20/2016 12:07AM by Giantkiller.
Replikeo Prusa I3 Rework, Ramps 1.4, Marlin, Pronterface, Tinkercad.
Plan B is always to be somebody else.
|
Re: A 3d design technique January 25, 2016 12:33PM |
Registered: 8 years ago Posts: 200 |
After much deliberating I pulled two STLs together and sent out for printing at a shop just up in Morrison, Colo. I should be able to pickup on Wednesday.
Edited 1 time(s). Last edit at 01/25/2016 12:33PM by Giantkiller.
Replikeo Prusa I3 Rework, Ramps 1.4, Marlin, Pronterface, Tinkercad.
Plan B is always to be somebody else.
Edited 1 time(s). Last edit at 01/25/2016 12:33PM by Giantkiller.
Replikeo Prusa I3 Rework, Ramps 1.4, Marlin, Pronterface, Tinkercad.
Plan B is always to be somebody else.
|
Re: A 3d design technique January 30, 2016 12:34AM |
Registered: 8 years ago Posts: 200 |
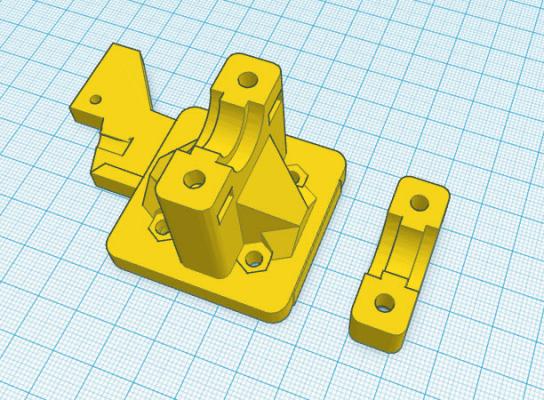
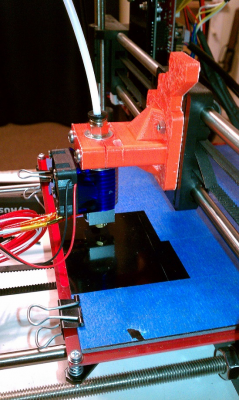
Tada! Part made by munging two stls together in Tinkercad then shipping off to RA3d Technologies, Morrison, Co. www.Ra3dTech.com
A great part!
Edited 1 time(s). Last edit at 01/30/2016 12:37AM by Giantkiller.
Replikeo Prusa I3 Rework, Ramps 1.4, Marlin, Pronterface, Tinkercad.
Plan B is always to be somebody else.
A great part!
Edited 1 time(s). Last edit at 01/30/2016 12:37AM by Giantkiller.
Replikeo Prusa I3 Rework, Ramps 1.4, Marlin, Pronterface, Tinkercad.
Plan B is always to be somebody else.
|
Re: A 3d design technique March 03, 2016 07:55PM |
Registered: 8 years ago Posts: 4 |
Giantkiller - I am in a very similar situation. I purchased a Replikeo dual extruder. Finished the build with my kids, played with the software, and had big problems with printing.
I dislike the dual extruder mount a lot. It may have been my fault, it may be the problems I am having with the extruding, but the mount is sagging due to the heat from the extruder.
I am thinking of upgrading the mount. Would you share the stl files for the design you had made? Would you mind if I asked that company to print a set and send them to me?
Thanks.
|
Re: A 3d design technique March 04, 2016 04:35PM |
Registered: 8 years ago Posts: 200 |
Quote
Verrin13
Giantkiller - I am in a very similar situation. I purchased a Replikeo dual extruder. Finished the build with my kids, played with the software, and had big problems with printing.
I dislike the dual extruder mount a lot. It may have been my fault, it may be the problems I am having with the extruding, but the mount is sagging due to the heat from the extruder.
I am thinking of upgrading the mount. Would you share the stl files for the design you had made? Would you mind if I asked that company to print a set and send them to me?
Thanks.
Open up a tinkercad account and look for BowdenPrusaHeadBase and BowdenPrusaHeadMountCap.
Let me know if this doesnt work. I would rather pass around clicks than files. I hope this works for you.
I know your pain. I have switched out the extruders to a single Omerod mount Bowden Herringbone with E3d V6 hotend for now.
Then I will work the dual aspect of it and progress to there. The leveling of both Relikeo print heads is not the way to go. So I want to design in a better mechanism.
Edited 2 time(s). Last edit at 03/04/2016 04:44PM by Giantkiller.
Replikeo Prusa I3 Rework, Ramps 1.4, Marlin, Pronterface, Tinkercad.
Plan B is always to be somebody else.
|
Re: A 3d design technique March 04, 2016 05:30PM |
Registered: 11 years ago Posts: 5,780 |
Quote
Giantkiller
After much deliberating I pulled two STLs together and sent out for printing at a shop just up in Morrison, Colo. I should be able to pickup on Wednesday.
[attachment 70759 PrusaheadBowdenmount.jpg]
Some suggestions...
I have printed many parts that screw together and have developed a few techniques that make things work better.
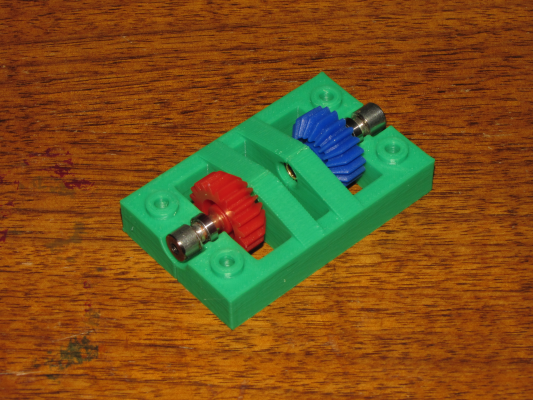
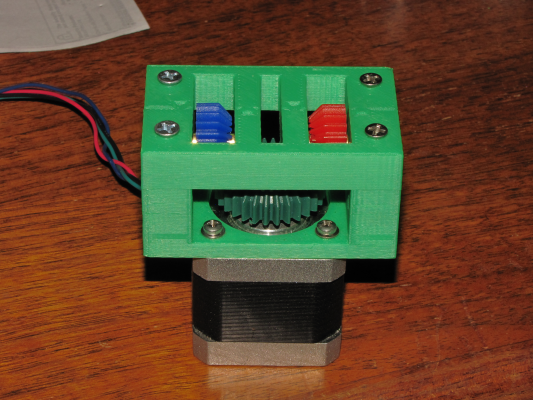
1) you have the two pieces butted against each other and are relying on the screws to align them. I have been designing parts so that there are collars around the screw holes in one part and mating depressions in the opposite parts so that the parts align themselves when put together:
2) Use screws that are designed to go into plastic (thread rolling screws)
3) For parts that get assembled and disassembled a lot, threaded inserts are a good idea.
4) Using modifiers in slic3r to change the infill density around a screw hole to 100%. This gives the screws something solid to bite into.
Ultra MegaMax Dominator 3D printer: [drmrehorst.blogspot.com]
|
Re: A 3d design technique March 04, 2016 06:39PM |
Registered: 8 years ago Posts: 200 |
|
Re: A 3d design technique March 05, 2016 08:49PM |
Registered: 8 years ago Posts: 200 |
@Verrin13,
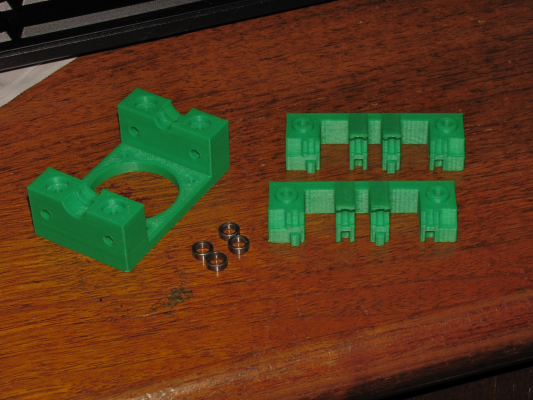
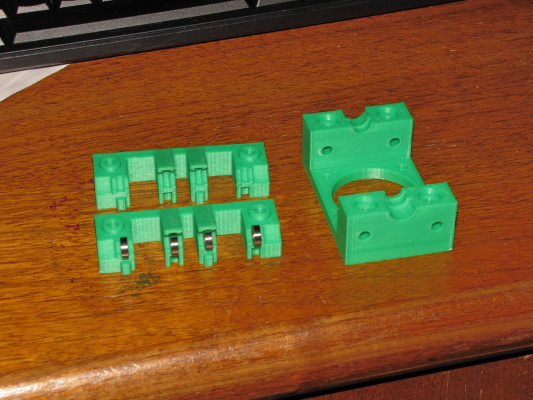
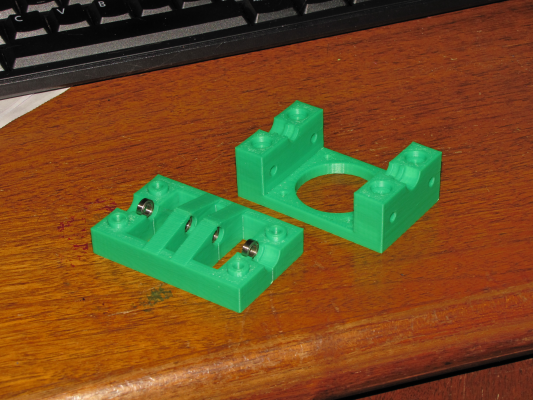
Here are the Prusa e3d v6 mount stls.
Edited 1 time(s). Last edit at 03/05/2016 08:50PM by Giantkiller.
Replikeo Prusa I3 Rework, Ramps 1.4, Marlin, Pronterface, Tinkercad.
Plan B is always to be somebody else.
Here are the Prusa e3d v6 mount stls.
Edited 1 time(s). Last edit at 03/05/2016 08:50PM by Giantkiller.
Replikeo Prusa I3 Rework, Ramps 1.4, Marlin, Pronterface, Tinkercad.
Plan B is always to be somebody else.
|
Re: A 3d design technique March 06, 2016 03:44PM |
Registered: 8 years ago Posts: 4 |
Sorry, only registered users may post in this forum.
