My Replikeo Prusa i3 Rework Build
Posted by Trike
|
Re: My Replikeo Prusa i3 Rework Build February 05, 2015 12:40AM |
Registered: 9 years ago Posts: 120 |
Quote
Jonny Five
I wouldn't raise your hotend to minimize the first layer thickness. You need it very close to the bed to lay down a solid first layer for adhesion - it should be smashed down a bit.
If you think you don't need an extra fat first layer, then you adjust this in slic3r. The default settings are to lay down a thicker layer, which I think is ideal. Anyway, look at print settings -> first layer height (default .35mm for .3mm layer height). Also, Print Settings -> Advanced -> First Layer (default 200%).
That's a great point that I totally glossed over.
My first layer height is 0.12 mm for a 0.2 mm layer height, which allows the hotend to be super close to the heatbed for the start of the print. I'm so used to it that I gave you advice for my own printer instead of yours- I haven't changed the value from 0.12 mm in months. It's the reverse of the defaults, so YMMV. Thanks for putting that in, Johnny Five.
Edited 3 time(s). Last edit at 02/05/2015 12:42AM by Blue Ice.
Blue Ice
blog at [contemporarymaker.com]
|
Anonymous User
Re: My Replikeo Prusa i3 Rework Build February 05, 2015 07:10PM |
Quote
Ano
Oh, and I didn't say: My layers were 0,2mm, my hotend 245°C and my heatbed 100°C first layers, then 95°C
And I just tried a print with heatbed temp 105°C for the whole print, still warping.
I do 100-110C heatbed with Schwarzkopf hair spray. Still never experience warping:
|
Re: My Replikeo Prusa i3 Rework Build February 05, 2015 07:27PM |
Registered: 9 years ago Posts: 30 |
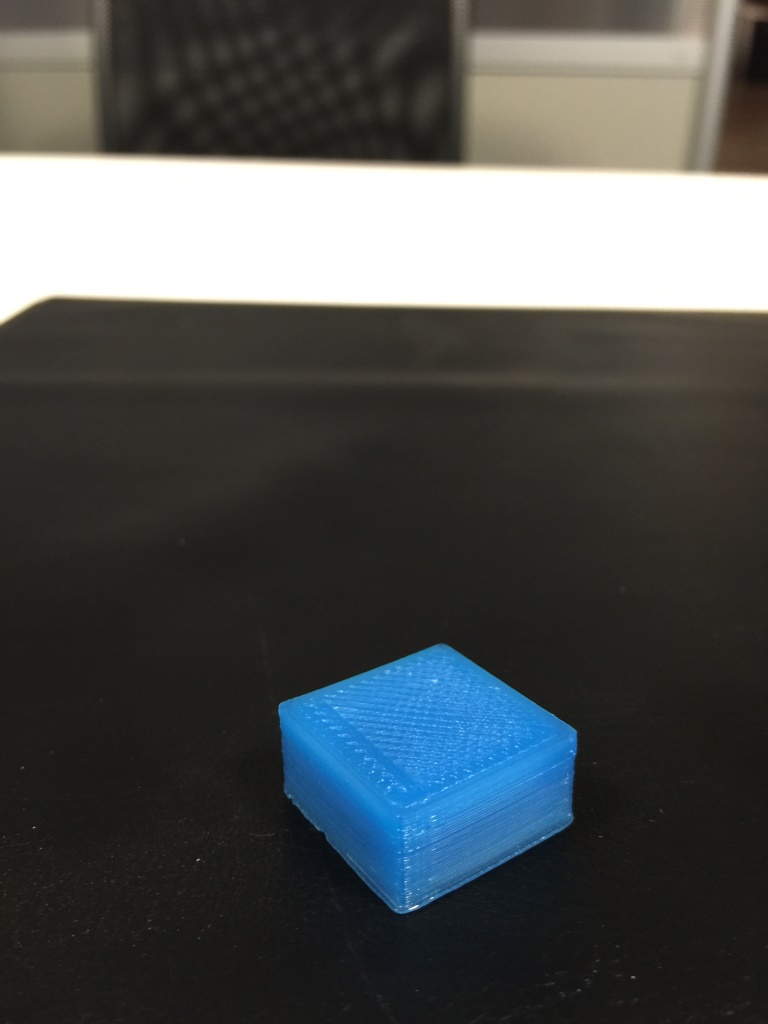
Hey Blue Ice, any advice for nozzle dragging? I printed the 20mm cube almost perfectly, but the top layer shows minor dragging (see attached). When moving to the 50mm tower though, the nozzle really starts to push material to the edges as it gets higher. Any ideas? Pictures attached.
My only thoughts so far, and the settings should be correct, have been:
- The printer extruding more material than it thinks (adjust extruder steps in firmware, adjust filament diameter in slic3r, or adjust layer height properly with respect to nozzle diameter).
- The printer is not moving as high up the z-axis as it thinks (adjust z-axis steps in firmware).
Edited 1 time(s). Last edit at 02/05/2015 07:27PM by Jonny Five.
|
Re: My Replikeo Prusa i3 Rework Build February 06, 2015 02:04PM |
Registered: 9 years ago Posts: 21 |
Hey all,
i'm also owning a replikeo prusa i3 rework (Steel-version) for two weeks now.
I've buildt up the prusa within 3 days till the first print.
If i print a calibration STL (see attached), everything seems fine, the wall thickness fits perfectly, no bending or other problems.
As soon as i start printing longer print-jobs (see baseLCD.stl), there seems to be a shift in x-Axis. The following picture shows the layers start shifting to the x-axis. At one point i paused the print and moved the x-axis a bit to the correct position and then continued the print. After a while, there was nearly the same shift in x-axis.
i don't know what to do. I checked the rods, i checked the x-wagon, also the nozzle itself seems to be fixed and has no movement in x-direction.
any idea what i can do?
Prints were sliced using Slic3R in Repetier-Host Mac.
Printed with PLA on 210 Celsius with bed temperature at 65 Celsius.
Firmware -> Marlin
Full Graphics LCD attached to RAMPS 1.4 board.
Edited 2 time(s). Last edit at 02/06/2015 02:14PM by BoxSon.
i'm also owning a replikeo prusa i3 rework (Steel-version) for two weeks now.
I've buildt up the prusa within 3 days till the first print.
If i print a calibration STL (see attached), everything seems fine, the wall thickness fits perfectly, no bending or other problems.
As soon as i start printing longer print-jobs (see baseLCD.stl), there seems to be a shift in x-Axis. The following picture shows the layers start shifting to the x-axis. At one point i paused the print and moved the x-axis a bit to the correct position and then continued the print. After a while, there was nearly the same shift in x-axis.


i don't know what to do. I checked the rods, i checked the x-wagon, also the nozzle itself seems to be fixed and has no movement in x-direction.
any idea what i can do?
Prints were sliced using Slic3R in Repetier-Host Mac.
Printed with PLA on 210 Celsius with bed temperature at 65 Celsius.
Firmware -> Marlin
Full Graphics LCD attached to RAMPS 1.4 board.
Edited 2 time(s). Last edit at 02/06/2015 02:14PM by BoxSon.
|
Re: My Replikeo Prusa i3 Rework Build February 06, 2015 02:34PM |
Registered: 9 years ago Posts: 119 |
Seems like you are loosing steps. You could try to fasten the x-carriage belt. Perhaps your motors are just on the edge of power. You could try to
give them some more (using the potentiometer on the driver boards (see wiki)).
I'm making some progress, too ^^
@Blue Ice: Thanks for the hint, a 0.12mm starting layer seems to raise the adhesion on the printbed. Even strong enough to not being able to lift
the 0.12mm high skirt
Edited 1 time(s). Last edit at 02/06/2015 02:36PM by Ano.
Prusa i3 Rework (from Replikeo.com) & original Prusa i3 MK2 (from shop.prusa3d.com) << the MK2 definitely is worth the higher cost!
Print Troubleshooting Guide // Visual troubleshooting guide
|
Re: My Replikeo Prusa i3 Rework Build February 07, 2015 12:40PM |
Registered: 9 years ago Posts: 137 |
Just wanted to share this incredibly helpful video I found, that finally helped me solve my extrusion length issue.
[www.youtube.com]
Previously no matter how many steps used I couldn't extrude exactly 100mm. That video above made process very clear. I calculated that I need to set extruder to 740 steps, and like magic it extruded exactly 100mm!!! It seems I've been printing by underextruding all these months...
740 seems like a huge number comparing to 600 steps recommended by Replikeo, but it works for me... Getting some good prints finally! Next project is to switch to Bowden E3D V6 mechanism...
And also on top of my list is some kind of belt tentioner for X-axis. Going to try adapting one from Hephestos i3 edition...
Edited 1 time(s). Last edit at 02/07/2015 12:43PM by Bratan.
|
Re: My Replikeo Prusa i3 Rework Build February 07, 2015 08:55PM |
Registered: 9 years ago Posts: 120 |
Quote
Jonny Five
Hey Blue Ice, any advice for nozzle dragging? I printed the 20mm cube almost perfectly, but the top layer shows minor dragging (see attached). When moving to the 50mm tower though, the nozzle really starts to push material to the edges as it gets higher. Any ideas? Pictures attached.
My only thoughts so far, and the settings should be correct, have been:
- The printer extruding more material than it thinks (adjust extruder steps in firmware, adjust filament diameter in slic3r, or adjust layer height properly with respect to nozzle diameter).
- The printer is not moving as high up the z-axis as it thinks (adjust z-axis steps in firmware).
Hmm. Can I see what your DEFAULT_AXIS_STEPS_PER_UNIT line looks like? I think you might be right with your first thought. Sorry for the late reply- I've been busy with non-printer stuff lately

Blue Ice
blog at [contemporarymaker.com]
|
Re: My Replikeo Prusa i3 Rework Build February 07, 2015 08:58PM |
Registered: 9 years ago Posts: 120 |
Quote
BoxSon
Hey all,
i'm also owning a replikeo prusa i3 rework (Steel-version) for two weeks now.
I've buildt up the prusa within 3 days till the first print.
If i print a calibration STL (see attached), everything seems fine, the wall thickness fits perfectly, no bending or other problems.
As soon as i start printing longer print-jobs (see baseLCD.stl), there seems to be a shift in x-Axis. The following picture shows the layers start shifting to the x-axis. At one point i paused the print and moved the x-axis a bit to the correct position and then continued the print. After a while, there was nearly the same shift in x-axis.
i don't know what to do. I checked the rods, i checked the x-wagon, also the nozzle itself seems to be fixed and has no movement in x-direction.
any idea what i can do?
Prints were sliced using Slic3R in Repetier-Host Mac.
Printed with PLA on 210 Celsius with bed temperature at 65 Celsius.
Firmware -> Marlin
Full Graphics LCD attached to RAMPS 1.4 board.
Hi BoxSon!
Can you post your layer height values from Slic3r? For the first and the other layers? Also, how tight are your belts?
Thanks.
Blue Ice
blog at [contemporarymaker.com]
|
Re: My Replikeo Prusa i3 Rework Build February 07, 2015 09:02PM |
Registered: 9 years ago Posts: 120 |
Quote
Ano
Seems like you are loosing steps. You could try to fasten the x-carriage belt. Perhaps your motors are just on the edge of power. You could try to
give them some more (using the potentiometer on the driver boards (see wiki)).
I'm making some progress, too ^^
@Blue Ice: Thanks for the hint, a 0.12mm starting layer seems to raise the adhesion on the printbed. Even strong enough to not being able to lift
the 0.12mm high skirt
Sweet! I'm glad the hint helped. If you are having trouble getting the skirt off, try using one of these to peel off the skirt on the glass plate (I use the 35 degree bend one most frequently for this):

[www.homedepot.com]
If you don't press hard, they won't scratch at all. It makes cleaning off the bed way easier
Edited 1 time(s). Last edit at 02/07/2015 09:02PM by Blue Ice.
Blue Ice
blog at [contemporarymaker.com]
|
Re: My Replikeo Prusa i3 Rework Build February 07, 2015 09:10PM |
Registered: 9 years ago Posts: 120 |
Quote
Bratan
Just wanted to share this incredibly helpful video I found, that finally helped me solve my extrusion length issue.
[www.youtube.com]
Previously no matter how many steps used I couldn't extrude exactly 100mm. That video above made process very clear. I calculated that I need to set extruder to 740 steps, and like magic it extruded exactly 100mm!!! It seems I've been printing by underextruding all these months...
740 seems like a huge number comparing to 600 steps recommended by Replikeo, but it works for me... Getting some good prints finally! Next project is to switch to Bowden E3D V6 mechanism...
I ran into the same issue- each time I had reset the extruder value, the extrusion amount would change. Turns out for me that the springs never held the bearing tightly enough against the filament. Even in normal operation, the hobbed bolt would slip a little. My value was always somewhere ridiculously high to compensate for the slippage.
I ended up swapping the springs for spacers in my printer. Now I can tighten those screws down pretty well and the filament never slips. My value for the extrusion amount became much more reasonable as well.
It's great that you got yours to work out without all of what I did, though. Nice job that you got it to stay put for you because mine was just awful
Edited 2 time(s). Last edit at 02/07/2015 09:11PM by Blue Ice.
Blue Ice
blog at [contemporarymaker.com]
|
Re: My Replikeo Prusa i3 Rework Build February 08, 2015 11:48AM |
Registered: 9 years ago Posts: 30 |
My relevant settings are as follows. I've slowed everything down quite a bit from the defaults, and seen very smooth printing with hardly reduced total times.
#define DEFAULT_AXIS_STEPS_PER_UNIT {80,80,4000,455}
#define DEFAULT_MAX_FEEDRATE {500, 500, 2, 25} // (mm/sec)
#define DEFAULT_MAX_ACCELERATION {2000,2000,10,1000} // X, Y, Z, E maximum start speed for accelerated moves.
#define DEFAULT_ACCELERATION 1000 // X, Y, Z and E max acceleration in mm/s^2 for printing moves
#define DEFAULT_RETRACT_ACCELERATION 1000 // X, Y, Z and E max acceleration in mm/s^2 for retracts
#define DEFAULT_ZJERK 0.4 // (mm/sec)
I think the issue is that I need a print fan directly on the PLA, specifically for any print with solid infill or small cross-sectional areas. It really makes sense that these layers don't have adequate time to cool, so on the next layer above the nozzle draws the molten plastic up higher.
|
Re: My Replikeo Prusa i3 Rework Build February 09, 2015 03:56PM |
Registered: 9 years ago Posts: 124 |
Hello there LittleMike. Did you ever manage to print something to see if it printed backwards?
I am in the middle (?) of building my Rework I3 and I found that I had mounted my Y-axis motor to the rear as well. My motor is also located to the left side of the motor mount - closer to the main board and Ramps 1.4 board.
I haven't hooked anything up yet and my z-axis rods haven't been installed yet.
|
Re: My Replikeo Prusa i3 Rework Build February 09, 2015 05:10PM |
Registered: 9 years ago Posts: 120 |
Quote
Jonny Five
My relevant settings are as follows. I've slowed everything down quite a bit from the defaults, and seen very smooth printing with hardly reduced total times.
#define DEFAULT_AXIS_STEPS_PER_UNIT {80,80,4000,455}
#define DEFAULT_MAX_FEEDRATE {500, 500, 2, 25} // (mm/sec)
#define DEFAULT_MAX_ACCELERATION {2000,2000,10,1000} // X, Y, Z, E maximum start speed for accelerated moves.
#define DEFAULT_ACCELERATION 1000 // X, Y, Z and E max acceleration in mm/s^2 for printing moves
#define DEFAULT_RETRACT_ACCELERATION 1000 // X, Y, Z and E max acceleration in mm/s^2 for retracts
#define DEFAULT_ZJERK 0.4 // (mm/sec)
I think the issue is that I need a print fan directly on the PLA, specifically for any print with solid infill or small cross-sectional areas. It really makes sense that these layers don't have adequate time to cool, so on the next layer above the nozzle draws the molten plastic up higher.
Oh yeah! Do you have a fan that you use to blow air around in your house? I use one to usually gently waft air over the build area when printing PLA. It works great.
Otherwise, it seems that 455 is a little low for your extruder steps per mm:
#define DEFAULT_AXIS_STEPS_PER_UNIT {80,80,4000,455}
I would just check to see if the right length is going in.
Edited 1 time(s). Last edit at 02/09/2015 05:10PM by Blue Ice.
Blue Ice
blog at [contemporarymaker.com]
|
Re: My Replikeo Prusa i3 Rework Build February 10, 2015 10:23AM |
Registered: 9 years ago Posts: 119 |
I ordered some of these:
and 1m of ptfe tube that just arrived. I would like to upgrade my printer to bowden setup. I will try to design a j-head-holder in this style:
(Source: http://www.thingiverse.com/thing:547706).
The holder will have an adapter to get the push-fit connector in place.
(I made a mistake in fact, didn't think of the possibility to directly screw the connector to the j-head instead of the metall cap that's in the top of the j-head)
I am wondering how long the tube should be. 1m seems a lot of waste for each roll change.
/Edit: Oh, and I ordered a MK8 drive gear.
Edited 2 time(s). Last edit at 02/10/2015 10:33AM by Ano.
Prusa i3 Rework (from Replikeo.com) & original Prusa i3 MK2 (from shop.prusa3d.com) << the MK2 definitely is worth the higher cost!
Print Troubleshooting Guide // Visual troubleshooting guide

and 1m of ptfe tube that just arrived. I would like to upgrade my printer to bowden setup. I will try to design a j-head-holder in this style:

(Source: http://www.thingiverse.com/thing:547706).
The holder will have an adapter to get the push-fit connector in place.
(I made a mistake in fact, didn't think of the possibility to directly screw the connector to the j-head instead of the metall cap that's in the top of the j-head)
I am wondering how long the tube should be. 1m seems a lot of waste for each roll change.
/Edit: Oh, and I ordered a MK8 drive gear.
Edited 2 time(s). Last edit at 02/10/2015 10:33AM by Ano.
Prusa i3 Rework (from Replikeo.com) & original Prusa i3 MK2 (from shop.prusa3d.com) << the MK2 definitely is worth the higher cost!
Print Troubleshooting Guide // Visual troubleshooting guide
|
Re: My Replikeo Prusa i3 Rework Build February 10, 2015 05:12PM |
Registered: 9 years ago Posts: 30 |
Quote
Blue Ice
Quote
Jonny Five
My relevant settings are as follows. I've slowed everything down quite a bit from the defaults, and seen very smooth printing with hardly reduced total times.
#define DEFAULT_AXIS_STEPS_PER_UNIT {80,80,4000,455}
#define DEFAULT_MAX_FEEDRATE {500, 500, 2, 25} // (mm/sec)
#define DEFAULT_MAX_ACCELERATION {2000,2000,10,1000} // X, Y, Z, E maximum start speed for accelerated moves.
#define DEFAULT_ACCELERATION 1000 // X, Y, Z and E max acceleration in mm/s^2 for printing moves
#define DEFAULT_RETRACT_ACCELERATION 1000 // X, Y, Z and E max acceleration in mm/s^2 for retracts
#define DEFAULT_ZJERK 0.4 // (mm/sec)
I think the issue is that I need a print fan directly on the PLA, specifically for any print with solid infill or small cross-sectional areas. It really makes sense that these layers don't have adequate time to cool, so on the next layer above the nozzle draws the molten plastic up higher.
Oh yeah! Do you have a fan that you use to blow air around in your house? I use one to usually gently waft air over the build area when printing PLA. It works great.
Otherwise, it seems that 455 is a little low for your extruder steps per mm:
#define DEFAULT_AXIS_STEPS_PER_UNIT {80,80,4000,455}
I would just check to see if the right length is going in.
Ah, yeah I put in some herringbone gears, that's why I changed that. The gear ratio is different. The gears are pretty amazing, as they're locked into place laterally extremely well - there's absolutely no play or backlash whatsoever.
|
Re: My Replikeo Prusa i3 Rework Build February 10, 2015 06:56PM |
Registered: 9 years ago Posts: 30 |
|
Re: My Replikeo Prusa i3 Rework Build February 10, 2015 08:42PM |
Registered: 9 years ago Posts: 124 |
Quote
Blue Ice
Awesome!
Quote
Joe2014
Just got a text from DHL. My kit shall arrive tomorrow! Just in time for the weekend. I'll probably post my thoughts during the build, possible some video logs. I'm excited! Hopefully nothing was damaged in shipping...
My kit arrived just a couple days ago, as you can see above. I'm through the first big step (here), and I haven't run into any issues yet. When I opened the box, I went through all of the parts to make sure they were there from the BOM before I built the kit. I thought I was missing the Fan Duct part until I realized that it was the part wrapped up in protective foam. In case you run into that, now you know
I would really love to hear about how your build goes or see some pictures- because we are assembling the kits at about the same time, we can try to help each other out. Does that work for you?
I started a Flickr album for my project here, and I am also putting out info on my blog about the project as well.
So here is where I am at:
More info coming soon

Finally got my smooth rods for my I3 Rework build. I have done quite a bit of the assembly and I was checking out your build blog - very nice!!
I noticed early on in your build that you had the y-axis motor set up to the rear and in the end it was in the front. Mine is currently set up with the y-axis motor to the rear. I assume I will need to swap it around? I have attached a couple of pictures of where I'm at in my build right now.
|
Re: My Replikeo Prusa i3 Rework Build February 11, 2015 01:35PM |
Registered: 9 years ago Posts: 30 |
Quote
psneddon
Quote
Blue Ice
Awesome!
Quote
Joe2014
Just got a text from DHL. My kit shall arrive tomorrow! Just in time for the weekend. I'll probably post my thoughts during the build, possible some video logs. I'm excited! Hopefully nothing was damaged in shipping...
My kit arrived just a couple days ago, as you can see above. I'm through the first big step (here), and I haven't run into any issues yet. When I opened the box, I went through all of the parts to make sure they were there from the BOM before I built the kit. I thought I was missing the Fan Duct part until I realized that it was the part wrapped up in protective foam. In case you run into that, now you know
I would really love to hear about how your build goes or see some pictures- because we are assembling the kits at about the same time, we can try to help each other out. Does that work for you?
I started a Flickr album for my project here, and I am also putting out info on my blog about the project as well.
So here is where I am at:
More info coming soon
Finally got my smooth rods for my I3 Rework build. I have done quite a bit of the assembly and I was checking out your build blog - very nice!!
I noticed early on in your build that you had the y-axis motor set up to the rear and in the end it was in the front. Mine is currently set up with the y-axis motor to the rear. I assume I will need to swap it around? I have attached a couple of pictures of where I'm at in my build right now.
From what I've seen, some people have chosen to move the y-axis motor to the rear purely for aesthtics and wiring reasons. However, it seems to cause some people headaches when trying to set up the firmware settings for their endstops, or they get oddly inverted prints. If you can get it to work, that's great though! I opted to keep the motor up front as the original design called for, and didn't have any issues with the axis directions, homing, or endstop function.
|
Re: My Replikeo Prusa i3 Rework Build February 12, 2015 01:22AM |
Registered: 9 years ago Posts: 120 |
Quote
psneddon
Quote
Blue Ice
Awesome!
Quote
Joe2014
Just got a text from DHL. My kit shall arrive tomorrow! Just in time for the weekend. I'll probably post my thoughts during the build, possible some video logs. I'm excited! Hopefully nothing was damaged in shipping...
My kit arrived just a couple days ago, as you can see above. I'm through the first big step (here), and I haven't run into any issues yet. When I opened the box, I went through all of the parts to make sure they were there from the BOM before I built the kit. I thought I was missing the Fan Duct part until I realized that it was the part wrapped up in protective foam. In case you run into that, now you know
I would really love to hear about how your build goes or see some pictures- because we are assembling the kits at about the same time, we can try to help each other out. Does that work for you?
I started a Flickr album for my project here, and I am also putting out info on my blog about the project as well.
So here is where I am at:
More info coming soon
Finally got my smooth rods for my I3 Rework build. I have done quite a bit of the assembly and I was checking out your build blog - very nice!!
I noticed early on in your build that you had the y-axis motor set up to the rear and in the end it was in the front. Mine is currently set up with the y-axis motor to the rear. I assume I will need to swap it around? I have attached a couple of pictures of where I'm at in my build right now.
Johnny Five is spot on. Setting it up with the motor in the front is what I recommend, but the other way is also doable if you enjoy fiddling with settings
Which photos had the motor in the back? I can fix those so there will be less confusion!
Blue Ice
blog at [contemporarymaker.com]
|
Re: My Replikeo Prusa i3 Rework Build February 12, 2015 01:59PM |
Registered: 9 years ago Posts: 124 |
Quote
Blue Ice
Quote
psneddon
Quote
Blue Ice
Awesome!
Quote
Joe2014
Just got a text from DHL. My kit shall arrive tomorrow! Just in time for the weekend. I'll probably post my thoughts during the build, possible some video logs. I'm excited! Hopefully nothing was damaged in shipping...
My kit arrived just a couple days ago, as you can see above. I'm through the first big step (here), and I haven't run into any issues yet. When I opened the box, I went through all of the parts to make sure they were there from the BOM before I built the kit. I thought I was missing the Fan Duct part until I realized that it was the part wrapped up in protective foam. In case you run into that, now you know
I would really love to hear about how your build goes or see some pictures- because we are assembling the kits at about the same time, we can try to help each other out. Does that work for you?
I started a Flickr album for my project here, and I am also putting out info on my blog about the project as well.
So here is where I am at:
More info coming soon
Finally got my smooth rods for my I3 Rework build. I have done quite a bit of the assembly and I was checking out your build blog - very nice!!
I noticed early on in your build that you had the y-axis motor set up to the rear and in the end it was in the front. Mine is currently set up with the y-axis motor to the rear. I assume I will need to swap it around? I have attached a couple of pictures of where I'm at in my build right now.
Johnny Five is spot on. Setting it up with the motor in the front is what I recommend, but the other way is also doable if you enjoy fiddling with settings
Which photos had the motor in the back? I can fix those so there will be less confusion!
I think it was when it showed the y axis frame with the motor mount to what I expected to be the "back" since the fame mounting nuts were closer to the y-axis motor. Do you know what I mean?
The way the frame is supposed to be mounted to the y-axis frame, the longer portion of the frame is to the front of the printer. Yet some of the build instructions show the y-axis frame mounting nuts closer to the y-axis motor mount which seems to imply that the motor goes to the back. Like the photo shown above.
|
Re: My Replikeo Prusa i3 Rework Build February 12, 2015 04:21PM |
Registered: 9 years ago Posts: 120 |
This one seems pretty misleading:
Well. I'll either switch the photo out or add a note in there to clear things up. Thanks for the tips.
By the way, are you nearly at the latest build log? I can get the next one up soon if it helps- I didn't know people liked them so much, so I wasn't especially concerned about time
Blue Ice
blog at [contemporarymaker.com]
|
Re: My Replikeo Prusa i3 Rework Build February 12, 2015 11:06PM |
Registered: 11 years ago Posts: 76 |
|
Re: My Replikeo Prusa i3 Rework Build February 13, 2015 05:34AM |
Registered: 9 years ago Posts: 59 |
Mine was a collection of Prusa i3 parts from all over including Ebay. Used a Melzi 2.0 controller from Dealextreme, and a Budaschnozzle hot end bought locally (and converted to 1.75mm fillament).
Edited 2 time(s). Last edit at 02/13/2015 05:36AM by mr.sneezy.


Edited 2 time(s). Last edit at 02/13/2015 05:36AM by mr.sneezy.
|
Re: My Replikeo Prusa i3 Rework Build February 13, 2015 08:49AM |
Registered: 9 years ago Posts: 124 |
Quote
Blue Ice
This one seems pretty misleading:
Well. I'll either switch the photo out or add a note in there to clear things up. Thanks for the tips.
By the way, are you nearly at the latest build log? I can get the next one up soon if it helps- I didn't know people liked them so much, so I wasn't especially concerned about time
Yes. That one shows the motor to the rear - as does the one posted by mr.sneezy above. I think it all stems from the official build diagrams where most people assume that the motor is going to the rear by the position of the frame mounting nuts.
I haven't gotten my heated bed or hot end yet, so I'm not up to the final blog page. Trying to keep costs down - I am going to get the standard MK2A heated bed. I just want to make sure I get the proper "standard" thermistor that goes with it.
I appreciate the response(s) and all the information and advice I've gotten.
|
Re: My Replikeo Prusa i3 Rework Build February 13, 2015 05:34PM |
Registered: 9 years ago Posts: 119 |
I would mount the motor on the back. I have it on the front and I am currently to lazy to change that ^^
But for wiring reasons, at the back should be better. And changing the software is not a really big deal.
Just got another print running. It's a spool holder.
For adhesion reasons I used "L'Oréal Paris Elnett" hairspray, which one of the users suggested here I think.
This thing is sick! Worked really well and even at room temperature it holds on tightly. Needed to cool it down
in the freezer to get it off without too much force. I used 2 "big" layers and let it dry before printing.
Apparently I have a problem with my x-Axis. In the middle you see a layer that got too big and after that layer
the upper layers got really good. The layers at the bottom always vary in size but over that big step, the quality
is astonishing.
I will try to turn my threaded rods upside down and see, if that helps for the layers on the bottom.
Another thing I recognized is the holes being too little. The diameter I chose was 3,2mm, in the end it would be
printed as about 2mm. All other dimensions seem to be about fine.
My plan for further upgrading is to change to a bowden setup, as I said earlier. For that I will print an extruder
(Bratan showed me a nice one in another thread: http://www.thingiverse.com/thing:669459)
and place it in the middle of the top frame.
Edited 4 time(s). Last edit at 02/13/2015 05:50PM by Ano.
Prusa i3 Rework (from Replikeo.com) & original Prusa i3 MK2 (from shop.prusa3d.com) << the MK2 definitely is worth the higher cost!
Print Troubleshooting Guide // Visual troubleshooting guide
But for wiring reasons, at the back should be better. And changing the software is not a really big deal.
Just got another print running. It's a spool holder.

For adhesion reasons I used "L'Oréal Paris Elnett" hairspray, which one of the users suggested here I think.
This thing is sick! Worked really well and even at room temperature it holds on tightly. Needed to cool it down
in the freezer to get it off without too much force. I used 2 "big" layers and let it dry before printing.
Apparently I have a problem with my x-Axis. In the middle you see a layer that got too big and after that layer
the upper layers got really good. The layers at the bottom always vary in size but over that big step, the quality
is astonishing.

I will try to turn my threaded rods upside down and see, if that helps for the layers on the bottom.
Another thing I recognized is the holes being too little. The diameter I chose was 3,2mm, in the end it would be
printed as about 2mm. All other dimensions seem to be about fine.

My plan for further upgrading is to change to a bowden setup, as I said earlier. For that I will print an extruder
(Bratan showed me a nice one in another thread: http://www.thingiverse.com/thing:669459)
and place it in the middle of the top frame.
Edited 4 time(s). Last edit at 02/13/2015 05:50PM by Ano.
Prusa i3 Rework (from Replikeo.com) & original Prusa i3 MK2 (from shop.prusa3d.com) << the MK2 definitely is worth the higher cost!
Print Troubleshooting Guide // Visual troubleshooting guide
|
Re: My Replikeo Prusa i3 Rework Build February 13, 2015 11:22PM |
Registered: 9 years ago Posts: 59 |
I put the Y motor on the back to keep the wiring tidier and shorter, that's all. Yes the software doesn't care either way.
During my build I was not happy with the slop in the X carriage printed ends, when assembled the normal way I could see and feel the two X rods move in the ends. I tried thin brass shims under the rods, then when that was not good enough I carefully glued the rods in permanently with 30 minute epoxy. I did one end at a time and slide the X carriage over to the end being glued to accurately set the spacing. That process stiffened the X axis up a remarkable amount.
Just recently I've now glued the Wade extruder holder to the X carriage. I found the extruder holder is slowly drooping (PLA moving I guess). I used Devcon expoxy (goes as hard as glass), just a thin bit on the mating faces. I've also fitted extra long extruder to X carriage screws and fat washers on the front face of the extruder, instead of using the shorter screws deeply counter sunk into the extruder holder. I found that the 3mm diameter mounting screws were loosening by 1/4 turn about every second print, more PLA creep I guess.
I've also put a 5mm ply packer between the Budaschnozzle and the bottom of the X carriage. This stiffened up the rocking flex of the extruder holder a lot. Yet to print with that done, as I noticed today that one of my Y carriage smooth rods has got bent. How I'm not sure, maybe during a mishap with bad G-code that drove the extruder too far down a while ago...
Martin
Edited 2 time(s). Last edit at 02/13/2015 11:25PM by mr.sneezy.
|
Re: My Replikeo Prusa i3 Rework Build February 15, 2015 08:46PM |
Registered: 9 years ago Posts: 120 |
Quote
Ano
I would mount the motor on the back. I have it on the front and I am currently to lazy to change that ^^
But for wiring reasons, at the back should be better. And changing the software is not a really big deal.
Just got another print running. It's a spool holder.
[attachment 49250 IMG_20150213_213152.jpg]
For adhesion reasons I used "L'Oréal Paris Elnett" hairspray, which one of the users suggested here I think.
This thing is sick! Worked really well and even at room temperature it holds on tightly. Needed to cool it down
in the freezer to get it off without too much force. I used 2 "big" layers and let it dry before printing.
Apparently I have a problem with my x-Axis. In the middle you see a layer that got too big and after that layer
the upper layers got really good. The layers at the bottom always vary in size but over that big step, the quality
is astonishing.
[attachment 49254 IMG_20150213_215641.jpg]
I will try to turn my threaded rods upside down and see, if that helps for the layers on the bottom.
Another thing I recognized is the holes being too little. The diameter I chose was 3,2mm, in the end it would be
printed as about 2mm. All other dimensions seem to be about fine.
[attachment 49261 IMG_20150213_223023.jpg]
My plan for further upgrading is to change to a bowden setup, as I said earlier. For that I will print an extruder
(Bratan showed me a nice one in another thread: http://www.thingiverse.com/thing:669459)
and place it in the middle of the top frame.
Does your hotend wiggle in your extruder at all? That caused lines like that on my parts at one point.
Blue Ice
blog at [contemporarymaker.com]
|
Re: My Replikeo Prusa i3 Rework Build February 16, 2015 02:59AM |
Registered: 9 years ago Posts: 59 |
Update on my Prusa i3.
The printed parts on my machine are made of PLA. Yesterday the shed where it's used was 40C ambient in a bit of Aussie hot weather. You'd think that would make for nice printing as the print would not cool so much between layers.
Well about 15 minutes into the print the Wade extruder assembly softened up and drooped by about 10mm, ruined the print of course, and the Wade extruder holder. The X-carriage is also warped.
Now getting those parts reprinted in ABS.
Martin
|
Re: My Replikeo Prusa i3 Rework Build February 21, 2015 07:38PM |
Registered: 9 years ago Posts: 119 |
Tried to update my printer:
Direct drive extruder at the top frame with 45° mount angle.
Now I just need to fix the extruder:
https://www.youtube.com/watch?v=b4G1odhli3I&feature=youtu.be
I'm not sure what's causing this motor behavior. I would understand the gear not being able to pull/push the filament, but this "jumps"
are a bit strange.
Prusa i3 Rework (from Replikeo.com) & original Prusa i3 MK2 (from shop.prusa3d.com) << the MK2 definitely is worth the higher cost!
Print Troubleshooting Guide // Visual troubleshooting guide
|
Re: My Replikeo Prusa i3 Rework Build February 22, 2015 03:06AM |
Registered: 9 years ago Posts: 120 |
Hey guys-
Ano, thanks for mentioning the picture confusion with whether the motor should be at the front or the back. I fixed it in the introduction post and added a note that the motor should be at the front as per the build instructions.
I also got the next build log post published, covering the extruder setup. It seems that you won't need it after all, though, because you have a different extruder! But other people might find a use for it at some point, so we'll see.
Blue Ice
blog at [contemporarymaker.com]


Sorry, only registered users may post in this forum.