My Replikeo Prusa i3 Rework Build
Posted by Trike
|
Re: My Replikeo Prusa i3 Rework Build September 17, 2015 10:00PM |
Registered: 8 years ago Posts: 338 |
So, looks Iike my 3d printer is gonna be arriving tomorrow.
it took about two weeks, which is more than the 2-5 business days that replikeo advertised. However, the communication with them regarding the shipping was excellent and they responded to me every time I had a question promptly. Two weeks isnt bad comming from China.
I got the dual extruderr model with lcd... I also got an mk3 hotbed..
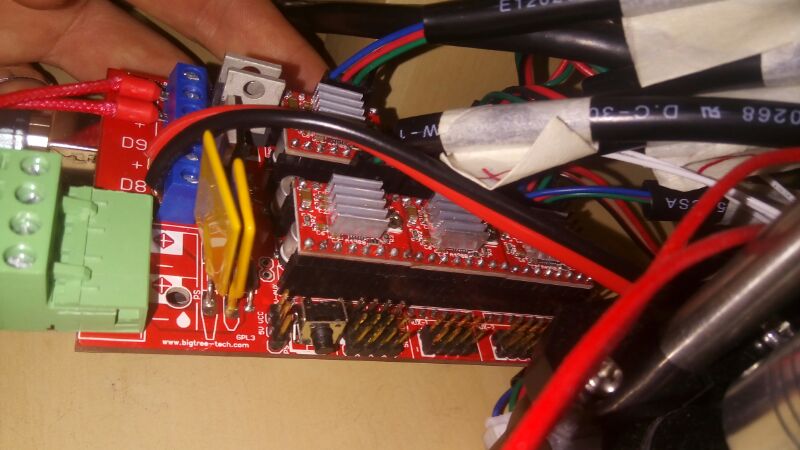
can I connect 24v to 11amp input on the replikeo ramps board?
it took about two weeks, which is more than the 2-5 business days that replikeo advertised. However, the communication with them regarding the shipping was excellent and they responded to me every time I had a question promptly. Two weeks isnt bad comming from China.
I got the dual extruderr model with lcd... I also got an mk3 hotbed..
can I connect 24v to 11amp input on the replikeo ramps board?
|
Re: My Replikeo Prusa i3 Rework Build September 19, 2015 12:40AM |
Registered: 8 years ago Posts: 338 |
Well, So far so good.
I'm not an expert on 3d printers by any means, but everything "felt" like good quality" The steel is nicely powder coated, everthing is in ziplock baggies, the power supply appears to be better than a few i've gotten right from amazon and the quality of the 3D printed parts for the extruder are good quality (i do have experience with good quality prints vs poor quality from 3dhubs) Most of the plastic is molded however, it's just the parts for the extruder that are printed.
ALSO, to my suprise it looks like they included a genuine arduino... i mean, there is no way to tell for sure but it has the blue and white on the back and looks legit... better than the sainsmart ones atleast. The ramps controller looks OK aswell. The caps are rated at 35v so should be no problem running at 24v
I have spent around three hours putting it together so far, and i've got the y axis done. Slides pretty well, but a little lube made it even better.
Since this is a dual extruder model, i might start my own build thread.
Edited 1 time(s). Last edit at 09/19/2015 12:41AM by Qdeathstar.
|
Re: My Replikeo Prusa i3 Rework Build September 20, 2015 08:29AM |
Registered: 8 years ago Posts: 338 |
Whelp, one of the Hobbes inserts had its threads messed up... So I have to get a replacement... Trying to fix that problem also caused me to destroy the bolt for the gear (it sheared in two) so ill need a new one of those.
The good new is that it is a dual extruder so at least I'll be able to use one head while I wait.
Also, a problem I am having is that the hot end is loose. It feels wobbly.. I put a few washers between the hot end and cold end and it is right now... But, will heat transfer be a huge problem?
The good new is that it is a dual extruder so at least I'll be able to use one head while I wait.
Also, a problem I am having is that the hot end is loose. It feels wobbly.. I put a few washers between the hot end and cold end and it is right now... But, will heat transfer be a huge problem?
|
Re: My Replikeo Prusa i3 Rework Build September 21, 2015 08:01AM |
Registered: 9 years ago Posts: 722 |
|
Re: My Replikeo Prusa i3 Rework Build September 25, 2015 04:57PM |
Registered: 8 years ago Posts: 2 |
Hi everyone,
i'm new to 3D-printing and got my printer from Replikeo about 2 weeks ago. I ordered the version with a single extruder and the steel frame.
The assembly was pretty straightforward. I tested the movement of the three axis in pronterface and everything was moving in the right way.
When i tried to do my first print the problem begun.
I'm using 3 mm PLA and a 0,4 nozzle.
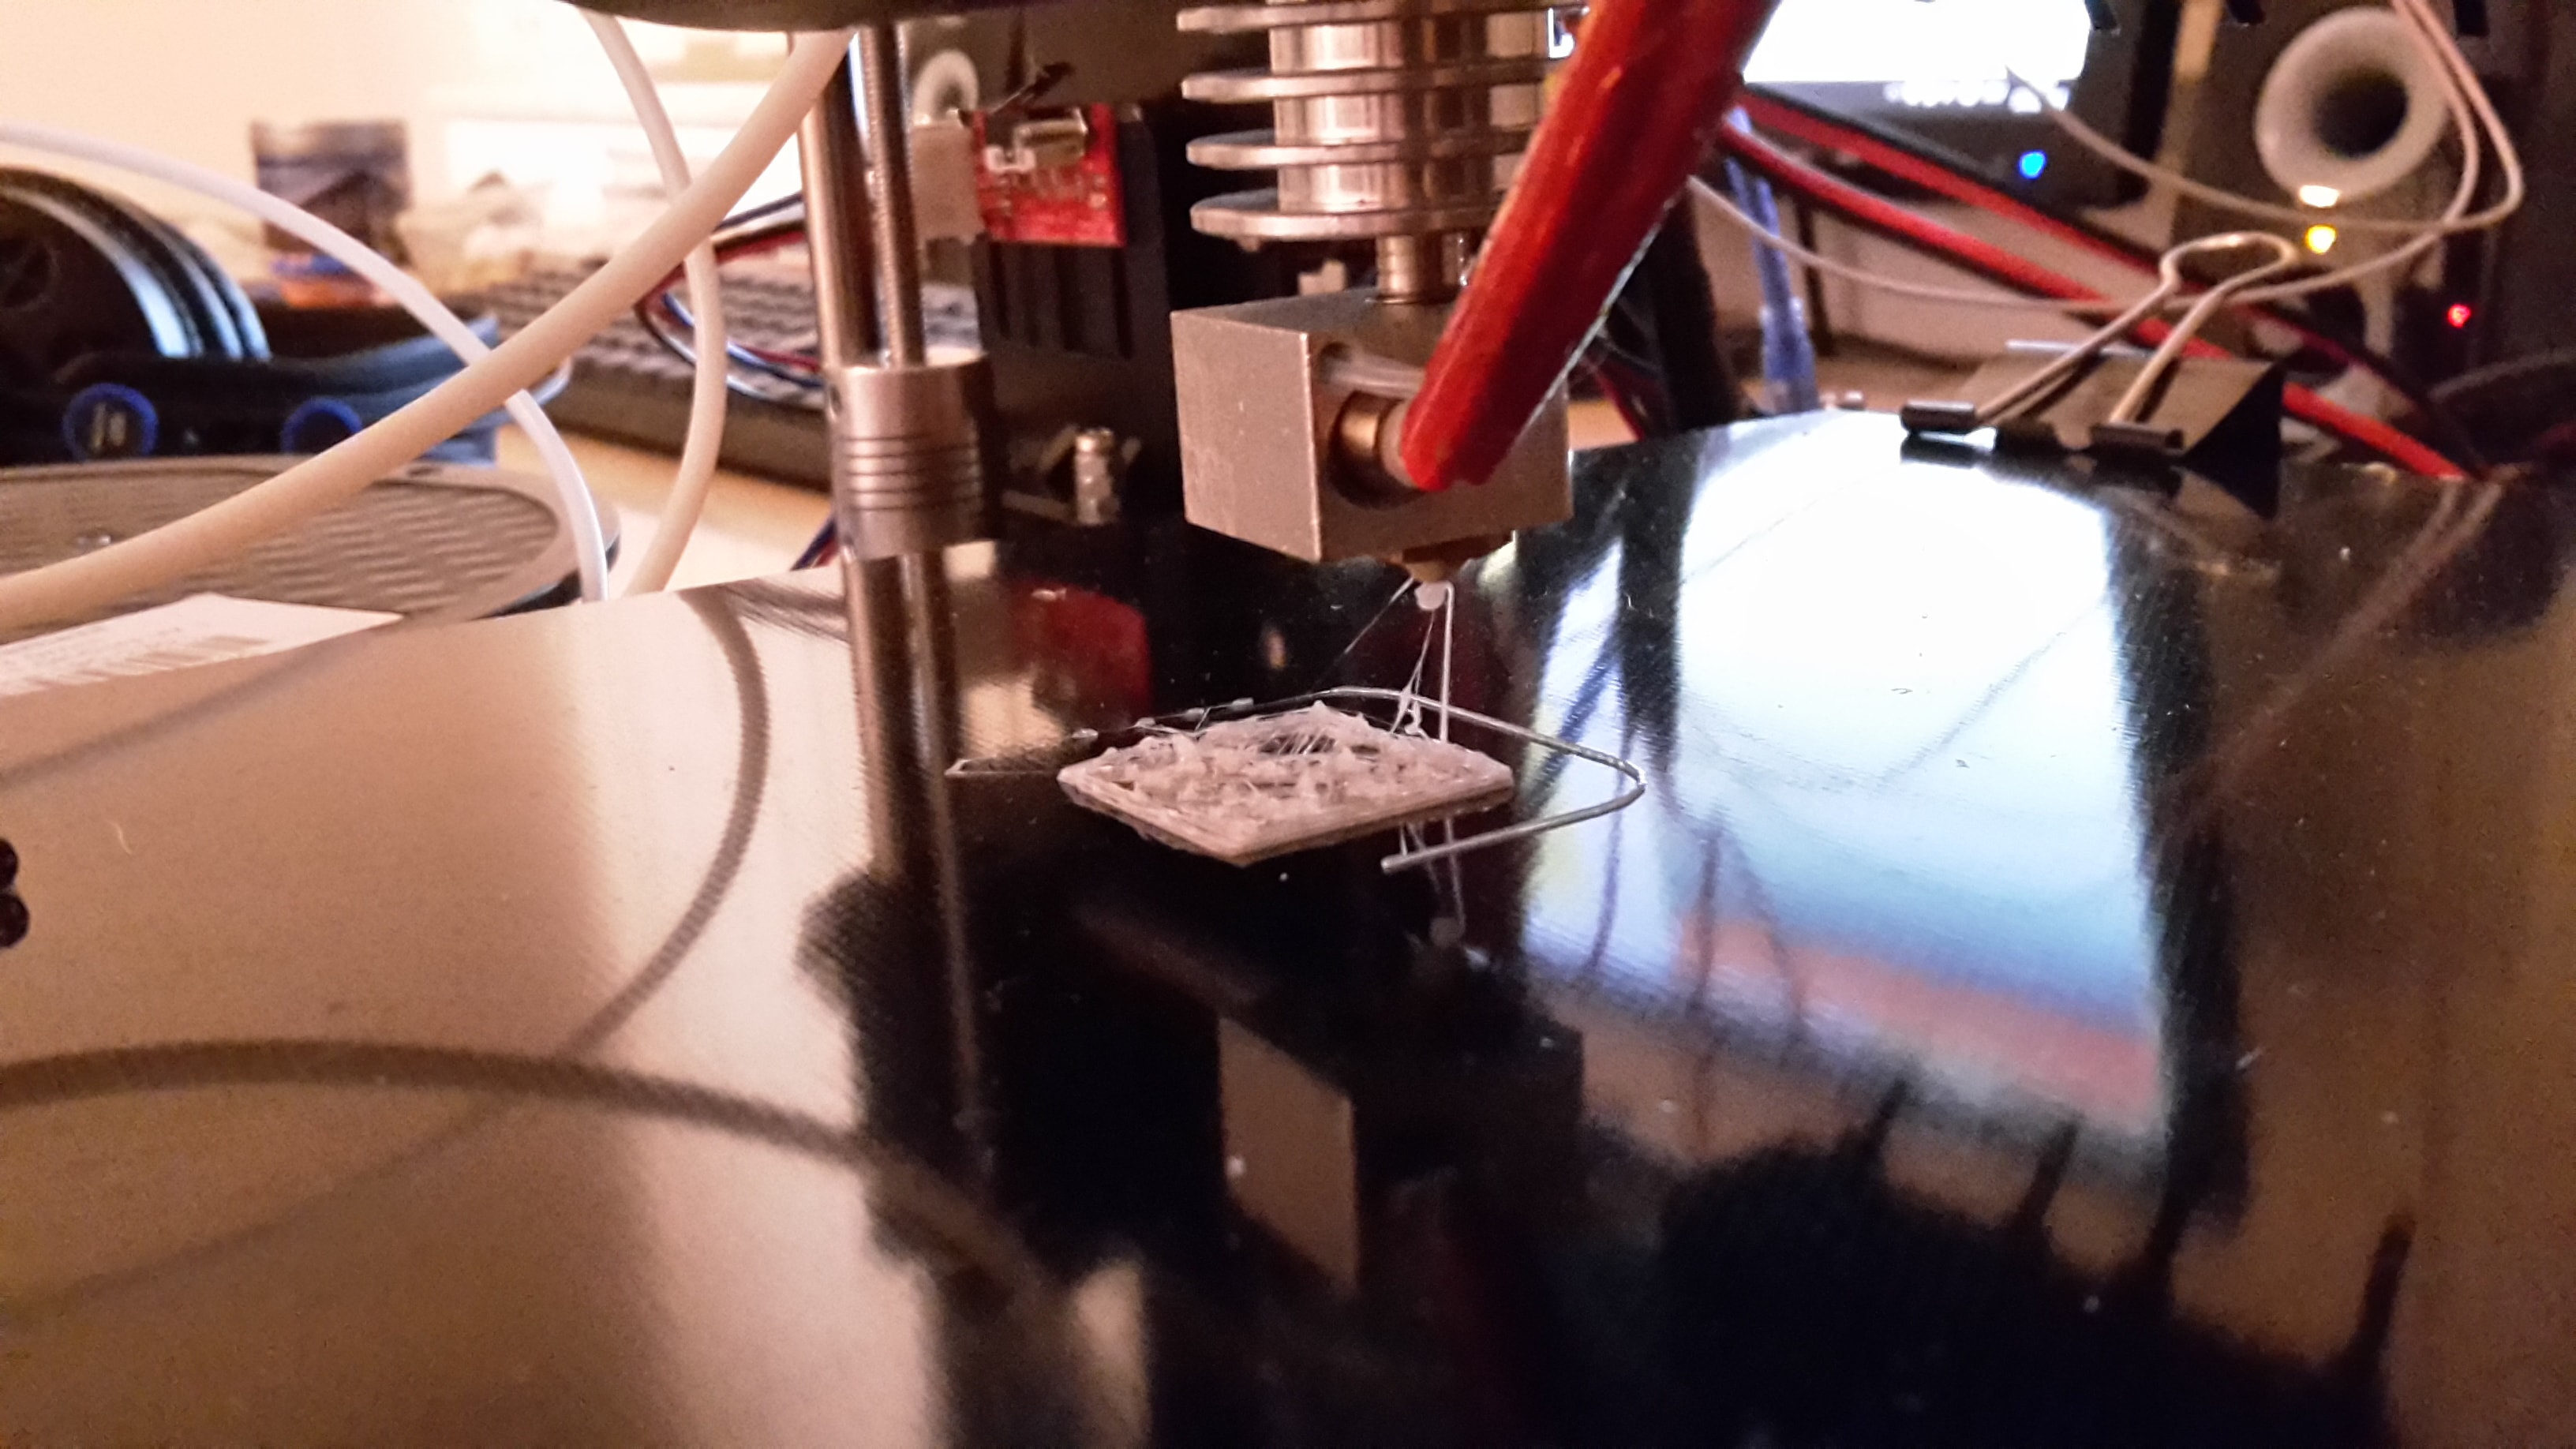
My extruder seems to not push the material continuously. In the first few seconds of the print the PLA gets pushed out right but after a short time the extrusion stops working continuously. Only tiny amounts of PLA get pushed out and it seems to stick to the nozzle.
I've been trying around for a week but i couldn't get a succesfull print. I tested different temperatures and tightened the screws with the springs on the extruder idler. I also tried to print after loosening
them a bit.
I checked the firmeware to make sure the settings are the same as on Replikeos website.
But in the end all my attempts to print end up looking like in the picture.
Did somebody of you have a similar problem or does know a fix for it?
i'm new to 3D-printing and got my printer from Replikeo about 2 weeks ago. I ordered the version with a single extruder and the steel frame.
The assembly was pretty straightforward. I tested the movement of the three axis in pronterface and everything was moving in the right way.
When i tried to do my first print the problem begun.
I'm using 3 mm PLA and a 0,4 nozzle.
My extruder seems to not push the material continuously. In the first few seconds of the print the PLA gets pushed out right but after a short time the extrusion stops working continuously. Only tiny amounts of PLA get pushed out and it seems to stick to the nozzle.
I've been trying around for a week but i couldn't get a succesfull print. I tested different temperatures and tightened the screws with the springs on the extruder idler. I also tried to print after loosening
them a bit.
I checked the firmeware to make sure the settings are the same as on Replikeos website.
But in the end all my attempts to print end up looking like in the picture.
Did somebody of you have a similar problem or does know a fix for it?
|
Re: My Replikeo Prusa i3 Rework Build September 26, 2015 01:14AM |
Registered: 8 years ago Posts: 338 |
hello,
I HAVE MY FIRST SUCCESSFUL PRINT!
it's just the test square, but it's looking good.
I had a hard time getting it started, but I solved it by setting the hot end temp up to 250 and manually pushing the filament through until it went.... after the first time it operates smoothly now, but I havnt changed spools yet, as this literally just happend.... and the thing I printed is actually still printing.
I have Bowden setup though.... dual extruder, though right now it's only a single extruderr because I messed up the parts of one extruderr trying to figure it out.
for someone who knows 3d printing, this is probably a great set, for me it was a learning experience. Still happy ^_^
|
Re: My Replikeo Prusa i3 Rework Build September 26, 2015 01:31AM |
Registered: 8 years ago Posts: 338 |


|
Re: My Replikeo Prusa i3 Rework Build September 26, 2015 08:20AM |
Registered: 9 years ago Posts: 119 |
@Giselberd: Welcome =)
Did you level your bed? Could be the nozzle being too close to the bed at some point.
You could check, if the filament extruder works properly and is well adjusted: Make a mark on the filament and
extrude 5cm for example, then look if you really extruded 5cm.
@Qdeathstar: Great!
You could have a look at the guides (see my signature) for some advice. I think you can try to set the heated bed
to a lower temperature than you have right now.
Prusa i3 Rework (from Replikeo.com) & original Prusa i3 MK2 (from shop.prusa3d.com) << the MK2 definitely is worth the higher cost!
Print Troubleshooting Guide // Visual troubleshooting guide
|
Re: My Replikeo Prusa i3 Rework Build September 27, 2015 09:41AM |
Registered: 8 years ago Posts: 338 |
well, it was nice while it lasted....
I was having problems with my geared Bowden drive, the Bowden tube wouldn't stay locked in place, but I could easily push filament through the hotend, so I decided to go direct drive.
however, now all my prints are smooshed..
I think it has to do with the extruderr rate, so I looked online for help and say that you need to check to see if when you tell the extruder to feed 10mm of filament, that it actually is. I checked it and it seems like it is (after I made a slight adjustment) but it didn't seem to improve print quality.


|
Re: My Replikeo Prusa i3 Rework Build September 27, 2015 11:01AM |
Registered: 8 years ago Posts: 338 |
|
Re: My Replikeo Prusa i3 Rework Build September 27, 2015 01:00PM |
Registered: 8 years ago Posts: 338 |

|
Re: My Replikeo Prusa i3 Rework Build September 27, 2015 06:33PM |
Registered: 9 years ago Posts: 119 |
Well, that's kind of a combination of overhang and bridging. I didn't find a solution so far, my printed holes (vertical ones) look the same.
/edit: Oh and please try to use the edit function instead of posting multiple times in a row, otherwise we start answering your questions
just to find out that one post further you already found a solution to the problem =)
Edited 2 time(s). Last edit at 09/28/2015 09:39AM by Ano.
Prusa i3 Rework (from Replikeo.com) & original Prusa i3 MK2 (from shop.prusa3d.com) << the MK2 definitely is worth the higher cost!
Print Troubleshooting Guide // Visual troubleshooting guide
|
Re: My Replikeo Prusa i3 Rework Build September 29, 2015 03:53PM |
Registered: 8 years ago Posts: 2 |
Hello again!
Thank you for your answer Ano. It was a problem with the extruder.
When i measured the length of the extruded filament as you suggested i noticed it pulled in the material at a kinda random rate.
I toke the extruder apart and cleaned the rills of the hobbed bolt. That solved the problems
So i was able to finish my first print successfull and i'm really happy with the result
Thank you very much for your help!
Edited 1 time(s). Last edit at 09/29/2015 04:22PM by Giselberd.
Thank you for your answer Ano. It was a problem with the extruder.
When i measured the length of the extruded filament as you suggested i noticed it pulled in the material at a kinda random rate.
I toke the extruder apart and cleaned the rills of the hobbed bolt. That solved the problems
So i was able to finish my first print successfull and i'm really happy with the result

Thank you very much for your help!
Edited 1 time(s). Last edit at 09/29/2015 04:22PM by Giselberd.
|
Re: My Replikeo Prusa i3 Rework Build October 29, 2015 07:56PM |
Registered: 8 years ago Posts: 338 |
I have to say, i am happy with this printer, i feel it is a good choice for a beginner. The only immidiate upgrades i would recommend is the MK3 heatbed, and the proximity sensor on the z axis, not just for auto leveling, but because it helps put the extruder in exactly the right spot everytime without having to worry about a springy zstop switch. Most of the things i got as an "upgrade" ended up being downgrades... i printed out some antibacklash things for my printer, and they just made it noisy, with no difference in print quality...... and they made my heatbed too low because they went under the crossbar....
The stock hotends were actually pretty good, i got the chimera, but i had to tinker with it a lot to get it right... I'm sure if i didn't dismiss the stock hotends righ away, i could have gotten those working aswell, as getting one to work was actually easier than getting one of the chimera's hotends to work (jamming).
I'll post some pics of my printer in its final (for now) state after i finish calibrating the thermistors.
Edited 1 time(s). Last edit at 10/29/2015 07:58PM by Qdeathstar.
|
Re: My Replikeo Prusa i3 Rework Build October 30, 2015 05:30AM |
Registered: 10 years ago Posts: 444 |
|
Re: My Replikeo Prusa i3 Rework Build October 30, 2015 08:22PM |
Registered: 8 years ago Posts: 338 |


Some pics...
I can't seem to get the dual extruders perfectly level.. I got the bed actually level, and in using auto leveling, but the second extruder still wants to dig in slightly to the plastic, resulting in a slight waviness to the print where the print herald rises and lowers over the bumps in the plastic... Any ideas?
|
Re: My Replikeo Prusa i3 Rework Build November 05, 2015 04:20PM |
Registered: 9 years ago Posts: 119 |
Nice one!
For dual nozzels, you just need to get it leveled. Otherwise one will always ram into the printed part. Just meaning: There is no software
solution to it. You could try to add a thin ring between the nozzle and the mount of the one, that's a bit higher than the other one, to get them
leveled.
And btw, try to print downwards. To the side or upwards isn't working well... or just turn your photos =)
Nice build btw
Edited 1 time(s). Last edit at 11/05/2015 04:21PM by Ano.
Prusa i3 Rework (from Replikeo.com) & original Prusa i3 MK2 (from shop.prusa3d.com) << the MK2 definitely is worth the higher cost!
Print Troubleshooting Guide // Visual troubleshooting guide
|
Re: My Replikeo Prusa i3 Rework Build November 08, 2015 10:26PM |
Registered: 9 years ago Posts: 12 |
Quote
Qdeathstar
I have to say, i am happy with this printer, i feel it is a good choice for a beginner. The only immidiate upgrades i would recommend is the MK3 heatbed, and the proximity sensor on the z axis, not just for auto leveling, but because it helps put the extruder in exactly the right spot everytime without having to worry about a springy zstop switch. Most of the things i got as an "upgrade" ended up being downgrades... i printed out some antibacklash things for my printer, and they just made it noisy, with no difference in print quality...... and they made my heatbed too low because they went under the crossbar....
The stock hotends were actually pretty good, i got the chimera, but i had to tinker with it a lot to get it right... I'm sure if i didn't dismiss the stock hotends righ away, i could have gotten those working aswell, as getting one to work was actually easier than getting one of the chimera's hotends to work (jamming).
I'll post some pics of my printer in its final (for now) state after i finish calibrating the thermistors.
Well, after struggling a while with low printing speeds because of too much y-axis slack, I found that this design turned out to be a good upgrade, the only actually worth mentioning:
[www.thingiverse.com]
In case you are interested, the bowden setup uses the original extruder and requires absolutely no modifications on firmware. It can be found here:
[www.thingiverse.com]
Here are some pictures of my current setup:


|
Re: My Replikeo Prusa i3 Rework Build November 18, 2015 01:27PM |
Registered: 8 years ago Posts: 9 |
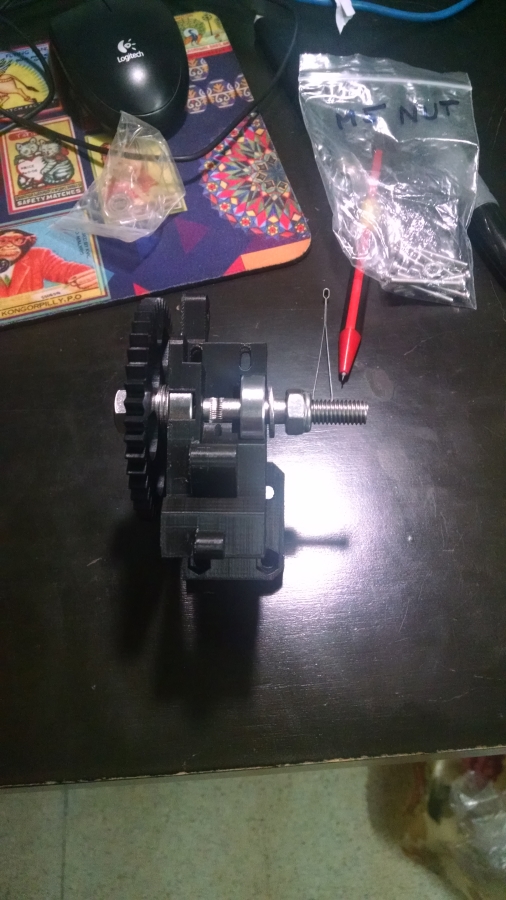
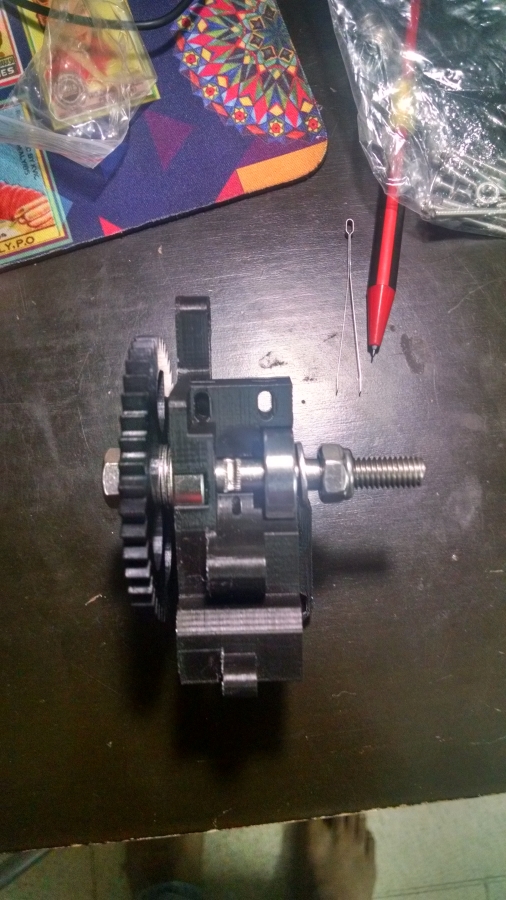
1.I cant seem to get my nylon stop nut all the way to the washer/bearing in my extruder assembly.
The Hobbed bolt isn't threaded all the way and the nut stops at the thread.
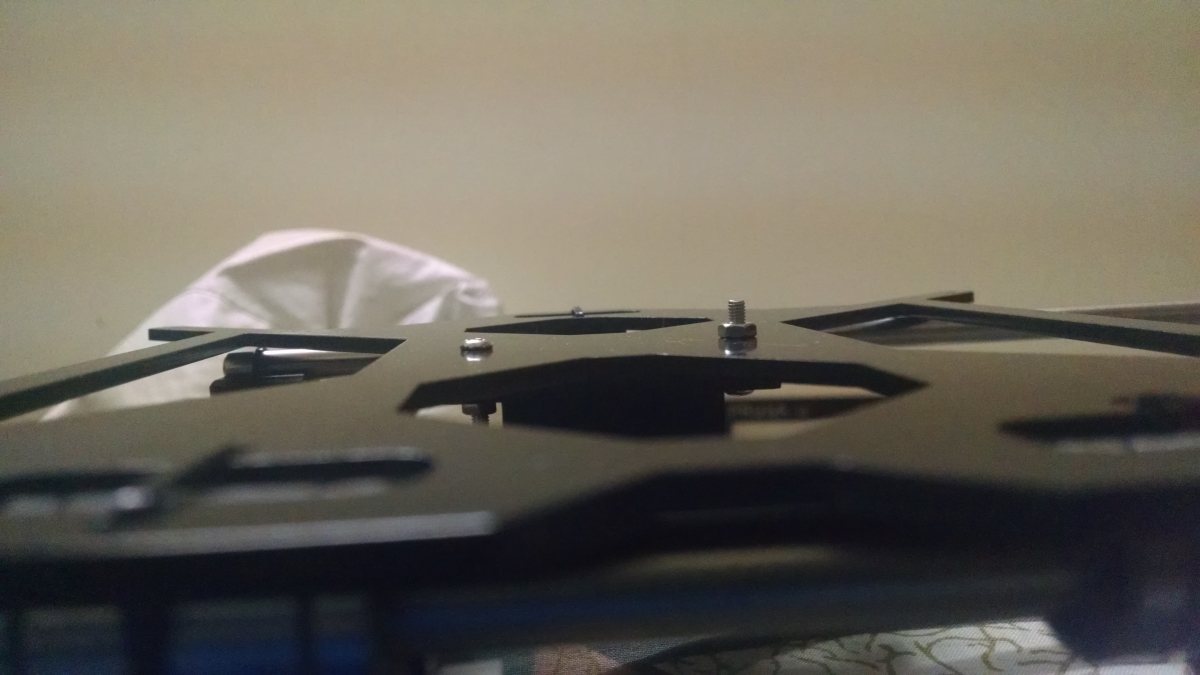
2. I'm using m3x14 mm screws for my heated bed mount. Its a little too long, is that okay? I've shown both possible variations in the image. Can i apply either one or none?
3. Lastly my X axis smooth rods, protrudes out from the x axis idler by a few cms. Had to let this happen to align it right. It isn't lose. Should i worry about this?
I am attaching some images, It'd be great if someone could tell me what I'm doing wrong.
The Hobbed bolt isn't threaded all the way and the nut stops at the thread.
2. I'm using m3x14 mm screws for my heated bed mount. Its a little too long, is that okay? I've shown both possible variations in the image. Can i apply either one or none?
3. Lastly my X axis smooth rods, protrudes out from the x axis idler by a few cms. Had to let this happen to align it right. It isn't lose. Should i worry about this?
I am attaching some images, It'd be great if someone could tell me what I'm doing wrong.
|
Re: My Replikeo Prusa i3 Rework Build December 01, 2015 04:54PM |
Registered: 9 years ago Posts: 119 |
Quote
owaisshaf
1.I cant seem to get my nylon stop nut all the way to the washer/bearing in my extruder assembly.
The Hobbed bolt isn't threaded all the way and the nut stops at the thread.
2. I'm using m3x14 mm screws for my heated bed mount. Its a little too long, is that okay? I've shown both possible variations in the image. Can i apply either one or none?
3. Lastly my X axis smooth rods, protrudes out from the x axis idler by a few cms. Had to let this happen to align it right. It isn't lose. Should i worry about this?
I am attaching some images, It'd be great if someone could tell me what I'm doing wrong.
Sry for the delay:
1) This seems odd. Normally it should be threaded a bit longer. You can however use some more washers on this side, if you have some.
2) It worked for me. The screw head must be on the upper side, because the heated bed will be mounted on top, so there is little space there.
3) What exactely do you mean by this, sry can't imagine the situation right now.
Prusa i3 Rework (from Replikeo.com) & original Prusa i3 MK2 (from shop.prusa3d.com) << the MK2 definitely is worth the higher cost!
Print Troubleshooting Guide // Visual troubleshooting guide
|
Re: My Replikeo Prusa i3 Rework Build December 01, 2015 06:29PM |
Registered: 8 years ago Posts: 1 |
First time poster, pardon my etiquette but I really didn't feel up to reading 37 pages... I am looking to obtain my first 3d-printer and have settled on the Prusa i3. I have read up on building my own and parts came to about $400. Having trouble justifying that over spending $300 on a dual extruder from Replikeo. Thought I would pop in and ask if you guys think its worth it, or would you spend a little extra for a different kit if you had it to do over again?
|
Re: My Replikeo Prusa i3 Rework Build December 02, 2015 05:08PM |
Registered: 9 years ago Posts: 119 |
Hey, no problem =)
You probably didn't see the shipping costs on replikeo, do you? For me there amounted to over 120€ (to germany).
Still, the replikeo pack is a nice package of all you need. Tip: Buy the LCD, too. Printing from SD card is really helpfull!
Prusa i3 Rework (from Replikeo.com) & original Prusa i3 MK2 (from shop.prusa3d.com) << the MK2 definitely is worth the higher cost!
Print Troubleshooting Guide // Visual troubleshooting guide
|
Re: My Replikeo Prusa i3 Rework Build December 14, 2015 12:05PM |
Registered: 8 years ago Posts: 8 |
|
Re: My Replikeo Prusa i3 Rework Build December 21, 2015 09:10AM |
Registered: 8 years ago Posts: 9 |
Quote
Ano
Quote
owaisshaf
1) This seems odd. Normally it should be threaded a bit longer. You can however use some more washers on this side, if you have some.
2) It worked for me. The screw head must be on the upper side, because the heated bed will be mounted on top, so there is little space there.
3) What exactely do you mean by this, sry can't imagine the situation right now.
I used washers and it worked just fine.
I'm in the last stages, well I'm done to be honest but i have two problems which will just not sort themselves out
1) My extruder, doesn't extrude. When i put the command on ponterface, the motor moves, but the plastic spool doesn't get pulled in. I tried all sorts of things to only achieve the best result of a small blob of plastic coming out and consequently staying fixed to the extruder.
2) My Y axis refuses to move, my y-belt isn't the tightest, could that be a problem.
3) How do i calibrate the end stops, can anyone please share their marlin config and what version of arduino, they're running it in. I used the replikeo one that was shared in the earlier posts
Still haven't managed a first print
|
Re: My Replikeo Prusa i3 Rework Build December 21, 2015 03:15PM |
Registered: 9 years ago Posts: 119 |
Hi owaisshaf,
okay, so three new challenges:
1) If your extruder doesn't extrude, try to test only the extruder itself (without the heating nozzle), first. Put your filament in and extrude via proterface for example. The torque shouldn't be a problem, if you are using the wade geared extruder. So try to tighten the extruder screws, to get more force on the filament. Normally you should see some marks of the drive gear on the plastic when it is extruded with the right force.You should be able to see if it should work, when the extruder is opened (when the tightening screws are unscrewed completely).
2) Is the motor moving? If it only makes some noise but doesn't actually move or just vibrates, then the motor current is too low. You can adjust the current on the motor driver board with the potentiometer. Try the move command while slowly turning the potentiometer, it should start moving more and more until the normal function is achieved.
3) The end-stops depend on the site you mounted them. My Endstops for example are in front of the y-axis and on the right side for the x-axis. And, of course, on the bottom for z-axis.
You can look up some articles about endstops in marlin on google (sry, I looked it up on my code and can't explain my values XD) for example: http://solidutopia.com/marlin-firmware-user-guide-basic/
But my values are:
I just wanted to be sure, that the nozzle doesn't run into them. If I would need the 200x200, it would still be possible, if I would
adjust the clamps.
Prusa i3 Rework (from Replikeo.com) & original Prusa i3 MK2 (from shop.prusa3d.com) << the MK2 definitely is worth the higher cost!
Print Troubleshooting Guide // Visual troubleshooting guide
okay, so three new challenges:
1) If your extruder doesn't extrude, try to test only the extruder itself (without the heating nozzle), first. Put your filament in and extrude via proterface for example. The torque shouldn't be a problem, if you are using the wade geared extruder. So try to tighten the extruder screws, to get more force on the filament. Normally you should see some marks of the drive gear on the plastic when it is extruded with the right force.You should be able to see if it should work, when the extruder is opened (when the tightening screws are unscrewed completely).
2) Is the motor moving? If it only makes some noise but doesn't actually move or just vibrates, then the motor current is too low. You can adjust the current on the motor driver board with the potentiometer. Try the move command while slowly turning the potentiometer, it should start moving more and more until the normal function is achieved.
3) The end-stops depend on the site you mounted them. My Endstops for example are in front of the y-axis and on the right side for the x-axis. And, of course, on the bottom for z-axis.
You can look up some articles about endstops in marlin on google (sry, I looked it up on my code and can't explain my values XD) for example: http://solidutopia.com/marlin-firmware-user-guide-basic/
But my values are:
//===========================================================================
//=============================Mechanical Settings===========================
//===========================================================================

// Uncomment the following line to enable CoreXY kinematics
// #define COREXY

// coarse Endstop Settings
#define ENDSTOPPULLUPS // Comment this out (using // at the start of the line) to disable the endstop pullup resistors

#ifndef ENDSTOPPULLUPS
  // fine endstop settings: Individual pullups. will be ignored if ENDSTOPPULLUPS is defined
  // #define ENDSTOPPULLUP_XMAX
  // #define ENDSTOPPULLUP_YMAX
  // #define ENDSTOPPULLUP_ZMAX
  // #define ENDSTOPPULLUP_XMIN
  // #define ENDSTOPPULLUP_YMIN
  // #define ENDSTOPPULLUP_ZMIN
#endif

#ifdef ENDSTOPPULLUPS
  #define ENDSTOPPULLUP_XMAX
  #define ENDSTOPPULLUP_YMAX
  #define ENDSTOPPULLUP_ZMAX
  #define ENDSTOPPULLUP_XMIN
  #define ENDSTOPPULLUP_YMIN
  #define ENDSTOPPULLUP_ZMIN
#endif

// The pullups are needed if you directly connect a mechanical endswitch between the signal and ground pins.
const bool X_MIN_ENDSTOP_INVERTING = true; // set to true to invert the logic of the endstop.
const bool Y_MIN_ENDSTOP_INVERTING = true; // set to true to invert the logic of the endstop.
const bool Z_MIN_ENDSTOP_INVERTING = true; // set to true to invert the logic of the endstop.
const bool X_MAX_ENDSTOP_INVERTING = true; // set to true to invert the logic of the endstop.
const bool Y_MAX_ENDSTOP_INVERTING = true; // set to true to invert the logic of the endstop.
const bool Z_MAX_ENDSTOP_INVERTING = true; // set to true to invert the logic of the endstop.
//#define DISABLE_MAX_ENDSTOPS
//#define DISABLE_MIN_ENDSTOPS

// Disable max endstops for compatibility with endstop checking routine
#if defined(COREXY) && !defined(DISABLE_MAX_ENDSTOPS)
  #define DISABLE_MAX_ENDSTOPS
#endif

// For Inverting Stepper Enable Pins (Active Low) use 0, Non Inverting (Active High) use 1
#define X_ENABLE_ON 0
#define Y_ENABLE_ON 0
#define Z_ENABLE_ON 0
#define E_ENABLE_ON 0 // For all extruders

// Disables axis when it's not being used.
#define DISABLE_X false
#define DISABLE_Y false
#define DISABLE_Z false
#define DISABLE_E false // For all extruders
#define DISABLE_INACTIVE_EXTRUDER true //disable only inactive extruders and keep active extruder enabled

#define INVERT_X_DIR false    // for Mendel set to false, for Orca set to true
#define INVERT_Y_DIR true    // for Mendel set to true, for Orca set to false
#define INVERT_Z_DIR false     // for Mendel set to false, for Orca set to true
#define INVERT_E0_DIR true   // for direct drive extruder v9 set to true, for geared extruder set to false
#define INVERT_E1_DIR false    // for direct drive extruder v9 set to true, for geared extruder set to false
#define INVERT_E2_DIR false   // for direct drive extruder v9 set to true, for geared extruder set to false

// ENDSTOP SETTINGS:
// Sets direction of endstops when homing; 1=MAX, -1=MIN
#define X_HOME_DIR -1
#define Y_HOME_DIR -1
#define Z_HOME_DIR -1

#define min_software_endstops true // If true, axis won't move to coordinates less than HOME_POS.
#define max_software_endstops true  // If true, axis won't move to coordinates greater than the defined lengths below.

// Travel limits after homing
#define X_MAX_POS 190
#define X_MIN_POS 0
#define Y_MAX_POS 180
#define Y_MIN_POS 0
#define Z_MAX_POS 190
#define Z_MIN_POS 0
The last values are for my printer, as my setup doesn't allow full 200x200 mm, because my heated bed is attached with clamps.
I just wanted to be sure, that the nozzle doesn't run into them. If I would need the 200x200, it would still be possible, if I would
adjust the clamps.
Prusa i3 Rework (from Replikeo.com) & original Prusa i3 MK2 (from shop.prusa3d.com) << the MK2 definitely is worth the higher cost!
Print Troubleshooting Guide // Visual troubleshooting guide
|
Re: My Replikeo Prusa i3 Rework Build December 29, 2015 11:51AM |
Registered: 8 years ago Posts: 8 |
|
Re: My Replikeo Prusa i3 Rework Build January 06, 2016 05:39AM |
Registered: 8 years ago Posts: 6 |
|
Re: My Replikeo Prusa i3 Rework Build January 07, 2016 05:12AM |
Registered: 9 years ago Posts: 17 |
Hi Riccardo,
The might be several problems. So follow steps
1, if you are using driver A4988, check current which is going to motors , especially Y motor have this problem. normal current is between 0.5 - 0.8
2, Check your marlin settings in configuration.h. There should be feedrate , max acceleration. see wiki page of replikeo: [wiki.replikeo.com] (post here your configuration.h file.)
#define DEFAULT_AXIS_STEPS_PER_UNIT {80,80,4000,600}
#define DEFAULT_MAX_FEEDRATE {500, 500, 2, 25}
#define DEFAULT_MAX_ACCELERATION {2000,2000,20,1000}
3, Check if you motor connector to RAMPS are inserted well.
4, insert driver with correct position
Are you using RAMPS 1.4
Are U using pololu A4988 or/and DVR (if U don't know, post here pictures of electronic)
Edited 1 time(s). Last edit at 01/07/2016 05:15AM by tomleeds.
|
Re: My Replikeo Prusa i3 Rework Build January 07, 2016 10:15AM |
Registered: 8 years ago Posts: 6 |
Quote
tomleeds
Hi Riccardo,
The might be several problems. So follow steps
1, if you are using driver A4988, check current which is going to motors , especially Y motor have this problem. normal current is between 0.5 - 0.8
2, Check your marlin settings in configuration.h. There should be feedrate , max acceleration. see wiki page of replikeo: [wiki.replikeo.com] (post here your configuration.h file.)
#define DEFAULT_AXIS_STEPS_PER_UNIT {80,80,4000,600}
#define DEFAULT_MAX_FEEDRATE {500, 500, 2, 25}
#define DEFAULT_MAX_ACCELERATION {2000,2000,20,1000}
3, Check if you motor connector to RAMPS are inserted well.
4, insert driver with correct position
Are you using RAMPS 1.4
Are U using pololu A4988 or/and DVR (if U don't know, post here pictures of electronic)
|
Re: My Replikeo Prusa i3 Rework Build January 08, 2016 12:19AM |
Registered: 8 years ago Posts: 9 |
How do i achieve cold extrusion, i tightened the screws on my extruder and still no luck 
I also varied the potentiometer for the Y axis motor and it either whines or it skips steps with a lot of resisting noises.
Also I have a new problem, which I don't know how I didn't notice till now. My Z axis motors started to act funny too, here is a video of the same : [www.youtube.com]
The left motor does not rotate uni directionally, it keeps coming back a few steps and then continuing


Sorry, only registered users may post in this forum.