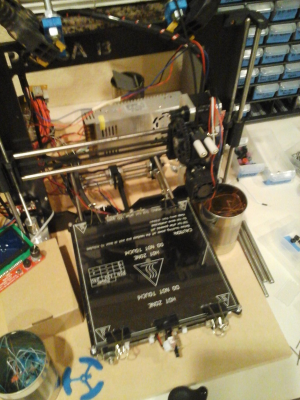
My Replikeo Prusa i3 Rework Build
Posted by Trike
|
Re: My Replikeo Prusa i3 Rework Build March 07, 2015 09:49PM |
Registered: 9 years ago Posts: 120 |
Quote
Ano
Oh nice, thanks for that link!
I tried some more settings for my bowden setup, but I think I'll change back to the direct method. But I will replace the wade extruder for a direct drive one, just for the looks of it ^^
Thinking about letting the PTFE tube in place to guide my filament from the spool to the extruder, though.
No problem!
I'll probably put in a filament guide like that for my printer at some time as well.
Blue Ice
blog at [contemporarymaker.com]
|
Re: My Replikeo Prusa i3 Rework Build March 08, 2015 07:42AM |
Registered: 9 years ago Posts: 119 |
@Bratan: I have mounted a MK8 direct drive right now and even when the rest of my setup is far from great, the MK8 never failed. And that, after several people in this forum told me, that my MK8 version sucks XD (german thread: link)
My hobbed bolt worked, too, but I wanted to try a direct drive one =)
@psneddon: I think you have the 24V version of the heated bed. Mine (12V) is about 1.6 Ohm.
Edited 1 time(s). Last edit at 03/08/2015 07:43AM by Ano.
Prusa i3 Rework (from Replikeo.com) & original Prusa i3 MK2 (from shop.prusa3d.com) << the MK2 definitely is worth the higher cost!
Print Troubleshooting Guide // Visual troubleshooting guide
|
Re: My Replikeo Prusa i3 Rework Build March 08, 2015 08:25PM |
Registered: 9 years ago Posts: 59 |
Quote
psneddon
Blue Ice
Thanks again. I'll check mine over once I receive it in the mail.
I received my MK2B heated bed and hooked up the wires to it and measured the resistance and I'm getting 2.6 ohms. Most of the information I've read about this heated bed states that the resistance should be 1.2 to 1.3 ohms. Is this correct?
I have the negative lead hooked to pad #1 and the positive lead hooked to pad #2 for a 12 volt supply - as stenciled on the heated bed.
I haven't hooked it up to any power yet and definitely not to my Ramps board until I test it. I have a DC power supply that can put out 3 amps of power at 12 volts, but I think the bed can take a higher current - is that so?
Did you short out pads two and three to change the two heater loops from series for 24V to parallel for 12V, if not it would explain why your bed is at half power ?
I have the MK2B as well, and the diagram on mine shows pad one is positive, and two and three negative for 12V (hence 2 &3 are shorted together with a wire link). Polarity would only matter for the LED's, or they wont light up.
Martin
Edited 2 time(s). Last edit at 03/08/2015 08:27PM by mr.sneezy.
|
Re: My Replikeo Prusa i3 Rework Build March 09, 2015 09:43AM |
Registered: 9 years ago Posts: 124 |
Quote
mr.sneezy
Quote
psneddon
Blue Ice
Thanks again. I'll check mine over once I receive it in the mail.
I received my MK2B heated bed and hooked up the wires to it and measured the resistance and I'm getting 2.6 ohms. Most of the information I've read about this heated bed states that the resistance should be 1.2 to 1.3 ohms. Is this correct?
I have the negative lead hooked to pad #1 and the positive lead hooked to pad #2 for a 12 volt supply - as stenciled on the heated bed.
I haven't hooked it up to any power yet and definitely not to my Ramps board until I test it. I have a DC power supply that can put out 3 amps of power at 12 volts, but I think the bed can take a higher current - is that so?
Did you short out pads two and three to change the two heater loops from series for 24V to parallel for 12V, if not it would explain why your bed is at half power ?
I have the MK2B as well, and the diagram on mine shows pad one is positive, and two and three negative for 12V (hence 2 &3 are shorted together with a wire link). Polarity would only matter for the LED's, or they wont light up.
Martin
Ah. I see. That makes sense now - two separate 2.6 ohm heater loops.
I didn't know I had to short the two pads together. Thanks again!

Edited 1 time(s). Last edit at 03/09/2015 09:44AM by psneddon.
|
Re: My Replikeo Prusa i3 Rework Build March 09, 2015 10:56AM |
Registered: 9 years ago Posts: 137 |
I'm gonna give it a try. I decided to skip this and go straight to bowden drive, and failed... It won't push filament for some reason, so I'm going to try direct driveQuote
Ano
@Bratan: I have mounted a MK8 direct drive right now and even when the rest of my setup is far from great, the MK8 never failed. And that, after several people in this forum told me, that my MK8 version sucks XD (german thread: link)
My hobbed bolt worked, too, but I wanted to try a direct drive one =)

Some issues, but I wanted to lighten up weight and bulk, and maybe even gain some speedQuote
Blue Ice
I don't know. My extruder is working great with the hobbed bolt and the gears, ever since I put in spacers instead of springsAre you having issues with yours?
 That two gear setup just seems so clunky and unnecessary...
|
Re: My Replikeo Prusa i3 Rework Build April 01, 2015 03:38AM |
Registered: 9 years ago Posts: 120 |
Hey guys!
Long time no chat... how's everything working out?
Anyway, I just finished my build log for my printer and I said I'd share it with you guys. I made a post on a different thread: Complete Prusa i3 Rework build log, with pictures
Blue Ice
blog at [contemporarymaker.com]
Long time no chat... how's everything working out?
Anyway, I just finished my build log for my printer and I said I'd share it with you guys. I made a post on a different thread: Complete Prusa i3 Rework build log, with pictures
Blue Ice
blog at [contemporarymaker.com]
|
Re: My Replikeo Prusa i3 Rework Build April 05, 2015 06:30AM |
Registered: 9 years ago Posts: 119 |
Nice!
Currently looking into new hotend possibilities, just for the fun of it ^^ Don't have really big issues with the J-Head,
just would like to test something else. As of now, the E3D V6 seems to be the best option so far.
Prusa i3 Rework (from Replikeo.com) & original Prusa i3 MK2 (from shop.prusa3d.com) << the MK2 definitely is worth the higher cost!
Print Troubleshooting Guide // Visual troubleshooting guide
|
Re: My Replikeo Prusa i3 Rework Build May 03, 2015 11:03PM |
Registered: 9 years ago Posts: 12 |
Hello there, my printer is up and running, much thanks to hints and tips found in this forum.
Things I have modified:
The x-end idler is now the newer version from Replikeo's site, just because it has spacer so the bearings do not rub against the walls of the part;
The printer is mounted over a 500x500x30 MDF base with four adjustable supports under. I have tied the printer and the PSU to the base and routed the cables under;
I have printed a spool holder with bearing and mounted it at the base, now the printer is a single unity;
Adjustable end-stopper from thingiverse in order to replace the horrible original design;
Graphics LCD case;
z-axis stabilizer by tech2c, but attached to the base;
Replaced the springs of the heated bed mount by four printed plastic spacers and scattered more four of these underneath the heated bed. I have measured the y-carriage to be rather flat, so I ensured that both the heated bed and the carbon finber bowed downards before mounting, this made the printing surface dead flat. I have also used termal paste between the heated bed and the carbon fiber plate;
I have designed and printed an adapter for a Bowden-style extrusion;
I get rather precise prints but some things bother me:
I don't get great prints, for example, gear bearings with 0.2mm clearance still does not move;
It can't print very well parts with difficult overhangs, Gyro Air fails to print with a huge plastic mess;
Before the current bed and extrusion setup, I couldn't go to 50mm/s without missing y-steps, have to test again, though.
Things I will do:
I will return my acceleration setups to the original level, because I recall having lowered them in the firmware for some reason. This may or may not be giving me problems with sharp corners;
I will design and print a part to keep the z-axis leadscrew to oscillate that much, I have two old bearings replaced from my bike that will do the job very well;
All in all I have learned a lot in the process and I am glad that I bought this kit. Someone could try this one here, from Hic, though:
[www.ebay.com]
This one seems rather reasonable and is even cheaper than Replikeo's offer. Its z-aixs leadscrews are amazing, I am even consdering buying leadscrews like those and adapting them to my Prusa.
|
Re: My Replikeo Prusa i3 Rework Build May 04, 2015 04:16PM |
Registered: 9 years ago Posts: 119 |
The 0.2mm clearance could be a problem of extrusion. Did you check your extrusion esteps? Like, if you want to extrude 5mm, does it do exactly 5? Are you sure to have set
the right nozzle size in your slicer program?
Y-Steps missing could be the belt not being tightened enough. If that's not the case, then check the motor current. Eventually you have to adjust it a bit higher.
I can do about 70mm/s without motor problems, didn't try higher because other problems occurred, like not enough filament flow and stuff.
Printing overhangs can apparently be easier with a fan, blowing on the just extruded plastic. Didn't try it myself, though.
Prusa i3 Rework (from Replikeo.com) & original Prusa i3 MK2 (from shop.prusa3d.com) << the MK2 definitely is worth the higher cost!
Print Troubleshooting Guide // Visual troubleshooting guide
|
Re: My Replikeo Prusa i3 Rework Build May 04, 2015 11:41PM |
Registered: 9 years ago Posts: 12 |
Last time I checked, esteps where close to perfect. However, it seems that some further calibrations may be required. Extrusion width is set to 0.4mm as advertised by Replikeo for the nozzle diameter.
I will perform the full calibration set again, even though the 0.5mm box does not print at all when slicing with Cura (it is a 0s print, simply doing nothing). Bridging was fairly OK. I was not using the fan because of bed temp for ABS not being attained with the fan on :-(
Now I am using PLA and using the fan at 100% speed, just right now trying again the Air Gyro Mini.
Thank you for the response.
What do you get when printing the gear bearing?
|
Re: My Replikeo Prusa i3 Rework Build May 05, 2015 04:14PM |
Registered: 9 years ago Posts: 119 |
I printed it with the white replikeo ABS, i think at 0.3 clearance. Had to break it by turning by force. But at that moment, my esteps weren't correct, i had too much flow.
Prusa i3 Rework (from Replikeo.com) & original Prusa i3 MK2 (from shop.prusa3d.com) << the MK2 definitely is worth the higher cost!
Print Troubleshooting Guide // Visual troubleshooting guide
Prusa i3 Rework (from Replikeo.com) & original Prusa i3 MK2 (from shop.prusa3d.com) << the MK2 definitely is worth the higher cost!
Print Troubleshooting Guide // Visual troubleshooting guide
|
Re: My Replikeo Prusa i3 Rework Build May 06, 2015 04:24PM |
Registered: 9 years ago Posts: 12 |
I have found that there is a _lot_ of play in the y-carriage bearings. Probably faulty bearings, do you have any play on it? I have left a print running at home with some makeshift pre-loading (had to spend R$65 (brazilian currency, about $21 dolars) on a PTFE sheet for that).
When I return home I will see if quality has improved.
I am thinking about contacting Replikeo for a replacement, but if they will send me these horrible cheap stuff again, then it may be useless. The price of the H6 tolerance LM8UU bearings here in my city is $13,00 each, and the smooth rod costs almost $50! Mine are mildly scratched becaused of the low quality bearings that I have got.
This is my only complaint about the kit so far.
As for the issues printing the Gyro Air Mini, I believe it may be because of the hot-end drooling too much, will try lowering the temp and also increasing retraction length and speed.
Thank you for the feedback.
|
Re: My Replikeo Prusa i3 Rework Build May 08, 2015 12:22PM |
Registered: 9 years ago Posts: 12 |
|
Re: My Replikeo Prusa i3 Rework Build May 09, 2015 06:14PM |
Registered: 9 years ago Posts: 12 |
Here is a video of the play due to poorly manufactured linear bearings. Do any of you have this problem?
[www.youtube.com]
Edit: Added "linear bearings"
Edited 1 time(s). Last edit at 05/09/2015 06:16PM by eshneto.
[www.youtube.com]
Edit: Added "linear bearings"
Edited 1 time(s). Last edit at 05/09/2015 06:16PM by eshneto.
|
Re: My Replikeo Prusa i3 Rework Build May 10, 2015 01:08AM |
Registered: 9 years ago Posts: 12 |
|
Re: My Replikeo Prusa i3 Rework Build May 10, 2015 07:52AM |
Registered: 9 years ago Posts: 119 |
Hi,
well, my bearings also have some tolerances, but i think it's about 2/3 of yours. I am not sure, that it makes any difference, as long as the bed doesn't start to jump while printing.
Prusa i3 Rework (from Replikeo.com) & original Prusa i3 MK2 (from shop.prusa3d.com) << the MK2 definitely is worth the higher cost!
Print Troubleshooting Guide // Visual troubleshooting guide
|
Re: My Replikeo Prusa i3 Rework Build May 11, 2015 08:39AM |
Registered: 9 years ago Posts: 17 |
Hello All,
Do you have some experience with dual extrusion? If yes could you give some hint how to do set it? I follow [www.instructables.com] but it doesn’t work.
Do you have some experience with dual extrusion? If yes could you give some hint how to do set it? I follow [www.instructables.com] but it doesn’t work.
|
Re: My Replikeo Prusa i3 Rework Build May 25, 2015 10:06PM |
Registered: 10 years ago Posts: 444 |
|
Re: My Replikeo Prusa i3 Rework Build May 26, 2015 03:50AM |
Registered: 9 years ago Posts: 120 |
tomleeds,
Nope! Sorry about that!
RRuser,
I hope to sometime soon... I have a filament extruder that I am working on, and hopefully I can get PET started. What's up?
Blue Ice
blog at [contemporarymaker.com]
Nope! Sorry about that!
RRuser,
I hope to sometime soon... I have a filament extruder that I am working on, and hopefully I can get PET started. What's up?
Blue Ice
blog at [contemporarymaker.com]
|
Re: My Replikeo Prusa i3 Rework Build May 26, 2015 08:11AM |
Registered: 10 years ago Posts: 444 |
|
Re: My Replikeo Prusa i3 Rework Build May 27, 2015 05:36AM |
Registered: 9 years ago Posts: 17 |
Hello guys,
It is one month and 20 successful print when my buildtak came. I can only recommend it. Now I’m using MK3 heatbed and autobed leveling. With PLA im not heating bed and for ABS is 90C enough. I don’t need any more glue or any other kind of tape. Now I’m working on dual extrusion. I have first success with slic3r calibration. I will post some pictures.
Edited 2 time(s). Last edit at 05/28/2015 04:50AM by tomleeds.
|
Re: My Replikeo Prusa i3 Rework Build May 27, 2015 02:44PM |
Registered: 9 years ago Posts: 120 |
Sounds good! Do you use anything for heatbed adhesion for ABS? If not, that's pretty impressive 
Blue Ice
blog at [contemporarymaker.com]

Blue Ice
blog at [contemporarymaker.com]
|
Re: My Replikeo Prusa i3 Rework Build May 28, 2015 03:29AM |
Registered: 9 years ago Posts: 17 |
Hi, Since i have buildtak I dont used anything for adhesion. Only Buildtak and heat  (since yesterday tested with PET, PLA, ABS, HIPS, FlexFill) But if you will use it with wrong leveled bed the adhesion will be poor. Alfa and Omega of good adhesion is perfect bed leveling.I suggest to use autobed leveling. When nozzle is too close to buildtak will be very hard top pull out model from buildtak and if nozzle will very high , the adhesion will be poor.
 (since yesterday tested with PET, PLA, ABS, HIPS, FlexFill) But if you will use it with wrong leveled bed the adhesion will be poor. Alfa and Omega of good adhesion is perfect bed leveling.I suggest to use autobed leveling. When nozzle is too close to buildtak will be very hard top pull out model from buildtak and if nozzle will very high , the adhesion will be poor.
|
Re: My Replikeo Prusa i3 Rework Build May 28, 2015 05:23PM |
Registered: 8 years ago Posts: 9 |
Hello fellow Washingtonian. 

Quote
Trike
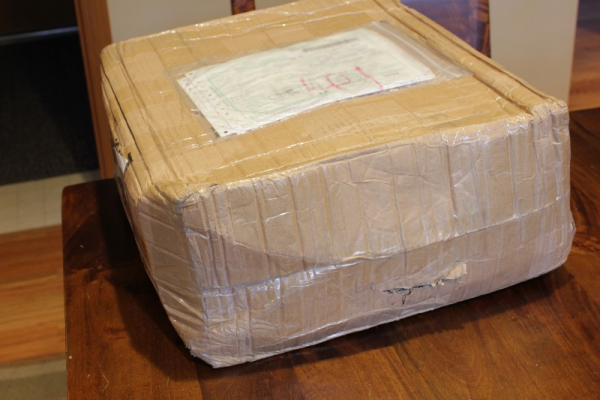
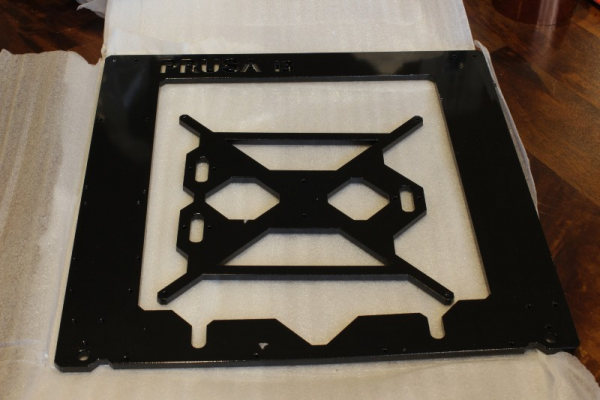
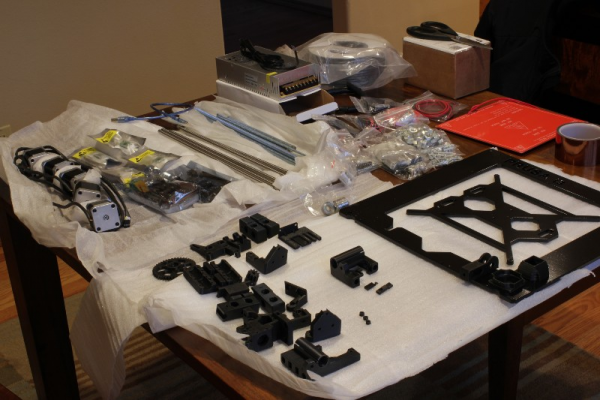
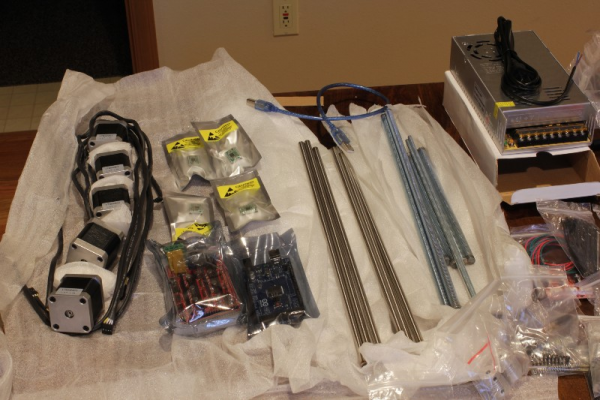
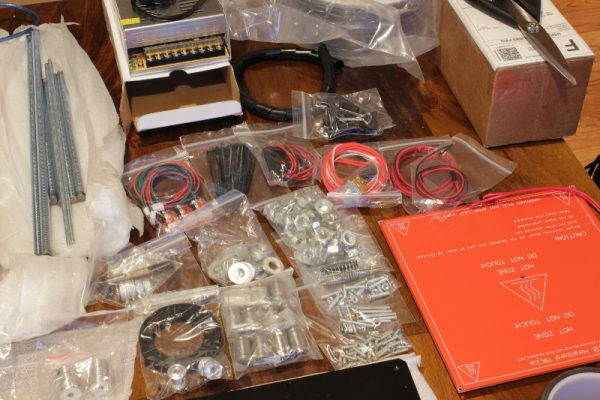
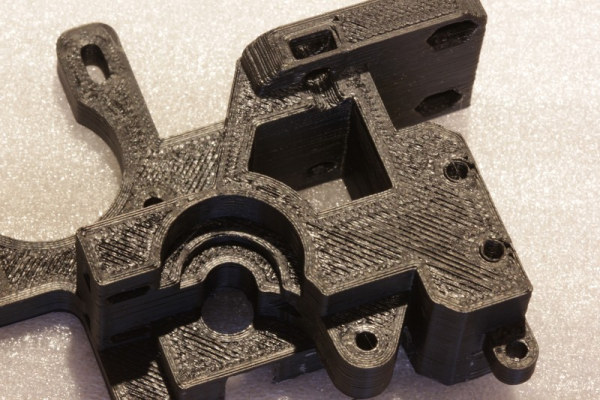
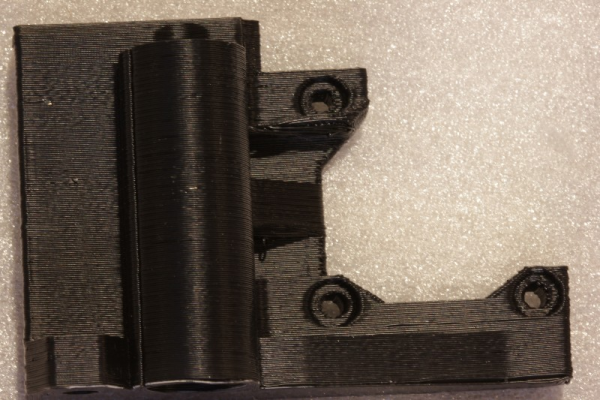
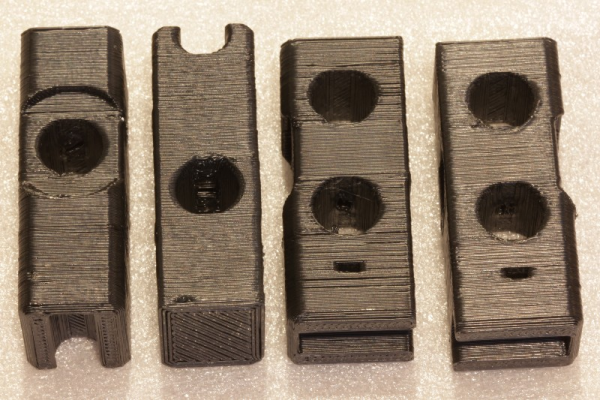
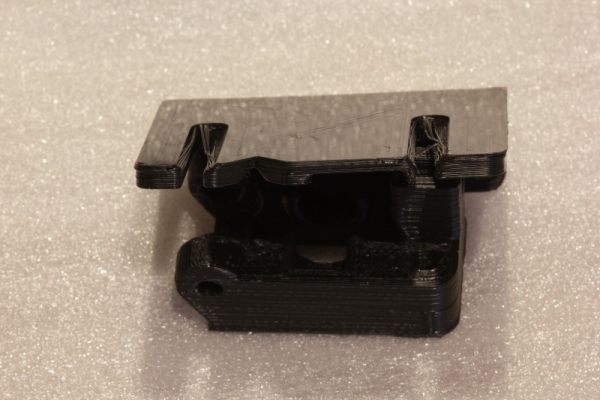
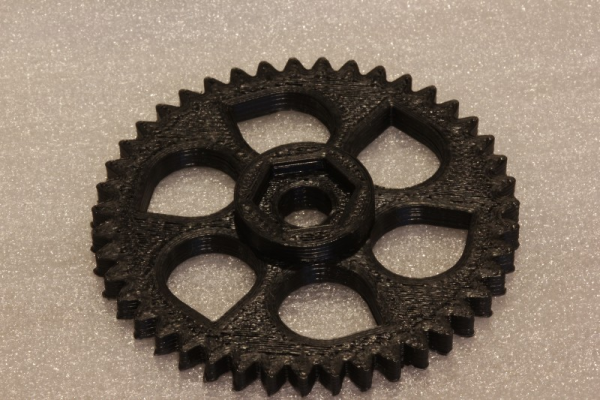
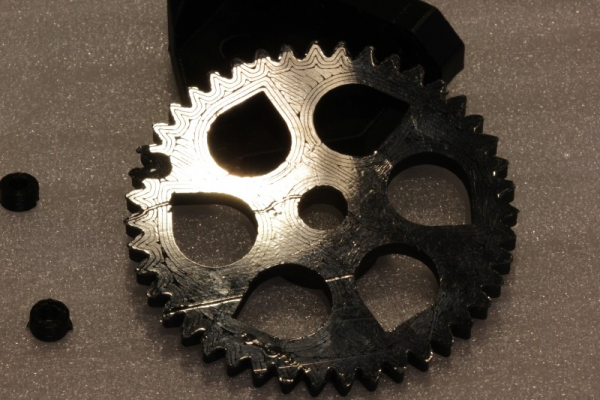
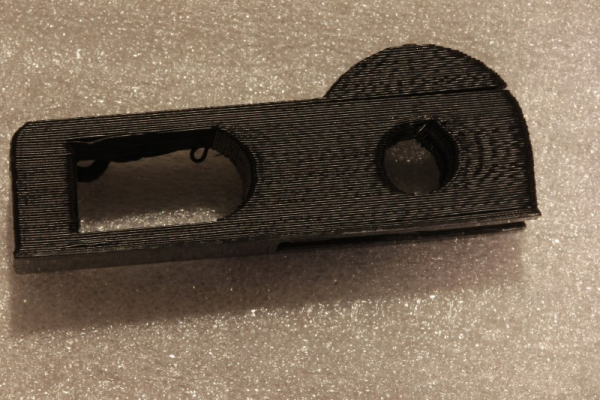
I just got my Replikeo Aluminum i3 kit. Not bad. SAL shipping took two weeks to get to Washington state. The package looked it went through hell and back. I started taking inventory to see if anything got damaged. Admittedly I was a little apprehensive from ordering, because there are no reviews of this vendor. Since the design is based off the BOM listed on reprap and not a modified i3 design, I felt I could get support through here with the large user base. My first initial impressions of the kit are very good. There were only 4 parts damaged. The glass bed, X end idler, y idler, and fan duct. I have already contacted Replikeo about the received package condition and damaged parts. They responded right away and will be sending me replacement parts today. They also said they're going to beef up the packaging for future orders. Instead of a glass bed, they're going to send me a 1mm carbon plate. They said they're having good luck with it. So far, after sales support has been excellent. It'll probably take another two weeks to get it. Once I get some time, I'll start the build. I already purchased a E3D hotend as a first upgrade and I'll use the J-head as a backup or use it as a second head later on.
This is my first 3D printer, and I researched the reworked i3 with alum. frame and priced parts by myself. Even after the shipping cost, I just couldn't beat Replikeo's price. I waffled between this and the i3xl from diytechshop. I ended preferring this.
Since this is my first printer, I'm not sure what a "good" print looks like. I noticed some slight separation on some parts, but nothing a little CA can't fix.
Here are some pics:
|
Re: My Replikeo Prusa i3 Rework Build May 28, 2015 07:05PM |
Registered: 9 years ago Posts: 17 |
|
Re: My Replikeo Prusa i3 Rework Build May 29, 2015 01:35PM |
Registered: 8 years ago Posts: 9 |
Hi all, I got min a couple weeks ago and so far it has been a lot of fun, I mean frustration, at least when I have time to work on it it is. So let me ask a stupid question about the home spot for the HE. 0,0,0 is supposed to be at the end stops, that would mean the HE is at its lowest position to the right front corner of the HB, at the xyz endstops? And just so that I can make sure all is clear, when you click in pronterface X, Y, Z+ that axis should move towards the mechanical end stops or the other way. Sorry if this was answered later in this thread, just started reading it the other day and it has been a wealth of knowledge but I would really like to make some progress on this thing before I toss it out the window.
Oh, and I did get my unit with no damage even though it looked like Ace Ventura had delivered it. You think China Postal uses that movie for a training video?
Oh, and I did get my unit with no damage even though it looked like Ace Ventura had delivered it. You think China Postal uses that movie for a training video?
|
Re: My Replikeo Prusa i3 Rework Build May 29, 2015 06:16PM |
Registered: 9 years ago Posts: 119 |
No, everz new printer gets injected molded parts (only extruder bodz is still printed I think). This fotos are from an older version.Quote
tomleeds
OMG This is Replikeo printer? i see very poor printed parts. As i know replikeo is selling parts from injected abs. Anyway, from my experience your first print after calibration must be extruder. I think that orinal extruder is printed with 50% infill and will be damaged soon.
Quote
lurch68b
Hi all, I got min a couple weeks ago and so far it has been a lot of fun, I mean frustration, at least when I have time to work on it it is. So let me ask a stupid question about the home spot for the HE. 0,0,0 is supposed to be at the end stops, that would mean the HE is at its lowest position to the right front corner of the HB, at the xyz endstops? And just so that I can make sure all is clear, when you click in pronterface X, Y, Z+ that axis should move towards the mechanical end stops or the other way. Sorry if this was answered later in this thread, just started reading it the other day and it has been a wealth of knowledge but I would really like to make some progress on this thing before I toss it out the window.
Oh, and I did get my unit with no damage even though it looked like Ace Ventura had delivered it. You think China Postal uses that movie for a training video?
It depends how you have configured your firmware. I myself have my home in the back right corner because my endstops are in front and on the right side. You must configure Marlin with the right endstop position though.
Prusa i3 Rework (from Replikeo.com) & original Prusa i3 MK2 (from shop.prusa3d.com) << the MK2 definitely is worth the higher cost!
Print Troubleshooting Guide // Visual troubleshooting guide
|
Re: My Replikeo Prusa i3 Rework Build May 29, 2015 07:16PM |
Registered: 9 years ago Posts: 120 |
Quote
lurch68b
Hi all, I got min a couple weeks ago and so far it has been a lot of fun, I mean frustration, at least when I have time to work on it it is. So let me ask a stupid question about the home spot for the HE. 0,0,0 is supposed to be at the end stops, that would mean the HE is at its lowest position to the right front corner of the HB, at the xyz endstops? And just so that I can make sure all is clear, when you click in pronterface X, Y, Z+ that axis should move towards the mechanical end stops or the other way. Sorry if this was answered later in this thread, just started reading it the other day and it has been a wealth of knowledge but I would really like to make some progress on this thing before I toss it out the window.
Oh, and I did get my unit with no damage even though it looked like Ace Ventura had delivered it. You think China Postal uses that movie for a training video?
Welcome to the community! Hopefully we can help you figure out the frustrating problems!
I'm seconding what Ano put. My zero spot is in the back right. I took a quick picture last night of what my printer looks like when zeroing, which might help.
Let us know if you need help with anything else

Blue Ice
blog at [contemporarymaker.com]
|
Re: My Replikeo Prusa i3 Rework Build May 30, 2015 12:02AM |
Registered: 8 years ago Posts: 9 |
Thanks guys, my y end stop is in back. Why did you guys put it int he front?
Quote
Blue Ice
Quote
lurch68b
Hi all, I got min a couple weeks ago and so far it has been a lot of fun, I mean frustration, at least when I have time to work on it it is. So let me ask a stupid question about the home spot for the HE. 0,0,0 is supposed to be at the end stops, that would mean the HE is at its lowest position to the right front corner of the HB, at the xyz endstops? And just so that I can make sure all is clear, when you click in pronterface X, Y, Z+ that axis should move towards the mechanical end stops or the other way. Sorry if this was answered later in this thread, just started reading it the other day and it has been a wealth of knowledge but I would really like to make some progress on this thing before I toss it out the window.
Oh, and I did get my unit with no damage even though it looked like Ace Ventura had delivered it. You think China Postal uses that movie for a training video?
Welcome to the community! Hopefully we can help you figure out the frustrating problems!
I'm seconding what Ano put. My zero spot is in the back right. I took a quick picture last night of what my printer looks like when zeroing, which might help.
Let us know if you need help with anything else
|
Re: My Replikeo Prusa i3 Rework Build May 30, 2015 10:28AM |
Registered: 9 years ago Posts: 119 |
Quote
lurch68b
Thanks guys, my y end stop is in back. Why did you guys put it int he front?
Well... Don't know =) The pictures I saw had it on the front. Really doesn't matter though. You just need to have the same physical and software configuration.
Should be this lines in marlin:
// ENDSTOP SETTINGS:
// Sets direction of endstops when homing; 1=MAX, -1=MIN
#define X_HOME_DIR -1
#define Y_HOME_DIR -1
#define Z_HOME_DIR -1
So for you I think the y should then be +1 instead of -1.
Prusa i3 Rework (from Replikeo.com) & original Prusa i3 MK2 (from shop.prusa3d.com) << the MK2 definitely is worth the higher cost!
Print Troubleshooting Guide // Visual troubleshooting guide
Sorry, only registered users may post in this forum.
