Folger Tech 2020 i3 Printer Kit (Official Thread)
Posted by Dan_FolgerTech
|
Re: Folger Tech 2020 3DPrinter July 01, 2015 02:37PM |
Registered: 8 years ago Posts: 22 |
Quote
[email protected]
This file would be good for pimped my ride kind of show.
Imagin mounting your electronics in a transparent gerrycan and have fluorescent cooling non conducting fluids, fanned with bubles). I call my. Projects landing a can on a plate.
P.S.: would love to post my build experience as I recall and embellish it to 2015 festive games time Toronto sports.
Competitors here are printing frogs here blue yes. Check this kit out, best time ever doing a puzzle, landing a can on the moon/contest. Fanciest mooves while arriving to centre at plate level.
Cool shit if you'll allow/r review
|
Re: Folger Tech 2020 i3 Printer Kit (Official Thread) July 01, 2015 04:20PM |
Registered: 8 years ago Posts: 135 |
|
Re: Folger Tech 2020 i3 Printer Kit (Official Thread) July 01, 2015 09:00PM |
Registered: 8 years ago Posts: 6 |
Thanks mel0n,
The woodfill is Esun brand I get it from Intservo all of my filament is Esun. It seems to work well and the price is right. The settings on the woodfill are the same as with PLA. I ran this at .02 layer height and my extruder was set at 185 with the bed set at 40. I have not checked the actual temps verses what the thermistors are reading but, the printer seem to run a little hotter then what it shows on the LCD.
I haven't had any problems with the spool mount yet, but I haven't been running it long and I don't really walk off and leave the printer that much right now. Using the spool mount for the LCD sounds like a good idea though. I may also end up changing that.
|
Re: Folger Tech 2020 i3 Printer Kit (Official Thread) July 01, 2015 09:02PM |
Registered: 8 years ago Posts: 6 |
Thanks markts,
Here is the case I used for my LCD [www.thingiverse.com]
There are a bunch more to chose from though. This one turned out Ok, but I did have to cut a hole in the back for the plugs on the board. I mounted it on the top bar using mounting tape and zip ties. You could print some t-nuts and use screws, it would look better that way.
|
Re: Folger Tech 2020 i3 Printer Kit (Official Thread) July 01, 2015 10:58PM |
Registered: 8 years ago Posts: 430 |
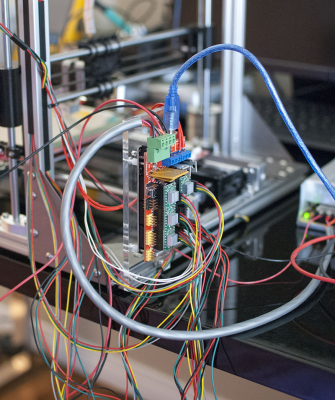
Working on wiring now and I am to the point where they ask you to connect the heated bed and hot end thermistors. The instructions say to attach the molex connector to them both yourself. Mine has the connector already on the heated bed thermistor but the hot end is bare and they didn't send any loose molex connectors.
How did everyone else's kit come?
How did everyone else's kit come?
|
Re: Folger Tech 2020 i3 Printer Kit (Official Thread) July 01, 2015 11:08PM |
Registered: 8 years ago Posts: 6 |
Quote
msaeger
Working on wiring now and I am to the point where they ask you to connect the heated bed and hot end thermistors. The instructions say to attach the molex connector to them both yourself. Mine has the connector already on the heated bed thermistor but the hot end is bare and they didn't send any loose molex connectors.
How did everyone else's kit come?
I had some old servo connectors that I cut and soldered to the end of mine. I think I recived the hot end connector and not one on the bed or maybe it was the same as yours, but I was missing one.
|
Re: Folger Tech 2020 i3 Printer Kit (Official Thread) July 02, 2015 12:15AM |
Registered: 8 years ago Posts: 430 |
Quote
Garben
Quote
msaeger
Working on wiring now and I am to the point where they ask you to connect the heated bed and hot end thermistors. The instructions say to attach the molex connector to them both yourself. Mine has the connector already on the heated bed thermistor but the hot end is bare and they didn't send any loose molex connectors.
How did everyone else's kit come?
I had some old servo connectors that I cut and soldered to the end of mine. I think I recived the hot end connector and not one on the bed or maybe it was the same as yours, but I was missing one.
I am going to steal one off an old pc case but I was just wondering if they messed them all up or just mine

|
Re: Folger Tech 2020 i3 Printer Kit (Official Thread) July 02, 2015 02:22AM |
Registered: 8 years ago Posts: 276 |
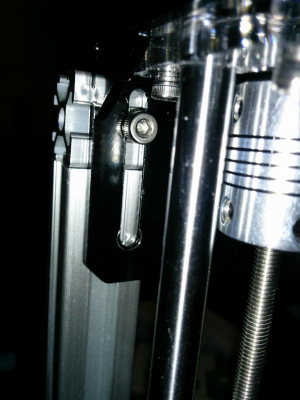
Did anyone else have problems with step 16? The motor brackets are held in with three bolts/t-nuts (two on the top rail, one on the side). In the instructions, when they lift the motors all the way up, it looks like they remove the bolt on the side rail. Anyway, after putting it all together, and using all 3 bolts, the z-axis chrome rods are definitely bowing a little bit to fit into the acrylic motor mount and the mount on the bottom rails. The only way I can get it to not bow is remove the side rail screws. Also, how the hell are you supposed to tighten the screws begin the chrome rods?!
Also, does anyone have any tips on how to align the y-axis rods?
Edited 1 time(s). Last edit at 07/02/2015 03:31AM by therippa.
Also, does anyone have any tips on how to align the y-axis rods?
Edited 1 time(s). Last edit at 07/02/2015 03:31AM by therippa.
|
Re: Folger Tech 2020 i3 Printer Kit (Official Thread) July 02, 2015 08:40AM |
Registered: 8 years ago Posts: 135 |
Quote
msaeger
Working on wiring now and I am to the point where they ask you to connect the heated bed and hot end thermistors. The instructions say to attach the molex connector to them both yourself. Mine has the connector already on the heated bed thermistor but the hot end is bare and they didn't send any loose molex connectors.
How did everyone else's kit come?
Mine was missing too, though it came with a molex for the fan, which I used on the fan with extension wire, and soldered the one that came off the fan(since the fan is hard wired and doesnt need it) on the bed thermistor.
Quote
therippa
Did anyone else have problems with step 16? The motor brackets are held in with three bolts/t-nuts (two on the top rail, one on the side). In the instructions, when they lift the motors all the way up, it looks like they remove the bolt on the side rail. Anyway, after putting it all together, and using all 3 bolts, the z-axis chrome rods are definitely bowing a little bit to fit into the acrylic motor mount and the mount on the bottom rails. The only way I can get it to not bow is remove the side rail screws. Also, how the hell are you supposed to tighten the screws begin the chrome rods?!
Also, does anyone have any tips on how to align the y-axis rods?
My rods line up like yours, I just pulled it til it fit, though my screws werent hex nuts, but phillips head bolts. I had the same thoughs about screw placement behind the rid, and thought that screws like yours would work better because you can put the short side of an allen wrench behind the rod? I had to hold a scewdriver at an angle which obviously strips the bolt a tiny bit but I got them tight and have removed/replaced the mount while the rods were in place multiple times now. My screw heads are looking a bit rought but they still work.
However a side effect of the rods bowing is the distance between the smooth and threaded rods varies so it makes going to the top of the z axis (~145mm ) kinda scary to watch.
As far as tips go, make sure your x axis/z carriage ends arent pushed too close together, that was a problem I ran into as well. The printed ends will slide too far onto the rod easily, and are hard to separate without yanking them right off the rod.
Edited 2 time(s). Last edit at 07/02/2015 08:43AM by mel0n.
|
Re: Folger Tech 2020 i3 Printer Kit (Official Thread) July 02, 2015 11:39AM |
Registered: 8 years ago Posts: 19 |
Just printed my first hollow cube and a batarang last night. Didn't heat the bed since I'm using PLA so having some first layer sticking issues but they came out nice.
I'm having a strange problem with the X axis which I'm 100% sure is software, but I can't seem to figure out how to fix it.
Whenever I switch on the printer, I home my axes first. If I try to home the X axis first, instead of moving to the right and hitting the endstop, the printer moves maybe 5 to 10 mm to the left and stops. The red numbers on the manual control turn black and become 200 ( which is the max value for X axis).
The printer thinks it has homed but it actually is far from it. I don't understand why it thinks it has homed without hitting an endstop. If I dont hit home and try moving it towards the endstop using manual controls, it does not move. For some reason it thinks it is on the far end of the limit without any input. Is there a way to set the initial software position(before homing) in the firmware?
The strange thing is: If I home the Y and Z axes first (separately) and then try the same procedures for X axis, it works fine.
I can't seem to deduce why this would happen from the config code.
Edited 1 time(s). Last edit at 07/02/2015 11:40AM by go_gn.
|
Re: Folger Tech 2020 i3 Printer Kit (Official Thread) July 02, 2015 12:27PM |
Registered: 8 years ago Posts: 367 |
Quote
therippa
Did anyone else have problems with step 16? The motor brackets are held in with three bolts/t-nuts (two on the top rail, one on the side). In the instructions, when they lift the motors all the way up, it looks like they remove the bolt on the side rail. Anyway, after putting it all together, and using all 3 bolts, the z-axis chrome rods are definitely bowing a little bit to fit into the acrylic motor mount and the mount on the bottom rails. The only way I can get it to not bow is remove the side rail screws. Also, how the hell are you supposed to tighten the screws begin the chrome rods?!
Also, does anyone have any tips on how to align the y-axis rods?
I found this tricky too. I didn't have to bow the rods, but it was a tight fit. It helped to loosen the set screw on the L-piece that holds the frame together and very slightly move the vertical piece of 2020 - just 1-2 mm made mine fit much better.
See my blog at [moosteria.blogspot.com].
|
Re: Folger Tech 2020 i3 Printer Kit (Official Thread) July 02, 2015 12:29PM |
Registered: 8 years ago Posts: 367 |
Has anyone tried running the printer at faster speeds than the ones in the default Slic3r config supplied by Folger? (For example, 40mm/s for perimeters). Any risks in doing so?
See my blog at [moosteria.blogspot.com].
See my blog at [moosteria.blogspot.com].
|
Re: Folger Tech 2020 i3 Printer Kit (Official Thread) July 02, 2015 01:27PM |
Registered: 8 years ago Posts: 135 |
Quote
animoose
Has anyone tried running the printer at faster speeds than the ones in the default Slic3r config supplied by Folger? (For example, 40mm/s for perimeters). Any risks in doing so?
Yes, but then my retraction settings were off. Also I haven't had a successful print with Slic3r, but I havent really tried to fix it. I found on my first print it came out pretty mehh with slicer, changed no values and tried the same print with Cura and it came out close to perfect without making adjustments. So
I have been using Cura and have been happy with it. Maybe once I get all my upgrades printed and have the printer in a place where I think it is really good, I may go back and try to get Slic3r as good as Cura.
Quote
go_gn
Just printed my first hollow cube and a batarang last night. Didn't heat the bed since I'm using PLA so having some first layer sticking issues but they came out nice.
I'm having a strange problem with the X axis which I'm 100% sure is software, but I can't seem to figure out how to fix it.
Whenever I switch on the printer, I home my axes first. If I try to home the X axis first, instead of moving to the right and hitting the endstop, the printer moves maybe 5 to 10 mm to the left and stops. The red numbers on the manual control turn black and become 200 ( which is the max value for X axis).
The printer thinks it has homed but it actually is far from it. I don't understand why it thinks it has homed without hitting an endstop. If I dont hit home and try moving it towards the endstop using manual controls, it does not move. For some reason it thinks it is on the far end of the limit without any input. Is there a way to set the initial software position(before homing) in the firmware?
The strange thing is: If I home the Y and Z axes first (separately) and then try the same procedures for X axis, it works fine.
I can't seem to deduce why this would happen from the config code.
In Repetier, go into your printer settings, and make sure X axis home is set to min, not max. and also make sure your X endstop is plugged into min not max. Here is the shematic with lables, on your board they are lables X Y Z, I believe its upside down from the schematic but the order is the same.
[www.reprap.org]
I dont have my printer infront of me at the moment but I believe it goes z y x, so from right to left it goes x-min, x-max, y-min, y-max and so on.
Edited 2 time(s). Last edit at 07/02/2015 01:31PM by mel0n.
|
Re: Folger Tech 2020 i3 Printer Kit (Official Thread) July 02, 2015 02:54PM |
Registered: 8 years ago Posts: 135 |
I am only double posting because I am not sure if you read my last post or not yet, but I didnt have my printer in front of me at the time of posting. the way mine is set up, looking at the front of the printer, my X endstop is all the way on the right side, and plugged into the X-Max endstop pins (X+ or the second set of pins in from the right side), and in repetier I have it set to max (under printer settings > printer shape).
In firmware my settings are:
const bool X_ENDSTOPS_INVERTING = true; // set to true to invert the logic of the endstops.
#define INVERT_X_DIR true // for Mendel set to false, for Orca set to true
With these settings, my printers home is at the front right corner of the print area, and it considers this to be x = 200.
|
Re: Folger Tech 2020 i3 Printer Kit (Official Thread) July 02, 2015 10:42PM |
Registered: 11 years ago Posts: 335 |
Quote
691175002
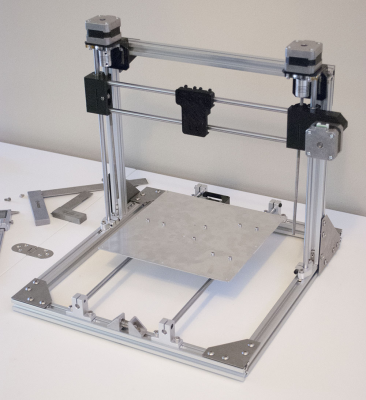
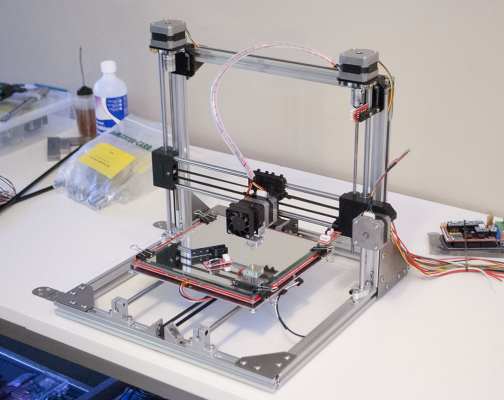
Mine arrived a few days ago and I've finished the assembly - still need to get the electronics set up.
I've kind of been doing my own thing but the only dramatic alteration is the corner brackets.
So far the kit has been pretty good, the only complaint I've got is that the Z linear bearing holders were shitty prints and I had to carve them out with a knife.
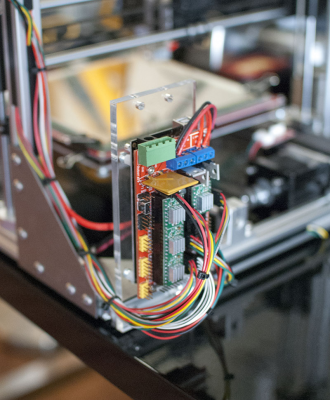
Finally managed to get everything set up.
Just plug everything in to make sure it works:
Cut the cables to length:
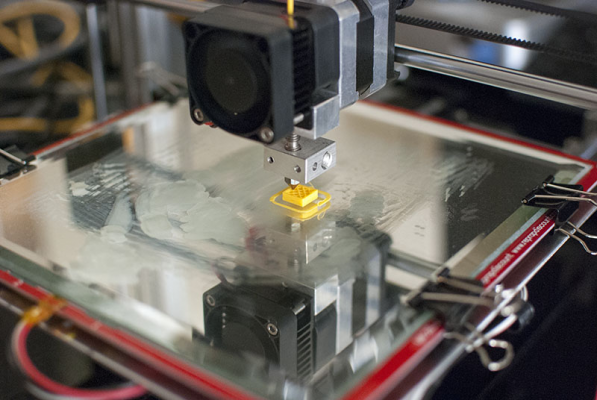
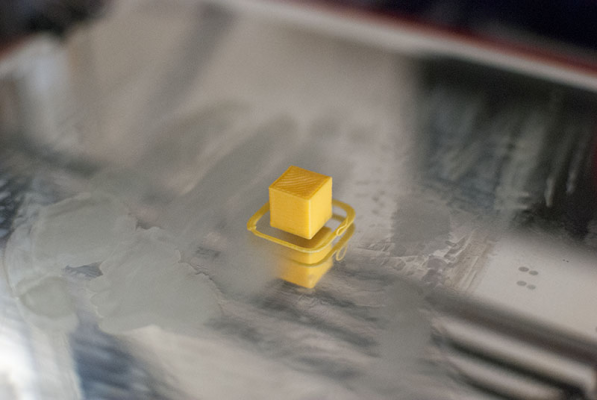
First print:
I tried flashing the current version of marlin so I could make use of some of the safety features and put the extruder fan on D9 but the former feature kept tripping in manual mode and the second one wouldn't even compile properly.
|
Re: Folger Tech 2020 i3 Printer Kit (Official Thread) July 02, 2015 11:02PM |
Registered: 9 years ago Posts: 606 |
Marlin1.0.3-dev or 1.0.2 should compile fine *BUT* you cannot just take your Configuration.h file over, you need to edit the values into the template that comes with the new version. (Configuration_adv.h too . . .)
And frankly, I have no idea what 'tripping' even means in your context, nor 'manual mode' . . . . more detail would help!
- Tim
And frankly, I have no idea what 'tripping' even means in your context, nor 'manual mode' . . . . more detail would help!
- Tim
|
Re: Folger Tech 2020 i3 Printer Kit (Official Thread) July 02, 2015 11:28PM |
Registered: 8 years ago Posts: 135 |
Just curious, is anybody else's printer really loud? Mine has been really loud, and getting progressively louder the more I print with it. Its completely related to the X-Axis and its a really loud vibration. I have tried messing with belt tension to make sure its not too tight, but the sound is still loud. If I grab the x axis stepper and hold it firmly, my hand absorbs most of the vibration and the sound goes away. I am looking into stepper motor dampeners, but none of my other steppers are anywhere near as loud... My Y is nice and quiet even during rapid movements that usually have my X axis screaming.
|
Re: Folger Tech 2020 i3 Printer Kit (Official Thread) July 02, 2015 11:43PM |
Registered: 8 years ago Posts: 367 |
Quote
mel0n
Just curious, is anybody else's printer really loud? Mine has been really loud, and getting progressively louder the more I print with it. Its completely related to the X-Axis and its a really loud vibration. I have tried messing with belt tension to make sure its not too tight, but the sound is still loud. If I grab the x axis stepper and hold it firmly, my hand absorbs most of the vibration and the sound goes away. I am looking into stepper motor dampeners, but none of my other steppers are anywhere near as loud... My Y is nice and quiet even during rapid movements that usually have my X axis screaming.
My X is a bit noisy, but not too bad, even though I damaged one of the bearings while building it. My Y is noisier, and was even before I finished construction. It's been worse the last week or so. I think most of the noise is from the bearings, and the aluminium bed then acts like a sounding board. There may be some loose fixings as well, and I'm planning to go over everything and see what needs tightening up. A longer term possibility is replacing the bearings with bushings, which are supposed to be quieter.
See my blog at [moosteria.blogspot.com].
|
Re: Folger Tech 2020 i3 Printer Kit (Official Thread) July 03, 2015 12:14AM |
Registered: 8 years ago Posts: 276 |
Quote
animoose
Quote
therippa
Did anyone else have problems with step 16? The motor brackets are held in with three bolts/t-nuts (two on the top rail, one on the side). In the instructions, when they lift the motors all the way up, it looks like they remove the bolt on the side rail. Anyway, after putting it all together, and using all 3 bolts, the z-axis chrome rods are definitely bowing a little bit to fit into the acrylic motor mount and the mount on the bottom rails. The only way I can get it to not bow is remove the side rail screws. Also, how the hell are you supposed to tighten the screws begin the chrome rods?!
Also, does anyone have any tips on how to align the y-axis rods?
I found this tricky too. I didn't have to bow the rods, but it was a tight fit. It helped to loosen the set screw on the L-piece that holds the frame together and very slightly move the vertical piece of 2020 - just 1-2 mm made mine fit much better.
Thanks for the advice animoose, and thanks for your blog. I used it as much as I did the prusa pdf during the build

|
Re: Folger Tech 2020 i3 Printer Kit (Official Thread) July 03, 2015 12:50AM |
Registered: 8 years ago Posts: 430 |
I got it together and the wires connected. I was able to program the aurdino and tried moving everything manually in repetier host and manually hitting the limit switches makes it stop so I think I have it all connected right. Next I need to get the limit switches positioned right then I can clean up the wires.
I haven't tried the extruder motor yet. What's the consensus on how that should be plugged in red wire on the right or left? There seems to be a conflict in the instructions.
I haven't tried the extruder motor yet. What's the consensus on how that should be plugged in red wire on the right or left? There seems to be a conflict in the instructions.
|
Re: Folger Tech 2020 i3 Printer Kit (Official Thread) July 03, 2015 01:56AM |
Registered: 8 years ago Posts: 367 |
Quote
msaeger
I got it together and the wires connected. I was able to program the aurdino and tried moving everything manually in repetier host and manually hitting the limit switches makes it stop so I think I have it all connected right. Next I need to get the limit switches positioned right then I can clean up the wires.
I haven't tried the extruder motor yet. What's the consensus on how that should be plugged in red wire on the right or left? There seems to be a conflict in the instructions.
Red wire towards the edge of the board where the screw terminal connectors are. Mine is the other way round because I have a different extruder set up from the normal one (nozzle under the left hand filament hole, when it's usually under the right hand one).
See my blog at [moosteria.blogspot.com].
|
Re: Folger Tech 2020 i3 Printer Kit (Official Thread) July 03, 2015 10:27AM |
Registered: 8 years ago Posts: 430 |
Quote
animoose
Quote
msaeger
I got it together and the wires connected. I was able to program the aurdino and tried moving everything manually in repetier host and manually hitting the limit switches makes it stop so I think I have it all connected right. Next I need to get the limit switches positioned right then I can clean up the wires.
I haven't tried the extruder motor yet. What's the consensus on how that should be plugged in red wire on the right or left? There seems to be a conflict in the instructions.
Red wire towards the edge of the board where the screw terminal connectors are. Mine is the other way round because I have a different extruder set up from the normal one (nozzle under the left hand filament hole, when it's usually under the right hand one).
I tried to extrude some before setting the limit switches with the red wire on the right (the side toward the USB/RAMPS power terminals) it was feeding the filament out the top. I flipped it so red is on the left and it extrudes,
Here's my first lump [goo.gl]
|
Re: Folger Tech 2020 i3 Printer Kit (Official Thread) July 03, 2015 12:14PM |
Registered: 11 years ago Posts: 335 |
The safety features shut down the printer if you turn the heaters on manually in Repetier.Quote
tadawson
Marlin1.0.3-dev or 1.0.2 should compile fine *BUT* you cannot just take your Configuration.h file over, you need to edit the values into the template that comes with the new version. (Configuration_adv.h too . . .)
And frankly, I have no idea what 'tripping' even means in your context, nor 'manual mode' . . . . more detail would help!
- Tim
I was really confused by the auto extruder fan configuration. This is from the current release version of marlin on github:
Config_adv.h:78
#define EXTRUDER_0_AUTO_FAN_PIN   9

pins.h:61
#define FAN_PIN            -1

temperature.cpp:364
    #if EXTRUDER_0_AUTO_FAN_PIN == FAN_PIN
       #error "You cannot set EXTRUDER_0_AUTO_FAN_PIN equal to FAN_PIN"
    #endif
The error in temperature.cpp gets triggered regardless of what the pins are set to. I have no idea why, unless there is some random file somewhere defining FAN_PIN as EXTRUDER_0_AUTO_FAN_PIN. If I remove the #error the code will compile but the feature does not work.
I'd like to run the extruder fan at ~80% duty cycle so I can up the power supply to 14V and get a little more power out of the heated bed.
Edited 1 time(s). Last edit at 07/03/2015 12:16PM by 691175002.
|
Re: Folger Tech 2020 i3 Printer Kit (Official Thread) July 03, 2015 12:50PM |
Registered: 8 years ago Posts: 430 |
|
Re: Folger Tech 2020 i3 Printer Kit (Official Thread) July 03, 2015 12:56PM |
Registered: 11 years ago Posts: 335 |
|
Re: Folger Tech 2020 i3 Printer Kit (Official Thread) July 03, 2015 01:05PM |
Registered: 8 years ago Posts: 367 |
Quote
msaeger
Any tips for mounting the Y carriage end stop before I modify the bracket or something? The carriage hits the switch mount before it hits the switch because the block protrudes slightly past the switch.
I turned mine so that it's at a slight angle to the mount (about 15 degrees). Also check whether you get the same problem on the Z axis. I wasn't able to find an angle that worked for that, so stuck a small plastic bumper to the X motor mount.
See my blog at [moosteria.blogspot.com].
|
Re: Folger Tech 2020 i3 Printer Kit (Official Thread) July 03, 2015 02:02PM |
Registered: 8 years ago Posts: 430 |
|
Re: Folger Tech 2020 i3 Printer Kit (Official Thread) July 03, 2015 02:04PM |
Registered: 8 years ago Posts: 430 |
Quote
animoose
Quote
msaeger
Any tips for mounting the Y carriage end stop before I modify the bracket or something? The carriage hits the switch mount before it hits the switch because the block protrudes slightly past the switch.
I turned mine so that it's at a slight angle to the mount (about 15 degrees). Also check whether you get the same problem on the Z axis. I wasn't able to find an angle that worked for that, so stuck a small plastic bumper to the X motor mount.
I thought to look at your blog after I posted the message and turning the switch at an angle did indeed get it to work. I agree with you that I don't really trust it will stay in position. Thanks for the tip!
|
Re: Folger Tech 2020 i3 Printer Kit (Official Thread) July 03, 2015 02:45PM |
Registered: 8 years ago Posts: 21 |
i'm anxiously awaiting for my 2020 prusa to arrive, today. Bought from Folgertech's ebay store and have been looking forward to this all week. I have to say i'm disappointed in the USPS tracking service as it doesn't give me any update other than the day which the label was made. What's the point of a tracking service if all it shows you is when it was shipped and when it arrives? This is by no means a complaint on Folgertech, of course.
Edited 2 time(s). Last edit at 07/03/2015 02:47PM by hobbes.
Edited 2 time(s). Last edit at 07/03/2015 02:47PM by hobbes.
|
Re: Folger Tech 2020 i3 Printer Kit (Official Thread) July 03, 2015 02:49PM |
Registered: 8 years ago Posts: 430 |
Quote
hobbes
i'm anxiously awaiting for my 2020 prusa to arrive, today. Bought from Folgertech's ebay store and have been looking forward to this all week. I have to say i'm disappointed in the USPS tracking service as it doesn't give me any update other than the day which the label was made. What's the point of a tracking service if all it shows you is when it was shipped and when it arrives? This is by no means a complaint on Folgertech, of course.
That's because it hasn't been shipped yet. USPS doesn't give as finite of details as UPS but it did show the package moving after it was actually picked up.
Sorry, only registered users may post in this forum.
