Folger Tech 2020 i3 Printer Kit (Official Thread)
Posted by Dan_FolgerTech
|
Re: Folger Tech 2020 i3 Printer Kit (Official Thread) July 08, 2015 12:34AM |
Registered: 8 years ago Posts: 276 |
Quote
markts
@therippa - what settings did you use to design/print the LCD holder? I tried a couple with different infill settings and percentages, but I never know what to pick. One turned out ok (honeycomb, 70%? 80%?), the other crumbled when I tried to install it (recitilinear, 70%) Should they be 100%?
I did PLA at 60% infill, honeycomb. Came out very sturdy for me.
|
Re: Folger Tech 2020 i3 Printer Kit (Official Thread) July 08, 2015 07:31AM |
Registered: 8 years ago Posts: 27 |
Quote
wderoxas
Quote
therippa
Quote
ejnelson
Quote
markts
Quote
ejnelson
Anyone have trouble getting the reprapdiscount smart controller to work? mine only lights up when the computer is connected via USB. the point of the controller is to be able to use the machine when the USB is NOT connected. what the heck.
I had the same trouble, but apparently others got it to work out of the box. Check my post on page 5. I had to upgrade to the latest version of the firmware (Marlin) to get it to work.
Hey thanks for the quick response. I actually just flashed the marlin fork from therippa because i plan on doing inductive sensing too. I also, just tried using "#define KILL_PIN -1", no change. It seems that my LCD panel works, I can use it to control things on the machine, but it only lights up when I have a USB connection to my computer. As soon as i disconnect, the LCD shuts down.
That's weird, it works me fine when not plugged in to USB power.
Yeah, it should work as long as the psu is on. How about manually triggering any endstop while your not connected to usb and psu is on. Does the led on the endstop lits up?
When not connected to USB power, only from the power supply, the end stop triggers do not light up any LEDs when activated....
|
Re: Folger Tech 2020 i3 Printer Kit (Official Thread) July 08, 2015 08:46AM |
Registered: 8 years ago Posts: 135 |
Quote
go_gn
So I fixed my X axis problem by moving the endstop pins to Xmax on the RAMPS board. Only to run into another strange problem that didn't happen before.
I'm having a problem with the extruder.It worked fine before. The temperature display on Repetier is behaving strangely. I don't know what the heck is going on.
It starts off at 12degC , which is strange, because that's not the room temperature. Then after I turn it on, nothing happens for almost 10 seconds. it just stays at same temperature. I touched the extruder with a piece of paper to see if it was heating and apparently it was , as the paper started to blacken. Then I check the temperature on the screen again and by now, it shows 88 deg C. but rising very slowly, even going back sometimes. Then it kind of tops out at 105 - 106 , sometime 110degC and stays there fluctuating up and down . Command still shows heating extruder. I checked the thermistor and heater wires, no loose contact or anything.
What is going on??? And how do I diagnose and fix this?

I would start by trying a different host to rule out software. Give Cura a try. If it happens in multiple hosts, I would think the thermistor is suspect, so get out the multimeter if you have one and try out this stuff [www.learningaboutelectronics.com] (quick google search for "test thermistor with multimeter")
My creations/2020 aluminum parts/FolgerTech i3 upgrades [www.thingiverse.com]
|
Re: Folger Tech 2020 i3 Printer Kit (Official Thread) July 08, 2015 02:29PM |
Registered: 8 years ago Posts: 19 |
Checking the thermistor seems like the most logical step. I will try out this test today.
But still can't understand why a thermistor would suddenly go bad. Is there even a working component that can go bad in a thermistor?
If not the thermistor, any thoughts on what else it could be?
Edited 2 time(s). Last edit at 07/08/2015 02:30PM by go_gn.
But still can't understand why a thermistor would suddenly go bad. Is there even a working component that can go bad in a thermistor?
If not the thermistor, any thoughts on what else it could be?
Edited 2 time(s). Last edit at 07/08/2015 02:30PM by go_gn.
|
Re: Folger Tech 2020 i3 Printer Kit (Official Thread) July 08, 2015 04:19PM |
Registered: 8 years ago Posts: 135 |
Well whats between the driver and the wheels of the car. We have the thermistor, the ramps, the arduino, firmware, then the software. So the problem has to lie in one of those things, the easiest to test being software which is why I suggested it first. If you have changed to a different/newer version of marlin make sure your thermisor settings are correct. Once you rule out software then move on to hardware. If the thermistor has exposed wire that could short it out intermittently and cause an issue. There could also be a broken/bad wire so if the thermistor checks out, use the multimeter on the wire and wiggle it around to make sure it doesnt lose connection. If all checks out, then I would point the finger at the ramps or arduino.
Edited 1 time(s). Last edit at 07/08/2015 04:19PM by mel0n.
Edited 1 time(s). Last edit at 07/08/2015 04:19PM by mel0n.
|
Re: Folger Tech 2020 i3 Printer Kit (Official Thread) July 08, 2015 04:50PM |
Registered: 8 years ago Posts: 25 |
So I posted earlier about an issue I was having with the printer just stopping mid print for no apparent reason. After a lot of research and trying a couple of things I came to the conclusion that it must be noise on the 8ft USB cable I'm using (2 ft extension and 6 ft cable). Since I can't move the printer any closer to the computer, I opted to print from an SD card using the LCD controller. After several hours of printing, I've had no issues at all.
But... the rotary encoder on the LCD controller does not work well at all with the stock firmware. I can fix the direction issue, but not the step issue. To get that to work, I need the latest firmware. It wasn't too difficult to get it working. I've read a few posts of people asking for instructions, so I decided to post what I had to change to get it working...
These are the changes that I had to make. Note that I built the printer per the build instruction, so I have the X end stop on the right side of the printer, and this is the config for that.
Lines with * are my preference, and not required for the printer to function.
Lines with ** are for the 2004 LCD controller from Folger Tech that I ordered from them. Also the fixes for the encoder.
Lines with *** are for the X homing issue. So if your setup is different than mine, you may have to play with these.
Also, if you want to change line 51 in configuration.h, make sure that whatever text you use for the CUSTOM_MENDEL_NAME variable is not longer than 12 or 13 characters. Otherwise the code will give you an error about a character array being too long and will not compile.
Configuration.h
30: #define STRING_VERSION_CONFIG_H __DATE__ " 7-7-15 " __TIME__ // build date and time
31: #define STRING_CONFIG_H_AUTHOR "(Folger Tech, Prusa i3 Config)" // Who made the changes.
47: #define MOTHERBOARD BOARD_RAMPS_13_EFB
51: #define CUSTOM_MENDEL_NAME "FT Prusa i3"
107: #define TEMP_SENSOR_0 6
108: #define TEMP_SENSOR_1 0
110: #define TEMP_SENSOR_BED 6
284: // #define ENDSTOPPULLUP_XMAX
285: // #define ENDSTOPPULLUP_YMAX
286: // #define ENDSTOPPULLUP_ZMAX
321: #define INVERT_Y_DIR true // for Mendel set to true, for Orca set to false
*** 329: #define X_HOME_DIR 1
333: #define min_software_endstops false // If true, axis won't move to coordinates less than HOME_POS.
337: #define X_MAX_POS 200
339: #define Y_MAX_POS 200
341: #define Z_MAX_POS 175
478: #define HOMING_FEEDRATE {50*60, 50*60, 50, 0} // set the homing speeds (mm/min)
482: #define DEFAULT_AXIS_STEPS_PER_UNIT {80,80,4000,90} // default steps per unit for Ultimaker
483: #define DEFAULT_MAX_FEEDRATE {250, 250, 2, 22} // (mm/sec)
484: #define DEFAULT_MAX_ACCELERATION {1000,1000,5,1000} // X, Y, Z, E maximum start speed for accelerated moves. E default
486: #define DEFAULT_ACCELERATION 500 // X, Y, Z and E max acceleration in mm/s^2 for printing moves
487: #define DEFAULT_RETRACT_ACCELERATION 500 // X, Y, Z and E max acceleration in mm/s^2 for retracts
* 519: #define EEPROM_SETTINGS
* 522: #define EEPROM_CHITCHAT
** 534: #define ULTRA_LCD //general LCD support, also 16x2
** 536: #define SDSUPPORT // Enable SD Card Support in Hardware Console
** 539: #define ENCODER_PULSES_PER_STEP 4 // Increase if you have a high resolution encoder
** 540: #define ENCODER_STEPS_PER_MENU_ITEM 1 // Set according to ENCODER_PULSES_PER_STEP or your liking
** 552: #define REPRAP_DISCOUNT_SMART_CONTROLLER
Configuration_adv.h
* 219: #define QUICK_HOME //if this is defined, if both x and y are to be homed, a diagonal move will be performed initially.
* 241: #define MANUAL_FEEDRATE {50*60, 50*60, 50, 60} // set the speeds for manual moves (mm/min)
* 301: #define LCD_PROGRESS_BAR
* 330: #define BABYSTEPPING
Pins.h
545: #define RAMPS_V_1_3
*** 599: #define X_MIN_PIN 2
*** 600: #define X_MAX_PIN 3
** 774: #define BTN_EN1 33
** 775: #define BTN_EN2 31
|
Re: Folger Tech 2020 i3 Printer Kit (Official Thread) July 08, 2015 07:54PM |
Registered: 8 years ago Posts: 81 |
Quote
ejnelson
Quote
wderoxas
Quote
therippa
Quote
ejnelson
Quote
markts
Quote
ejnelson
Anyone have trouble getting the reprapdiscount smart controller to work? mine only lights up when the computer is connected via USB. the point of the controller is to be able to use the machine when the USB is NOT connected. what the heck.
I had the same trouble, but apparently others got it to work out of the box. Check my post on page 5. I had to upgrade to the latest version of the firmware (Marlin) to get it to work.
Hey thanks for the quick response. I actually just flashed the marlin fork from therippa because i plan on doing inductive sensing too. I also, just tried using "#define KILL_PIN -1", no change. It seems that my LCD panel works, I can use it to control things on the machine, but it only lights up when I have a USB connection to my computer. As soon as i disconnect, the LCD shuts down.
That's weird, it works me fine when not plugged in to USB power.
Yeah, it should work as long as the psu is on. How about manually triggering any endstop while your not connected to usb and psu is on. Does the led on the endstop lits up?
When not connected to USB power, only from the power supply, the end stop triggers do not light up any LEDs when activated....
That means, you dont have the vcc voltage. Two things u can do:
1) powered on from psu, no usb connected, measure voltage from psu ground to diode D1's end one at a time. You should have 12v on both with one slightly lower than the other.
2) if 1 is ok, then your going to need to remove the ramps shield to check mega's voltage regulator. You have to power it through the power jack on board. Not too sure on the jack's polarity though. Just beside it is the voltage regulator. When powered on, you should get a 5v on one of the regulator's pin, otherwise, u got a broken regulator.
|
Re: Folger Tech 2020 i3 Printer Kit (Official Thread) July 09, 2015 09:29AM |
Registered: 8 years ago Posts: 135 |
Got my Printer running on Octoprint/Octopi. Being an Embeded/Embeded Linux Software engineer, I had to of course tweak the crap out of it until it worked flawlessly and can be accessed from anywhere in the world but with a lot of added security measures. I think this is the way to go. I can start a print in the morning when I get up, take a shower and get redy for work, and check to make sure the first layers whent as planned before heading off to work. Then from work I can periodically check in on the webcam/gcode progress. One thing I like about it is the Temperature graphs. I have been noticing in my larger prints, some inconsistancies in the plastic. Now that I have a good temp curve I can see that the temps constantly vary by ~5C up and down at random intervals. It seems that there are sharp temperature drops occasionally and then it overheats by the same ammount when trying to recover. I am printing ABS currently and I am using 225C, which has been producing nice and clean small prints(cable chain links) but on larger prints I am getting occasional stringing and globbing here and there. Which now that I see them temp curve makes a lot of sense. Drops to ~220 then shoots up to ~230 at certain points in the print. Also looking at the curve, it was pretty stable at ~225 for the first 20-30 mins then started varying by those numbers.
So I am not sure if it is related to what part of the print it is working on, the size of the print, the slicer being used (Cura), the Heater Block's thermal conductivity, the heater itself, the ramps, or the Gcode. I am planning on moving up to an E3D V6 eventually anyways. It still prints fine, but you can tell where the heat varied.
On a side note, completed my first 12 hour print yesterday. And I am currently in the middle of a 7 hour print. Both are ABS as well and contrary to what everybody says, I think PLA is insanely easier to work with/print than ABS. I am really happy with Octoprint's time estemates as well. Repetier sliced with Cura predicted a 5 hour print time for that part which ended up taking 12 hours at 50mm/s. And my currently running print was predicted to be 2.5 hours by cura/repetier, however it is 2 hours in and octoprint is reporting an additional 5 hours which makes sense given where its at in the print. In repetier it just reports the estimated time, but counts down WAYYYY slower than real time. Octoprint calculates an initial predicted time, then as the print progresses, it recalculates for a while then reports a much more accurate time.
Edited 1 time(s). Last edit at 07/09/2015 10:26AM by mel0n.
My creations/2020 aluminum parts/FolgerTech i3 upgrades [www.thingiverse.com]
|
Re: Folger Tech 2020 i3 Printer Kit (Official Thread) July 09, 2015 01:17PM |
Registered: 8 years ago Posts: 27 |
|
Re: Folger Tech 2020 i3 Printer Kit (Official Thread) July 09, 2015 02:18PM |
Registered: 8 years ago Posts: 135 |
Cura, the prints come out much more precise, faster, and in general I haven't had much luck with slic3r.
I pretty much referenced tom's guide for a couple things, but in general just used the octopi image and since I work with embedded linux devices(mostly variants of the raspberry pi, but much more powerful and expensive) all day at work and have a lot of raspberry pi experience, I did most of it myself without following a guide. One thing that was tricky is that octoprint has a configuration file that allows you to specify a port. Since I am exposing mine to the WWW, I didnt want it running on port 80 which seemed to be the default. Though all of the documentation claims that port 5000 is the default port. I was getting really confused up until I read some documentation stating that a reverse proxy service such as ha proxy should be run if you want it running on port 80. So i checked and well, octopi already has haproxy installed, and it redirects port 80 to octopi at 172.0.0.1:5000. So I had a lightbulb come on in my head and then just did all my port configuration for haproxy since it also masks port 8080 which is the default port for mjpeg-streamer(what the webcam runs on).
As for learning octopi's quirks and the interface, it takes some getting used to and playing around with to figure out. I tried slicing stl's with cura in octoprint, but I was not very happy with the results, and it doesnt give you anywhere near as much control over cura's configuration as repetier does, and you have to export your config from repetier, then upload it to octoprint, and even then its not the same slice or settings. So I do all my slicing in repetier, save it as if to put on an sd card, then just upload the gcode file to octoprint and click start!
My creations/2020 aluminum parts/FolgerTech i3 upgrades [www.thingiverse.com]
|
Re: Folger Tech 2020 i3 Printer Kit (Official Thread) July 09, 2015 03:01PM |
Registered: 8 years ago Posts: 1 |
Hi folks - Just started putting together my kit and the heater for the bed is warped. Will this go away once it is used or do I need to get it replaced? It would seem IMHO that I would have heating issues if the glass plate isn't making contact across the area of the heater. How much will the glass clamps mitigate this issue? Thanks - Jim
|
Re: Folger Tech 2020 i3 Printer Kit (Official Thread) July 09, 2015 03:38PM |
Registered: 8 years ago Posts: 135 |
The heated bed will warp when it heats anyways. Just my 2 cents.
My creations/2020 aluminum parts/FolgerTech i3 upgrades [www.thingiverse.com]
My creations/2020 aluminum parts/FolgerTech i3 upgrades [www.thingiverse.com]
|
Re: Folger Tech 2020 i3 Printer Kit (Official Thread) July 09, 2015 05:45PM |
Registered: 8 years ago Posts: 14 |
|
Re: Folger Tech 2020 i3 Printer Kit (Official Thread) July 09, 2015 06:30PM |
Registered: 8 years ago Posts: 2 |
Major Edit: Turns out my axis' that werent homing properly because I connected them into different endstop connections on my RAMPS. Switched them around and they home properly. Now, my z axis still will not move. I am comtemplating trying the spare stepper driver that was included in my kit unless someone has any suggestions that might help (have already tried pot tuning clockwise and no dice).
Many Thanks,
Lifey
Edited 1 time(s). Last edit at 07/09/2015 07:19PM by LifeEscalade.
Many Thanks,
Lifey
Edited 1 time(s). Last edit at 07/09/2015 07:19PM by LifeEscalade.
|
Re: Folger Tech 2020 i3 Printer Kit (Official Thread) July 09, 2015 07:10PM |
Registered: 9 years ago Posts: 606 |
Quote
awmyhr
@mel0n: is there a guide for how you are using Octoprint with the Folger? Did you replace the Mega?
@all: Hi, been lurking a few weeks; just got my kit today! Now my boy and I gotta put it together...
Octoprint runs on a Raspberry Pi, and connects to a stock printer via USB with no changes to the printer required. You access the Pi via an IP network connection, either wireless or wired.
- Tim
|
Re: Folger Tech 2020 i3 Printer Kit (Official Thread) July 09, 2015 08:37PM |
Registered: 8 years ago Posts: 33 |
Got my 2020 yesterday, did inventory and everything was there . Checked the ramps board and found 1 solder bridge that if it was connected would have gone up in smoke and possibly taken the Arduino with it. I decided to make some checks on some known problem areas. The bed , well to start off with the bearing seats, I worked on all 3 of them until I could use the calipers and measure 25.92 mm all the way across the bearing top to the mounting base. The base rods , when turned in the mounts have a noticeable wiggle , should be no wiggle, linear bearings don't like this. I measured the run out with a dial indicator and it was .012 ln . I got this down to .0015. The problem I see with the guide rods for the Z axis problem with getting them into the plastic support under the motors is the holes in the plastic support are on an angle. I guess the laser cutter is off. 8 mm chucking reamer fixed this. I see people talking about bearings and lubrication. I pack my bearings with light general purpose grease, fill the bearing 1/2 full of grease, place your finger over the end where you put the grease and push an 8 mm rod from into the other end and push gently this will force the grease to completely fill in behind the bearing retainer and bearings. Try it and see if it is not quite . Don't worry about dust and dirt these bearings have seals on them.
|
Re: Folger Tech 2020 i3 Printer Kit (Official Thread) July 09, 2015 08:44PM |
Registered: 8 years ago Posts: 81 |
Mine was also warped when i got it. To ensure that the glass and heater will get a better/larger contact area, i sandwiched two 5mm cork boards between the heater and the aluminum plate. Cut out the areas where the heater and thermistor cord will pass through as well as for the head of the bolts for the bearing pillow block.Quote
JimF2799
Hi folks - Just started putting together my kit and the heater for the bed is warped. Will this go away once it is used or do I need to get it replaced? It would seem IMHO that I would have heating issues if the glass plate isn't making contact across the area of the heater. How much will the glass clamps mitigate this issue? Thanks - Jim
|
Re: Folger Tech 2020 i3 Printer Kit (Official Thread) July 09, 2015 09:55PM |
Registered: 8 years ago Posts: 135 |
Quote
awmyhr
@mel0n: is there a guide for how you are using Octoprint with the Folger? Did you replace the Mega?
@all: Hi, been lurking a few weeks; just got my kit today! Now my boy and I gotta put it together...
There are a lot of guides out there, but none for my specific methods. I am a very experienced linux user/software developer so I know how I want things to work.
But for how its wired up.
Ramps > Arduino Mega > USB to powered usb hub> Raspberry PI > back to the powered hub to power the pi itself. And then a wifi card and webcam on the pi, and software configurations.
P.S. I am all about sharing how to do stuff and will generally provide a guide to how I do things, though I don't share my security stuff, especially since its what I am using and I like to keep the baddies in the dark as much as I can. So I won't be saying much about my Octoprint setup, and you really shouldn't expose it to anything outside of your network like I have unless you know what your doing. (in which case you won't need a guide
 )
)Edited 3 time(s). Last edit at 07/09/2015 09:58PM by mel0n.
My creations/2020 aluminum parts/FolgerTech i3 upgrades [www.thingiverse.com]
|
Re: Folger Tech 2020 i3 Printer Kit (Official Thread) July 09, 2015 10:01PM |
Registered: 8 years ago Posts: 21 |
Finally got my printer today. I'm checking all the parts. Noticed through the bag that some parts on this board were bent. Could an expert set of eyes tell me if i should request for a new part or will this work just fine?

|
Re: Folger Tech 2020 i3 Printer Kit (Official Thread) July 09, 2015 10:24PM |
Registered: 8 years ago Posts: 81 |
|
Re: Folger Tech 2020 i3 Printer Kit (Official Thread) July 09, 2015 10:26PM |
Registered: 9 years ago Posts: 606 |
Quote
hobbes
Finally got my printer today. I'm checking all the parts. Noticed through the bag that some parts on this board were bent. Could an expert set of eyes tell me if i should request for a new part or will this work just fine?
If it bugs you, bend 'em back vertical, but from an electrical standpoint, unless the tabs are touching, it's irrelevant.
In this day and age of cheap and Chinese, consider yourself lucky that the parts are *ON* the board at all . . .
- Tim
Edited 1 time(s). Last edit at 07/09/2015 10:27PM by tadawson.
|
Re: Folger Tech 2020 i3 Printer Kit (Official Thread) July 09, 2015 10:29PM |
Registered: 9 years ago Posts: 606 |
Quote
If you aren't up for tinkering haproxy on the pi, then port forwarding on your router might be easier. Forward a port of your choice to pi's ip:80.
Meh . . . 128 bit encrypted OpenVPN tunnel into the network, call it good . . . and don't have to screw with anything on the host side . . .
- Tim
Edited 2 time(s). Last edit at 07/09/2015 10:32PM by tadawson.
|
Re: Folger Tech 2020 i3 Printer Kit (Official Thread) July 09, 2015 10:46PM |
Registered: 8 years ago Posts: 81 |
Guys, i need some advise. Im working on converting my i3 to a dual extruder bowden. I've read a lot that the extruder for bowden should have a pretty good amount of torque on it.
Will the slim steppers that came with our kit be up for the task? I want to do a direct drive extruder (no gears) if possible to keep it simple. Perhaps someone might have tried it out?
I looked up for torque multiplier designs anyway and i found a planetary gearbox with same profile as the nema 17s. Wouldnt want to go for those with big gears cause i dont want them dangling on my printer.
Edited 1 time(s). Last edit at 07/09/2015 11:05PM by wderoxas.
|
Re: Folger Tech 2020 i3 Printer Kit (Official Thread) July 09, 2015 10:54PM |
Registered: 8 years ago Posts: 81 |
Quote
tadawson
Quote
If you aren't up for tinkering haproxy on the pi, then port forwarding on your router might be easier. Forward a port of your choice to pi's ip:80.
Meh . . . 128 bit encrypted OpenVPN tunnel into the network, call it good . . . and don't have to screw with anything on the host side . . .
- Tim
Hahaha, yeah i know. I was thinking of suggesting that, as well as an ssh tunnel with port-forwarding, but figured might be quite complex for the other guys who doesn't know how to do it but wants to get it done anyway.
But if security is a concern and putting more effort on it wont be a problem, then a secured/encrypted connection is indeed the way to go.
|
Re: Folger Tech 2020 i3 Printer Kit (Official Thread) July 09, 2015 11:00PM |
Registered: 8 years ago Posts: 6 |
Quote
tadawson
Quote
hobbes
Finally got my printer today. I'm checking all the parts. Noticed through the bag that some parts on this board were bent. Could an expert set of eyes tell me if i should request for a new part or will this work just fine?
If it bugs you, bend 'em back vertical, but from an electrical standpoint, unless the tabs are touching, it's irrelevant.
In this day and age of cheap and Chinese, consider yourself lucky that the parts are *ON* the board at all . . .
- Tim
Agree, the bent parts in most cases are not going to hurt you. I would be looking at the other side of the board for bad and bridged solder joints. Like this

|
Re: Folger Tech 2020 i3 Printer Kit (Official Thread) July 09, 2015 11:04PM |
Registered: 8 years ago Posts: 81 |
Quote
Garben
Quote
tadawson
Quote
hobbes
Finally got my printer today. I'm checking all the parts. Noticed through the bag that some parts on this board were bent. Could an expert set of eyes tell me if i should request for a new part or will this work just fine?
If it bugs you, bend 'em back vertical, but from an electrical standpoint, unless the tabs are touching, it's irrelevant.
In this day and age of cheap and Chinese, consider yourself lucky that the parts are *ON* the board at all . . .
- Tim
Agree, the bent parts in most cases are not going to hurt you. I would be looking at the other side of the board for bad and bridged solder joints. Like this
[attachment 57809 image.jpg]
That's one nasty bridge!!

|
Re: Folger Tech 2020 i3 Printer Kit (Official Thread) July 09, 2015 11:28PM |
Registered: 8 years ago Posts: 367 |
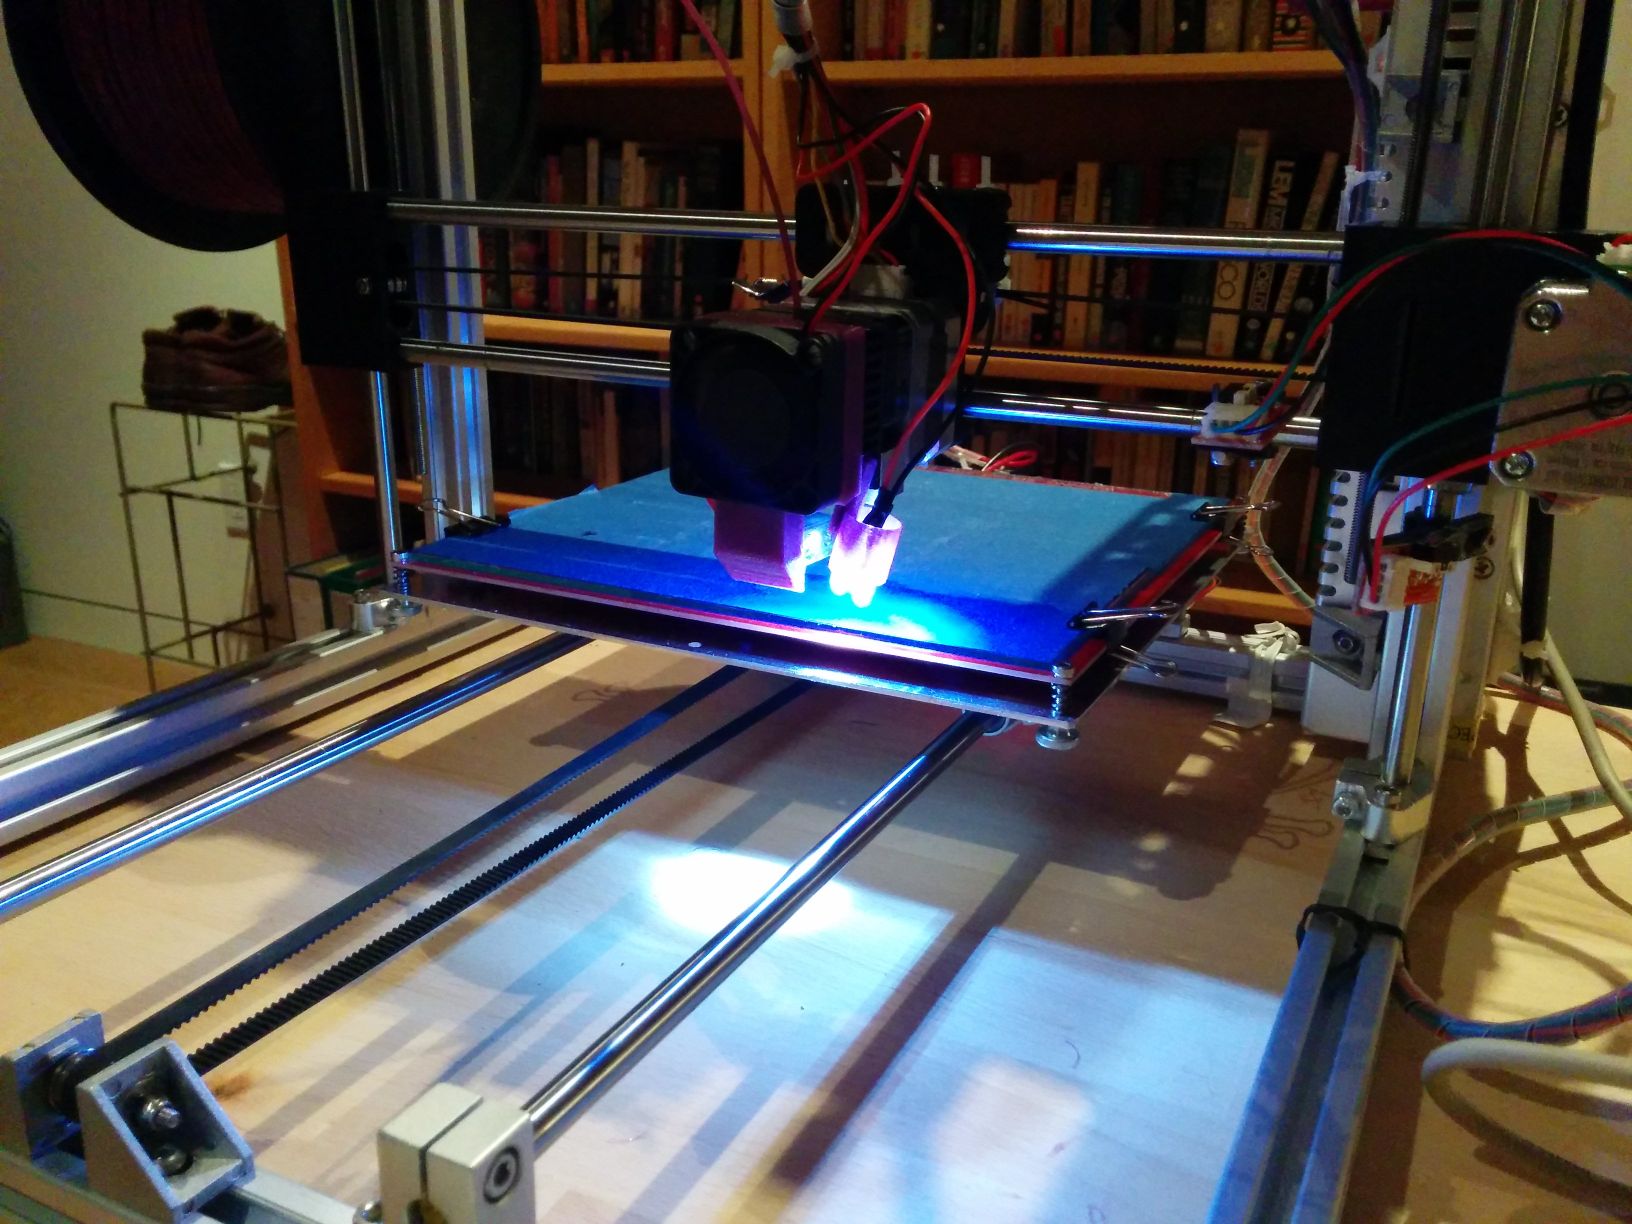
Today's tweak. Now I can see things as I print (brightness adjustment to follow).
See my blog at [moosteria.blogspot.com].
See my blog at [moosteria.blogspot.com].
|
Re: Folger Tech 2020 i3 Printer Kit (Official Thread) July 09, 2015 11:38PM |
Registered: 8 years ago Posts: 171 |
|
Re: Folger Tech 2020 i3 Printer Kit (Official Thread) July 10, 2015 08:30AM |
Registered: 8 years ago Posts: 27 |
Has anyone added a 2nd fan to be used as a PLA print cooling fan? I know someone designed a fan diverter to divert some of the air that blows on the heat sink for the hot end, but would it be possible to just add another fan so that you don't have to take off the diverter every time you want to print ABS?
|
Re: Folger Tech 2020 i3 Printer Kit (Official Thread) July 10, 2015 08:45AM |
Registered: 8 years ago Posts: 135 |
Quote
wderoxas
If you aren't up for tinkering haproxy on the pi, then port forwarding on your router might be easier. Forward a port of your choice to pi's ip:80.
This is exactly what people should NOT be doing. Yes it will work, but your also putting your printer out there on the default port for websites, so when that guy in china hits your ip when he is running a long term scan on his server array, youve now become a target. And believe me China WILL ATTACK YOU if you put anything on port 80 ever. We had a guy from china break into VM's set up to teach some basic linux courses, which he then used toattack everything on the schools network. Once they are into your network, they will attack everything on it. Everything is being attacked by China 100% of the time and I am not exadurating. The raspberry pi by default has no security measures AT ALL. Theres no firewall (iptables), your passwords are default, packages are not 100% up to date. There are a LOT of security vulnerabilities that need to be taken care of before you put it on the WWW
and Hobbes, like already said, check the soldering on the board, those fets are fine, mine were bent exactly like that. So were the fuses, I just bent them back up.
Quote
animoose
Today's tweak. Now I can see things as I print (brightness adjustment to follow).
Cool! I am waiting on my Raspberry Pi camera to come in so I can print a case and mount some LED's on it for my octoprint setup. I am currently using a Microsoft Lifecam Cinema for web monitoring.
Quote
ejnelson
Has anyone added a 2nd fan to be used as a PLA print cooling fan? I know someone designed a fan diverter to divert some of the air that blows on the heat sink for the hot end, but would it be possible to just add another fan so that you don't have to take off the diverter every time you want to print ABS?
It's on my todo list. I found it was annoying taking the fan on and off as well. But I have a lot of other things to make first. I am working on cable chains for everything that moves, an LCD case, Raspberry pi case that mounts to 2020, Raspberry pi camera mount for 2020, and some other things. Plus the whole point of the fan is for overhangs, which I found ABS works REALLY WELL for overhangs so any parts with overhangs I will just do in ABS.
Edited 3 time(s). Last edit at 07/10/2015 08:53AM by mel0n.
My creations/2020 aluminum parts/FolgerTech i3 upgrades [www.thingiverse.com]


Sorry, only registered users may post in this forum.