Folger Tech 2020 i3 Printer Kit (Official Thread)
Posted by Dan_FolgerTech
|
Re: Folger Tech 2020 i3 Printer Kit (Official Thread) August 05, 2015 10:39PM |
Registered: 8 years ago Posts: 81 |
Quote
[email protected]
I want to reprint the x-carriage parts, I thought I saw a copy of them with screws to snug up the bearings but without the 8 mm collars like these have [www.thingiverse.com] I like wderoxas design but for some reason I am nervous about changing out the 5 mm rods to the 8mm collared ones. I cracked the under motor bracket for the Z rod holders. I have been asking Folger tech to sell me new ones.
Does anyone know where I can find the ones I mentioned> I have yet to play with 3d modeling software so maybe this could be my first project in google sketch up?
I added the X-ends for the 5mm threaded rod. X-ends for 5mm threaded rod. Haven't tried printing it but it was the original dimensions from the original STL files.
I assume it was the acrylic parts that you cracked. I haven't done any model for it but it should be fairly easy to do. Im currently at work so i cant take measurements. But of you could give me the length and thickness of the sides/edges of the acrylic part, i could probably replicate it.
|
Re: thermistor location? power cable connections? August 05, 2015 10:51PM |
Registered: 8 years ago Posts: 81 |
Quote
Steve_in_NJ
Greetings all,
Here's my first msg here. I have gone through a lot of the thread - tons of great info!
I have two questions, both related to my build which is 90% complete.
1) The tape holding the thermistor to the heatbed let go so I need to re-do it. While I am at it I should ask - where precisely should the bulb-tip be placed? I had it right in the hole in the middle of the heatbed, essentially filling it level with the surface. Is that best?
Yes, it should be inside the hole. Its best if you can make the bulb-tip to be in contact with whatever build plate your going to use on top of the heated bed (glass or aluminum bed).
Quote
Steve_in_NJ
2) Please note this part of step 21 (on page 29) in the build manual. Is there a misprint here or am I dreaming? Does this really refer to BOTH the first and second place on the ramp board's blue power strip as (-)? Does the picture really show the black cable connecting to the (+) terminal?
Thanks much. I am looking forward to getting to the end of this build and seeing just what it can do.
Steve
Each heater (extruder1 (D10), bed (D8), extruder2 (D9) if any) connects to each pair of power-strips. Polarity really doesnt matter with heaters except if your going to use an led indicator for it.
Edited 1 time(s). Last edit at 08/05/2015 10:52PM by wderoxas.
|
Re: thermistor location? power cable connections? August 05, 2015 10:53PM |
Registered: 8 years ago Posts: 276 |
Quote
Steve_in_NJ
Greetings all,
Here's my first msg here. I have gone through a lot of the thread - tons of great info!
I have two questions, both related to my build which is 90% complete.
1) The tape holding the thermistor to the heatbed let go so I need to re-do it. While I am at it I should ask - where precisely should the bulb-tip be placed? I had it right in the hole in the middle of the heatbed, essentially filling it level with the surface. Is that best?
2) Please note this part of step 21 (on page 29) in the build manual. Is there a misprint here or am I dreaming? Does this really refer to BOTH the first and second place on the ramp board's blue power strip as (-)? Does the picture really show the black cable connecting to the (+) terminal?
Thanks much. I am looking forward to getting to the end of this build and seeing just what it can do.
Steve
1. You want the tip of the thermistor head touching the build plate
2. I don't think polarity matters (I'm also not officially an electrical engineer), but in subsequent pictures in the guide those wires are flipped, and that's how I have them
Edited 1 time(s). Last edit at 08/05/2015 11:15PM by therippa.
|
Re: thermistor location? power cable connections? August 05, 2015 11:53PM |
Registered: 8 years ago Posts: 276 |
|
Re: thermistor location? power cable connections? August 06, 2015 12:01AM |
Registered: 9 years ago Posts: 44 |
Im all for this. I want my printer to have an enclosure. Im trying to research to create one, the only thing is i'm on a budget of under $50.Quote
therippa
Has anyone thought about making an enclosure for this printer? It heats up my office a lot when printing ABS. Maybe we could make it a group project?
Edited 1 time(s). Last edit at 08/06/2015 12:02AM by zarnold16.
|
Re: thermistor location? power cable connections? August 06, 2015 12:01AM |
Registered: 9 years ago Posts: 44 |
Im all for this. I want my printer to have an enclosure. Im trying to research to create one, the only thing is i'm on a budget of under $50.Quote
therippa
Has anyone thought about making an enclosure for this printer? It heats up my office a lot when printing ABS. Maybe we could make it a group project?
|
Re: thermistor location? power cable connections? August 06, 2015 12:23AM |
Registered: 8 years ago Posts: 4 |
Quote
wderoxas
Quote
Steve_in_NJ
Greetings all,
Here's my first msg here. I have gone through a lot of the thread - tons of great info!
I have two questions, both related to my build which is 90% complete.
1) The tape holding the thermistor to the heatbed let go so I need to re-do it. While I am at it I should ask - where precisely should the bulb-tip be placed? I had it right in the hole in the middle of the heatbed, essentially filling it level with the surface. Is that best?
Yes, it should be inside the hole. Its best if you can make the bulb-tip to be in contact with whatever build plate your going to use on top of the heated bed (glass or aluminum bed).
Uh, WHAT build plate on top of the heated bed? I didn't know there needed to be another plate on top of the red bed. What is appropriate/typical? Can one not print directly on the red bed?
|
Re: thermistor location? power cable connections? August 06, 2015 12:52AM |
Registered: 8 years ago Posts: 276 |
Quote
Steve_in_NJ
Quote
wderoxas
Quote
Steve_in_NJ
Greetings all,
Here's my first msg here. I have gone through a lot of the thread - tons of great info!
I have two questions, both related to my build which is 90% complete.
1) The tape holding the thermistor to the heatbed let go so I need to re-do it. While I am at it I should ask - where precisely should the bulb-tip be placed? I had it right in the hole in the middle of the heatbed, essentially filling it level with the surface. Is that best?
Yes, it should be inside the hole. Its best if you can make the bulb-tip to be in contact with whatever build plate your going to use on top of the heated bed (glass or aluminum bed).
Uh, WHAT build plate on top of the heated bed? I didn't know there needed to be another plate on top of the red bed. What is appropriate/typical? Can one not print directly on the red bed?
You can, but you probably won't be happy with the results. The Folgertech website tells you you will need a 8x8 piece of glass ( [folgertech.com] ), you can get them on Amazon for ~$13 [www.amazon.com]
Edited 2 time(s). Last edit at 08/06/2015 01:35AM by therippa.
|
Re: thermistor location? power cable connections? August 06, 2015 01:48AM |
Registered: 8 years ago Posts: 81 |
Quote
therippa
Quote
Steve_in_NJ
Quote
wderoxas
Quote
Steve_in_NJ
Greetings all,
Here's my first msg here. I have gone through a lot of the thread - tons of great info!
I have two questions, both related to my build which is 90% complete.
1) The tape holding the thermistor to the heatbed let go so I need to re-do it. While I am at it I should ask - where precisely should the bulb-tip be placed? I had it right in the hole in the middle of the heatbed, essentially filling it level with the surface. Is that best?
Yes, it should be inside the hole. Its best if you can make the bulb-tip to be in contact with whatever build plate your going to use on top of the heated bed (glass or aluminum bed).
Uh, WHAT build plate on top of the heated bed? I didn't know there needed to be another plate on top of the red bed. What is appropriate/typical? Can one not print directly on the red bed?
You can, but you probably won't be happy with the results. The Folgertech website tells you you will need a 8x8 piece of glass ( [folgertech.com] ), you can get them on Amazon for ~$13 [www.amazon.com]
The pcb heater bed isnt exactly flat. So you need to have another build plate on top of it. While were on this topic, i have a hunch that you might have placed the heated bed wrongly.. the side with the copper traces should be facing up to get the most heat out of it. That said, the build plate will then protect those traces from scratches due to the hotend tip
|
Re: Folger Tech 2020 i3 Printer Kit (Official Thread) August 06, 2015 03:25AM |
Registered: 8 years ago Posts: 6 |
Hi all,
I recently got one of these kits and am mostly done putting it together.
Something that has me worried is that one of my stepper motors seems to have no hold (I can turn it by hand with no effort while the others put up a lot of resistance), the back area where the cords plug in also seems kind of loose compared to the others. Does this mean it is broken? Is it safe to test it out in my ramps board?
|
Re: Folger Tech 2020 i3 Printer Kit (Official Thread) August 06, 2015 06:13AM |
Registered: 8 years ago Posts: 121 |
Quote
wderoxas
Quote
[email protected]
I want to reprint the x-carriage parts, I thought I saw a copy of them with screws to snug up the bearings but without the 8 mm collars like these have [www.thingiverse.com] I like wderoxas design but for some reason I am nervous about changing out the 5 mm rods to the 8mm collared ones. I cracked the under motor bracket for the Z rod holders. I have been asking Folger tech to sell me new ones.
Does anyone know where I can find the ones I mentioned> I have yet to play with 3d modeling software so maybe this could be my first project in google sketch up?
I added the X-ends for the 5mm threaded rod. X-ends for 5mm threaded rod. Haven't tried printing it but it was the original dimensions from the original STL files.
I assume it was the acrylic parts that you cracked. I haven't done any model for it but it should be fairly easy to do. Im currently at work so i cant take measurements. But of you could give me the length and thickness of the sides/edges of the acrylic part, i could probably replicate it.
You sir are a life saver! Shortly after my post the Z bearing fell out of the left side of my X-carriage. I went to push it back in and lifted it off the nut trap tried to print then noticed. Then when trying to put that back I messed up my bed level badly. So I now have my printer out of commission until I reset the carriage and print out the two STL files you just uploaded which should avoid this ever happening again!!!
|
Re: thermistor location? power cable connections? August 06, 2015 09:45AM |
Registered: 8 years ago Posts: 4 |
Quote
wderoxas
The pcb heater bed isnt exactly flat. So you need to have another build plate on top of it. While were on this topic, i have a hunch that you might have placed the heated bed wrongly.. the side with the copper traces should be facing up to get the most heat out of it. That said, the build plate will then protect those traces from scratches due to the hotend tip
OK so clearly you are clairvoyant. Or you had a 50-50 shot and guessed correctly. I take it that the picture below shows my soldering and mounting cables to the WRONG side of the heated bed? DANG. Nothing like having to do stuff twice (except maybe three times).
|
Re: thermistor location? power cable connections? August 06, 2015 09:49AM |
Registered: 8 years ago Posts: 121 |
|
Re: Folger Tech 2020 i3 Printer Kit (Official Thread) August 06, 2015 09:50AM |
Registered: 8 years ago Posts: 50 |
@ Blank64
First I have no programming skill or 3d printing skill.
I'm having problems too. which motor is it? Mine was X. If your are having the problem with the printer powered on then go into configuration.h go down to end stop and change 1 to -1 or the same as y and z. For me this freed the motor then it moved freely.
goodluck
|
Re: Folger Tech 2020 i3 Printer Kit (Official Thread) August 06, 2015 09:52AM |
Registered: 8 years ago Posts: 121 |
Quote
shaol
@ Blank64
First I have no programming skill or 3d printing skill.
I'm having problems too. which motor is it? Mine was X. If your are having the problem with the printer powered on then go into configuration.h go down to end stop and change 1 to -1 or the same as y and z. For me this freed the motor then it moved freely.
goodluck
Make sure to use the marlin version therippa posted a few pages back it is all ready set for the Folger 2020 I3 if you use it and the build guides it will work fine. Even with the backwards plugs and weirdness no changing directions from 1 to -1. But I guess over all what ever works for you!1
Edited 1 time(s). Last edit at 08/06/2015 09:54AM by jasonsaffle13@gmail.com.
|
Re: Folger Tech 2020 i3 Printer Kit (Official Thread) August 06, 2015 10:08AM |
Registered: 8 years ago Posts: 10 |
Yay! My printer for the most part, works, X axis and all! I was able to air print the 20 mm test cube last night. The only glitch was the lcd screen had garbled text on it halfway through the print. Not sure what that was. Also, I haven't checked my voltages for the steppers yet. I felt them and the X axis was slightly warm but not too bad so they might be ok. Don't know if it would get hotter for a longer print. I have not tried to extrude anything yet though. I'll have to give it a go tonight maybe. Planning on buying some overpriced PLA filament at the local Staples just to have some to work with then ordering some online. A small roll is like $19. BTW this blog really helped a lot. All the problems I was having, which really weren't that many, were addressed in this blog. A big thankyou to Moosteria for the great blog.
[moosteria.blogspot.com]
Now, on to actually printing something.
[moosteria.blogspot.com]
Now, on to actually printing something.
|
Re: thermistor location? power cable connections? August 06, 2015 10:35AM |
Registered: 8 years ago Posts: 4 |
|
Re: thermistor location? power cable connections? August 06, 2015 10:46AM |
Registered: 8 years ago Posts: 81 |
Practically speaking, any thermal interface between the plate and the heater is unnecessary. While not flat, the heater do have a bit of flex. So if properly mated with the glass, you'll have an acceptable contact area between the two. Besides, there will be a point where you will need to remove the glass from the build plate.
|
Re: thermistor location? power cable connections? August 06, 2015 11:05AM |
Registered: 8 years ago Posts: 16 |
Long time lurker, first time poster...
Regarding the enclosure idea, what are the dimensions of the printer? I have seen a Prusa i3 enclosures made from Ikea Lack tables which sell for about $10. If the 2020 i3 is similar size, then should fit within the footprint of the Lack legs.
I was thinking about stacking the Lack tables, so the printer sits on one (not inverted) and then the other encloses it. Then it is just a matter of bolting some sheet like material on the legs of the upper table (I am thinking coroplast). If extra vertical space is needed, the print some leg extensions. Then drill a hole in the top table and feed filament down through it.
Edited 1 time(s). Last edit at 08/06/2015 11:08AM by TimJC.
|
Re: Folger Tech 2020 i3 Printer Kit (Official Thread) August 06, 2015 11:11AM |
Registered: 11 years ago Posts: 335 |
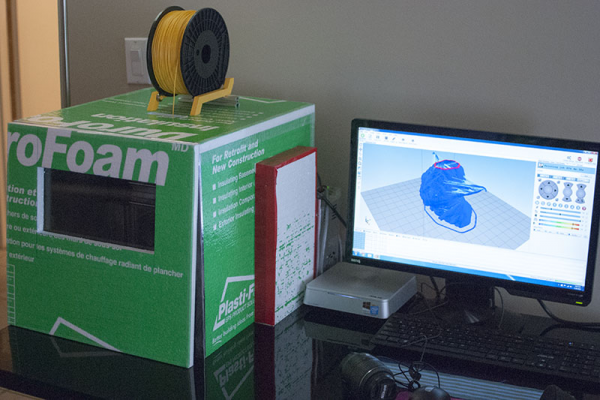
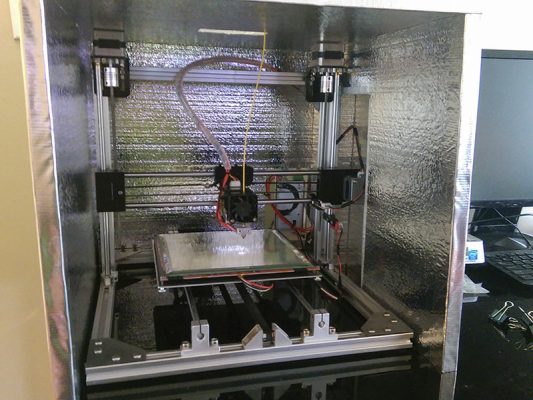
I built an enclosure with half a 10$ sheet of foam and some tape. Works almost too well.
|
Re: Folger Tech 2020 i3 Printer Kit (Official Thread) August 06, 2015 02:57PM |
Registered: 8 years ago Posts: 5 |
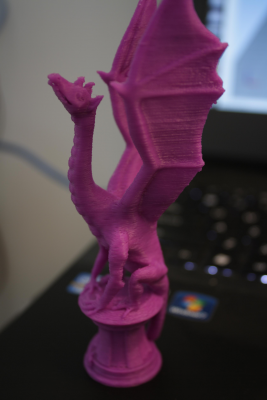
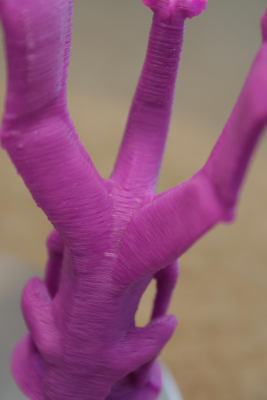
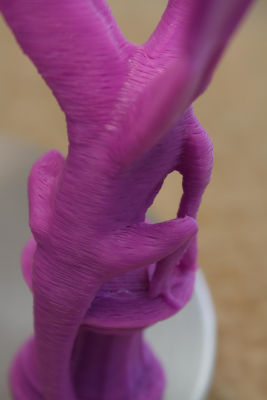
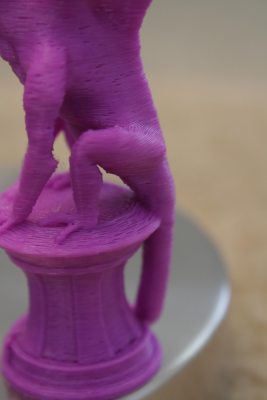
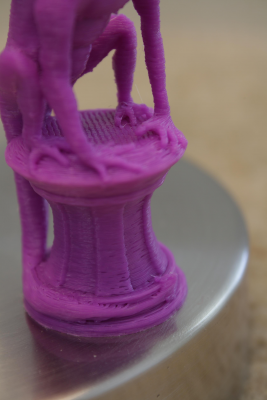
Update: My printer is working like a champ and I am very happy. I did a lot of test prints of cilinders to dial in the settings but this was my first true test print, please help me diagnose any issues you see. The print is roughly 5" tall.
I have made some adjustments and am currently printing a 0.08 layer hight print and will be done in 3 more hours though it looks really good so far.
I am currently using standard 3/32" glass that I slightly toothed with sand paper and applyed pruple vanishing gluestick to. (I find it better at adheasion than Acitone and ABS slury).
1.75mm ABS plastic @0.2 Layer height
Admin edit: fixed mis-typed img tags
Edited 1 time(s). Last edit at 08/06/2015 10:01PM by NewPerfection.
|
Re: Folger Tech 2020 i3 Printer Kit (Official Thread) August 06, 2015 04:47PM |
Registered: 8 years ago Posts: 47 |
|
Re: Folger Tech 2020 i3 Printer Kit (Official Thread) August 06, 2015 05:28PM |
Registered: 8 years ago Posts: 19 |
|
Re: Folger Tech 2020 i3 Printer Kit (Official Thread) August 06, 2015 06:52PM |
Registered: 8 years ago Posts: 276 |
|
Re: Folger Tech 2020 i3 Printer Kit (Official Thread) August 06, 2015 08:55PM |
Registered: 8 years ago Posts: 16 |
|
Re: Folger Tech 2020 i3 Printer Kit (Official Thread) August 06, 2015 08:56PM |
Registered: 8 years ago Posts: 11 |
Weird issue that I can't seem to figure out. I have auto bed leveling working and my start code has G28, G29. Prints are coming out beautifully, but for some reason when using Repetier my printer decides to do another G28 after the print. Most of the time this causes the servo arm to bend/smash my print. This doesn't happen in MatterControl, but I prefer Repetier for now. I have checked my end code and it is blank. Where else could this phantom G28 be hiding?
If I look at the commands it shows up as a G28, but even in my printer settings the end code is simply
M104 S0 ; turn off temperature
G28 X0 ; home X axis
M84 ; disable motors
Edited 1 time(s). Last edit at 08/06/2015 10:28PM by nmh5028.
If I look at the commands it shows up as a G28, but even in my printer settings the end code is simply
M104 S0 ; turn off temperature
G28 X0 ; home X axis
M84 ; disable motors
Edited 1 time(s). Last edit at 08/06/2015 10:28PM by nmh5028.
|
Re: thermistor location? power cable connections? August 06, 2015 09:57PM |
Registered: 8 years ago Posts: 276 |
|
Re: Folger Tech 2020 i3 Printer Kit (Official Thread) August 06, 2015 10:21PM |
Registered: 8 years ago Posts: 35 |
Quote
blank64
Hi all,
I recently got one of these kits and am mostly done putting it together.
Something that has me worried is that one of my stepper motors seems to have no hold (I can turn it by hand with no effort while the others put up a lot of resistance), the back area where the cords plug in also seems kind of loose compared to the others. Does this mean it is broken? Is it safe to test it out in my ramps board?
The motors are spin freely until they get voltage through them from the controller, then you can't move them. This is normal. You can probably feel the ratcheting from the magnets when you turn the shaft by hand.
What part is loose? You may just need to tighten the screws.
Edited 2 time(s). Last edit at 08/06/2015 10:29PM by RedneckGeek.
|
Re: thermistor location? power cable connections? August 06, 2015 10:25PM |
Registered: 8 years ago Posts: 35 |
Quote
Steve_in_NJ
If I am placing a perfectly flat piece of tempered glass on top of a presumably NOT perfectly flat heated bed, is some sort of tape or other heat-transferring goop between the two a good idea? Similar to the stuff one puts between a chip and a heatsink?
Use clips around the outside to hold them together. The heat bed is somewhat flexible and will flatten out well enough against the glass.
|
Re: Folger Tech 2020 i3 Printer Kit (Official Thread) August 07, 2015 07:57AM |
Registered: 8 years ago Posts: 33 |
I am new to the 3d printing world and would like to know what is the best fill % to use. Mine was set at 10% and this is what I have been using. I printed out the motor end that was posted by wderoxas using 20% fill. I turned out looking pretty good but I noticed some seperation in layers where it was going from thick areas to thin ones. I was ready for this so I had the super glue handy , when it started to seperate a little super glue stopped it. I was not going to let this 1 1/2 hour long print be wasted. I have also noticed in all my prints at the end it seems to not completely finish. it always seem to stop just shy of where it should and goes to park. I am using ABS with 220c on extruder, 105c on the bed 20% fill 0.2 layer height. I am doing the first layer at 230c. Give me some pointers guys.
Sorry, only registered users may post in this forum.
