Folger Tech 2020 i3 Printer Kit (Official Thread)
Posted by Dan_FolgerTech
|
Re: Folger Tech 2020 i3 Printer Kit (Official Thread) August 16, 2016 07:30PM |
Registered: 8 years ago Posts: 92 |
OK, so this has been a long-time promised and an long-time coming. Here's an overview of my most recent work/changes to the printer.
The first I'll talk about is the hot-end. I had switched to a bowden setup when I installed the V-Slot X-axis upgrade. I finally got it dialed in, and was getting good prints, but was still struggling with zits etc. I also wanted the option of printing with flexible filaments, so I knew I had to return to direct drive. I liked the design of Sonnylowe's E3D mount, and as I recently got a lite6, I started with that as a base. By then placing the extruder and motor above that, I could keep the weight of the motor closer to the axis rail, improving over all balance vs mounting from the back of the motor, like the stock setup. So that is what I did. The results are below:
All of my designs I mention here are available here: [www.thingiverse.com]
The sensor mount is designed for this 18mm sensor: [www.amazon.com]
The other major change I made was the enclosure. This was prompted from the difficulty I was having with some larger ABS prints. I was having a terrible time with warping and lift.
I built it from 2 IKEA Lack end tables ($7.99 ea.) I only used the top of the 2nd one for the base. I had to add some spacers to the bottom of the legs to make it tall enough for the printer with the Z-Motor stand-offs. A stock FT 2020 would probably fit fine.
I then purchased 3/16 plywood for the sides, covering them in shelf liner, and screwing them to the sides and back. Once these were attached, the rigidity of the whole thing is incredible. The front of the enclosure is a piece of acrylic, held on with cabinet magnets. I have a couple alignment L's I printed, that I set the bottom of the door on, then snap it into place. It works very well. Having it enclosed resulted in much better results with ABS. I am very pleased. The pics below show the whole thing, the front door alignment brackets/magnets, and how I store the front door when accessing the printer, or when printing PLA. There are clips I printed that it rests in on the side of the printer. The Star Fleet and Rebel logos you see on the door were added to cover the tips of the screws that hold the magnet plates to the door. They were too long, so I printed these parts to screw onto them. They kind of act like nuts, and also give a little personal flair to the front. (wish I had printed them in different colors, though).
I have more than 10 photos, so part 2 coming soon!
--Andrew
EDIT: fixed link for sensor
Edited 1 time(s). Last edit at 08/18/2016 01:09PM by iamquestar.
The first I'll talk about is the hot-end. I had switched to a bowden setup when I installed the V-Slot X-axis upgrade. I finally got it dialed in, and was getting good prints, but was still struggling with zits etc. I also wanted the option of printing with flexible filaments, so I knew I had to return to direct drive. I liked the design of Sonnylowe's E3D mount, and as I recently got a lite6, I started with that as a base. By then placing the extruder and motor above that, I could keep the weight of the motor closer to the axis rail, improving over all balance vs mounting from the back of the motor, like the stock setup. So that is what I did. The results are below:


All of my designs I mention here are available here: [www.thingiverse.com]
The sensor mount is designed for this 18mm sensor: [www.amazon.com]
The other major change I made was the enclosure. This was prompted from the difficulty I was having with some larger ABS prints. I was having a terrible time with warping and lift.
I built it from 2 IKEA Lack end tables ($7.99 ea.) I only used the top of the 2nd one for the base. I had to add some spacers to the bottom of the legs to make it tall enough for the printer with the Z-Motor stand-offs. A stock FT 2020 would probably fit fine.
I then purchased 3/16 plywood for the sides, covering them in shelf liner, and screwing them to the sides and back. Once these were attached, the rigidity of the whole thing is incredible. The front of the enclosure is a piece of acrylic, held on with cabinet magnets. I have a couple alignment L's I printed, that I set the bottom of the door on, then snap it into place. It works very well. Having it enclosed resulted in much better results with ABS. I am very pleased. The pics below show the whole thing, the front door alignment brackets/magnets, and how I store the front door when accessing the printer, or when printing PLA. There are clips I printed that it rests in on the side of the printer. The Star Fleet and Rebel logos you see on the door were added to cover the tips of the screws that hold the magnet plates to the door. They were too long, so I printed these parts to screw onto them. They kind of act like nuts, and also give a little personal flair to the front. (wish I had printed them in different colors, though).


I have more than 10 photos, so part 2 coming soon!
--Andrew
EDIT: fixed link for sensor
Edited 1 time(s). Last edit at 08/18/2016 01:09PM by iamquestar.
|
Re: Folger Tech 2020 i3 Printer Kit (Official Thread) August 16, 2016 08:01PM |
Registered: 8 years ago Posts: 92 |
Many of the V-Slot parts I printed, I did out of PLA. I will not be able to experiment with an enclosure heater until I replace all of them with ABS. That's a huge job, so I will probably stick with just being able to keep the temp within the enclosure up around the 45c mark at this point.
The other major items of note are running the printer with OctoPrint on a Raspberry Pi, and being able to control the printer's and LED's power from the Pi using a relay module. I must say that playing with all of this has been a lot of fun. (and frustrating at times too).
I used this guide [github.com] to get started, but ended up doing a lot of reading along the way. Here's some of what I learned:
DISCLAIMER: Make sure you know what you are doing, both with the Pi, and with the relay board and associated wiring. If you use this to control the power to your printer, you are playing with mains power. If you mess up, you could hurt yourself, your printer, set a fire, or even electrocute yourself (you could die). These instructions are only intended for theoretical purposes. Anyone attempting this setup should confirm all steps with a qualified professional.
So, here's how the relay board I link to above works:
There are 2 pin headers. One is a 2 pin, and is normally jumpered. The pins are labeled VCC, and VCC-JD. VCC-JD supplies the relays with power. When jumped, it uses 5v power coming into the 6 pin header from the Pi to power the relays. If you want to isolate the Pi from the relays (the safest method, which should prevent damage to the Pi from a power surge on the relays), you would remove the jumper, and apply power from a separate source (like a battery pack) to the VCC-JD pin. For this setup (in my opinion), there is little benefit, since it's a $35 computer, I don't think it's worth the hassle. (If I had $10,000 worth of electronics running this relay module, then by all means, I would take advantage of the isolation.)
The second Pin header has 6 pins. VCC and ground are on either end, with the signal wires for relays 1-4 in-between. For hooking up to the Pi, you connect VCC with 5v, Gnd to Gnd, then, since I'm using relays 3 and 4, I connect in3 and in4 to 2 of the GPIO pins. Specifically, My setup looks like this:
I found a 10 pin to 10 pin connector on an old computer that was used to connect the front USB ports to the MB. This was perfect for connecting the Pi to the Relay module. Just prying up the locking tab on the connector allowed me to re-arrange the wires as needed. I used a 2 and a 3 pin connector (from other computer case cables) for connecting on the relay board.
Pin 2 on the Raspberry Pi is 5v, so this attached to VCC on the relay board.
Pin 6 on the Pi is a ground, so this attaches to the GND on the relay board.
Pins 3 and 7 are GPIO pins, and these attach to the In 3 and In 4 on the relay board.
That's it for the interface! Follow the rest of the directions at this WIKI page: [github.com] for setting up the Pi and Octoprint to be able to control the module (DO NOT FOLLOW THE WIRING INSTRUCTIONS FOUND THERE. DOING SO WILL RESULT IN BACK FEEDING YOUR PI'S 3.3V PIN WITH 5V AND WILL DAMAGE THINGS!)
You'll then need to wire in the things you'll be switching with the relays. I am using it for Printer Power and the LEDs. For controlling printer, the power cable comes from the switch, the Neutral and Ground are hooked up directly to the Power Supply, and the line (or hot) is run to the relay, then from the relay to the power supply. Now the relay acts as a switch for the power supply.
For the LEDs, I am powering those from the FT power supply. So I have a line from the -12v on the Power supply to the -12v pad on the LED strip. Then I go from the Power Supply +12v to the relay, then from the relay to the +12v pad on the LED strip, so the relay will now switch the +12v for the LEDs. Note that by running the LED's from the Printer Power Supply, the printer must be on, for the LED's to work. To change this, you would have to have a separate power supply for the LED's, and you would hook that up similarly as the printer power.
These last 2 pictures show the various items mounted to the top of the enclosure. Things/wiring are still a bit of a mess. I will soon have all of that wrapped and secured so it all looks ship-shape. I still haven't decided what I will do with the display. I just recently got longer cables, so I have a lot more flexibility in mounting it. I'll get that figured out soon. The filament feeds through a teflon tube down through the top of the enclosure. It works very well.
Despite previous comments I've made, I think once I finish up here, I will be done with modifications of this printer. I think I'll be building a custom CoreXY using 2020 with dual extrusion in the near future... Of course that will probably be AFTER the laser cutter.engraver...
I hope that all of these explanations were clear, and helpful to some of you. If you have any questions, or need any help, please let me know, I'm happy to assist as I can. I am by no means an expert, and am learning like most of you. I try to check this thread every day, but at times I may be away for a few days. I will respond to questions as soon as I can.
The other major items of note are running the printer with OctoPrint on a Raspberry Pi, and being able to control the printer's and LED's power from the Pi using a relay module. I must say that playing with all of this has been a lot of fun. (and frustrating at times too).
I used this guide [github.com] to get started, but ended up doing a lot of reading along the way. Here's some of what I learned:
DISCLAIMER: Make sure you know what you are doing, both with the Pi, and with the relay board and associated wiring. If you use this to control the power to your printer, you are playing with mains power. If you mess up, you could hurt yourself, your printer, set a fire, or even electrocute yourself (you could die). These instructions are only intended for theoretical purposes. Anyone attempting this setup should confirm all steps with a qualified professional.
So, here's how the relay board I link to above works:
There are 2 pin headers. One is a 2 pin, and is normally jumpered. The pins are labeled VCC, and VCC-JD. VCC-JD supplies the relays with power. When jumped, it uses 5v power coming into the 6 pin header from the Pi to power the relays. If you want to isolate the Pi from the relays (the safest method, which should prevent damage to the Pi from a power surge on the relays), you would remove the jumper, and apply power from a separate source (like a battery pack) to the VCC-JD pin. For this setup (in my opinion), there is little benefit, since it's a $35 computer, I don't think it's worth the hassle. (If I had $10,000 worth of electronics running this relay module, then by all means, I would take advantage of the isolation.)
The second Pin header has 6 pins. VCC and ground are on either end, with the signal wires for relays 1-4 in-between. For hooking up to the Pi, you connect VCC with 5v, Gnd to Gnd, then, since I'm using relays 3 and 4, I connect in3 and in4 to 2 of the GPIO pins. Specifically, My setup looks like this:


I found a 10 pin to 10 pin connector on an old computer that was used to connect the front USB ports to the MB. This was perfect for connecting the Pi to the Relay module. Just prying up the locking tab on the connector allowed me to re-arrange the wires as needed. I used a 2 and a 3 pin connector (from other computer case cables) for connecting on the relay board.
Pin 2 on the Raspberry Pi is 5v, so this attached to VCC on the relay board.
Pin 6 on the Pi is a ground, so this attaches to the GND on the relay board.
Pins 3 and 7 are GPIO pins, and these attach to the In 3 and In 4 on the relay board.
That's it for the interface! Follow the rest of the directions at this WIKI page: [github.com] for setting up the Pi and Octoprint to be able to control the module (DO NOT FOLLOW THE WIRING INSTRUCTIONS FOUND THERE. DOING SO WILL RESULT IN BACK FEEDING YOUR PI'S 3.3V PIN WITH 5V AND WILL DAMAGE THINGS!)
You'll then need to wire in the things you'll be switching with the relays. I am using it for Printer Power and the LEDs. For controlling printer, the power cable comes from the switch, the Neutral and Ground are hooked up directly to the Power Supply, and the line (or hot) is run to the relay, then from the relay to the power supply. Now the relay acts as a switch for the power supply.

For the LEDs, I am powering those from the FT power supply. So I have a line from the -12v on the Power supply to the -12v pad on the LED strip. Then I go from the Power Supply +12v to the relay, then from the relay to the +12v pad on the LED strip, so the relay will now switch the +12v for the LEDs. Note that by running the LED's from the Printer Power Supply, the printer must be on, for the LED's to work. To change this, you would have to have a separate power supply for the LED's, and you would hook that up similarly as the printer power.


These last 2 pictures show the various items mounted to the top of the enclosure. Things/wiring are still a bit of a mess. I will soon have all of that wrapped and secured so it all looks ship-shape. I still haven't decided what I will do with the display. I just recently got longer cables, so I have a lot more flexibility in mounting it. I'll get that figured out soon. The filament feeds through a teflon tube down through the top of the enclosure. It works very well.


Despite previous comments I've made, I think once I finish up here, I will be done with modifications of this printer. I think I'll be building a custom CoreXY using 2020 with dual extrusion in the near future... Of course that will probably be AFTER the laser cutter.engraver...
I hope that all of these explanations were clear, and helpful to some of you. If you have any questions, or need any help, please let me know, I'm happy to assist as I can. I am by no means an expert, and am learning like most of you. I try to check this thread every day, but at times I may be away for a few days. I will respond to questions as soon as I can.
|
Re: Folger Tech 2020 i3 Printer Kit (Official Thread) August 17, 2016 08:27PM |
Registered: 8 years ago Posts: 65 |
|
Re: Folger Tech 2020 i3 Printer Kit (Official Thread) August 17, 2016 11:23PM |
Registered: 8 years ago Posts: 16 |
Quote
iamquestar
OK, so this has been a long-time promised and an long-time coming. Here's an overview of my most recent work/changes to the printer...
Great work! I like the motor/extruder mount. The stock cantilevered motor setup always bothered me, having it over the x-rail seems more balanced.
FYI, your amazon link to the sensor goes to the RaspPi kit instead.
Funny, my longer term plans are also the start building a corexy printer....AFTER I get this one set up the way I like it
 It never ends...
|
Re: Folger Tech 2020 i3 Printer Kit (Official Thread) August 17, 2016 11:54PM |
Registered: 8 years ago Posts: 367 |
Quote
pizzachef
Quote
iamquestar
OK, so this has been a long-time promised and an long-time coming. Here's an overview of my most recent work/changes to the printer...
Great work! I like the motor/extruder mount. The stock cantilevered motor setup always bothered me, having it over the x-rail seems more balanced.
FYI, your amazon link to the sensor goes to the RaspPi kit instead.
Funny, my longer term plans are also the start building a corexy printer....AFTER I get this one set up the way I like it
I moved on from the Folger to an Eclips3D CoreXY. It's better and faster, but it still makes me aware of what a good printer the Folger 2020 is. The key, as with the Eclips3D, is a really rigid frame - get that right and many other things become easier.
See my blog at [moosteria.blogspot.com].
|
Re: Folger Tech 2020 i3 Printer Kit (Official Thread) August 18, 2016 01:10PM |
Registered: 8 years ago Posts: 92 |
|
Re: Folger Tech 2020 i3 Printer Kit (Official Thread) August 18, 2016 02:03PM |
Registered: 8 years ago Posts: 16 |
Quote
animoose
I moved on from the Folger to an Eclips3D CoreXY. It's better and faster, but it still makes me aware of what a good printer the Folger 2020 is. The key, as with the Eclips3D, is a really rigid frame - get that right and many other things become easier.
You're only encouraging me more! But good to know the Folger 2020 has a good standing, I need it to make all my new printer parts
I've got my eye on the d-bot http://www.thingiverse.com/thing:1001065. After changing the Folger 2020 to v-slot rails for the x and y axes, I like the idea of the v-slots over the smooth rods. Although the oil-free bushings for the linear bearings are probably much better than the roller ball linear bearings in the Folger kits, so my hangup might be a bit unfounded.
|
Re: Folger Tech 2020 i3 Printer Kit (Official Thread) August 18, 2016 02:23PM |
Registered: 8 years ago Posts: 367 |
Quote
pizzachef
Quote
animoose
I moved on from the Folger to an Eclips3D CoreXY. It's better and faster, but it still makes me aware of what a good printer the Folger 2020 is. The key, as with the Eclips3D, is a really rigid frame - get that right and many other things become easier.
You're only encouraging me more! But good to know the Folger 2020 has a good standing, I need it to make all my new printer parts
I've got my eye on the d-bot http://www.thingiverse.com/thing:1001065. After changing the Folger 2020 to v-slot rails for the x and y axes, I like the idea of the v-slots over the smooth rods. Although the oil-free bushings for the linear bearings are probably much better than the roller ball linear bearings in the Folger kits, so my hangup might be a bit unfounded.
The Dbot is definitely worth thinking about. The designer of the Eclips3D also has a new design he is working on which will use linear guides.
See my blog at [moosteria.blogspot.com].
|
Re: Folger Tech 2020 i3 Printer Kit (Official Thread) August 18, 2016 02:55PM |
Registered: 8 years ago Posts: 65 |
@ iamquestar - While back do I remember correctly you were waiting on a 120V heated bed, or was that someone else? Jbed?ust ordered parts to go up to a 200mm x 300m bed. With the parts I take out of the FT I also want to increase Z as much as I can. Any recommendations on a bed?
WilberMaker
WilberMaker
|
Re: Folger Tech 2020 i3 Printer Kit (Official Thread) August 18, 2016 04:49PM |
Registered: 8 years ago Posts: 25 |
|
Re: Folger Tech 2020 i3 Printer Kit (Official Thread) August 19, 2016 12:31AM |
Registered: 7 years ago Posts: 129 |
|
Re: Folger Tech 2020 i3 Printer Kit (Official Thread) August 19, 2016 10:03AM |
Registered: 8 years ago Posts: 25 |
Quote
av8r1
Quote
jabu32
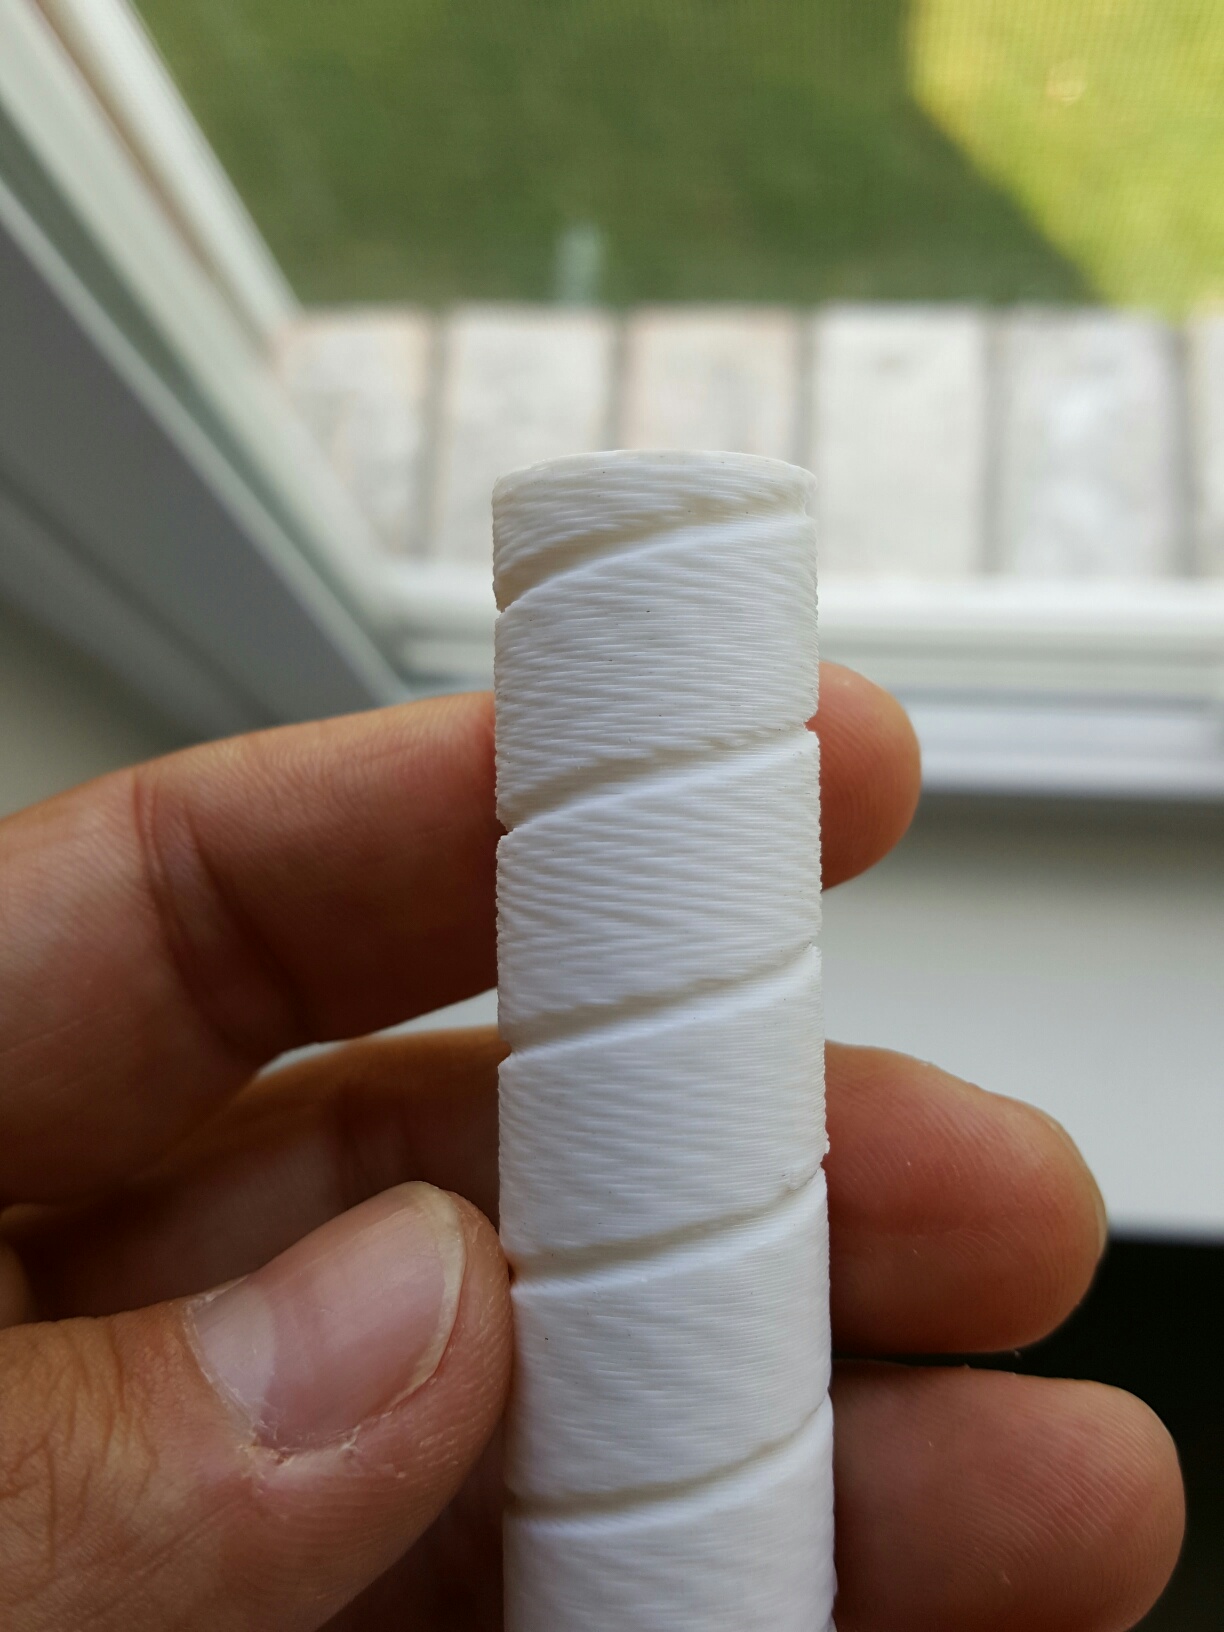
How do I get rid of the waves in the outside layers?
Looks like your extruder driver current is a little high. Check the Vref. You probably want to reduce the current on all of the steppers, they tend to run a little hot.
Here is a print where i lowered the voltage on the motors. This is a hollow cube.
you can see it looks good at the base where it is solid fill. then starts to look like crap once it starts building just the walls. a little higher and you can see where i lowered the voltages.
It is getting better but i ridges instead of waves now......

Edited 1 time(s). Last edit at 08/19/2016 10:03AM by jabu32.
|
Re: Folger Tech 2020 i3 Printer Kit (Official Thread) August 19, 2016 10:38AM |
Registered: 8 years ago Posts: 92 |
Quote
WilberMaker
@ iamquestar - While back do I remember correctly you were waiting on a 120V heated bed, or was that someone else? Jbed?ust ordered parts to go up to a 200mm x 300m bed. With the parts I take out of the FT I also want to increase Z as much as I can. Any recommendations on a bed?
WilberMaker
No, it must have been someone else, although I do hate how long my bed takes to heat up...
|
Re: Folger Tech 2020 i3 Printer Kit (Official Thread) August 19, 2016 11:19AM |
Registered: 8 years ago Posts: 69 |
Has anyone on here ran the 12864 lcd controller with sucess on the folger tech prusa i3?
Ive been trying for the past 6 hrs with little to no luck .....is there a trick to this??
Despite following instructions i wasnt able to get the screen to work.
When i downloaded the latest marlin and followed instructions on modifying the code for sd support and the #define REPRAP_DISCOUNT_FULL_GRAPHIC_SMART_CONTROLLER the screen worked but i nearly busted the printer . It would try to home in the x and y axies and ram into the end stops and not stop.
When i tried running the printer with a computer and repetier and no lcd panel i lost my heated bed function.
I ended up loading the old marlin firmware and recovered the heat bed function on repetier using a pc.
Is there a guide on properly configuring this lcd so the printer works properly?
|
Re: Folger Tech 2020 i3 Printer Kit (Official Thread) August 19, 2016 12:45PM |
Registered: 8 years ago Posts: 92 |
Quote
animoose
Quote
pizzachef
Quote
animoose
I moved on from the Folger to an Eclips3D CoreXY. It's better and faster, but it still makes me aware of what a good printer the Folger 2020 is. The key, as with the Eclips3D, is a really rigid frame - get that right and many other things become easier.
You're only encouraging me more! But good to know the Folger 2020 has a good standing, I need it to make all my new printer parts
I've got my eye on the d-bot http://www.thingiverse.com/thing:1001065. After changing the Folger 2020 to v-slot rails for the x and y axes, I like the idea of the v-slots over the smooth rods. Although the oil-free bushings for the linear bearings are probably much better than the roller ball linear bearings in the Folger kits, so my hangup might be a bit unfounded.
The Dbot is definitely worth thinking about. The designer of the Eclips3D also has a new design he is working on which will use linear guides.
Oh, now come on... This is not going to help my budget at all! Before looking at these, I was perfectly happy to keep my next printer "out in the future" somewhere, maybe toward the end of the year, but now... I just spent some time looking over the design of both of those printers, and I really want to move forward NOW!
Animoose, how do you like smoothieware on the Eclips3D? How much do you think that effects quality? I've seen the marketing claims... "faster calculations and look-ahead acceleration adjustments make for smoother movement..." but how does that translate in the real world? Anything you've noticed?
|
Re: Folger Tech 2020 i3 Printer Kit (Official Thread) August 19, 2016 12:45PM |
Registered: 8 years ago Posts: 92 |
|
Re: Folger Tech 2020 i3 Printer Kit (Official Thread) August 19, 2016 12:45PM |
Registered: 8 years ago Posts: 92 |
|
Re: Folger Tech 2020 i3 Printer Kit (Official Thread) August 19, 2016 01:14PM |
Registered: 8 years ago Posts: 65 |
I am printing blue PLA. nozzle 210deg Bed 70deg and no cooling fan on the part. The bottom couple mm of the part is darker than the rest and is squeezed out like the part is melting. Printing on blue tape and it is almost impossible to get the part off the bed when complete. Is it a bed temp problem, nozzle offset or first layer settings? Can not seem to find the right combination. Rest of the part looks fine and the dimensions are good.
|
Re: Folger Tech 2020 i3 Printer Kit (Official Thread) August 19, 2016 01:28PM |
Registered: 8 years ago Posts: 367 |
@iamquestar
I can do a fairly close comparison of using smoothieware, as I initially set up the Eclips3D with a RAMPS board. I later changed it to an Azteeg X5 V3 with 1/32 steppers. It definitely is much smoother and quieter, and it is more accurate on sharp corners. Some of this is due to the 1/32 rather than 1/16 steppers, and some may be due to the acceleration planning in Smoothieware. I haven't moved to the latest release which is said to have even more accurate planning.
I also tried the MKS SBASE board, which is another smoothieware compatible board. I never got it to work, and had a hostile and unco-operative response from the vendor. Spend the extra $50 and get the Azteeg.
I had some difficulties getting my PC to talk to both boards. It kept timing out over USB. The smoothieware people tried to solve this but were in the end not very helpful (suggesting I switch to Linux, and also spending time saying that Repetier Host was no good, when I had established that the problem appeared in other situations). I never got the bottom of this, but suspect it is a problem with some specific combination of drivers on my Dell PC. In the end, I settled on a configuration where I have a Raspberry Pi connected to the board, and then run Rep Server on the pi and Rep Host on the PC. I also tried controlling it over Ethernet and this works with Pronterface but not with Rep Host.
See my blog at [moosteria.blogspot.com].
|
Re: Folger Tech 2020 i3 Printer Kit (Official Thread) August 19, 2016 04:25PM |
Registered: 8 years ago Posts: 92 |
Quote
WilberMaker
I am printing blue PLA. nozzle 210deg Bed 70deg and no cooling fan on the part. The bottom couple mm of the part is darker than the rest and is squeezed out like the part is melting. Printing on blue tape and it is almost impossible to get the part off the bed when complete. Is it a bed temp problem, nozzle offset or first layer settings? Can not seem to find the right combination. Rest of the part looks fine and the dimensions are good.
That may be a little hot. The difficulty in removing a part can be caused by both too high temps, and a nozzle that's too close. 70c on the bed for PLA is higher than needed. I never go above 60c for PLA, and often go with 45-50 for smaller parts. Try that and see if it helps. If your nozzle is too close, than can really force the plastic into all the nooks and crannies of the tape, making it extra hard to remove. (I know what that's like. I broke multiple pieces of glass trying to remove parts in the beginning.)
Too hot on the extruder can cause removal problems as well. It definitely is a balancing act. With the stock setup, I was printing FT PLA at 195c. Initilly my bed thermistor was bad, so I was printing without heat, and it worked fine for PLA. Try dropping both temps, and see what happens. Then, try raising the height of your hot end a little, and see if that helps your over-adhesion.
To verify nozzle height, I would start a print, then pull up the skirt and measure the thickness of the first layer with a set of decent calipers (you can get a decent one without breaking the bank: [www.amazon.com] these aren't perfect, but when testing them with feeler gauges, they are very accurate.)
Hopefully one of these steps will help.
|
Re: Folger Tech 2020 i3 Printer Kit (Official Thread) August 19, 2016 09:33PM |
Registered: 8 years ago Posts: 16 |
Quote
WilberMaker
I am printing blue PLA. nozzle 210deg Bed 70deg and no cooling fan on the part. The bottom couple mm of the part is darker than the rest and is squeezed out like the part is melting. Printing on blue tape and it is almost impossible to get the part off the bed when complete. Is it a bed temp problem, nozzle offset or first layer settings? Can not seem to find the right combination. Rest of the part looks fine and the dimensions are good.
Ditto on the comments that iamquestar made about your temps. My PLA bed temp starts at 80 for the first layer and then drops to 55 (I had trouble initially getting PLA to stick, and that first layer bed temp worked for me). I use glue stick on the glass instead of blue tape, and PLA parts are sometimes stuck pretty well. Putting the glass bed in the freezer for a minute makes it pop right off, or I use a razor blade to get under one edge, then it pops off.
I've tried a few different brands of PLA, but most of them use a first layer temp of 195-200, and then 185-190 for the rest of the print. No real problem with prints having the elephant foot shape. And for the nozzle clearance, I use a little piece of paper at each corner. If I can't shove it under the nozzle, I lower the corner until it just slips under. Seems to work for me. Here's a decent troubleshooting guide that might have more info: https://www.simplify3d.com/support/print-quality-troubleshooting/#print-not-sticking-to-the-bed
|
Re: Folger Tech 2020 i3 Printer Kit (Official Thread) August 20, 2016 10:24AM |
Registered: 8 years ago Posts: 65 |
|
Re: Folger Tech 2020 i3 Printer Kit (Official Thread) August 21, 2016 02:09PM |
Registered: 8 years ago Posts: 6 |
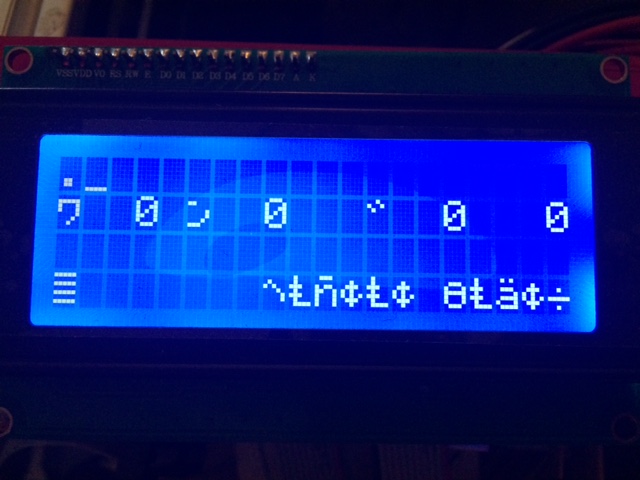
Hey, is anyone else having problems with the FT 2004 LCD display? Mine just shows gibberish (I have attached a picture), and I can't figure out if the display is defective, if it's a problem with my firmware, or if it's something completely different.
|
Re: Folger Tech 2020 i3 Printer Kit (Official Thread) August 21, 2016 02:55PM |
Registered: 9 years ago Posts: 40 |
I am trying to setup BLTouch with Marlin 1.1.0 RC7 and am having some issues.
[pastebin.com]
My setup has the X endstop on the right side.
The issue is when I do a G28, it moves the Z-axis up 10mm then homes X and Y, then moves X & Y to the safe home position(No issues so far). When it starts to home the Z axis it is moving up away from the bed.
If I invert the Z axis, it homes down, but it also moves Z down towards the bed at the start of G28.
What am I missing? I honestly don't care if it moves the Z axis away from the bed before it homes X or Y, how do I disable that?
|
Re: Folger Tech 2020 i3 Printer Kit (Official Thread) August 21, 2016 05:57PM |
Registered: 8 years ago Posts: 285 |
It is a firmware issue. I had the same problem with that display in marlin. I switched over to repetier since i could not figure it out.
Folger Tech I3 2020 Wikia page: [folgertech.wikia.com]
Custom Folger Tech I3 2020 custom search
Folger Tech I3 2020 Wikia page: [folgertech.wikia.com]
Custom Folger Tech I3 2020 custom search
|
Re: Folger Tech 2020 i3 Printer Kit (Official Thread) August 21, 2016 10:46PM |
Registered: 8 years ago Posts: 314 |
My cooling fan doesnt spin up at 50% (It does if I manually spart spinning it). Is there any way in the firmware to peg it at 100% 24/7?
This is a print cooling fan - Not the extruder hetsink fan.
Folger Tech 2020 i3 Wiki
Custom google search for the Folger Tech 2020 i3 forum topic by Animoose
This is a print cooling fan - Not the extruder hetsink fan.
Folger Tech 2020 i3 Wiki
Custom google search for the Folger Tech 2020 i3 forum topic by Animoose
|
Re: Folger Tech 2020 i3 Printer Kit (Official Thread) August 22, 2016 05:34AM |
Registered: 8 years ago Posts: 285 |
Oops
Edited 1 time(s). Last edit at 08/22/2016 05:35AM by Mach.
Folger Tech I3 2020 Wikia page: [folgertech.wikia.com]
Custom Folger Tech I3 2020 custom search
Edited 1 time(s). Last edit at 08/22/2016 05:35AM by Mach.
Folger Tech I3 2020 Wikia page: [folgertech.wikia.com]
Custom Folger Tech I3 2020 custom search
|
Re: Folger Tech 2020 i3 Printer Kit (Official Thread) August 22, 2016 05:35AM |
Registered: 8 years ago Posts: 285 |
Quote
UltiFix
My cooling fan doesnt spin up at 50% (It does if I manually spart spinning it). Is there any way in the firmware to peg it at 100% 24/7?
This is a print cooling fan - Not the extruder hetsink fan.
No. If you want it to be at 100% all the time, set the both the min and max fan speed to 100% in your slicer.
Folger Tech I3 2020 Wikia page: [folgertech.wikia.com]
Custom Folger Tech I3 2020 custom search
|
Re: Folger Tech 2020 i3 Printer Kit (Official Thread) August 22, 2016 06:57AM |
Registered: 8 years ago Posts: 65 |
Did you load the U8glib library? I had a couple versions of Marlin do this on me. When I found the correct version the display worked without having to make any setting changes or turning anything on.
Quote
ACoffin
Hey, is anyone else having problems with the FT 2004 LCD display? Mine just shows gibberish (I have attached a picture), and I can't figure out if the display is defective, if it's a problem with my firmware, or if it's something completely different.
|
Re: Folger Tech 2020 i3 Printer Kit (Official Thread) August 25, 2016 09:13AM |
Registered: 8 years ago Posts: 6 |
Quote
WilberMaker
Did you load the U8glib library? I had a couple versions of Marlin do this on me. When I found the correct version the display worked without having to make any setting changes or turning anything on.
Quote
ACoffin
Hey, is anyone else having problems with the FT 2004 LCD display? Mine just shows gibberish (I have attached a picture), and I can't figure out if the display is defective, if it's a problem with my firmware, or if it's something completely different.
I tried loading the U8glib library, but it didn't change anything. I thought the U8glib library was only for the full graphics LCDs. Which version of Marlin are you using? I am currently running Marlin 1.0.2-1.


Sorry, only registered users may post in this forum.