GEEETech Prusa i3 ProB Build and Review
Posted by CheopisIV
|
GEEETech Prusa i3 ProB Build and Review August 10, 2015 03:44AM |
Registered: 8 years ago Posts: 66 |
I love the Folger Tech 2020 i3 but had to try the GEEETech Prusa i3 after looking at the info online. I ordered one from eBay that would come direct form the company in China.
The Good:
- 8mm Z Axis Lead screws!
- 8mm Acrylic frame (sharp looking and sturdy once built)
- preconfigured electronics, no mods or loading firmware so build and print (although I plan to dig in and fine tune some things)
- amazing detail on packaging (mostly...)
- highly organized parts with labeling and a ton of extra screws, etc
- adjustable X/Y belt tensioners.
- good quality printed parts
- everything needed to go including a sheet of Borosilicate glass. I had to source ZERO parts to get going!
- Easy setup and good instructions on getting started with Repetier-Host and downloadable config files.... they have their own build of RH but I prefer the standard build so transferred all the settings.
- free screwdriver thingy, spool holder and roll of PLA (although I'd requested ABS in communication, not the end of the world)
- great communication and service, seriously top notch Customer Service!!
- Overall nice build with a lot of small things taken care of right off the hop. This machine comes stock with some of the things fixed that bug me about the Folgertech machine.
The Bad
- Poor fit on the frame, took a lot of filing nubbies to get them to fit but manageable.
- Y belt attachment block really sucks...
- Odd print quality off the hop. I'm still struggling to get something decent and trying many things here.
- I haven't met a 'stock' extruder/hotend configuration I like yet in any kit and no exception here.
- poor bearing choices for the X/Y axis. They have standard instead of flanged so the belts rub and wear on the edges without some help.
- Somewhat bad instruction, but able to be figured out by looking ahead as you go and guessing on some things.
- Power Supply. I'm not exactly sure what it is but it does run the machine well enough so maybe 350W? I'm into knowing exactly what I'm dealing with so it's being replaced but likely doesn't need to be.
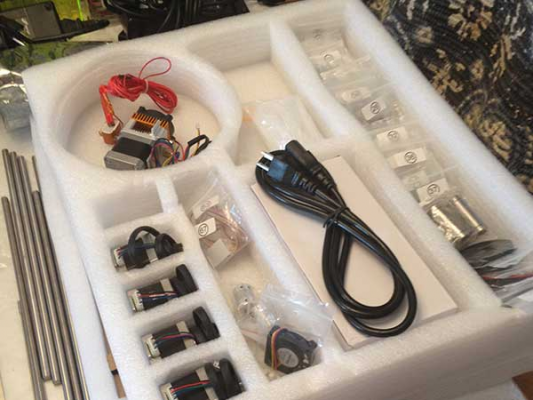
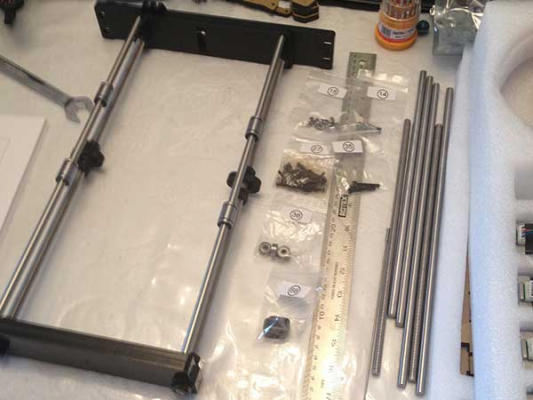
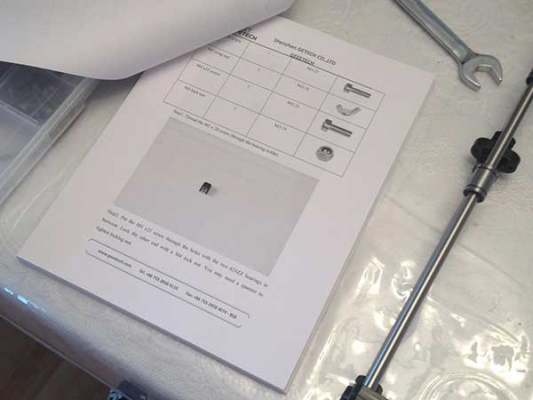
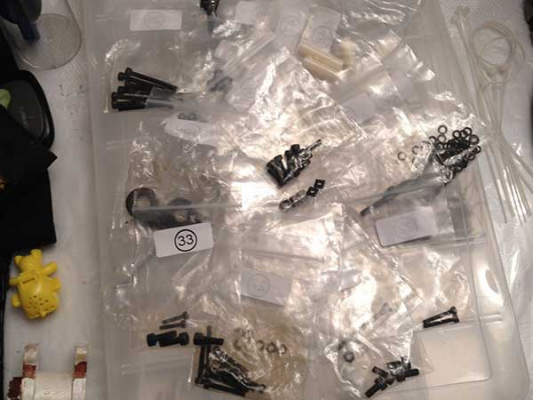
On arrival, I opened the box and gave a cursory look comparing the package to the build and itemization sheets (nice detail here). Everything was bagged and numbered and really easy to ID. I was impressed as it really saves time sorting bolts like you need to do with other kits. Everything was askew from shipping so needed to be organized a bit.
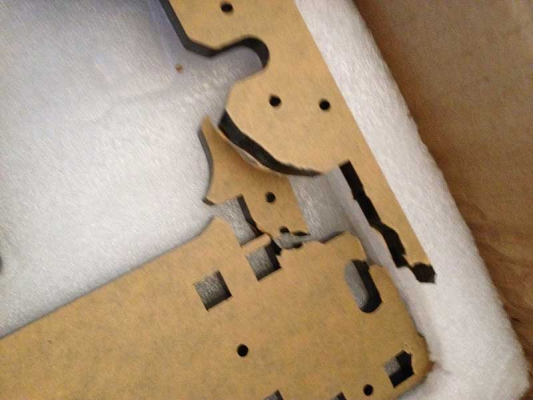
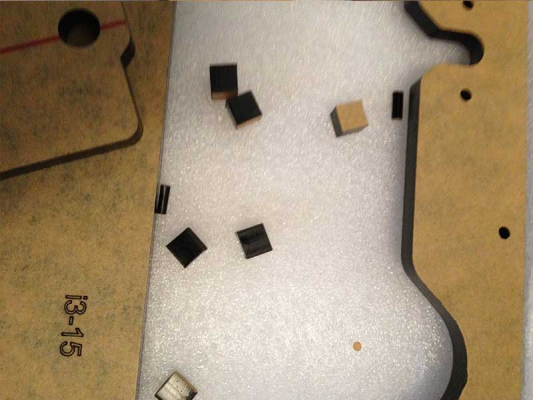
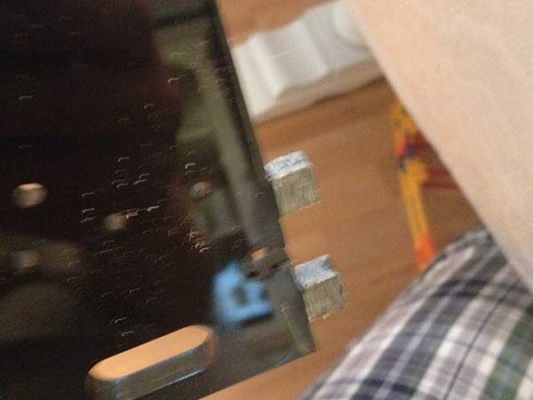
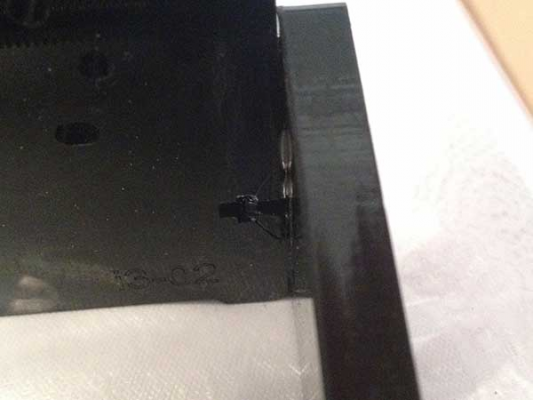
Also, on further investigation I found the main frame was damaged enroute. Most likely it was from the little laser cut squares getting under it and pressure from dropping/carrying/putting things on it by the couriers broke it. I was in touch with customer service and they immediately sent a new one which arrived ridiculously fast.
On building, I found myself jumping around in the booklet (printed form their website) as the pictures shown and order of build were not in sync. I kinda went my own direction on how I thought it would be best put together based on how I built to Folgertech machine. Someone taking this as their first kit might get confused. The saving grace was really the packaging as I could pull out a bag and build the part then return the bag in order to the box until needed again.
The frame fit was just yuck. It took some serious attention to filing for fit. I don't have any other Acrylic kits to compare it to, but they could use some attention on the CNC cutter. I had some laser cut Acrylic cams for my pickup winder from the 60s made semi-locally and that guy got to within 0.001" for tolerances as high precision was needed so I know it can be done.
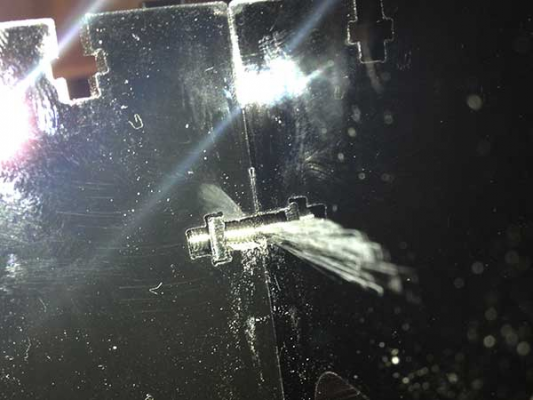
All that filing and I still managed to hear a snap on assembly. Out comes the Kragle (Krazy-Glue)
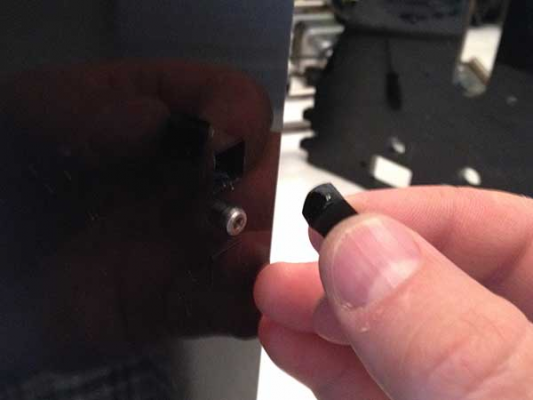
And one more;
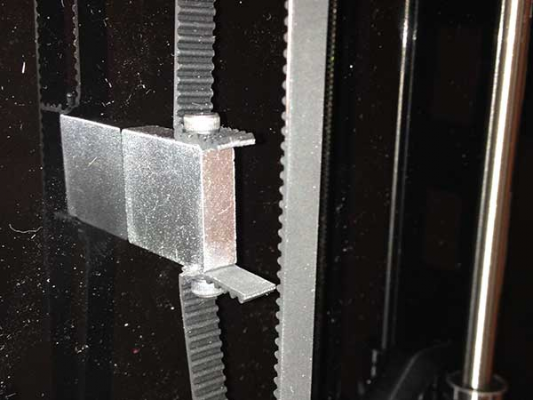
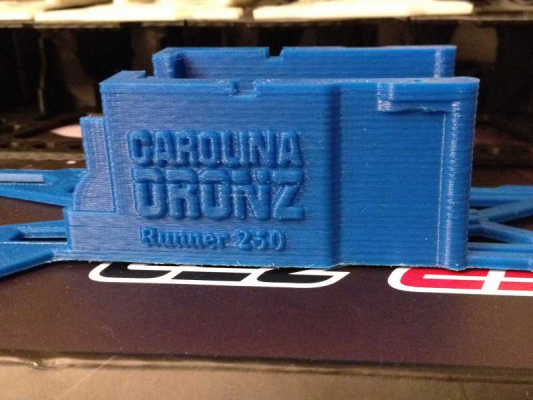
Here's the Y-Belt block. I read the instructions and literally laughed at the absurdity. "Drill a hole in your belt and screw it to the block"... seriously? I decided then and there to print a new assembly ASAP but decided to go through the process and build as instructed to see where it ended up. It does hold well enough but for how long?
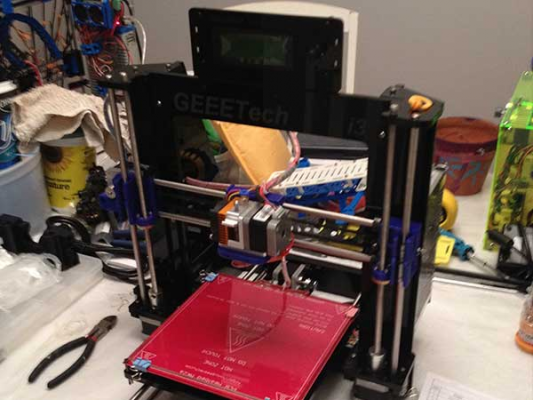
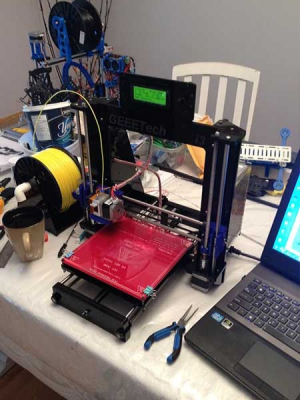
Completed machine; very nice looking really!
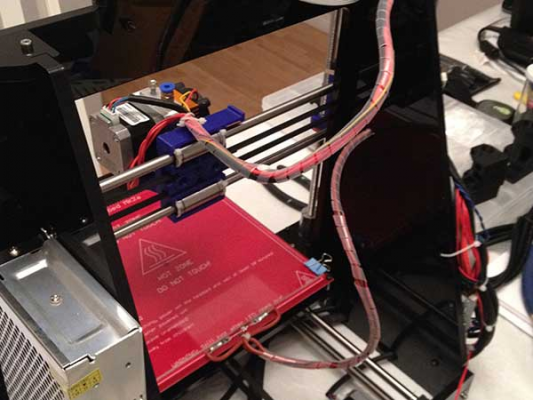
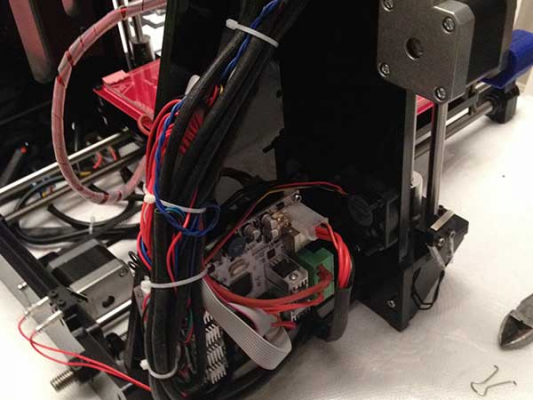
They included holes in the frame for cleanup of the wires which I thought was a nice touch!
I mounted the board backwards from the instructions... they showed it the other way but there's no wy I could fit a USB cable into the plug if it were reversed. I did try before flipping it around...
All the extras! I was scared at first as it's a bunch of things. The washers were actually supposed to go on the machine and I know where, but they were never shown or mentioned in the instructions so I didn't install (or even notcie them) until the end. I've since added a few to key parts where I adjust the screws now and then but still have a bag of them left over.
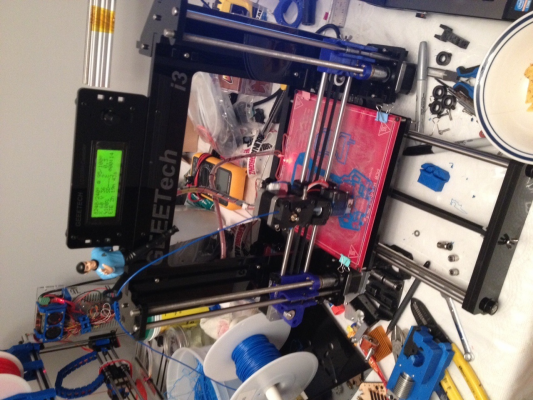
And fired up to print;
Overall I'd recommend it to someone with some skills in tinkering and patience, mostly just for the fitment issues. Aside from the filing, it was a pretty easy build and I didn't have to monkey with much to get it going. Build, bed level and go. GEEEtech was helpful and I even found a guy in the US who did some build vids and offers the printers for sale for the same price as from China (but likely quicker shipping). I was in touch with George (Georges 3D Printers) and he was very quick to respond to emails. Very nice guy who seems to know his stuff.
I'm still not entirely happy with the print quality I;m getting as it seems to have a bit of a resonance that gives a wavy quality to the prints. It could be configuration but I'm not entirely sure a I was able to get the FT machine tuned to near perfection. I suspect the extruder/hotend mount is too wobbly and needs some attention but no matter how much I adjust and tighten it has more play in it than I like. I'm going to swap it for a E3D V6 soon to see how much impact it has on the print. Tensioning the belts did nothing, freeing the Z-Axis lead screws made thing worse, changing the Z-Axis bearings helped a little but there's still some ugliness to the outer walls and some X/Y drift going on. I tightened the bed springs and it also helped a bit but not completely. Using Cura, Slic3r, Simplify3D didn't change much of anything either.
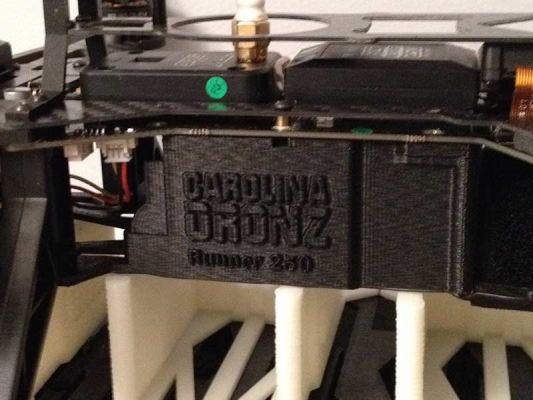
Here's a part printed on the Folgertech. It has a nice interweaving of the layers and a nice stacking with little drift as seen in the back edge and details;
And here's the GEEETech; you can see the waviness on the outer later with ridging and the back edge has some pronounces ridges as well.
They're defintely serviceable but I want to get as good quality as I can out of this machine I'll be updating this thread with anything I try as I go so will also be open to ideas and suggestions for fine tuning. Thanks for looking!
Edited 1 time(s). Last edit at 08/10/2015 03:45AM by CheopisIV.
Sigil Pickups || Stunt Monkey Pedals
The Good:
- 8mm Z Axis Lead screws!
- 8mm Acrylic frame (sharp looking and sturdy once built)
- preconfigured electronics, no mods or loading firmware so build and print (although I plan to dig in and fine tune some things)
- amazing detail on packaging (mostly...)
- highly organized parts with labeling and a ton of extra screws, etc
- adjustable X/Y belt tensioners.
- good quality printed parts
- everything needed to go including a sheet of Borosilicate glass. I had to source ZERO parts to get going!
- Easy setup and good instructions on getting started with Repetier-Host and downloadable config files.... they have their own build of RH but I prefer the standard build so transferred all the settings.
- free screwdriver thingy, spool holder and roll of PLA (although I'd requested ABS in communication, not the end of the world)
- great communication and service, seriously top notch Customer Service!!
- Overall nice build with a lot of small things taken care of right off the hop. This machine comes stock with some of the things fixed that bug me about the Folgertech machine.
The Bad
- Poor fit on the frame, took a lot of filing nubbies to get them to fit but manageable.
- Y belt attachment block really sucks...
- Odd print quality off the hop. I'm still struggling to get something decent and trying many things here.
- I haven't met a 'stock' extruder/hotend configuration I like yet in any kit and no exception here.
- poor bearing choices for the X/Y axis. They have standard instead of flanged so the belts rub and wear on the edges without some help.
- Somewhat bad instruction, but able to be figured out by looking ahead as you go and guessing on some things.
- Power Supply. I'm not exactly sure what it is but it does run the machine well enough so maybe 350W? I'm into knowing exactly what I'm dealing with so it's being replaced but likely doesn't need to be.
On arrival, I opened the box and gave a cursory look comparing the package to the build and itemization sheets (nice detail here). Everything was bagged and numbered and really easy to ID. I was impressed as it really saves time sorting bolts like you need to do with other kits. Everything was askew from shipping so needed to be organized a bit.
Also, on further investigation I found the main frame was damaged enroute. Most likely it was from the little laser cut squares getting under it and pressure from dropping/carrying/putting things on it by the couriers broke it. I was in touch with customer service and they immediately sent a new one which arrived ridiculously fast.
On building, I found myself jumping around in the booklet (printed form their website) as the pictures shown and order of build were not in sync. I kinda went my own direction on how I thought it would be best put together based on how I built to Folgertech machine. Someone taking this as their first kit might get confused. The saving grace was really the packaging as I could pull out a bag and build the part then return the bag in order to the box until needed again.
The frame fit was just yuck. It took some serious attention to filing for fit. I don't have any other Acrylic kits to compare it to, but they could use some attention on the CNC cutter. I had some laser cut Acrylic cams for my pickup winder from the 60s made semi-locally and that guy got to within 0.001" for tolerances as high precision was needed so I know it can be done.
All that filing and I still managed to hear a snap on assembly. Out comes the Kragle (Krazy-Glue)
And one more;
Here's the Y-Belt block. I read the instructions and literally laughed at the absurdity. "Drill a hole in your belt and screw it to the block"... seriously? I decided then and there to print a new assembly ASAP but decided to go through the process and build as instructed to see where it ended up. It does hold well enough but for how long?
Completed machine; very nice looking really!
They included holes in the frame for cleanup of the wires which I thought was a nice touch!
I mounted the board backwards from the instructions... they showed it the other way but there's no wy I could fit a USB cable into the plug if it were reversed. I did try before flipping it around...
All the extras! I was scared at first as it's a bunch of things. The washers were actually supposed to go on the machine and I know where, but they were never shown or mentioned in the instructions so I didn't install (or even notcie them) until the end. I've since added a few to key parts where I adjust the screws now and then but still have a bag of them left over.
And fired up to print;
Overall I'd recommend it to someone with some skills in tinkering and patience, mostly just for the fitment issues. Aside from the filing, it was a pretty easy build and I didn't have to monkey with much to get it going. Build, bed level and go. GEEEtech was helpful and I even found a guy in the US who did some build vids and offers the printers for sale for the same price as from China (but likely quicker shipping). I was in touch with George (Georges 3D Printers) and he was very quick to respond to emails. Very nice guy who seems to know his stuff.
I'm still not entirely happy with the print quality I;m getting as it seems to have a bit of a resonance that gives a wavy quality to the prints. It could be configuration but I'm not entirely sure a I was able to get the FT machine tuned to near perfection. I suspect the extruder/hotend mount is too wobbly and needs some attention but no matter how much I adjust and tighten it has more play in it than I like. I'm going to swap it for a E3D V6 soon to see how much impact it has on the print. Tensioning the belts did nothing, freeing the Z-Axis lead screws made thing worse, changing the Z-Axis bearings helped a little but there's still some ugliness to the outer walls and some X/Y drift going on. I tightened the bed springs and it also helped a bit but not completely. Using Cura, Slic3r, Simplify3D didn't change much of anything either.
Here's a part printed on the Folgertech. It has a nice interweaving of the layers and a nice stacking with little drift as seen in the back edge and details;
And here's the GEEETech; you can see the waviness on the outer later with ridging and the back edge has some pronounces ridges as well.
They're defintely serviceable but I want to get as good quality as I can out of this machine
 I'll be updating this thread with anything I try as I go so will also be open to ideas and suggestions for fine tuning. Thanks for looking!
Edited 1 time(s). Last edit at 08/10/2015 03:45AM by CheopisIV.
Sigil Pickups || Stunt Monkey Pedals
|
Re: GEEETech Prusa i3 ProB Build and Review August 10, 2015 06:53AM |
Registered: 9 years ago Posts: 476 |
|
Re: GEEETech Prusa i3 ProB Build and Review August 11, 2015 11:57AM |
Registered: 9 years ago Posts: 251 |
|
Re: GEEETech Prusa i3 ProB Build and Review August 11, 2015 08:06PM |
Registered: 8 years ago Posts: 4 |
Me acaba de construir la misma impresora 3D, pero tengo problemas a la hora de imprimir, no se como configurar el programa repetier, bueno lo esencial ya logre, ya estoy conectado y puedo enviar a imprimir.
Pero no imprime bien, me imagino que es la configuración del Slider, me pudieras ayudar colocando imágenes de toda la configuración que tienes en el programa repetier.
Ademas que utilizas para sostener la primer capa, yo estuve usando LACA, pero no me funciono de nada, ya que se mueve todo lo que estoy imprimiendo.
Por favor un poco de ayuda!! jejeje
|
Re: GEEETech Prusa i3 ProB Build and Review August 11, 2015 08:08PM |
Registered: 8 years ago Posts: 4 |
I just built the same 3D printer, but I have problems when printing, do not know how to configure the program repetier, and achieve the essential good, I'm connected and I can send to print.
But does not print well, I guess that is the setting of the Slider, I could help by placing images of all the settings you have in the program repetier.
Besides that you use to hold the first layer, I was using lacquer, but I did not work at all, because it moves all I'm printing.
Please a little help !! lol
|
Re: GEEETech Prusa i3 ProB Build and Review August 11, 2015 08:26PM |
Registered: 8 years ago Posts: 66 |
Quote
jonathanfede
I just built the same 3D printer, but I have problems when printing, do not know how to configure the program repetier, and achieve the essential good, I'm connected and I can send to print.
But does not print well, I guess that is the setting of the Slider, I could help by placing images of all the settings you have in the program repetier.
Besides that you use to hold the first layer, I was using lacquer, but I did not work at all, because it moves all I'm printing.
Please a little help !! lol
I used to use ABS slurry but have moved to Washable Elmer's Glue Stick. I'm sure any brand would work but it's been a Godsend for getting prints to stick without welding themselves to the plate.
For the Repetier setting, just load up the defaults from GEEETech to start, they have it set just fine to get started. Print troubles would be best diagnosed with some pictures but just make sure everything is tight and start small with some calibration pieces.
Here's a page with the GEEETech specific software and setup. They show all the setup steps for default printing.
Sigil Pickups || Stunt Monkey Pedals
|
Re: GEEETech Prusa i3 ProB Build and Review August 12, 2015 12:37AM |
Registered: 10 years ago Posts: 444 |
|
Re: GEEETech Prusa i3 ProB Build and Review August 12, 2015 01:56PM |
Registered: 8 years ago Posts: 4 |
Muchas gracias, por tu ayuda, voy a calibrar todo tal como lo dice en la pagina que me proporcionaste, te quería preguntar si nos sabes si se puede utilizar para esta impresora, el hilo de cortadora de grama, te envió una imagen, al parecer seria mas económica que los filamentos que venden.
Si sabes de algo te agradeceria la información.
Y de nuevo muchas gracias por la ayuda!!
(Q.59.99, Quetzales) ($7.50) x 200 ft
-----------------------
Thank you very much for your help, I will calibrate everything as it says on the page you provided me, I wanted to ask if you know whether you can use for this printer, the thread cutting program, I sent a picture, apparently more serious economic selling filaments.
If you know of something you appreciate the information.
And again thank you very much for the help !!
(Q.59.99, Quetzales) ($7.50) x 200 ft
|
Re: GEEETech Prusa i3 ProB Build and Review August 12, 2015 02:11PM |
Registered: 8 years ago Posts: 66 |
I've not tried running anything but proper ABS through my machines, I'd personally stay away from Weed Eater line and fishing line of any kind but you never know! 
Sigil Pickups || Stunt Monkey Pedals

Sigil Pickups || Stunt Monkey Pedals
|
Re: GEEETech Prusa i3 ProB Build and Review August 12, 2015 02:48PM |
Registered: 10 years ago Posts: 444 |
|
Re: GEEETech Prusa i3 ProB Build and Review August 21, 2015 02:32AM |
Registered: 8 years ago Posts: 66 |
Nimoy got an upgrade today!! E3D V6 clone from Leap3D on eBay. Every bit as good as the real deal (have one on my Makibox) but 1/3 the price.... Funny thing about switching from the stock hot end; it was supposed to have a 40 nozzle on it and so does this one, but the stock nozzle has a significantly bigger orifice than the E3 clone. This one is taking some doing to dial in. I use Simplify3D on my FolgerTech but can't get good print on the GEEEtech with it. Currently using RepetierHost and Cura with great results!
Sigil Pickups || Stunt Monkey Pedals
Sigil Pickups || Stunt Monkey Pedals
|
Re: GEEETech Prusa i3 ProB Build and Review August 21, 2015 03:33AM |
Registered: 9 years ago Posts: 476 |
|
Re: GEEETech Prusa i3 ProB Build and Review August 21, 2015 04:23AM |
Registered: 8 years ago Posts: 66 |
Quote
sarf2k4
What extruder design and groove mount you use? Can give me link to it?
I gutted the existing extruder setup and cannibalized what I could. This is the X-Carriage of which I use the top holes...and this is the Extuder setup. Didn't bother with the bearing extender as I used the gear from the stock unit.
The nice thing is that with proper cable management, it doesn't interfere with the Z-Axis in any way and I get 199 mm easy! 200mm and it gets really close to the top brackets.
Edited 1 time(s). Last edit at 08/21/2015 04:24AM by CheopisIV.
Sigil Pickups || Stunt Monkey Pedals
|
Re: GEEETech Prusa i3 ProB Build and Review August 21, 2015 06:58AM |
Registered: 9 years ago Posts: 476 |
Ahh, most simple direct drive I ever see for mk8 compared to mine here [www.thingiverse.com] , this extruder sits on top of the carriage, and the design of sitting on top of the carriage always concerns me that the motor might hit the display knob, but this design, requires another additional hardware such as spring and screws, salvaged parts is just the beariing and gear from mk8 :/
|
Re: GEEETech Prusa i3 ProB Build and Review September 14, 2015 11:32AM |
Registered: 8 years ago Posts: 66 |
I was having some issues with the E3D clone so swapped in the real E3D V6 I had on the Makibox and my issues went away. I suspected the thermistor but found I may have been using the wrong table after checking their online instructions on which table to use. I put the clone on the Makibox and set the proper table, ran the PID autotune and it prints every bit as good as the E3D did!
Regardless, I sold the GEEETech and ordered another Folger Tech 2020 i3. I had the GEEETech tuned pretty well but prefer the expandability of the FT overall. I just hope the FT kit comes complete this time!
Sigil Pickups || Stunt Monkey Pedals
Regardless, I sold the GEEETech and ordered another Folger Tech 2020 i3. I had the GEEETech tuned pretty well but prefer the expandability of the FT overall. I just hope the FT kit comes complete this time!
Sigil Pickups || Stunt Monkey Pedals
Sorry, only registered users may post in this forum.
