P3steel - toolson edition
Posted by toolson
|
P3steel - toolson edition October 10, 2015 07:50PM |
Registered: 9 years ago Posts: 1,720 |
In my opinion Irobri’s P3steel frame is probably the best i3 frame available.
But the printed parts didn’t meet my requirements. Most of the existing designs are not well thought out .
The other derivates and the other i3's aren't better.
More than 1 year ago I bought a P3steel kit from a spanish supplier.
After hundreds hours of printing i changed nearly every part.
Some weeks ago I decided to design a completly new P3steel. My third one and my final one.
I designed nearly every part from scratch based on my long time experience with my first P3steel and all the developments I did in the mean time.
I wanted to create a nearly perfect P3steel.
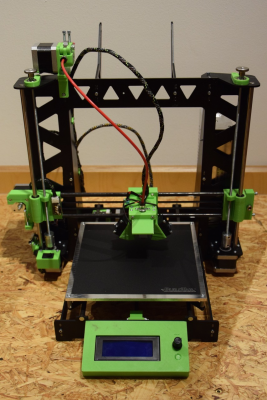
Now it's time for the P3steel – toolson edition -
My english isn't the best and pictures say more than words.
So here are the details and some short comments.
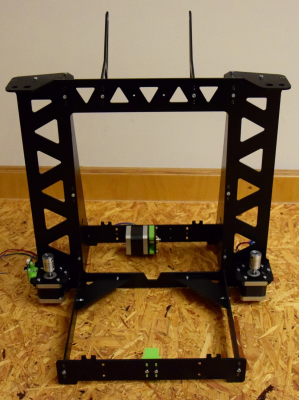
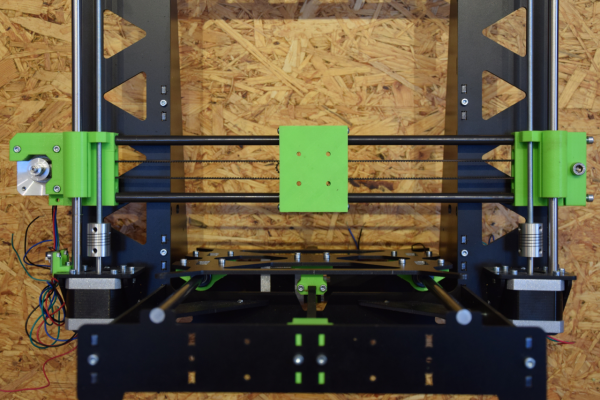
The nearly naked frame:
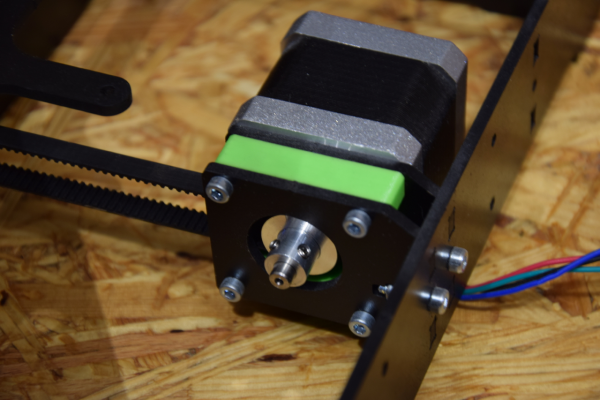
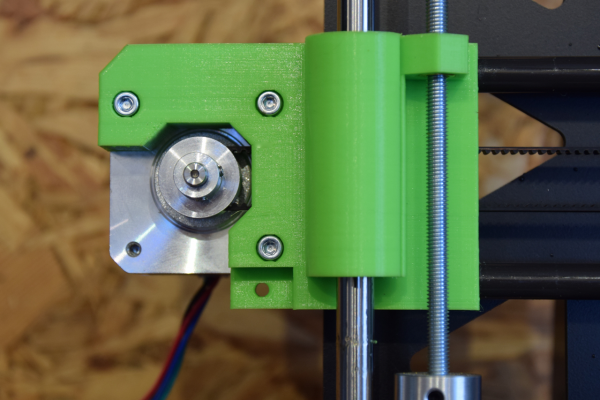
New designed spacer for the X-axis stepper mount, to sve tons of washers:
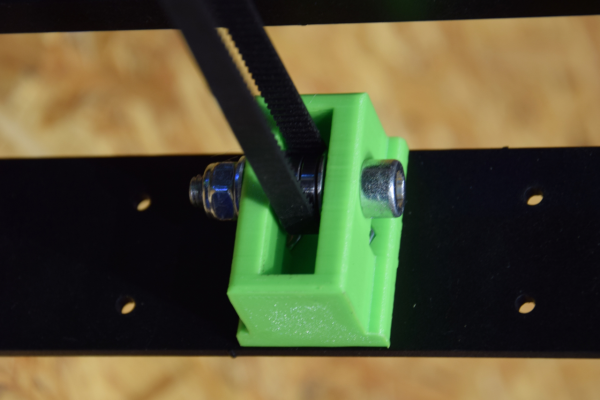
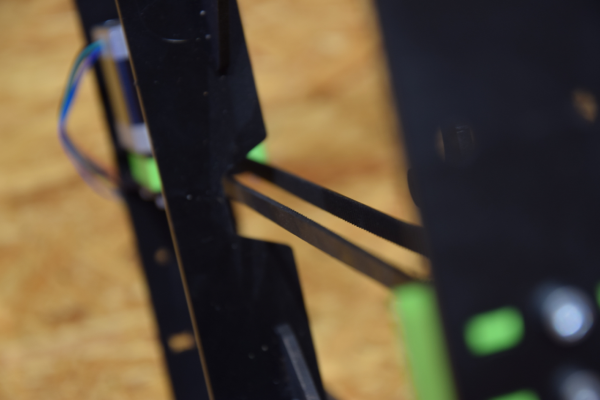
The original Y-axis idler is scrap. Just worth to throw on scrap yard. I designed a new one:
Perfect parallel and horizontal belt is the result.
Belt tensioner is missing on the original P3 steel. I designed a new one:
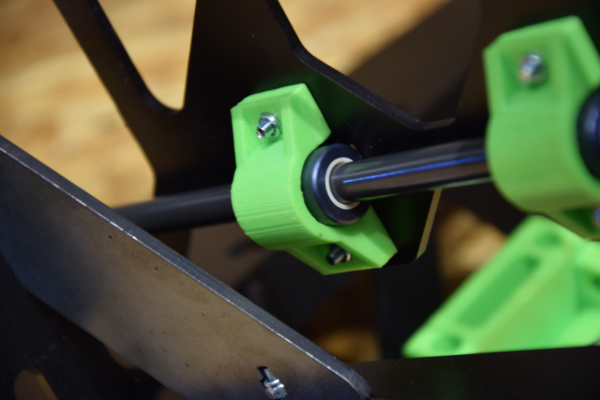
My P3 steel is running on IGUS linear glide bearings. These are super silent but a bit bigger in diameter. That's why I designed new clamps:
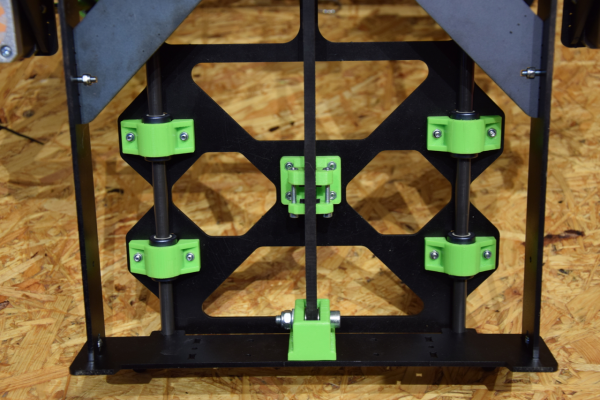
Y-axis is ready for perfekt prints:
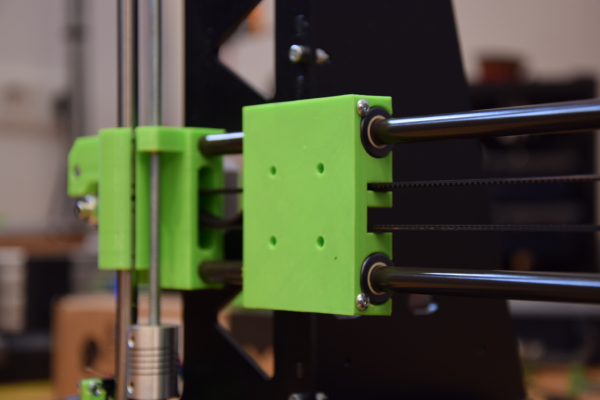
On X-Axis i use the same IGUS bearings. But i designed two carriages, one for the IGUS bearings and one for the standard LM8UU bearings:
New designed X-Axis. Here is the quality of LM8UU bearings sufficient. I designed the X-axis from scratch. It's reinforced and have ab more Y-Offset-
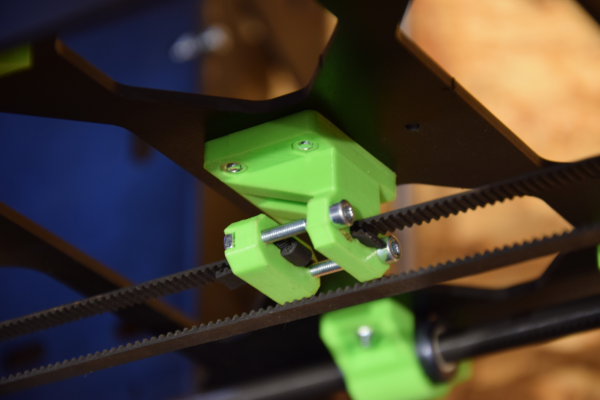
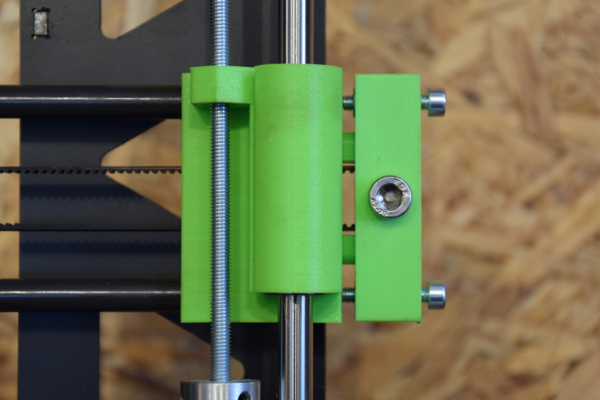
New designed belt tensioner. Belt tension doesn't effect Z-axis smooth rods.
X-Axis is ready for perfect prints. Again with perfect parallel belt.
High strength M5 threaded rods with brass nuts.
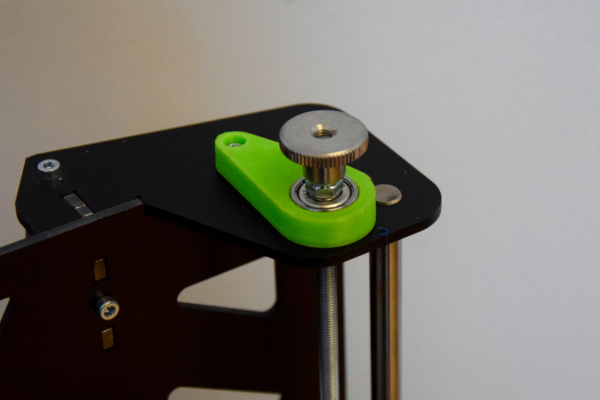
New designed Z-axis top bearings. The parts will prevent the ugly noises while printing with high jerks. Z-axis coupler are a bit pretensioned. The result is perfect and consistend layer height.
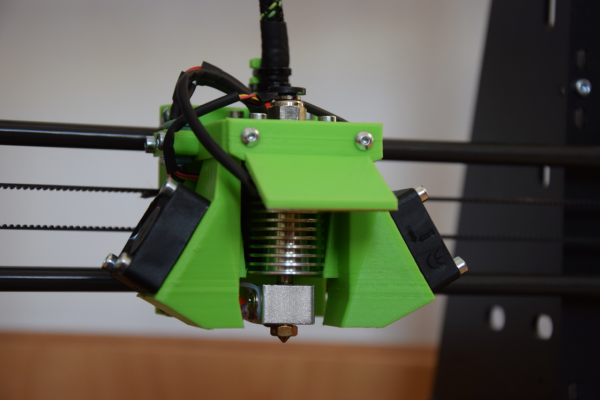
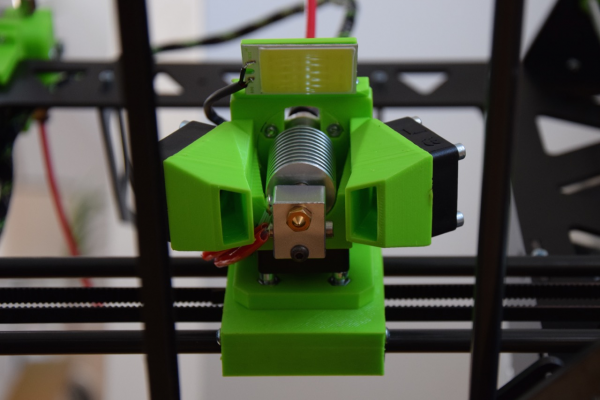
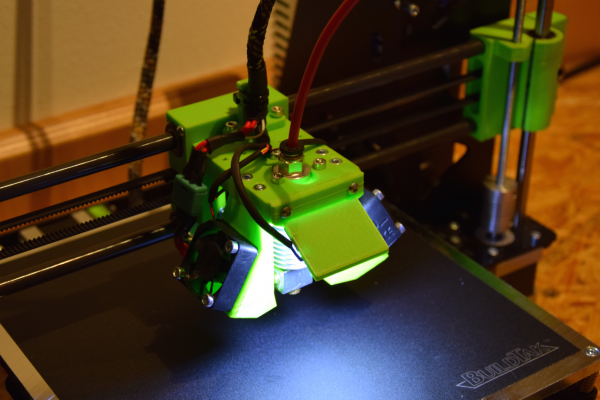
My solution for hotend and print cooling. Hotend is easy removable. With MPX connector.
COB LED added for best seight on the print.
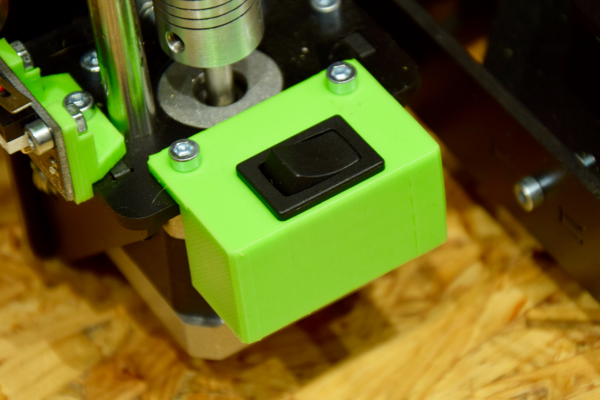
A switch for the LED:
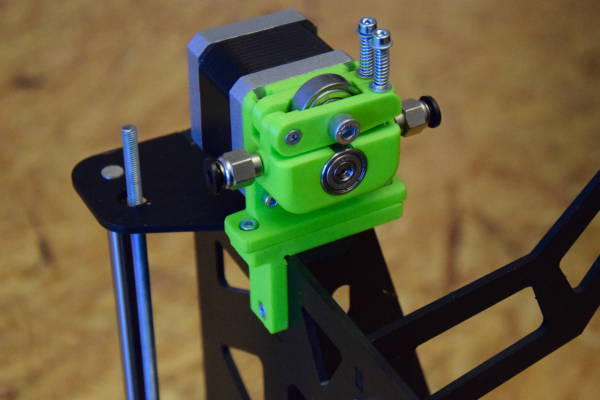
I like bowden extruder. That's why I made my favorite one and designed a mount.
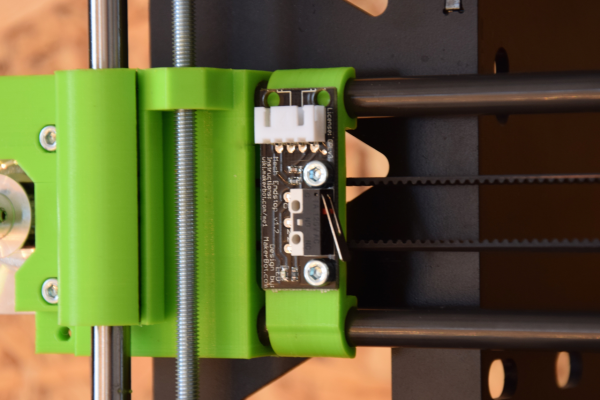
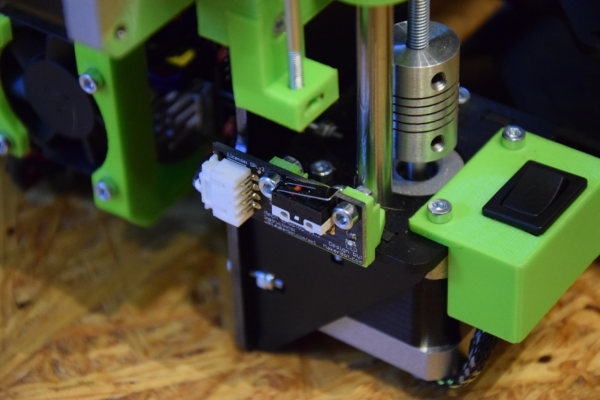
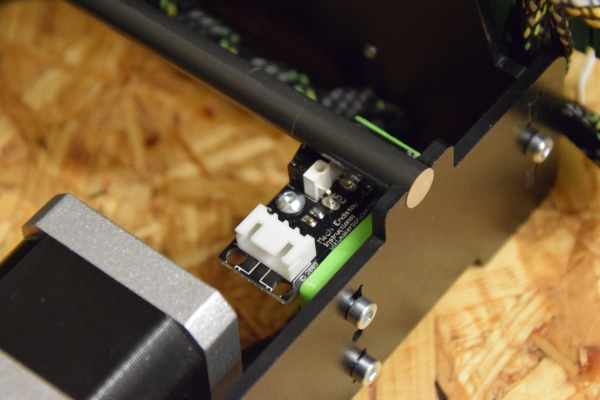
Some nice endstop mounts:
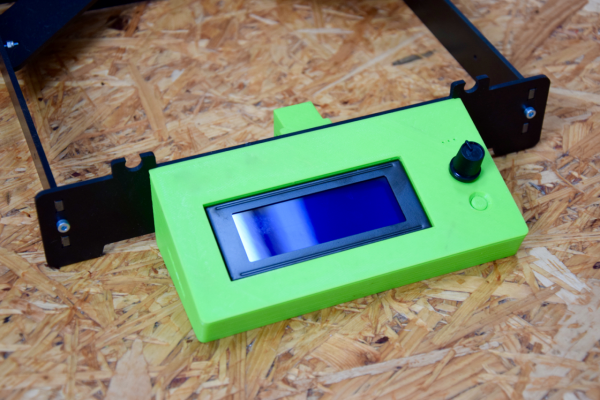
Display/SD-Card-Slot housing:
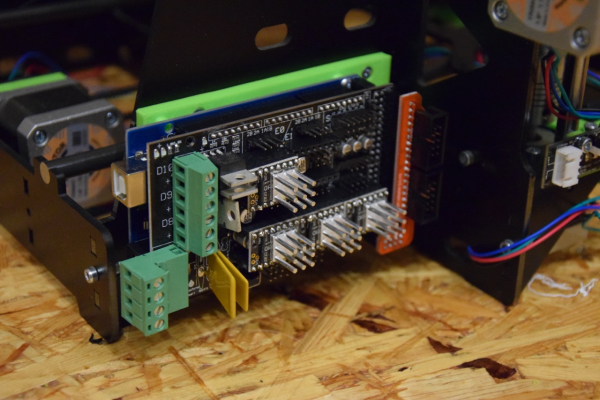
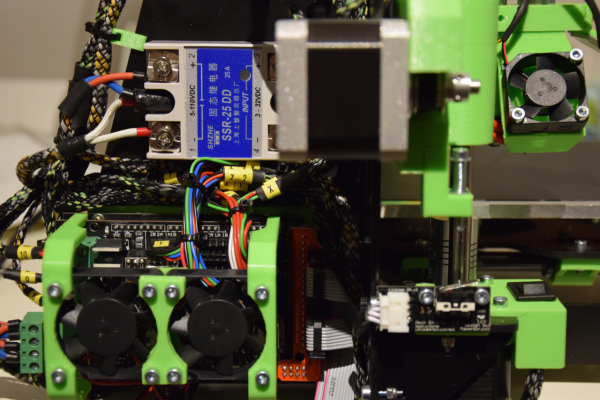
MEGA/RAMPS/SmartLCD/TMC2100 Combination.
Original mounting points posittion is not ideal. That's why I designed a mount plate with some offset
Mounted PSU with new designed cover for switch and IEC.
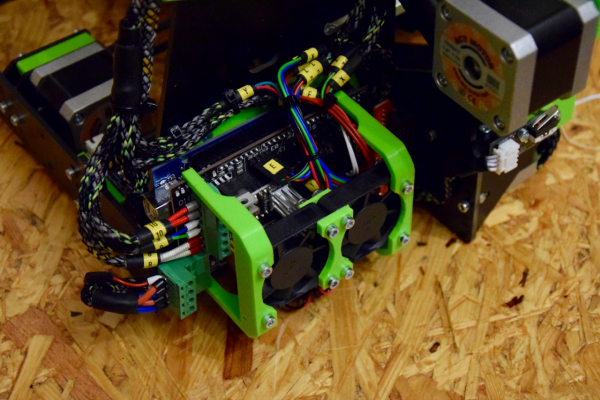
Electronics cooling:
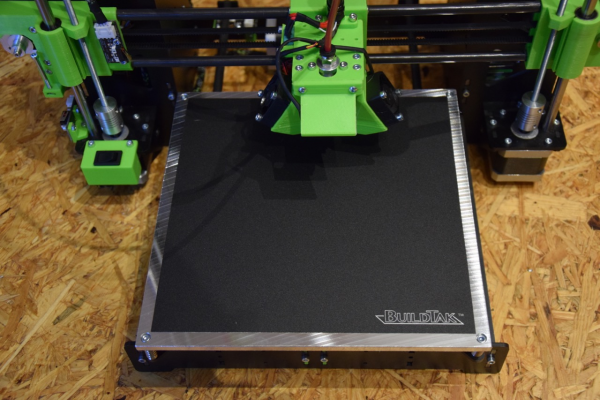
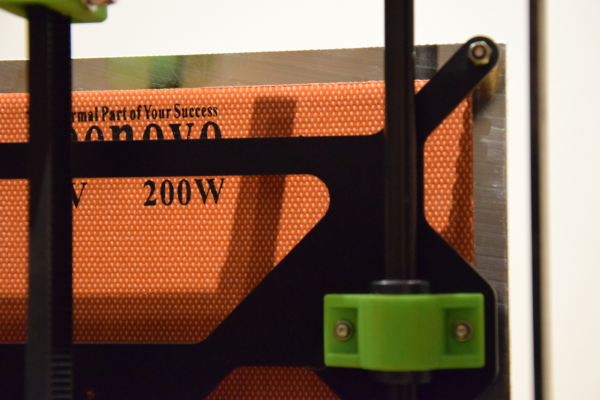
A nice Heatbed with aluminium cast plate, silicone heater and Buildtak:
To handle the high current of the silicone heater i use a solid state relais.
You can find all the parts in one set here:
[www.thingiverse.com]
You will find BOM, screw list and more pictures and information on my blog:
[scheuten.me]
All the chapter are written in german. Sorry, only the main page is in english.
At least it's a nice picture overview
I created a "thing" for every part during the development.
Here you will find all of the parts and more detailed descriptions:
[www.thingiverse.com]
Lars - Blog, Thingiverse, Git
After successfully ignoring Google, FAQ's, the board search and leaving a undecipherable post in the wrong sub-forum don't expect an intelligent reply.
|
Re: P3steel - toolson edition October 11, 2015 02:56PM |
Registered: 10 years ago Posts: 444 |
|
Re: P3steel - toolson edition October 12, 2015 02:36PM |
Registered: 8 years ago Posts: 541 |
|
Re: P3steel - toolson edition October 12, 2015 02:50PM |
Registered: 9 years ago Posts: 1,720 |
Thanks for your compliments.
I tested the SSR. Longest print until now was about two hours.
The steel frame absorbs the heat sufficient.
I don't expect any problems, but will keep an eye on it.
Edited 1 time(s). Last edit at 10/12/2015 02:51PM by toolson.
Lars - Blog, Thingiverse, Git
After successfully ignoring Google, FAQ's, the board search and leaving a undecipherable post in the wrong sub-forum don't expect an intelligent reply.
|
Re: P3steel - toolson edition October 12, 2015 03:10PM |
Registered: 8 years ago Posts: 541 |
|
Re: P3steel - toolson edition October 18, 2015 03:00AM |
Registered: 9 years ago Posts: 116 |
A great job.
I have one to build so I will allow myself to be inspired by your efforts. As perfection is the game using the frame as a heatsink would cause a thermal imbalance in the frame and make the frame warp. It would be best to have a heatsink on the relay and cool that with a fan. In theory of course.
I have one to build so I will allow myself to be inspired by your efforts. As perfection is the game using the frame as a heatsink would cause a thermal imbalance in the frame and make the frame warp. It would be best to have a heatsink on the relay and cool that with a fan. In theory of course.
|
Re: P3steel - toolson edition October 18, 2015 06:06PM |
Registered: 10 years ago Posts: 444 |
|
Re: P3steel - toolson edition October 20, 2015 03:59PM |
Registered: 9 years ago Posts: 41 |
|
Re: P3steel - toolson edition October 20, 2015 04:07PM |
Registered: 9 years ago Posts: 1,720 |
@ Ecky & RRUser
There is no significant warming of steel side panel. It is good place for the SSR.
@ dbrewski
The threaded rods are chea, have a high resolution and working really fine. I can get perfect print results with them, why should i spend more money?
I owned a lot of i3s. The M5 rods are not the fastest one, but work like a charm.
Risk of Z-Wobble is higher when used with not 100% aligned lead screw or M8 threaded rods.
Lars - Blog, Thingiverse, Git
After successfully ignoring Google, FAQ's, the board search and leaving a undecipherable post in the wrong sub-forum don't expect an intelligent reply.
|
Re: P3steel - toolson edition October 21, 2015 04:32AM |
Registered: 8 years ago Posts: 5 |
|
Re: P3steel - toolson edition October 21, 2015 02:37PM |
Registered: 9 years ago Posts: 251 |
|
Re: P3steel - toolson edition October 21, 2015 02:59PM |
Registered: 9 years ago Posts: 1,720 |
thanks.
Please be patiend. I'm very busy at the moment. Videoclip will be uploaded in the next days.
Lars - Blog, Thingiverse, Git
After successfully ignoring Google, FAQ's, the board search and leaving a undecipherable post in the wrong sub-forum don't expect an intelligent reply.
Please be patiend. I'm very busy at the moment. Videoclip will be uploaded in the next days.
Lars - Blog, Thingiverse, Git
After successfully ignoring Google, FAQ's, the board search and leaving a undecipherable post in the wrong sub-forum don't expect an intelligent reply.
|
Re: P3steel - toolson edition October 22, 2015 08:57AM |
Registered: 10 years ago Posts: 444 |
|
Re: P3steel - toolson edition December 16, 2015 08:50AM |
Registered: 8 years ago Posts: 5 |
I really like your edition and want to make one. Will P3Steel from this suppliers work?
[www.kitprinter3d.com]
[orballoprinting.com]
Edited 1 time(s). Last edit at 12/16/2015 09:00AM by rmrf.
[www.kitprinter3d.com]
[orballoprinting.com]
Edited 1 time(s). Last edit at 12/16/2015 09:00AM by rmrf.
|
Re: P3steel - toolson edition December 16, 2015 11:02AM |
Registered: 9 years ago Posts: 1,720 |
Quote
rmrf
I really like your edition and want to make one. Will P3Steel from this suppliers work?
[www.kitprinter3d.com]
[orballoprinting.com]
Yes, it will work!
Lars - Blog, Thingiverse, Git
After successfully ignoring Google, FAQ's, the board search and leaving a undecipherable post in the wrong sub-forum don't expect an intelligent reply.
|
Re: P3steel - toolson edition January 29, 2016 04:13AM |
Registered: 8 years ago Posts: 5 |
|
Re: P3steel - toolson edition January 29, 2016 11:35AM |
Registered: 9 years ago Posts: 1,720 |
From the very beginning i released two versions:
- LM8UU bearings on cf53 steel rods
- IGUS glyde bearings on aluminium shafts
In the meanwhile the printers was very very often build by others, especially here in germany.
I got a lot of feedback. A lot of beginners have trouble with the IGUS bearings. They need a very good alignment, otherwise they anger you with stick/slip effect.
Mine is running perfectly and extremely silent with IGUS bearings.
I removed the IGUS version from the BOM. Beginners can easier handle the LM8UU bearings.
The P3steel toolson edition project is moving forward. Some really nice things will come up.
For this you will need precise steel rods like the cf53 rods. I'm moving away from that shitty LM8UU bearings and the sometimes problematic IGUS bearings.
Lars - Blog, Thingiverse, Git
After successfully ignoring Google, FAQ's, the board search and leaving a undecipherable post in the wrong sub-forum don't expect an intelligent reply.
|
Re: P3steel - toolson edition February 23, 2016 10:42AM |
Registered: 9 years ago Posts: 101 |
I've been building my P3 Steel with Toolson's parts, thanks for the great work!
I found this thread while looking for info on the Z axis threaded rods... My old acrylic i3 had 8mm leadscrews and I never had a day of trouble with them. I'm using 5mm threaded's per your design but I have had nothing but trouble with them.
Some of the problems I've experienced:
- Z-crash broke the threaded rod nuts free from the X-axis parts, now they are loose and I've had a difficult time securing them again (super glue etc..)
- I've silicon lubed the z rods several times, they still squeel and squeak something horrible, also they are turning black in the most used areas, is that normal?
- The right rod is perfectly straight from the bottom of the shaft into the nut but from the top of the x-pulley to the top-bearing it is bowed... when I restrict it with the bearing it seems to get worse?
I suspect most of these are general threaded rod issues, no directly related to the Toolson build but thought I would share my experience anyway. I've been looking for some X parts for 8mm leadscrews just as an option if I can't solve the
above issues.
Thanks again for the great parts Though!
|
Re: P3steel - toolson edition February 23, 2016 11:20AM |
Registered: 9 years ago Posts: 251 |
|
Re: P3steel - toolson edition March 03, 2016 07:36PM |
Registered: 8 years ago Posts: 20 |
I've slowly iterrated away from the Sintron acrylic frame i3 I build with spares from my previous Makibox that I just ended up throwing away (if someone still needs som Makiboxspares I have a few around..).
A big part of the mods I've added have been from the toolson i3 setup. The whole x axis mount (including end stop mount), the compact extruder mount, although I wil create my own now to give more space for cable chains
I also use the y end stop mount and the Mega + RAMPS cooling and mount setup.
If the hot end mount would support inductive proximity sensor and dual hot ends I would almost definitely use that as well.
I've later on modifiedf it with cable chains to make it less messy. All in all I am very impressed by the work done into this version of the i3. As soon as I saw it I realized I wanted to do most of the mods it provided, and eventually give me ideas for more mods.
Sorry, only registered users may post in this forum.
