RepRap Guru i3 Printer Kit (Official Thread)
Posted by REPRAPGURU
|
Re: RepRap Guru i3 Printer Kit (Official Thread) February 22, 2017 01:59PM |
Registered: 7 years ago Posts: 7 |
QuoteQuote
lsmith1437
I've designed an X-Axis tension block as a drop-in part for the RepRapGuru. Works with the V1 and V2:
[www.thingiverse.com]
It requires some very inexpensive hardware from the likes of Ace Hardware. I'm using it right now, it works like a charm.
I also started a group for RepRapGuru group on Thingiverse:
[www.thingiverse.com]
-L. Smith
I joined your group
|
Re: RepRap Guru i3 Printer Kit (Official Thread) February 25, 2017 12:33PM |
Registered: 7 years ago Posts: 5 |
|
Re: RepRap Guru i3 Printer Kit (Official Thread) February 25, 2017 12:43PM |
Registered: 7 years ago Posts: 5 |
|
Re: RepRap Guru i3 Printer Kit (Official Thread) February 27, 2017 04:35PM |
Registered: 7 years ago Posts: 2 |
Hi all,
Ive gotten my RepRap Guru i3 kit up and running and it works great but Im getting 0 volts on the d9 output for a cooling fan. Right now I have the extruder fan wired on the 12v always on pins above and to the right and using the shroud helps with the cooling of the print but no matter the settings or firmware d9 seems to do nothing. It knows the fan should be on via the settings, it will display on the 2004lcd that its on full but it has no volts output. The config shows 33 in the marlin settings, and the fan even when set to be on 100% for testing has 0v output. Am i missing something? If im not and something is blown or bad what options do I have for controlled cooling? Or am I looking at getting a new board?
Lastly has anyone else had issues with the liner rods getting eat up by the bearings? My upper X axis rod had a massive groove that developed over the last week since ive gotten it up and running until I got to the point I had prints failing. Once I got that I pulled the rod sanded it with 600-1500 sandpaper and then wet with 1500 to get that cleaned up and replaced the 2 bearings but it feels like all the rods are starting to develop this and I wasn't sure what is going on. All the bearings are greased and so are the rods so i wouldn't think it should be happening unless I just have terrible luck.
Sorry for my rambling
o7 Turbo
|
Re: RepRap Guru i3 Printer Kit (Official Thread) February 28, 2017 05:53PM |
Registered: 7 years ago Posts: 5 |
Is it possible to share your Marlin RC8 Configure.h? I was told by manually transfer the value of parameters of the REPRAPGURU Marlin code to the RC8 version, it will work. It looks like a daunting task and I would appreciate it very much for a new working code to proceed for my autobed leveling adventure. Thanks in advance.
|
Re: RepRap Guru i3 Printer Kit (Official Thread) March 01, 2017 05:23PM |
Registered: 7 years ago Posts: 1 |
Hey guys, I just got my RepRapGuru kit yesterday, and I assembled it with relatively few problems, but my Z axis will only step in one direction. I've switched between the older Marlin RepRap firmware, and the newest Marlin Bugfix build, and I think it may be a problem with either the end-stop, the RAMPS, or the Arduino, but as far as that, I'm pretty much out of ideas. Also, I can't get my LCD display to work, no matter what firmware settings I try.
EDIT: So I enabled dual Z axis stepping, and moved one of the motors to the second Extruder driver. That motor now moves correctly, both up and down, and the motor I left on the Z driver only moves up. Seems to narrow it down to the Z driver. Also, the endstop is normally open, as it should be, so it's not an endstop issue.
EDIT2: So I fixed the issue by doing some printer hacking. I took apart the 4 pin connectors of the Z motors and wired them together, and now I'm running both motors off of the second extruder driver, which has finally got my printer working correctly. Also, my LCD issue seems to have sorted it self, it came alive after I reconnected it and it's working now
Edited 3 time(s). Last edit at 03/02/2017 04:01AM by Lightfeather10.
|
Re: RepRap Guru i3 Printer Kit (Official Thread) March 04, 2017 11:00AM |
Registered: 7 years ago Posts: 5 |
|
Re: RepRap Guru i3 Printer Kit (Official Thread) March 04, 2017 04:29PM |
Registered: 7 years ago Posts: 5 |
Hi Nick,
Can you explain me how to adjust the extruder ? With the factory setting I obtain 180mm when I command the printer to extrude 100mm ?
I tried to change this value on lcd panel: Control -> Motion -> Esteps/mm (900) with this formula (100/180) * 900 but it's worst
what can I do, I'm not able to print something ?
best
Reprapguru prusa i3 with PLA
|
Re: RepRap Guru i3 Printer Kit (Official Thread) March 05, 2017 12:57PM |
Registered: 7 years ago Posts: 2 |
Quote
MostTornBrain
Quote
adlammons
I am running REPRAP_GURU_MARLIN_V.2 but it doesn't include auto bed leveling. MARLIN 1.1.0RC8 does have auto bed leveling. However, I can't tell if it would be an issue to use it instead.
Is there a newer version of the Marlin software?
Or, can I just load the Marlin-1.1.0-RC8?
I've switched to the RC8 version of Marlin and it is working well for me, however I have not enabled the bed leveling as I don't have the hardware for it. The RC8 firmware has some new features which are very nice. However, the Marlin firmware configuration files have changed a lot since the REPRAP_GURU version (which was from 2014, I think) so it is a bit tedious having to make sure you bring over all the right settings from configuration.h and configuration_adv.h.
One key thing is they've changed the algorithm for how the jerk and acceleration are calculated, so you may need to adjust the value your were using (I've found cutting it by 50% was needed) otherwise you may notice some worse ringing in the walls of your prints after the nozzle turns a corner.
If you enable and calibrate the LIN_ADVANCE feature, it makes a significant improvement in the quality of the prints. There's a tutorial here for it: [marlinfw.org]
Maybe you could share your copy to help the less experienced of us on getting this setup and working? Im working on getting this all setup and for me ill just have a lot of trial and error. But maybe at the least we will get this going with help as a group.
|
Re: RepRap Guru i3 Printer Kit (Official Thread) March 05, 2017 01:35PM |
Registered: 7 years ago Posts: 8 |
Quote
Turboaddiction
Maybe you could share your copy to help the less experienced of us on getting this setup and working? Im working on getting this all setup and for me ill just have a lot of trial and error. But maybe at the least we will get this going with help as a group.
Here's a link to the configuration.h and configuration_adv.h I am using with RC8 for my Reprap Guru.
[www.stormyprods.com]
Note: you should definitely double-check them using a source code diff tool to make sure all the changes I've made make sense for your setup. For example, I've added a separate print cooling fan on pin 9 (independent of the nozzle heat element cooling fan), enabled the filament change support, Ive enabled LIN_ADVANCE, etc.
|
Re: RepRap Guru i3 Printer Kit (Official Thread) March 05, 2017 08:35PM |
Registered: 7 years ago Posts: 3 |
Im looking into buying one of these printers. One thing that I've noticed with the DIY i3 printers is that a lot of their power supplies are catching fire, sparking, or smoaking... Possibly dangerous stuff. Has that ever been an issue with this printer or is this one safer than the others?
|
Re: RepRap Guru i3 Printer Kit (Official Thread) March 08, 2017 10:38PM |
Registered: 7 years ago Posts: 1 |
My stepper motors crash into ends during manual controll testing and home command. Someone said to flip the stepper controllers wiring - did it work for anyone else. What color wires on the controllers should be oriented down ? Instructions showed RED.
Edited 1 time(s). Last edit at 03/08/2017 10:40PM by pdotterw.
Edited 1 time(s). Last edit at 03/08/2017 10:40PM by pdotterw.
|
Re: RepRap Guru i3 Printer Kit (Official Thread) May 15, 2017 04:39AM |
Registered: 6 years ago Posts: 26 |
Hello, I have ordered the RepRapGuru acrylic frame (and only that) and I'm in the middle of constructing the Prusa i3 Rework 3D printer based on that. I found that the 10mm threaded rods from the Rework Build instructions (the base bed with the heated bed on top) are not fitting into the frame, in fact they have to be 8mm in order to fit. I've seen in the original dxf file that there is a distance of 10mm. What is the design detail here and what are the consequences for the BOM? Shall I replace those 2 10mm rods by 8mm rods? Moreover, in the back triangular parts, I've seen two long holes opening towards the back, I guess that is supposed to hold one of the rods of the heatbed carrier, which should also be a 8mm rod. For those 8mm rods, is there any modifications necessary in the printed parts? I assume that an 8mm rod is not tight enough in a 10mm hole.
Thanks for your suggestions on this topic.
Kind regards
Michael
Thanks for your suggestions on this topic.
Kind regards
Michael
|
Re: RepRap Guru i3 Printer Kit (Official Thread) May 21, 2017 02:28PM |
Registered: 7 years ago Posts: 1 |
Hi!
I Love my ReprapGuru.
I do have an issue where one of my z threaded rods were bent on arrival.
I've been making due for now but it causes some wobble effects, especially on larger prints.
I'm going to be switching to a lead screw z axis, however I'm having a hard time finding printed parts that work with the Reprapguru.
Either the lead screw is too far from the guide rod...or won't fit the frame right.
Before I start designing and printing my own...do you guys have plans/stl's of the z threaded rod/guide rod holder? (I don't know what else to call it) but it holds the bearing for the z axis threaded rods on the top of the frame. The odd shaped piece that you screw on top of the left and right of the frame.
Thanks so much!
|
Re: RepRap Guru i3 Printer Kit (Official Thread) May 24, 2017 02:30PM |
Registered: 6 years ago Posts: 28 |
I have a RepRap Guru Prusa i3 kit I bought a little over a year ago and have been really happy with it overall.
Have definitely had my share of issues including but not limited to:
- a small fire but not the fault of the power supply but rather my wiring and the jack on the ramps board coming loose
- blowing the power regulator on the arduino board by flipping the switches around (now using USB to give it regulated 5V power, needs it for octopi control anyhow)
- used cables that were too long for the display and cause it to not connect properly
- y carriage is deforming over time so going to need to replace that soon, the bed height adjustment screws are getting to their limit (again not entirely the fault of the original design, I put it in an enclosure for nylon and other high temp plastic prints and the heated enclosure probably doesn't help the existing plastic parts in the machine)
All those issues aside it actually works surprisingly well and having gone through building it and replacing all sorts of parts and tweaking things I have a really good understanding of how it works and what the limiting factors are and how to continue to improve it the quality and types of parts I can make. So I still call it a win for how cheap the kits are now especially.
Regarding updating the firmware, I just decided to upgrade to the latest to open the opportunity to add automatic bed leveling as an option (no sensor yet but nice to have that option) and needed to update the config for my new hot end and using a bowden setup now so figured I'd get it all pulled up to current. I used meld to compare the old config/folder with the current marlin and just moved over the values that seemed to matter. After doing that I had to go and change the config to flip some of the stepper directions (could also switch the cable around but my board is in a box so easier to change the config and reupload).
Can see my diff here:
[github.com]
Can also just grab that whole repo and flash it onto your mega board (open the Marlin.ino and upload).
If you have problems let me know and will see if I can help.
**Edit**
One thing to note you may need to adjust the temp sensor selection based on the actual thermistor/thermocouple you have for your hotend and your heated bed (I have the original heated bed and a e3d v6 hotend upgrade for the thermoplastics).
**Edit 2**
Also I have a display and SD card if you don't have those you'd want to comment those lines back out but can still use the motor step settings since those are primarily what matters in terms of basic functioning.
Edited 2 time(s). Last edit at 05/24/2017 02:39PM by wafflejock.
|
Re: RepRap Guru i3 Printer Kit (Official Thread) May 25, 2017 07:00PM |
Registered: 6 years ago Posts: 7 |
|
Re: RepRap Guru i3 Printer Kit (Official Thread) May 25, 2017 07:11PM |
Registered: 6 years ago Posts: 28 |
Lancer3D need some more details about what's going on to say what to try next. When you say the LCD turns on do you mean you get the menu or just the backlight turns on? Did you flash the marlin code onto the mega board already? does it show as successfully uploaded when doing that? If you don't get any power on the mega board when you hook it up to the 12V it's likely you blew the voltage regulator on the mega board but you can still power it over USB so not the end of the world just means you need to have a USB hooked up to power for that to function. I also blew my voltage regulator by having the switch connections backwards (it's noted in the instructions with red text but I still managed to miss it), if you get the switches flipped around correctly then you'll just need to use USB power going forward (not a problem if you use OctoPi or whatever to control the printer over USB anyhow just means if you were expecting to just use SD card to transfer you'll need an extra USB power supply).
Let me know if you can flash the code to the mega or if it doesn't get that far, if it gets that far you'll want to try and home/auto home the printer to set the 0,0,0 point before trying to move anything around, also the extruder typically won't turn until it's above the min temp (170C I believe by default).
Let me know if you can flash the code to the mega or if it doesn't get that far, if it gets that far you'll want to try and home/auto home the printer to set the 0,0,0 point before trying to move anything around, also the extruder typically won't turn until it's above the min temp (170C I believe by default).
|
Re: RepRap Guru i3 Printer Kit (Official Thread) May 26, 2017 06:48PM |
Registered: 6 years ago Posts: 7 |
Thanks for the reply Wafflejock. The LCD powers on, but only the backlight. No writing just blank letter blocks.
So I will assume the 5v regulator is toast. Is that on the Ramps or the mega board?
Forgive my ignorance to the software/programming aspect. I did not know the Marlin had to be flashed to the mega. I assumed the Arduino had the Marlin on it. Can you help this clueless gather and son with directions? Or send some useful links? We have been searching the forum, bit dmost the time it's like a foreign language.
Thanks again. Anything helps
|
Re: RepRap Guru i3 Printer Kit (Official Thread) May 26, 2017 06:58PM |
Registered: 6 years ago Posts: 7 |
Thanks for the reply Wafflejock. I didn't see the reply button, so now my response is a new comment on the thread. Nothing like a newbie.
The LCD on gets the backlight with letter blocks, no writing. I'll assume the 5v regulator is toast, but is that on the mega or ramps? I'm pretty sure we got the wiring right.
Forgive the ignorance to all this programming/software stuff. My son and I had no idea we are supposed to flash Marlin to the mega. I honestly thought this was more plug and play when I bought it for my 14yr old son. Can you guide us to links for flashing and setup, or send us some?
Thanks a bunch in advance.
|
Re: RepRap Guru i3 Printer Kit (Official Thread) May 26, 2017 09:23PM |
Registered: 6 years ago Posts: 28 |
Hiya Lancer3D,
No worries I just joined the forum here too figured if I was going to do the legwork to get the configuration updated to use the latest firmware I might as well join and share what I was working on. Honestly don't recall if the Arduino Mega board came preflashed with the code or not but doesn't hurt to update it really and can do some diagnostics with the mega board by itself to make sure that's operating okay.
When the Arduino is plugged into a USB power supply it will use the 5V supplied by that power supply for the microprocessor at the core of the board that is doing all the work (usually a Atmel 328P chip but some small variations depending on the exact board), the 5V needs to be pretty clean but USB power is regulated already so that doesn't go through the regulator on the Arduino. If you hook up 9-16V to the VIN and GND or through the barrel jack connector on the Arduino then the power goes through the voltage regulator on there (comes out on the 5V line/pin), also regardless of where the 5V comes from it delivers that through the ramps board to the switches and to the A4988 stepper boards that sit on the RAMPS board (basically the RAMPS board is just taking in the main power and makes it easy to wire all the stepper drivers to the arduino, the ramps board also has the circuitry I think transistors or FETs for the heated bed and hot end power). So long story short if you ended up blowing the AMS1117 5V regulator on the Arduino (near the power input) then you'd need to use USB power for the regulated 5V for the 328P chip and the stepper driver chips and anything else using that 5V supply. The stepper drivers themselves handle controlling the pulses of power going through the coils in the stepper motors but the stepper motor power comes straight off the 12V not through the regulator.
Anyhow to get back to what to do with that info. You can plug the mega board in via USB and download the Arduino IDE for flashing software onto the board.
[www.arduino.cc]
Once you have the Arduino IDE installed in the file->examples menu there are sample "sketches" which is the name for a project in Arduino lingo. You can open the Blink example, then go to the tools menu to select the proper board and verify the port shows something selected (typically only the arduino is a serial device available) then click the Upload button in the top left. You'll see the tx/rx lights flash on the mega as it writes a program over USB and it should blink the LED on the board on and off every second once the program is running. This is just a good baseline to be sure the Mega board itself is functioning as expected (you can also try detaching from the computer and powering with a 9V + into the VIN and - on the GND, if the regulator is ok it should run fine if not it won't run. I linked a fork I made of the actual code you need for the printer above with the configuration updated for the reprap guru i3 kit, basically just adjusting the stepper speed limits and mm/s feed rate based on the components used for this kit.
Originally I used the firmware provided in a zip I believe but you might as well use the updated version it has some fixes and cleanup in the configuration and allows for more extruders and bed level sensing and other upgrades. To get that go here:
[github.com]
Click the green "clone or download" button and download the project as a zip file then extract it somewhere on your computer. Open the Marlin.ino file in the Arduino IDE and check out the Configuration.h file you can see my changes to that file from what is in the original Marlin configuration here:
[github.com]
See my comment above about what I changed that's specific to my changes to the i3 guru kit I bought a year back, but the gist is make sure the hot end option is the right one for the thermistor you have in the hot end I changed mine for an e3d v6 all metal hot end for printing with nylon and plastics that need higher temperature to melt.
One last thing is for the LCD you'll need to be sure it's the same one I enabled or if you have a different LCD you'll want to comment out the one I enabled and enable the appropriate one. For the LCD you'll also need to install the u8glib which is the library for doing the graphics display.
Once you have the Configuration.h file updates for your hotend thermistor you can upload to the mega board and you should be in good shape. You can use the serial monitor in the Arduino IDE to see messages from the board as it boots up and runs as well which can be helpful for diagnostics, usually once it's flashed though I just jump into Repetier to make sure it can auto home from there and then control each of the motors. When you first auto home, be ready to hit the abort on the ramps board in case the motors are driving things the wrong direction or don't properly meet up with a switch or switches are in the wrong position and things start to smash into each other (not that I had that happen . If something is going backwards you can see in the diff of the configuration linked above where I'm telling it to reverse some of the steppers so just toggle those true/false values to get things moving the right way or flip around the wire plugged into the ramps board either way will work. Make sure if you do start plugging and unplugging things on the board it's all powered down until things are plugged in or you can accidentally short things or just cause sparks and rushes of current through components and wires which they don't seem to appreciate.
Anyhow good luck let me know if any of that helped or if you get hung up trying to diagnose what's going wrong.
PS sorry to hear it about the expectations of a out of the box ready to go thing, I knew kit == lots of time but for me, but building machines is a lot of fun for me and I already have a lot of arduino experience so not as much to swallow at once. On the plus side it will function well once you get everything together, suggest using PLA at first as it is the most forgiving and easiest to get to stick to the bed, not warp etc.
PPS picture of my printer in action here just got done replacing the plastic y carriage part with a piece of 16gauge steel from the home depot. Painted it black but got a couple of scratches in the paint on account of impatience to just get it put back together:
[photos.google.com]
Still working like a champ.
Edited 2 time(s). Last edit at 05/26/2017 10:21PM by wafflejock.
No worries I just joined the forum here too figured if I was going to do the legwork to get the configuration updated to use the latest firmware I might as well join and share what I was working on. Honestly don't recall if the Arduino Mega board came preflashed with the code or not but doesn't hurt to update it really and can do some diagnostics with the mega board by itself to make sure that's operating okay.
When the Arduino is plugged into a USB power supply it will use the 5V supplied by that power supply for the microprocessor at the core of the board that is doing all the work (usually a Atmel 328P chip but some small variations depending on the exact board), the 5V needs to be pretty clean but USB power is regulated already so that doesn't go through the regulator on the Arduino. If you hook up 9-16V to the VIN and GND or through the barrel jack connector on the Arduino then the power goes through the voltage regulator on there (comes out on the 5V line/pin), also regardless of where the 5V comes from it delivers that through the ramps board to the switches and to the A4988 stepper boards that sit on the RAMPS board (basically the RAMPS board is just taking in the main power and makes it easy to wire all the stepper drivers to the arduino, the ramps board also has the circuitry I think transistors or FETs for the heated bed and hot end power). So long story short if you ended up blowing the AMS1117 5V regulator on the Arduino (near the power input) then you'd need to use USB power for the regulated 5V for the 328P chip and the stepper driver chips and anything else using that 5V supply. The stepper drivers themselves handle controlling the pulses of power going through the coils in the stepper motors but the stepper motor power comes straight off the 12V not through the regulator.
Anyhow to get back to what to do with that info. You can plug the mega board in via USB and download the Arduino IDE for flashing software onto the board.
[www.arduino.cc]
Once you have the Arduino IDE installed in the file->examples menu there are sample "sketches" which is the name for a project in Arduino lingo. You can open the Blink example, then go to the tools menu to select the proper board and verify the port shows something selected (typically only the arduino is a serial device available) then click the Upload button in the top left. You'll see the tx/rx lights flash on the mega as it writes a program over USB and it should blink the LED on the board on and off every second once the program is running. This is just a good baseline to be sure the Mega board itself is functioning as expected (you can also try detaching from the computer and powering with a 9V + into the VIN and - on the GND, if the regulator is ok it should run fine if not it won't run. I linked a fork I made of the actual code you need for the printer above with the configuration updated for the reprap guru i3 kit, basically just adjusting the stepper speed limits and mm/s feed rate based on the components used for this kit.
Originally I used the firmware provided in a zip I believe but you might as well use the updated version it has some fixes and cleanup in the configuration and allows for more extruders and bed level sensing and other upgrades. To get that go here:
[github.com]
Click the green "clone or download" button and download the project as a zip file then extract it somewhere on your computer. Open the Marlin.ino file in the Arduino IDE and check out the Configuration.h file you can see my changes to that file from what is in the original Marlin configuration here:
[github.com]
See my comment above about what I changed that's specific to my changes to the i3 guru kit I bought a year back, but the gist is make sure the hot end option is the right one for the thermistor you have in the hot end I changed mine for an e3d v6 all metal hot end for printing with nylon and plastics that need higher temperature to melt.
One last thing is for the LCD you'll need to be sure it's the same one I enabled or if you have a different LCD you'll want to comment out the one I enabled and enable the appropriate one. For the LCD you'll also need to install the u8glib which is the library for doing the graphics display.
Once you have the Configuration.h file updates for your hotend thermistor you can upload to the mega board and you should be in good shape. You can use the serial monitor in the Arduino IDE to see messages from the board as it boots up and runs as well which can be helpful for diagnostics, usually once it's flashed though I just jump into Repetier to make sure it can auto home from there and then control each of the motors. When you first auto home, be ready to hit the abort on the ramps board in case the motors are driving things the wrong direction or don't properly meet up with a switch or switches are in the wrong position and things start to smash into each other (not that I had that happen
. If something is going backwards you can see in the diff of the configuration linked above where I'm telling it to reverse some of the steppers so just toggle those true/false values to get things moving the right way or flip around the wire plugged into the ramps board either way will work. Make sure if you do start plugging and unplugging things on the board it's all powered down until things are plugged in or you can accidentally short things or just cause sparks and rushes of current through components and wires which they don't seem to appreciate.Anyhow good luck let me know if any of that helped or if you get hung up trying to diagnose what's going wrong.
PS sorry to hear it about the expectations of a out of the box ready to go thing, I knew kit == lots of time but for me, but building machines is a lot of fun for me and I already have a lot of arduino experience so not as much to swallow at once. On the plus side it will function well once you get everything together, suggest using PLA at first as it is the most forgiving and easiest to get to stick to the bed, not warp etc.
PPS picture of my printer in action here just got done replacing the plastic y carriage part with a piece of 16gauge steel from the home depot. Painted it black but got a couple of scratches in the paint on account of impatience to just get it put back together:
[photos.google.com]
Still working like a champ.
Edited 2 time(s). Last edit at 05/26/2017 10:21PM by wafflejock.
|
Re: RepRap Guru i3 Printer Kit (Official Thread) June 11, 2017 05:10PM |
Registered: 6 years ago Posts: 7 |
|
Re: RepRap Guru i3 Printer Kit (Official Thread) July 24, 2017 02:16PM |
Registered: 6 years ago Posts: 3 |
Just finished building my REPRAPGURU Prusa I3 V2 printer over the weekend. What a fun project for me and my 12 year old son!! We got all the way through the build including flashing the Arduino. We also did the Auto home via the LCD screen and all worked great. Once we tried connecting the printer in Repetier a "fatal error" appeared and also the LCD display had an error message (though it may have already been there - don't recall). The error on the Repetier software was a bit cryptic saying the temperature needs to be reset, set it after restarting use code M999.- I think. I'm not at the computer or printer right now. I will edit this post when I get home if necessary. On the LCD screen it states err: MINTEMP. I have investigated this to possibly be associated with the thermistors (heated bed and/or hot end). On the LCD screen, both the hot end and the heated bed read 0/0 degrees Celsius. I tried manually, via the LCD screen, to heat up the Hot End and the Heated bed to no avail. I also unpowered everything and tested both thermistors. This is where I am a bit concerned. I confess I am very new to all of this, including the use of a multimeter. When I tested the thermistors by unplugging them from the RAMPS board and touching the leads to the two silver exposed squares on the side of the coupler, I got no reading on them. The digital readout remained at 0L. I switched the multimeter dial to all possible selections in the Ohm part of the dial - still no reading. Does this mean the thermistors are shot? Could it be a bad connection? Is there another way to test them? Is this why I get the MINTEMP error and the fatal error in Repetier? Could it be an issue with the firmware flash? I read in another thread that if the reading is infinite, the thermistor is likely shot. Is what I describe above an "infinite reading"? This has been a fun project for us so far - including this bit of troubleshooting.
Getting ready to call REPRAPGURU, but wanted to see if anyone else experienced something similar.
Thanks!
Edited 1 time(s). Last edit at 07/24/2017 02:27PM by ManShear.
Getting ready to call REPRAPGURU, but wanted to see if anyone else experienced something similar.
Thanks!
Edited 1 time(s). Last edit at 07/24/2017 02:27PM by ManShear.
|
Re: RepRap Guru i3 Printer Kit (Official Thread) July 24, 2017 02:41PM |
Registered: 6 years ago Posts: 7 |
When I got my reprap Guru a few months ago, the bed was actually missing the thermistor completely (so I got no reading, just like you). No big deal, I just printed without heating the bed for a few days. I emailed the manufacturer and they promptly sent a replacement part, no questions asked.
|
Re: RepRap Guru i3 Printer Kit (Official Thread) July 24, 2017 03:39PM |
Registered: 6 years ago Posts: 3 |
Quote
3disforme
When I got my reprap Guru a few months ago, the bed was actually missing the thermistor completely (so I got no reading, just like you). No big deal, I just printed without heating the bed for a few days. I emailed the manufacturer and they promptly sent a replacement part, no questions asked.
Thanks for the quick reply, 3disforme, however, we are not able to heat either the hot end or the heated bed. We tried doing so through the LCD screen and through the Repetier software. We seem to be able to control everything but the heated bed and hot end through either the LCD or Repetier. We've been able to control all the axis motors and the extruder fan on the LCD. We've been able to control the extruder fan with the Repetier software. We tried homing the extruder head with Repetier, but it wouldn't do so. Also, though we get no reading on the LCD for the hot end or heated bed other than 0/0, they both remain cool to the touch, which to me is a good thing. I don't think I'd want them to heat up with no operating thermistor to tell me the temperature. So, we don't seem to have the option you had since the hot end thermistor doesn't seem to register and I'm also not able to heat up the hot end.
Haven't even began to contemplate printing anything... I plan on calling REPRAPGURU when I get home. Hopefully the customer experience will be as good as yours!!
|
Re: RepRap Guru i3 Printer Kit (Official Thread) July 24, 2017 03:51PM |
Registered: 6 years ago Posts: 7 |
The extruder fan should be always on (not controllable). The fan control in Repetier and on LCD is for a cooling fan which can be added later. The extruder fan is supposed to run %100 at all times to keep the filament from melting inside your extruder. I've seen a lot of people in forums say that they have disabled the extruder fan without issues but thought I'd mention it. So no resistance reading on the heat block thermistor either? Hmmm... Hopefully tech support gets you quick resolution! Working through these issues is a great way to familiarize yourself with the printer. Good luck! Let me know if I can help. Also, Facebook has some great 3D printing groups with a lot of experienced users. I've learned a lot by reading through comments in groups!
|
Re: RepRap Guru i3 Printer Kit (Official Thread) July 24, 2017 04:25PM |
Registered: 6 years ago Posts: 7 |
|
Re: RepRap Guru i3 Printer Kit (Official Thread) July 24, 2017 04:51PM |
Registered: 6 years ago Posts: 3 |
Quote
3disforme
The extruder fan should be always on (not controllable). The fan control in Repetier and on LCD is for a cooling fan which can be added later. The extruder fan is supposed to run %100 at all times to keep the filament from melting inside your extruder. I've seen a lot of people in forums say that they have disabled the extruder fan without issues but thought I'd mention it. So no resistance reading on the heat block thermistor either? Hmmm... Hopefully tech support gets you quick resolution! Working through these issues is a great way to familiarize yourself with the printer. Good luck! Let me know if I can help. Also, Facebook has some great 3D printing groups with a lot of experienced users. I've learned a lot by reading through comments in groups!
Hmmm... So, does that mean I've connected the extruder fan incorrectly? If so, where am I supposed to connect it?
Also, all of the numbers listed on their website and in the literature that came with the printer are either for T-Mobile sales support, or a survey to win a cruise. Sending an email to them and hoping for the best.
|
Re: RepRap Guru i3 Printer Kit (Official Thread) July 24, 2017 07:06PM |
Registered: 6 years ago Posts: 7 |
I just googled "reprap Guru" and found a number on their website. Ended up just using email to get it sorted out though because their techs were busy when I called. Yes, I recommend double checking your wiring. Use the PDF file, not the video. Video is for an older version and there are slight differences.
|
Re: RepRap Guru i3 Printer Kit (Official Thread) August 25, 2017 08:51AM |
Registered: 7 years ago Posts: 2 |
I upgraded to the new marlin firmware 1.1.4 and I run into a small problem, the heated bed now takes forever to heat to temp. when I use the old reprapguru firmware (v.2?) its back to normal (normal meaning that it heats up fast). Any help would be appreciated, thanks.
I'm at work at the moment so I am unable to change
#define TEMP_SENSOR_BED 6
to
#define TEMP_SENSOR_BED 1
...think this would help?
Edited 1 time(s). Last edit at 08/25/2017 08:52AM by abcdan71.
I'm at work at the moment so I am unable to change
#define TEMP_SENSOR_BED 6
to
#define TEMP_SENSOR_BED 1
...think this would help?
Edited 1 time(s). Last edit at 08/25/2017 08:52AM by abcdan71.
|
Re: RepRap Guru i3 Printer Kit (Official Thread) August 31, 2017 10:43PM |
Registered: 6 years ago Posts: 6 |
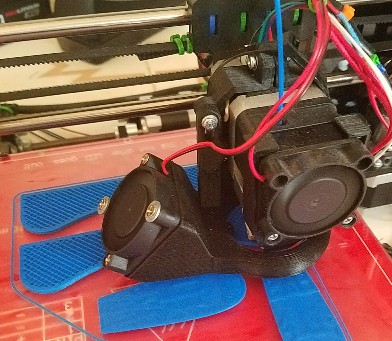
My printer kit is working excellently, however on some smaller diameter towers, they stay too hot and droop and sag. I read that a work cooling fan could be added to solve this problem, so I ordered a fan, printed the mount and funnel from thingsiverse... and all was going well until... I could not find a place on the ramps board to plug in a second fan. Any good ideas??
Also... I found out why it is better to print from the SD card than from the printer... I was about 90 minutes into a 2 hour print when Windows decided to stop for an update... a stationary hot hot-end sitting still on a print and cooling does nothing for the quality of the print....
Thanks...
Gary
Also... I found out why it is better to print from the SD card than from the printer... I was about 90 minutes into a 2 hour print when Windows decided to stop for an update... a stationary hot hot-end sitting still on a print and cooling does nothing for the quality of the print....
Thanks...
Gary


Sorry, only registered users may post in this forum.