I admit defeat, A little help with my P3steel of you please.
Posted by voyager
|
I admit defeat, A little help with my P3steel of you please. May 15, 2016 12:50PM |
Registered: 7 years ago Posts: 7 |
Hey guy's
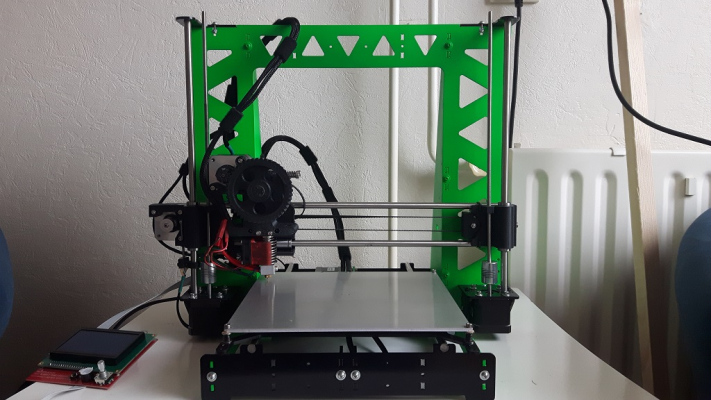
I have build this P3steel.
And after the first hiccups I was able to print very nice cubes, I I thought lets try to print some upgraded parts because the ones that came with the kit really suck like the end stops etc.
But soon I discovered it was not that easy. The craigs wade extruder sometimes deposits big blobs of filament, so I took the e3d lite hotend apart again and again and discoverd that there was nothing wrong with it.
I already ordered a bowden extruder so I did a conversion, calibrated the software and after that no more blobs yeay!
I noticed that my prints now were way more shiny then before, so I thought this was a temperature problem, I replaced the PTC because the e3d head was a big mess going true the big blobs of extruded material.
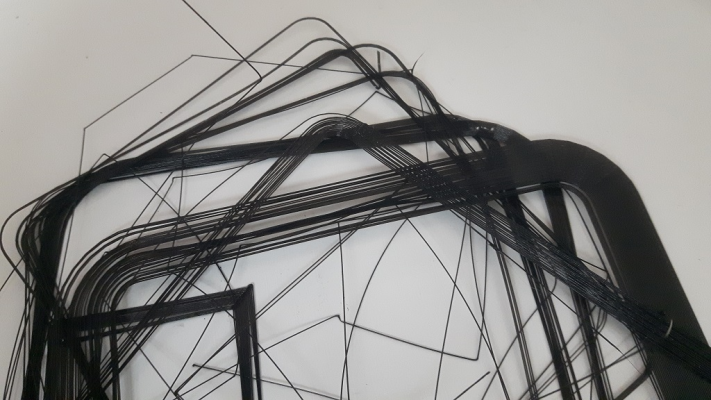
But there is something strange, if you look at the brim in picture 2 it's one solid mass.
This is how it looks now....
Is this under extrusion? or to low of a temperature? maybe the cheap PTC is completely bonkers. But it's sticking to nothing any more, not glue stick not painters tape nothing.
Before I started this endeavor I tough I was prepared, watched tons of youtube vids reading up the forum's but I admit defeat.
If you have any suggestions please let me know, all I wanted was to print the p3steel toolson parts, so I can dump the brittle as hell ABS parts that came with my kit.
Regards
Sebastian
|
Re: I admit defeat, A little help with my P3steel of you please. May 15, 2016 02:12PM |
Registered: 8 years ago Posts: 35 |
What slicer/settings are you using for that last print ?
I also have a P3 Steel and recently had issues with bridging which I think is due to having the wrong extruder nozzle diameter. I thought it was 0.3mm, and after I did a free extrusion very slowly and got 0.55mm my print quality improved. Try doing the same test, and checking the other calibrations (x,y,z and extruder steps) and double check your filament diameter.
Paul.
--
[www.paulhurley.co.uk]
|
Re: I admit defeat, A little help with my P3steel of you please. May 15, 2016 03:00PM |
Registered: 7 years ago Posts: 7 |
Hey Paul
This is my cura setting
Layer height 0.2
Shell thickness 0.8
Enable Retraction
Bottom top thickness 0.8
Fill Density 15%
Printspreed mm/s 40
print temp 230
bed 0
Diameter mm 1.75
Flow 100%
Nozzle size 0.4
Retraction speed 40.0
Distance 4.5
Initial layer thickness 0.2
Initial layer line width 100%
Its the same as for all my test prints
Sebastian
|
Re: I admit defeat, A little help with my P3steel of you please. May 18, 2016 11:51PM |
Registered: 8 years ago Posts: 71 |
Hey Voyager. I have the Toolson edition, and it was a pain in my ass getting it working correctly. So I feel your pain. First, you didn't state what material you are printing. That would help before going down some recommendations. You mentioned brim which I assume is the same as skirt in slic3r. It can be solid depending on how many lops it does. It's hard to tell if it's under extruding from that pic. Under extrusion leads to gaps on solid layers as well as see through walls. I use PETG and can share some of my successes if you are using it too.
Besides that, calibrate your esteps and make sure the belts are tight, like minimal movement tight. You can also calibrate the extrusion multiplier printing a thin walled part. That never worked well for me. I have an e3d v6 with .4 nozzle, and I set my print width at .48. Works well. Make sure your Bowden teflon tube is cut as short as it needs to be to reach the farthest edge. It acts like a spring, so there is no need for extra slack. Make sure your z axis is level. There is a part you can print on thingverse that calibrates this.
Besides that, calibrate your esteps and make sure the belts are tight, like minimal movement tight. You can also calibrate the extrusion multiplier printing a thin walled part. That never worked well for me. I have an e3d v6 with .4 nozzle, and I set my print width at .48. Works well. Make sure your Bowden teflon tube is cut as short as it needs to be to reach the farthest edge. It acts like a spring, so there is no need for extra slack. Make sure your z axis is level. There is a part you can print on thingverse that calibrates this.
|
Re: I admit defeat, A little help with my P3steel of you please. May 19, 2016 03:22AM |
Registered: 7 years ago Posts: 7 |
Skirt: around the object, not touching - Used to prime the extruder
Brim: around the object, connected to it - Used to help with adhesion
Raft: under the object - greatly improves adhesion, but at a price (time & material)
Your brims look like mine when the print bed isn't properly calibrated - too much space between bed and nozzle, the extruded material isn't hitting the bed in melted phase but almost in glas phase so it doesn't stick to it properly.
I had a lot of issues with my acrylic bed carrier which flexed to much before I added a fourth linear bearing to it (before doing so, be sure your rods are parallel in X AND Z planes. I also added a home made heat shield between carrier and bed.
Good luck
Rainer
|
Re: I admit defeat, A little help with my P3steel of you please. May 23, 2016 01:18AM |
Registered: 9 years ago Posts: 705 |
Basics first. Measure all four corners of your bed and adjust to the exact same width between the glass and the mounting plate. Let's say it is 1/2'. Now, center the plate below the nozzle and Z home. Move the nozzle to the middle (out of the way) and measure the distance between the upper x rod and the glass at the left and right. If it's uneven there is a problem. On my I3 I eliminated the right Z motor wiring and switched to a single motor with belt and pulley system. This eliminated the uneven 2 z stepper motor movement which was off by as much as .060 inches after homing z. You can turn one z leadscrew (before every print) to correct for level. Next, Home all and check all four corners of the build plate with a piece of copy paper to insure plate level. You will probably see that after leveling the middle of the plate is tighter than the corners. That's just the nature of the beast. Warped plate because of 4 point leveling system. See our "Digital Dentist's" Son Of Megamax" blog.
Sorry, only registered users may post in this forum.


