3DP 18 Hictop Pls Help
Posted by darrenbarker
|
3DP 18 Hictop Pls Help May 02, 2017 12:13PM |
Registered: 7 years ago Posts: 10 |
Hi there,
I purchased a 3dp 18 from Amazon and it has been a lot of trouble and faulty parts.
1) Currently, the Y Axis when I Prepare/Move/Y Axis and it travels and hits the limit switch, the motor stops--like normal.
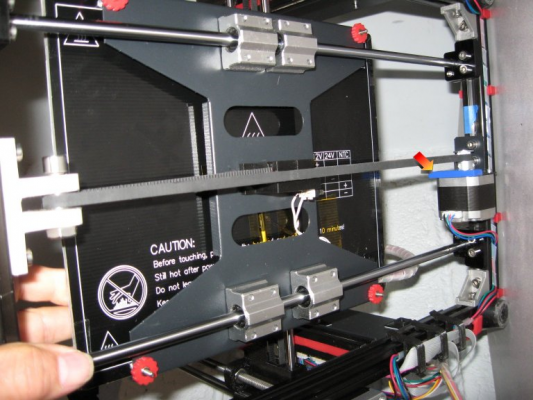
When I auto home, the motor does not stop. It continues to travel and then throws the belt off. Here is a
video of it:
[youtu.be]
2) When the Z Axis auto home, the motor on the left turns and when the carriage touches the Z limit, it stops. The Z motor on the right, continues to turn and click while the left has stopped properly. This results in a crooked carriage. One side is moving down, the other side is not--motors thrown out of sync. The set screws are tight.
It has been six weeks since my purchase and things are still not functioning. I find it hard to get help with problems and Hictop is a couple days to reply and then they pick and choose what they reply to, missing the rest of the question. Any help would be appreciated.
Thank you
Edited 1 time(s). Last edit at 05/03/2017 09:14AM by darrenbarker.
|
Re: 3DP 18 Hictop Pls Help May 03, 2017 01:14AM |
Admin Registered: 13 years ago Posts: 7,000 |
Well first off that video looks like you are showing us the Y axis
from when you are facing the front of the machine (ie can see the lcd)
X is left to right movement
Y is front to back movement
Z is up and down movement
I would suspect you have your X and Y and one of your Z stepper wires swapped over... so its getting really confused.
Check you have them correct according to the details I just listed about which axis is which.
Also check your have correct endstops in correct location on controller, I see that it has + and - endstop plugs
X endstop is at the left so should be plugged into X- plug
Y endstop is being hit when plate is fully back. this should be plugged into the Y- plug
Z endstop is at the bottom, so this should be plugged into the Z- plug
NB never make any changes to the machine while its powered on.
Edited 4 time(s). Last edit at 05/03/2017 01:24AM by Dust.
|
Re: 3DP 18 Hictop Pls Help May 03, 2017 09:18AM |
Registered: 7 years ago Posts: 10 |
Thank you so very much for your response.
I have no idea why I wrote X when it is obviously Y--I think I may have stared at it too long!
I am pretty confident the wiring is correct as before this happened, I did manage to print the Bench Boat and one other test.
I will check all three of my stepper motor wirings and the end stop/limit switches tonight and hope you're right. I'm more than happy to admit I made a mistake if it gets it working!
Will get back to you, thank you.
|
Re: 3DP 18 Hictop Pls Help June 27, 2017 12:16PM |
Registered: 6 years ago Posts: 1,863 |
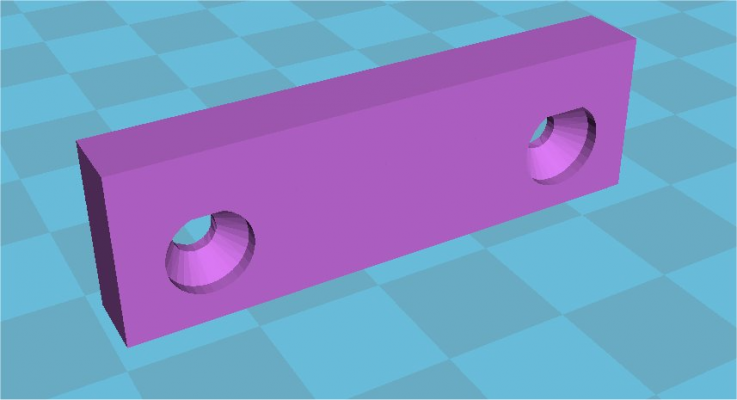
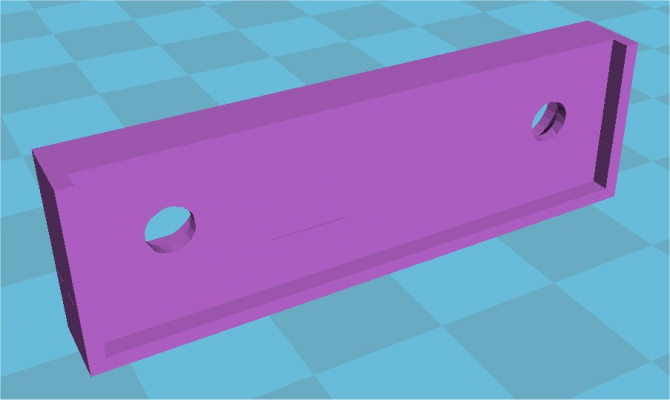
The y end stop switch appears not switching, Had the same problem, made a Y end stop Stepper mount.
y_motor_end_stop.stl
To temporally fix tape something ridged to the edge of the Stepper motor to extend the Stepper motor edge over, Not far as it will get into the way of the Belt.
If you reach under the bed an manually push the end stop switch does it stop then.
if not then.
It could be a bad connection to the end stop switch and it is not switching at all. You can do a continuity check with a meter across the Connector.
Edited 6 time(s). Last edit at 06/27/2017 12:28PM by Roberts_Clif.
|
Re: 3DP 18 Hictop Pls Help June 27, 2017 12:53PM |
Registered: 7 years ago Posts: 10 |
Quote
Roberts_Clif
The y end stop switch appears not switching, Had the same problem, made a Y end stop Stepper mount.
[attachment 95640 y_motor_end_stop.stl]
To temporally fix tape something ridged to the edge of the Stepper motor to extend the Stepper motor edge over, Not far as it will get into the way of the Belt.
If you reach under the bed an manually push the end stop switch does it stop then.
if not then.
It could be a bad connection to the end stop switch and it is not switching at all. You can do a continuity check with a meter across the Connector.
Anything mounted to moving parts is going to cause us trouble! Thank you for making the mount. Where did you anchor it to and did you have to drill? Can you include an image of it mounted?
Thanks!
|
Re: 3DP 18 Hictop Pls Help June 27, 2017 04:50PM |
Registered: 6 years ago Posts: 1,863 |
It mounts to the Y Stepper motor. remove the two screws on the side of the Switch and return the screws through holes in the y_motor_end_stop mount.
Holes are already in the Mount and they are tapered to allow use of same screws
Mount has an edge to fit the metal Stepper Motor Bracket
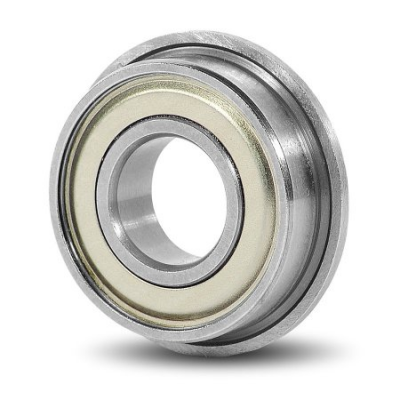
Have replaced the 608ZZ Y-Bearing with 2 half the width Flanged MF128ZZ Bearings makes alignment easier.
Make sure the Flange is on outside of the Belt
Edited 13 time(s). Last edit at 06/27/2017 05:22PM by Roberts_Clif.
|
Re: 3DP 18 Hictop Pls Help June 28, 2017 08:58AM |
Registered: 7 years ago Posts: 10 |
|
Re: 3DP 18 Hictop Pls Help June 28, 2017 08:58PM |
Registered: 6 years ago Posts: 1,863 |
|
Re: 3DP 18 Hictop Pls Help June 29, 2017 04:43AM |
Registered: 7 years ago Posts: 163 |
The easy way I found was to push the bed home (when the printer is off) and look why ite missing the switch. then move the switch so it comes in contact with the bed. I found a STL file on Thingiverseand printed it out. but you can drill some holes in a bit of scrap metal or plastic and make your own. If you've got an old print thats no good cut it up and make one.
|
Re: 3DP 18 Hictop Pls Help June 29, 2017 07:33PM |
Registered: 6 years ago Posts: 1,863 |
Quote
Bee69
The easy way I found was to push the bed home (when the printer is off) and look why ite missing the switch. then move the switch so it comes in contact with the bed. I found a STL file on Thingiverseand printed it out. but you can drill some holes in a bit of scrap metal or plastic and make your own. If you've got an old print thats no good cut it up and make one.
This would be fine if the Hictop Y-Axis switch was adjustable, however it is firmly attached to the Y-Axis Belt assembly which is firmly attached to the Carriage.
To allow the Y-Axis switch contact with the Motor assembly you have to move the Y-Axis Motor Assemble then Adjust the Stepper Belt Gear on the Stepper Motor Shaft. Afterwards you will find that in most cases the Y-Axis Belt does not run true, requiring more adjustments. This is the Simplest way to make contact for the Y-Axis Switch. And the MF128ZZ bearings allow you the leave the Front belt holder nut loose and apply some thread-lock to the thread. Allowing the belt to ride evenly between the Flanges of the two bearings. Identical to the Belt run on the X Axis except for a 8mm hole in the bearings.
Edited 1 time(s). Last edit at 06/29/2017 08:49PM by Roberts_Clif.
Sorry, only registered users may post in this forum.


