Modifying/upgrading CBot i3 Printer
Posted by Cougar281
|
Modifying/upgrading CBot i3 Printer April 05, 2018 05:25PM |
Registered: 6 years ago Posts: 52 |
I've been printing on my CBot i3 printer for a few months now, and although I've had some learning pains, mainly with regards to different filament, such as PETG, the printer has been making some pretty decent (IMO) prints - nothing has really failed that wasn't somehow my fault (for the most part - there was this one print..). But one area where I feel it's lacking is the way it rides along the X and Y axis. It's got 2020 and 2040 extrusion that the build plate and nozzle carriage ride on via plastic wheels. Overall, they're not bad, but at least on the Y axis, the wheels aren't 100% smooth for whatever reason, and this could be the reason the build plate doesn't seem to run perfectly even from end to end. Besides the Z stop sensor going from detecting the build plate to not and back when only the Y Axis is moving, I also get a wave-like pattern in the prints (very minute, but visible) that would seem to indicate something off with one or more of the wheels.
So this brings me to the first upgrade/modification I'd like to investigate. Does anyone have any suggestions on the best way to approach replacing the existing mechanism with two rails and linear bearings? At the moment, I'm not sure of the best way to attach rails to the platform my printer is attached to, but once that's figured out, I'm suspecting that I'm probably going to need or want a different carriage to be able to mount to the rails. Ideally, for simplicity, I'd like to leave the 2040 piece that the Y axis motor is mounted to and the belt runs through, but I don't think that should be an issue. Any thoughts?
So this brings me to the first upgrade/modification I'd like to investigate. Does anyone have any suggestions on the best way to approach replacing the existing mechanism with two rails and linear bearings? At the moment, I'm not sure of the best way to attach rails to the platform my printer is attached to, but once that's figured out, I'm suspecting that I'm probably going to need or want a different carriage to be able to mount to the rails. Ideally, for simplicity, I'd like to leave the 2040 piece that the Y axis motor is mounted to and the belt runs through, but I don't think that should be an issue. Any thoughts?
|
Re: Modifying/upgrading CBot i3 Printer June 06, 2018 04:58PM |
Registered: 6 years ago Posts: 52 |
|
Re: Modifying/upgrading CBot i3 Printer November 19, 2018 08:54PM |
Registered: 6 years ago Posts: 52 |
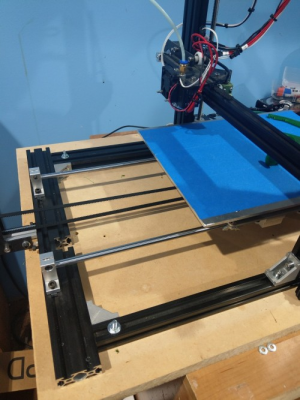
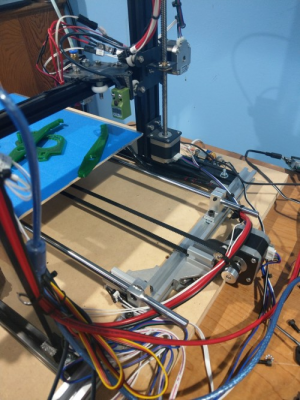
In case anyone is interested, after some time, thinking about it and figuring how I might go about it, I finally upgraded the way the Y-Axis on my i3 Clone rode. I got a few more pieces of 2020 Extrusion, two ling pieces of 500mm long 8mm linear rod, four linear bearing mounted in aluminum blocks, and a Gulf Coast Robotics V2 Aluminum Y Carriage plate. I also HIGHLY recommend this style of T-Nut over the cheap ones that came with my printer that you have to twist to get to grab. They were a huge pain and sucked.
In putting it all together, I discovered that the base was not square as originally assembled. Probably didn't make a huge difference, but who knows. I essentially took it all apart and put it back together from the base up, so everything is as perfectly square as it can be no, I think. With the new T-Nuts, everything is held together much better. The build plate is insanely more solid now, and to say it rides smooth on the linear rods and bearings compared to the wheels on the 2040 extrusion doesn't do it justice. The 'waves' that used to be in my prints are now gone. While the build plate does not seem to be truly perfectly flat, it's MUCH better now than it was riding on the 2020 rail and wheels. MUCH less variation. Even got some PETG prints to work nice now. Had lots of problems with the first layer, quite possibly due to the build plates height variation before. I lost about 1/2" in build height, but I've never printed anything that tall anyway.
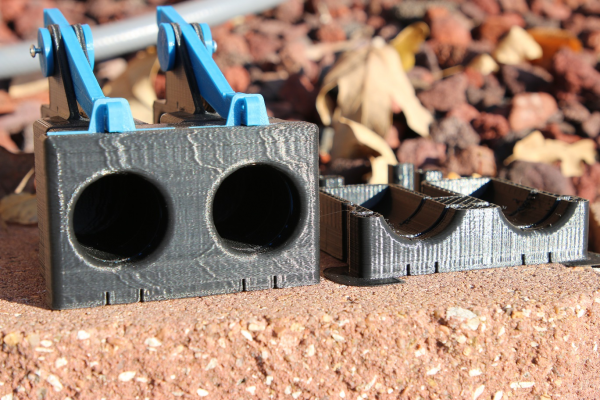
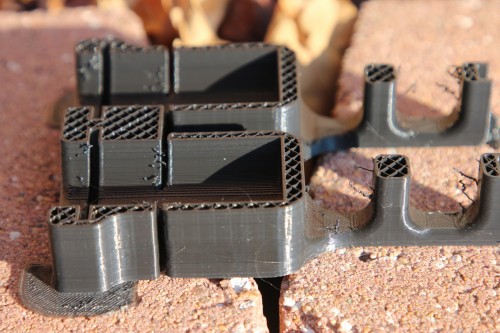
Here you can see in the print on the left, the 'waves' introduced into the print by the rollers with the original setup, gone on the right print on the new setup
The only thing that I saw now that I haven't had before is these 'flyaways' not sure if or how they could be related to the change in how the build plate rides, but I've printed several of these before and never had them before. The small PETG prints were near perfect, except for some PETG related stringiness and blob issues (The pieces sitting on the build plate are PETG prints after the upgrade). Right now, I don't think I want to try a long PETG print with now the material seems to collect around the nozzle and then get deposited in some random location.
Still need to clean up and maybe re-route the wires and figure out where I want to put the RPi that's running Octoprint.
Maybe my next upgrade down the road will be to turn it into a 'cube', make it wider and upgrade the build plate to 300mm x 300mm, instead of the 300mm x 230mm that it is now.
Edited 1 time(s). Last edit at 11/19/2018 08:56PM by Cougar281.
Sorry, only registered users may post in this forum.


