RepRapPro's new printer kit (off-topic)
Posted by dc42
|
Re: RepRapPro's new printer kit (off-topic) June 03, 2015 05:36PM |
Registered: 10 years ago Posts: 300 |
Quote
dc42
While we are on the subject of delta printer videos, here is a video of my delta running auto calibration using the mini differential IR height sensor: [www.youtube.com]. The printer is described in more detail in my blog at [miscsolutions.wordpress.com]. I'm sure it cost me lot more than £199 in parts though!
Great video and build write-up. Now you've built it, anything significant you'd do differently in the light of experience?
RS Components Reprap Ormerod No. 481
|
Re: RepRapPro's new printer kit (off-topic) June 03, 2015 06:16PM |
Registered: 10 years ago Posts: 14,672 |
Quote
Radian
Quote
dc42
While we are on the subject of delta printer videos, here is a video of my delta running auto calibration using the mini differential IR height sensor: [www.youtube.com]. The printer is described in more detail in my blog at [miscsolutions.wordpress.com]. I'm sure it cost me lot more than £199 in parts though!
Great video and build write-up. Now you've built it, anything significant you'd do differently in the light of experience?
Thanks! As I mentioned at the end of the blog, I'd increase the parallel rod spacing a little, use 0.9 degree/step motors, and increase the bed heating power to 400W. I may yet make the first two of those changes.
I have plans for a tilting effector to make dual extrusion easier, see [forums.reprap.org].
Large delta printer [miscsolutions.wordpress.com], E3D tool changer, Robotdigg SCARA printer, Crane Quad and Ormerod
Disclosure: I design Duet electronics and work on RepRapFirmware, [duet3d.com].
|
Re: RepRapPro's new printer kit (off-topic) June 04, 2015 03:01AM |
Registered: 9 years ago Posts: 395 |
For that, a friend of mine and myself are making something easier requiring no tilting or mechanical parts, but something automatic based in temperature sensing. We are almost there ... We just need to find a solution for occasional clogging of the head when we print pla instead of abs. Something totally unrelated to the mechanism :-(
----- Making the world smarter @ www.xetal.eu
----- Helping entrepreneurs @ www.fralke.com
----- Making the world smarter @ www.xetal.eu
----- Helping entrepreneurs @ www.fralke.com
|
Re: RepRapPro's new printer kit (off-topic) July 07, 2015 08:26AM |
Registered: 11 years ago Posts: 248 |
|
Re: RepRapPro's new printer kit (off-topic) July 07, 2015 09:24AM |
Registered: 12 years ago Posts: 1,611 |
Quote
woo
will fisher remain open source?
Yes, it will be open source. Instructions are now developing, though still a work-in-progress: [reprappro.com]
Ian
RepRapPro tech support
|
Re: RepRapPro's new printer kit (off-topic) July 11, 2015 04:24PM |
Registered: 8 years ago Posts: 475 |
I've received my kit of Fisher Delta yesterday afternoon and I finished its assembly this afternoon (total ~15h with a few troubles).
It was very nicely packed and I received a spool of PLA filament as an extra (White color).
I have to leave for a few days so I won't start it before end of next week, but I've made a few photos that you could find here :
[rouzeau.net]
I will make a summary of my findings when I will be back.
I 've already reported to RRP the (small) errors I found in the manual.
The printed parts are of very high quality and I have very few cleaning to do.
Kit was complete with nearly no fault.
All fittings (except two isolated screws) are in stainless steel.
Power supply 19V, 6.32A
Micro-SD card supplied with SD/micro-sd converter is 4Gb.
A few difficulties to install the end stops, and I finally soldered the wires to the switches. It is better to do that before install them (indeed, I dismount them for soldering). Their screwing is not ok, as one hole on the two is larger than the screw and they are too short to add a nut. Gluing it was not very successful. Longer screws are a good solution, but do not do like me, while cutting too long screw (own supply) with a dremel, I melted the switch (still ok, but does not look very nice). So cut screws only disassembled.
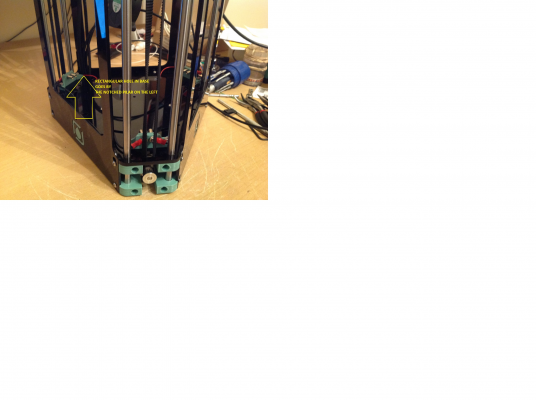
Beware of the position of the rectangular side hole of the bottom plate for cable passage. I set it on the wrong side and it costed me A LOT of time. Shall be either mirrored or have a marking 'top' on the plate.
Edited 1 time(s). Last edit at 07/11/2015 04:40PM by PRZ.
|
Re: RepRapPro's new printer kit (off-topic) July 12, 2015 08:21AM |
Registered: 8 years ago Posts: 6 |
Also received my Fisher Delta kit yesterday afternoon and also experienced difficulties with the end stops-though it was my fault for miss-reading the screw size! I also placed the bottom plate upside-down!-The instruction:
As PRZ said the printed parts are of high quality and for the most part the instructions are clear with just one or two moments.
Fisher Delta sub-forum needed.
Edited 1 time(s). Last edit at 07/12/2015 10:46AM by Springfield-Jack.
Doesn't mean anything until you get to installing the hot-end loom much further on in the build.So until the "Draft" instructions are amended, check out the Electronics section to help make sense of how the base plate should go.I think, I am in for a near complete rebuild to sort it out!Quote
"Slide the base plate along the bars to each motor assembly in turn. Start with the side nearest the rectangular slot to ensure the base plate is correctly orientated."
As PRZ said the printed parts are of high quality and for the most part the instructions are clear with just one or two
 moments.
Fisher Delta sub-forum needed.
Edited 1 time(s). Last edit at 07/12/2015 10:46AM by Springfield-Jack.
|
Re: RepRapPro's new printer kit (off-topic) July 13, 2015 10:27PM |
Registered: 8 years ago Posts: 11 |
|
Re: RepRapPro's new printer kit (off-topic) July 14, 2015 07:51AM |
Registered: 12 years ago Posts: 1,611 |
|
Re: RepRapPro's new printer kit (off-topic) July 14, 2015 08:30AM |
Registered: 8 years ago Posts: 6 |
|
Re: RepRapPro's new printer kit (off-topic) July 14, 2015 08:10PM |
Registered: 8 years ago Posts: 6 |
I realised that my warning wasn't particularly helpful so I'll try again:
Looking from the front, the cable hole in the base plate should be on the left, at the base of the notched pillar.
Another thing that caught me out-would have been obvious had I done a test fit.....I didn't!
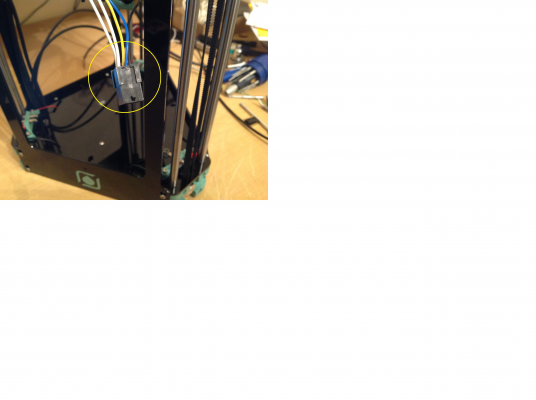
The catch--the little black thing in the diagram-- is at the front and the wires should be inserted from the back(where is the "embarrassed" smiley?).
Fisher Delta sub-forum needed.
|
Re: RepRapPro's new printer kit (off-topic) July 15, 2015 01:56AM |
Registered: 9 years ago Posts: 177 |
Quote
Springfield-Jack
[attachment 58109 IMG_0153B.jpg]
The catch--the little black thing in the diagram-- is at the front and the wires should be inserted from the back(where is the "embarrassed" smiley?).
The Ormerod 2 has a similar diagram in it's instructions. I also had a bit of an issue with it, took me a minute to figure out why the crimp pins weren't latching to the housing.....
|
Re: RepRapPro's new printer kit (off-topic) July 16, 2015 10:56PM |
Registered: 8 years ago Posts: 11 |
|
Re: RepRapPro's new printer kit (off-topic) July 17, 2015 04:17AM |
Registered: 8 years ago Posts: 24 |
|
Re: RepRapPro's new printer kit (off-topic) July 17, 2015 11:58AM |
Registered: 12 years ago Posts: 1,611 |
There's a few Fisher owners who have tweeted pictures on our twitter feed: [twitter.com]
One little problem; some people's prints are coming out mirrored! The instructions are wrong (hopefully fixed soon) for connecting up the motors. However, it's easily fixed; swap the X and Y axis motor and endstop wiring over.
Ian
RepRapPro tech support
Edited 1 time(s). Last edit at 07/17/2015 11:58AM by droftarts.
|
Re: RepRapPro's new printer kit (off-topic) July 17, 2015 01:48PM |
Registered: 10 years ago Posts: 1,230 |
Quote
droftarts
There's a few Fisher owners who have tweeted pictures on our twitter feed: [twitter.com]....
Ian
RepRapPro tech support
just noticed this link from your link, off-topic but too funny to miss...
[3dprint.com]
3D Printed Pop Pop Boat
[www.youtube.com]
3D Printed Pop Pop Boat
[www.thingiverse.com]
Erik
|
Re: RepRapPro's new printer kit (off-topic) July 17, 2015 03:41PM |
Registered: 9 years ago Posts: 638 |
Thats a nice boat!! and someone from my country made it xDQuote
ormerod168
Quote
droftarts
There's a few Fisher owners who have tweeted pictures on our twitter feed: [twitter.com]....
Ian
RepRapPro tech support
just noticed this link from your link, off-topic but too funny to miss...
[3dprint.com]
3D Printed Pop Pop Boat
[www.youtube.com]
3D Printed Pop Pop Boat
[www.thingiverse.com]
Erik
|
Re: RepRapPro's new printer kit (off-topic) July 17, 2015 07:32PM |
Registered: 8 years ago Posts: 475 |
Hello, I have added two directories for photos to my 3D printer page here : [rouzeau.net]
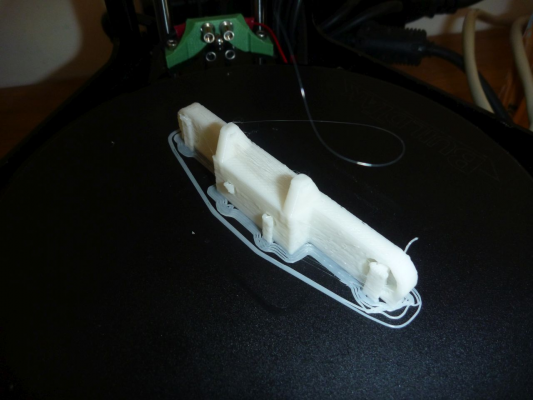
- one with Printed parts:
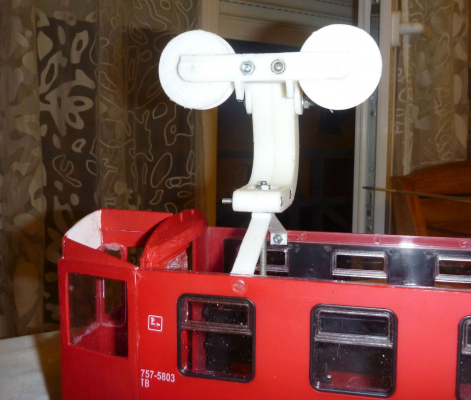
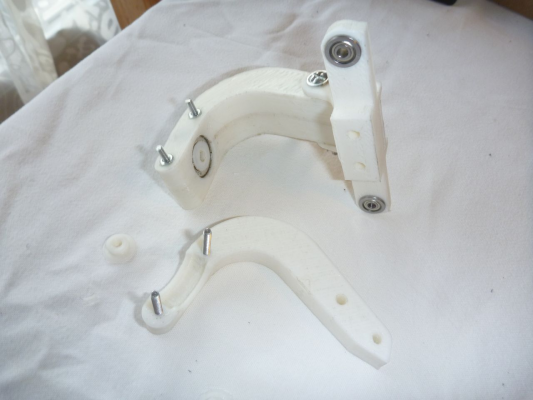
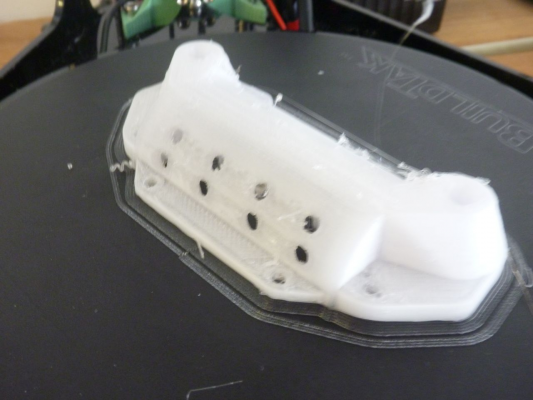
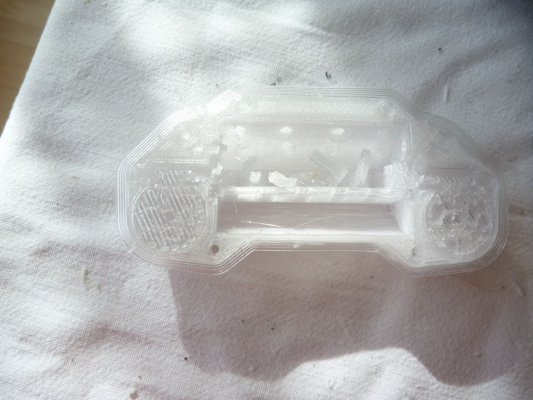
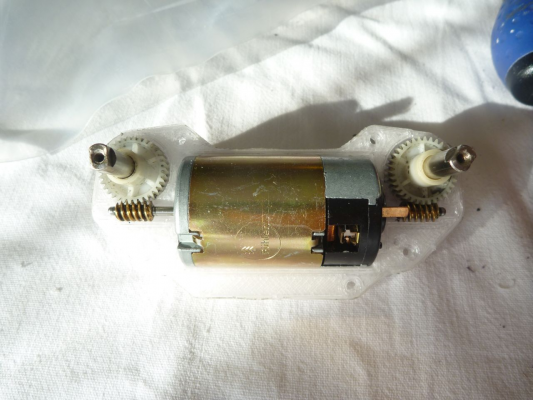
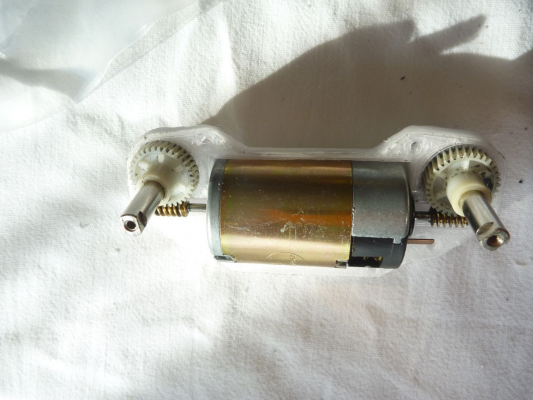
Parts for a garden train monorail (free wheeling bogie)
just Three photos here:
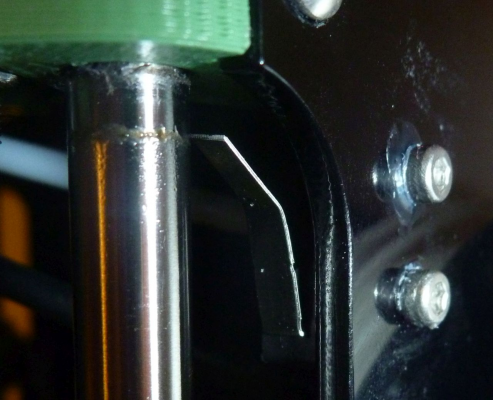
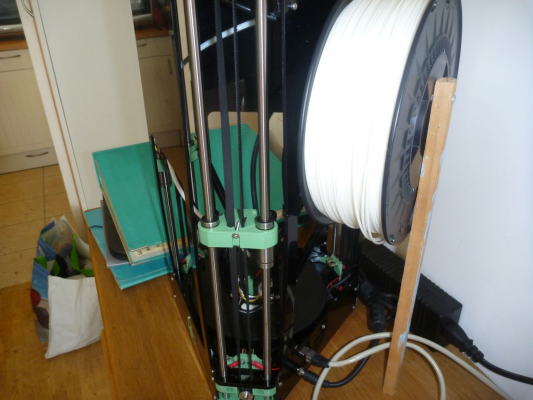
- One with the few modifications I have done on the printer :
* end switch lever bending as it was not properly triggering
* auxiliary support for the spool as it was bending the panel so much that it was touching the carriage
* electronic cooling fan
At first start, what you notice is that the fan is very noisy. In fact, while printing you barely noticed other printer noises. The problem is that finding a silent centrifugal fan in 19V may be quite a deal. The fan setup looks strange, but it seems to work nicely. For printing non cooled materials (PET), you shall dismount the part flow duct (only one screw for top and bottom ducts). Not yet tested.
My first start was a failure because the filament was locked in the end of the bowden in the hotend. I had to redrill the end of the bowden (2.4mm) and after screwing it, I unscrew of 1/2 a turn.
I got some difficulties for the first layer. That may be due to the fact that as the cooling fan flow goes through hotend fin THEN to the part cooling, so it is not possible to stop the fan for first layer.
I had to offset up by 0.06 mm the head (offset defined in Slic3R) and I have increased the first layer height to 0.38 mm. That drive somewhat to extruder skipping steps on the first layer, even at low speed (20 mm/s).
However, There are very frequent failure at start.
I have configured Slic3R to have a brim, to help maintain the defaults outside the printing area.
I printed one part with 0.2mm layer, with very good quality, and then others with 0.25mm layer. I will test 0.3mm, but I am not very confident as the extruder cannot cope with large flow.
The extruder grip is quite good, and you shall not overtight the spring, as this make the filament very difficult to introduce. Filament shall be cut with a bias to be taken by the extruder. If not, this is quite impossible to grip.
I got a lot of unwinding problem, the filament locking in the spool, so the extruder pull in bias, which aggravate the problem. The extruder stepper is very weak (2.2 kg.cm) so even minor problems stop the print.
I successfully printed 12 parts, but lost 5 parts due to unwinding problems, mostly at 2/3 of the print. I had to make three trials for one part. Some pulley/guiding system to have filament pulling straight may be devised.
Two things you shall take care at the beginning of a print:
- Removing parts from the buildtak is difficult and you frequently displace the bed. That prevent the bed levelling to work, but there is no warning during the levelling, so you start 4mm over the bed. I have done that ~4 to 5 times. If you look the screen, this is shown on the sensor display. Just be more careful than me.
- You shall ALWAYS do a manual extrusion (with the panel) before printing. Even if this is a restart one minute after a failing start, you shall extrude again manually.
Manual extrusion (with the panel), even at the lowest speed, tend to drive to extruder skipping steps.
Edited 4 time(s). Last edit at 07/17/2015 07:44PM by PRZ.
|
Re: RepRapPro's new printer kit (off-topic) July 18, 2015 03:02AM |
Registered: 10 years ago Posts: 14,672 |
PRZ, thanks for reporting your experiences. I don't have a Fisher, but I wrote the delta printer support code in the firmware including the auto calibration. Some thoughts:
1. What do you have the extruder stepper motor current set to in the M906 command in config.g, and what is the rated current of the motor? You may be able to increase the extruder motor current to reduce the step skipping.
2. It is a good thing for the extruder motor to skip steps when the nozzle is obstructed e.g. because the nozzle is too low. Otherwise the extruder will grind through the filament and lose traction completely.
3. What hot end temperature are you using? A higher temperature will need less extruder force. I increase temperature when doing high speed prints on my delta.
4. If the problem of the bed being misplaced during auto calibration cannot be resolved mechanically, then the firmware could be modified to detect it, by placing a limit on how much it adjusts the endstop corrections.
5. Why the need for manual extrusion before each print? You can increase the minimum amount of filament used in the skirt.
Large delta printer [miscsolutions.wordpress.com], E3D tool changer, Robotdigg SCARA printer, Crane Quad and Ormerod
Disclosure: I design Duet electronics and work on RepRapFirmware, [duet3d.com].
|
Re: RepRapPro's new printer kit (off-topic) July 18, 2015 06:45AM |
Registered: 8 years ago Posts: 475 |
The steppers are JK42HS34-1334AC. They are all identical and I assume they used this stepper for the extruder for supply simplicity. Yet, this is the bottleneck of the printer. I will for sure change it, but I am waiting a few days of experience to define all my needs.
1/ Manufacturer data tells that torque is 2.2 kg.cm and nominal current 1.3 A
The setup is 800 mA for movements motors and 1200 mA for the extruder motor. So we are already practically to the maximum and in my opinion, a little too high (from my CNC background, I prefer not exceeding 85% of nominal current for steppers). I have tried to increase the current with no improvement, but this is not workable, the stepper will overheat and the torque benefit will be marginal. At 92% current, the torque may already be at more than 95% of its nominal value.
2/ The grip of the extruder is quite good and it can have much more torque without grinding. When you operate it manually, you can exert a much higher torque and I never had any grinding. Indeed, I chew the manual knob without grinding. I have to reprint one (I'll try to design one with a set screw).
3/ I run at 215°C for first layer and 210°C for other layers. I have not checked the real temperature, but at least, the ambient measure is very accurate. From the photos, you could see that I have some stringing and I think I am relatively high.
Manual test by pushing the filament works well, I think that this is only a too weak stepper.
4/ The misplaced bed is just a question of attention. Now, I am a bit more careful on that. What could be nice is to inform the user that the calibration have failed (a blinking red sensor field or something like that). I don't know how the interaction between the macro and the web server is managed ? In fact when activated, the sensor field is light rose, so the info is there, just not well noticeable. Maybe the sensor actuated color could be parametered in the web server ? That may suffice.
5/ Really, I don't quite understand why such need. I just know that if I don't do that, I have no extrusion before the layer is already started (and I already make two loops before printing) . It may be some sort of blockage when not extruding for some time ? Maybe there is a retraction while stopping and aborting a printing ? Maybe an initial extrusion travel could be parametered at new start. I will try to define an initial extrusion at printing startup in Slic3R. I always have extruder skipping a few steps when doing that, even at the lowest speed. My assumption (unproven) is that the initial extrusion is harder than sustained extrusion. I can also increase the first layer temperature to 220°C ?
Edited 2 time(s). Last edit at 07/18/2015 07:09AM by PRZ.
|
Re: RepRapPro's new printer kit (off-topic) July 18, 2015 08:08AM |
Registered: 10 years ago Posts: 14,672 |
PRZ, thanks for replying.,
1. Those motors are the same ones that the Ormerod uses. I believe the rated current is 1.33A, but I agree with you that 1.2A is a reasonable limit. I use M906 E1000 on the Ormerod and have no problems with the extruder. So I am wondering what is different on the Fisher. Perhaps the extruder gearing is less? On the Ormerod it is 11:34.
2. -
3. On the Ormerod I use 195C first layer and 185C subsequent layers. From the build instructions, it looks to me that the thermistor is the same type as used on the Ormerod. So I agree, if anything your hot end temperature looks a little high. It may need to be higher than on the Ormerod if the Fisher has better print cooling.
4. The problem is how to report the calibration error to the user. It should be reasonably straightforward via the web interface or PanelDue using the same mechanism that is already used to implement M117. Not so easy if all you have is USB/Pronterface. But I also wonder if a simple mechanical change could reduce the chance of the bed being misplaced.
5. As well as the number of skirt loops, slic3r has a parameter for the minimum amount of filament to be extruded in the skirt. I had to increase this to 15mm to guarantee that extrusion was steady by the end of the skirt.
Edited 1 time(s). Last edit at 07/18/2015 08:10AM by dc42.
Large delta printer [miscsolutions.wordpress.com], E3D tool changer, Robotdigg SCARA printer, Crane Quad and Ormerod
Disclosure: I design Duet electronics and work on RepRapFirmware, [duet3d.com].
|
Re: RepRapPro's new printer kit (off-topic) July 18, 2015 09:11AM |
Registered: 9 years ago Posts: 1,699 |
I think the maximum motor current rate is 1.2A. As I bought similiar motors I saw this limit somewhere.
Slicer: Simplify3D 4.0; sometimes CraftWare 1.14 or Cura 2.7
Delta with Duet-WiFi, FW: 1.20.1RC2; mini-sensor board by dc42 for auto-leveling
Ormerod common modifications: Mini-sensor board by dc42, aluminum X-arm, 0.4 mm nozzle E3D like, 2nd fan, Z stepper nut M5 x 15, Herringbone gears, Z-axis bearing at top, spring loaded extruder with pneumatic fitting, Y belt axis tensioner
Ormerod 2: FW: 1.19-dc42 on Duet-WiFi. own build, modifications: GT2-belts, silicone heat-bed, different motors and so on. Printed parts: bed support, (PSU holder) and Y-feet.
Ormerod 1: FW: 1.15c-dc42 on 1k Duet-Board. Modifications: Aluminium bed-support, (nearly) all parts reprinted in PLA/ ABS, and so on.
|
Re: RepRapPro's new printer kit (off-topic) July 18, 2015 11:03AM |
Registered: 8 years ago Posts: 475 |
|
Re: RepRapPro's new printer kit (off-topic) July 18, 2015 11:16AM |
Registered: 10 years ago Posts: 14,672 |
Quote
PRZ
There is a gearing of 11.34 with the same stepper. Ouch.
The extruder of the Fisher is DIRECT drive. That makes more than ten time more torque on the Ormerod. Just a slight difference ! and some reasons not to be afraid of filament grinding...
That explains it. IMO direct drive extruders are a bad idea, because there is such a large mechanical impedance mismatch between the stepper motor and the filament drive, However, the Ormerod gearing produces about three times the torque, not ten (it is the mechanical impedance that gets changed by a factor of ten).
I guess your options are:
1. Use a geared extruder design, if there is room. Or:
2. Use a longer stepper motor, if there is room. A 48mm long bipolar motor such as [www.ebay.co.uk] should give you about twice the torque, if you can find one with a current rating that matches the driver well enough.
Large delta printer [miscsolutions.wordpress.com], E3D tool changer, Robotdigg SCARA printer, Crane Quad and Ormerod
Disclosure: I design Duet electronics and work on RepRapFirmware, [duet3d.com].
|
Re: RepRapPro's new printer kit (off-topic) July 18, 2015 11:34AM |
Registered: 10 years ago Posts: 14,672 |
PS - Looking at the config.g file for the Fischer, the extruder steps/mm are set to 144, compared to 420 on the Ormerod. That suggests an increase in speed and corresponding loss of torque by a factor of 2.92, due to the lack of gearing gearing and possibly a different hobbed insert diameter.
Large delta printer [miscsolutions.wordpress.com], E3D tool changer, Robotdigg SCARA printer, Crane Quad and Ormerod
Disclosure: I design Duet electronics and work on RepRapFirmware, [duet3d.com].
Large delta printer [miscsolutions.wordpress.com], E3D tool changer, Robotdigg SCARA printer, Crane Quad and Ormerod
Disclosure: I design Duet electronics and work on RepRapFirmware, [duet3d.com].
|
Re: RepRapPro's new printer kit (off-topic) July 18, 2015 11:42AM |
Registered: 9 years ago Posts: 1,699 |
But this does also mean that the Ormerod is able to extrude less filament at a longer time or in other word the Ormerod can slower and can extrude less filament. I have no clue if a direct drive could end in a problem otherwise it can be considered if a direct drive extruder for the Ormerod can be provided. (As I am not getting my hobbed insert I am thinking of alternatives).
Slicer: Simplify3D 4.0; sometimes CraftWare 1.14 or Cura 2.7
Delta with Duet-WiFi, FW: 1.20.1RC2; mini-sensor board by dc42 for auto-leveling
Ormerod common modifications: Mini-sensor board by dc42, aluminum X-arm, 0.4 mm nozzle E3D like, 2nd fan, Z stepper nut M5 x 15, Herringbone gears, Z-axis bearing at top, spring loaded extruder with pneumatic fitting, Y belt axis tensioner
Ormerod 2: FW: 1.19-dc42 on Duet-WiFi. own build, modifications: GT2-belts, silicone heat-bed, different motors and so on. Printed parts: bed support, (PSU holder) and Y-feet.
Ormerod 1: FW: 1.15c-dc42 on 1k Duet-Board. Modifications: Aluminium bed-support, (nearly) all parts reprinted in PLA/ ABS, and so on.
|
Re: RepRapPro's new printer kit (off-topic) July 18, 2015 12:15PM |
Registered: 8 years ago Posts: 475 |
Longer steppers are possible, and if you look the top plate stepper cooling openings, that was thought from start.
The hobbed insert is the smallest possible with a 5mm shaft, so you cannot compare directly the drive and the comparaison done by treito is the most accurate.
About the motors, you can have high torque motors which needs only 1.8A, however, in that case, their impedance is high. This is where the choice of a power supply of 19V is good, as it helps a lot to cope with high impedance steppers. But in fact, extruder steppers don't run that fast, so I think high impedance for an extruder stepper is not such a big deal.
That will need an electronic cooling fan on the duet, that I have already installed (it is not standard), but this fan is becaming very noisy and is probably dying after 5 to 6h of service. I think I will install a 19V to 12V converter to be able to use high quality fans, because as it is running all day at 2m from me, the overall noise is really tiring and not acceptable.
|
Re: RepRapPro's new printer kit (off-topic) July 18, 2015 12:50PM |
Registered: 10 years ago Posts: 14,672 |
A direct drive extruder will indeed be capable of a higher speed, but only when there is very little force resisting the movement. So it can do faster retraction, and load/unload filament at stupidly high speeds. But I have no reason to think that the retraction on the Ormerod is too slow, and I am prepared to wait a few seconds while loading or unloading filament. The Fisher, with its 19V power supply, could probably do higher retraction speed than the Ormerod using the same extruder.
Let's compare the torque of some extruders, using the Fisher as the reference:
Fisher @ 1.2A: 1.0
Ormerod @ 0.8A (the default in RepRapPro's config.g for the Ormerod): 1.94
Ormerod @ 1.0A (what I use): 2.43
T3P3 Kossel @ 0.5A (the current I consider optimum for this system): 3.17
I reckon 0.5A is about optimum for the Kossel extruder, because at higher currents such as 0.8A it grinds the filament instead of skipping steps when the nozzle is blocked. 0.4A is probably enough (relative torque 2.54).
In summary, I think you need 2 to 3 times the torque provided by that extruder
Large delta printer [miscsolutions.wordpress.com], E3D tool changer, Robotdigg SCARA printer, Crane Quad and Ormerod
Disclosure: I design Duet electronics and work on RepRapFirmware, [duet3d.com].
|
Re: Fisher Delta - better first layer July 18, 2015 02:28PM |
Registered: 8 years ago Posts: 475 |
Good news. After a big fear, as my printer was no longer communicating with the printer, this was a very unusual problem: my mikrotik router is either dying or overheating!
With another router, I made the following test with serious improvements :
increase the z offset up to 0.2mm
increase the first layer temperature to 220°C
I got better adhesion on the bed, fairly better 1rst layer, and no longer any need for manual extrusion before starting.
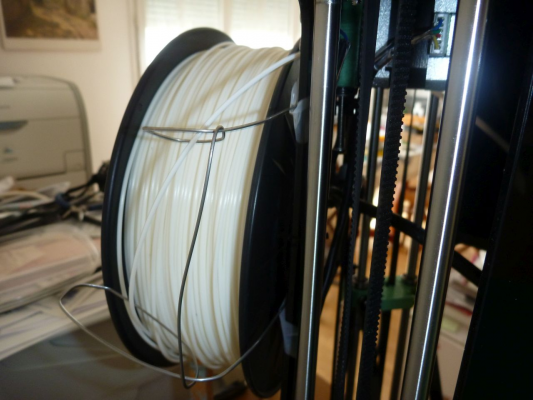
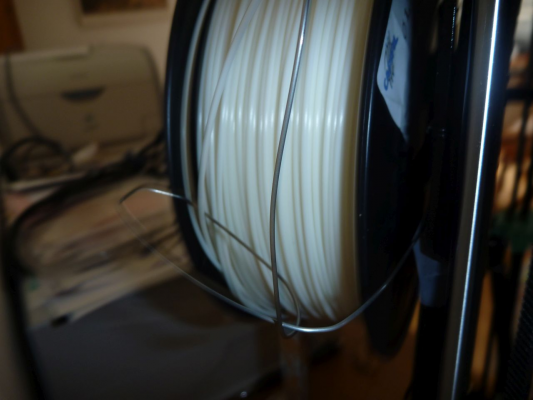
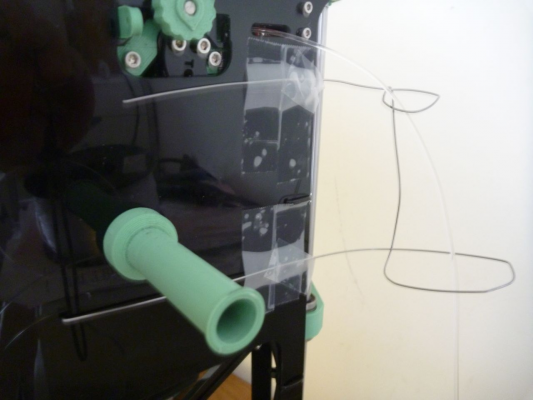
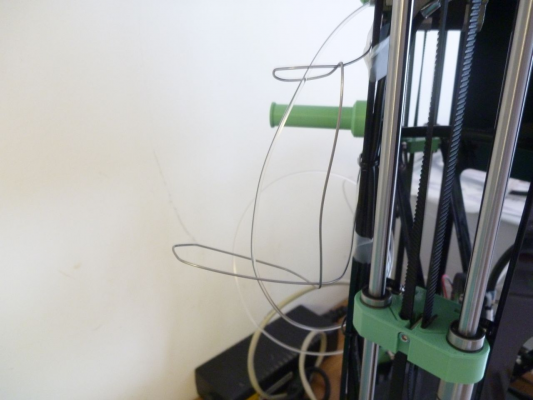
Also, I have made with piano wire diam 1mm a filament guide wich help seriously unwinding, however, I still have some blockage of extrusions where the extruder cannot pull the filament. Not very classy but that works better.
The end of the wire are bent and inserted in holes diam 1.2 mm.
It flex a lot, but that spring effect helps to separate the loops.
With a stronger stepper, I will probably do the same setup, but with 1.5mm piano wire.
|
Fisher Delta : PETG printing July 18, 2015 02:45PM |
Registered: 8 years ago Posts: 475 |
I have done a test of printing PETG on the Fisher Delta:
first layer at 260°, next layers at 250°. layer thickness .25 mm, width : per Slic3R default
speed 80mm/s and 100 mm/s for infill
I have removed the part cooling ducts
The adhesion to buildtak is excellent, and it was quite difficult to remove the part.
However, the filament layer adhesion is not very good, except for the first layer so I will increase the temperature to 260° for all layers and increase the extrusion coefficient (to 1.08 for first test). As the filament is much more flexible than PLA, I assume the output length is lower.
Also, I will decrease the layer height to 0.2mm and try higher speed (to have some remaining temp while new layer is deposited.
The filament cool quite fast and there are some blobs on the print
Due to poor adhesion, cleaning the part was easier than I thought.
The accuracy was near perfect.
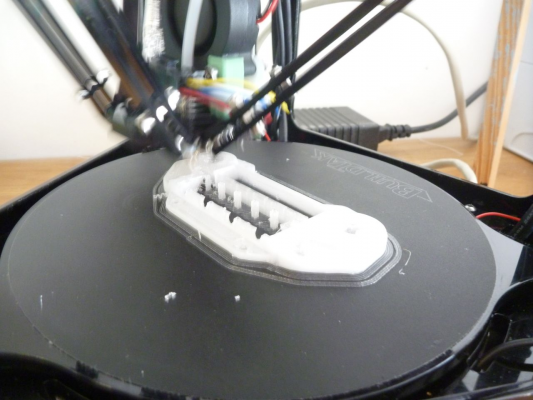
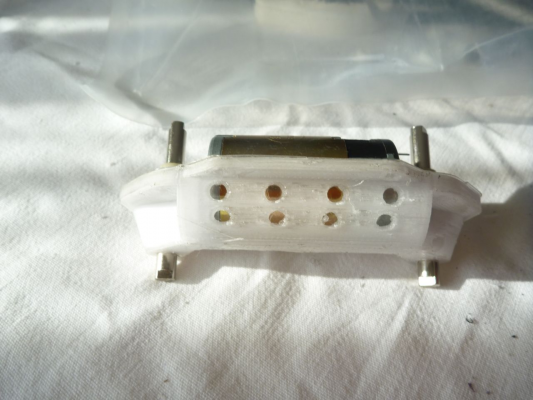
This is the motor bogie of the garden train monorail, PETG is used to resist temperature.
Sorry, only registered users may post in this forum.

