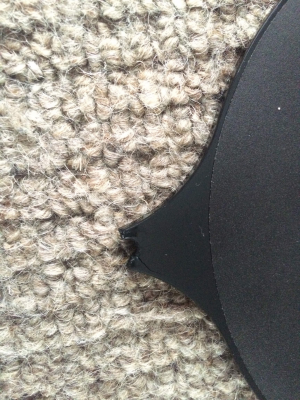
Be careful when removing the bed
Posted by jmg123
|
Be careful when removing the bed August 14, 2015 01:04PM |
Registered: 8 years ago Posts: 40 |
Just head heads up to be careful when removing the bed - doing it more than a few times is liable to make the bed ends crack off, even if you push down to make sure the silver balls will clear the silver posts that they rest against.
I think I am going to add a bit more material to the ends before laser cutting some new ones.
Edited 2 time(s). Last edit at 08/14/2015 01:14PM by jmg123.
I think I am going to add a bit more material to the ends before laser cutting some new ones.
Edited 2 time(s). Last edit at 08/14/2015 01:14PM by jmg123.
|
Re: Be careful when removing the bed August 14, 2015 01:33PM |
Registered: 8 years ago Posts: 83 |
|
Re: Be careful when removing the bed August 14, 2015 01:39PM |
Registered: 8 years ago Posts: 40 |
|
Re: Be careful when removing the bed August 17, 2015 11:54AM |
Registered: 12 years ago Posts: 1,611 |
Sorry you are having problems with your bed. It is a problem that has been reported by a small number of customers. The pressure of the countersunk screw and the steel ball on the hole in the acrylic, and particularly as they all expand and contract with temperature (a few other people have said they have had the same issue the day after), causes them to break. We think it happens mostly when there is already a fracture in the acrylic sheet, as we haven't had the problem ourselves. There's a couple of things you can do:
- You can glue acrylic with Superglue, depending on it's type, can hold acrylic well. It needs to contain (preferably 100%) Cyanoacrylate [en.wikipedia.org] which is the best glue for acrylic.
- If you have three spare M3x16mm button head screws (or any other M3x8mm round-headed screws, eg crossheads, which are often rounded), you can use these instead of the steel balls. You will need to cut them down to 8mm long, but then you can put these through the bed (button head on top, to act as the contact in place of the steel ball), with an M3 nut (and maybe an M3 washer) on the back. You can space them up with a couple of washers. This should then not stress the holes in the acrylic, and should have enough clearance to add and remove the bed from the printer; the bed will be a couple of mm higher, though. We are testing this as a way to replace the steel balls. At present, we don't plan to replace the bed with a different material, though. We may leave a bit more material around the hole, in future, too.
Ian
RepRapPro tech support
|
Re: Be careful when removing the bed August 17, 2015 03:08PM |
Registered: 10 years ago Posts: 132 |
|
Re: Be careful when removing the bed August 17, 2015 04:36PM |
Registered: 8 years ago Posts: 40 |
Quote
droftarts
Sorry you are having problems with your bed. It is a problem that has been reported by a small number of customers. The pressure of the countersunk screw and the steel ball on the hole in the acrylic, and particularly as they all expand and contract with temperature (a few other people have said they have had the same issue the day after), causes them to break. We think it happens mostly when there is already a fracture in the acrylic sheet, as we haven't had the problem ourselves. There's a couple of things you can do:
Ian
RepRapPro tech support
If it would help with analysis of the Fisher Beta, I could post the broken bed back to you?
Edited 1 time(s). Last edit at 08/17/2015 04:37PM by jmg123.
Sorry, only registered users may post in this forum.
