Hobbing Flavours
Posted by waitaki
|
Hobbing Flavours November 29, 2012 04:31AM |
Registered: 11 years ago Posts: 1,592 |
Looking around the Reprap world, it seems there are a few different flavours of hobbed bolts. By this I mean there are several different profiles ranging from non grooved (knurled bolts) to deep cavity ones. I decided to explore this at the weekend. My first bolt, bought from Mitre10 had a shank (the smooth bit) that measured 7.5mm in diameter - you get what you pay for I guess! Anyway,I made a half round groove in it then hobbed it. It was useless!
A second bolt bought from my local engineering supplier measured 7.85mm on the "shiny" bit- more like the standard it should be. I cut a slightly deeper groove and a bit wider in it then hobbed it. It had much more grip on the filament when I installed it but not to my satisfaction.
For my final attempt I tried an off-cut of tool steel from when I made up my smooth rods. This of course measured exactly 8mm. This time I made a "V" groove in the rod to mimic a car fan belt then hobbed it - the idea being for the filament to grip the sides of the groove. I stuffed it in the extruder to check the bite on the filament. It gripped it like a vice!! Will test it properly when I'm up and running but it looks the business.
The bonus is, the bearings are a push fit on the shaft (just a bit of emery to knock a thou off), plus, being a shaft I don't have to worry about getting the groove cut in exactly the right place coz' I can adjust it with the nyloc nut to get it dead on. I also have the option of hardening and tempering it - last for years maybe?
AL
|
Re: Hobbing Flavours November 29, 2012 01:00PM |
Registered: 11 years ago Posts: 137 |
|
Re: Hobbing Flavours November 29, 2012 01:50PM |
Registered: 11 years ago Posts: 103 |
|
Re: Hobbing Flavours November 29, 2012 03:20PM |
Registered: 13 years ago Posts: 862 |
I have used Vik's ones from Diamond age and they work fine but on my Sells mendel I use the original brass insert version that goes with my Adrians extruder and its done 100's of hours with no slipping
__________________________________________________________________________
Experimenting in 3D in New Zealand
__________________________________________________________________________
Experimenting in 3D in New Zealand
|
Re: Hobbing Flavours November 29, 2012 06:21PM |
Registered: 11 years ago Posts: 525 |
How are you doing the "hobbing? I gotta try this
_________________________________________________________________________________________
Richmond, New Zealand
Thingiverse ~ YouTube
_________________________________________________________________________________________
Richmond, New Zealand
Thingiverse ~ YouTube
|
Re: Hobbing Flavours November 30, 2012 02:39AM |
Registered: 11 years ago Posts: 1,592 |
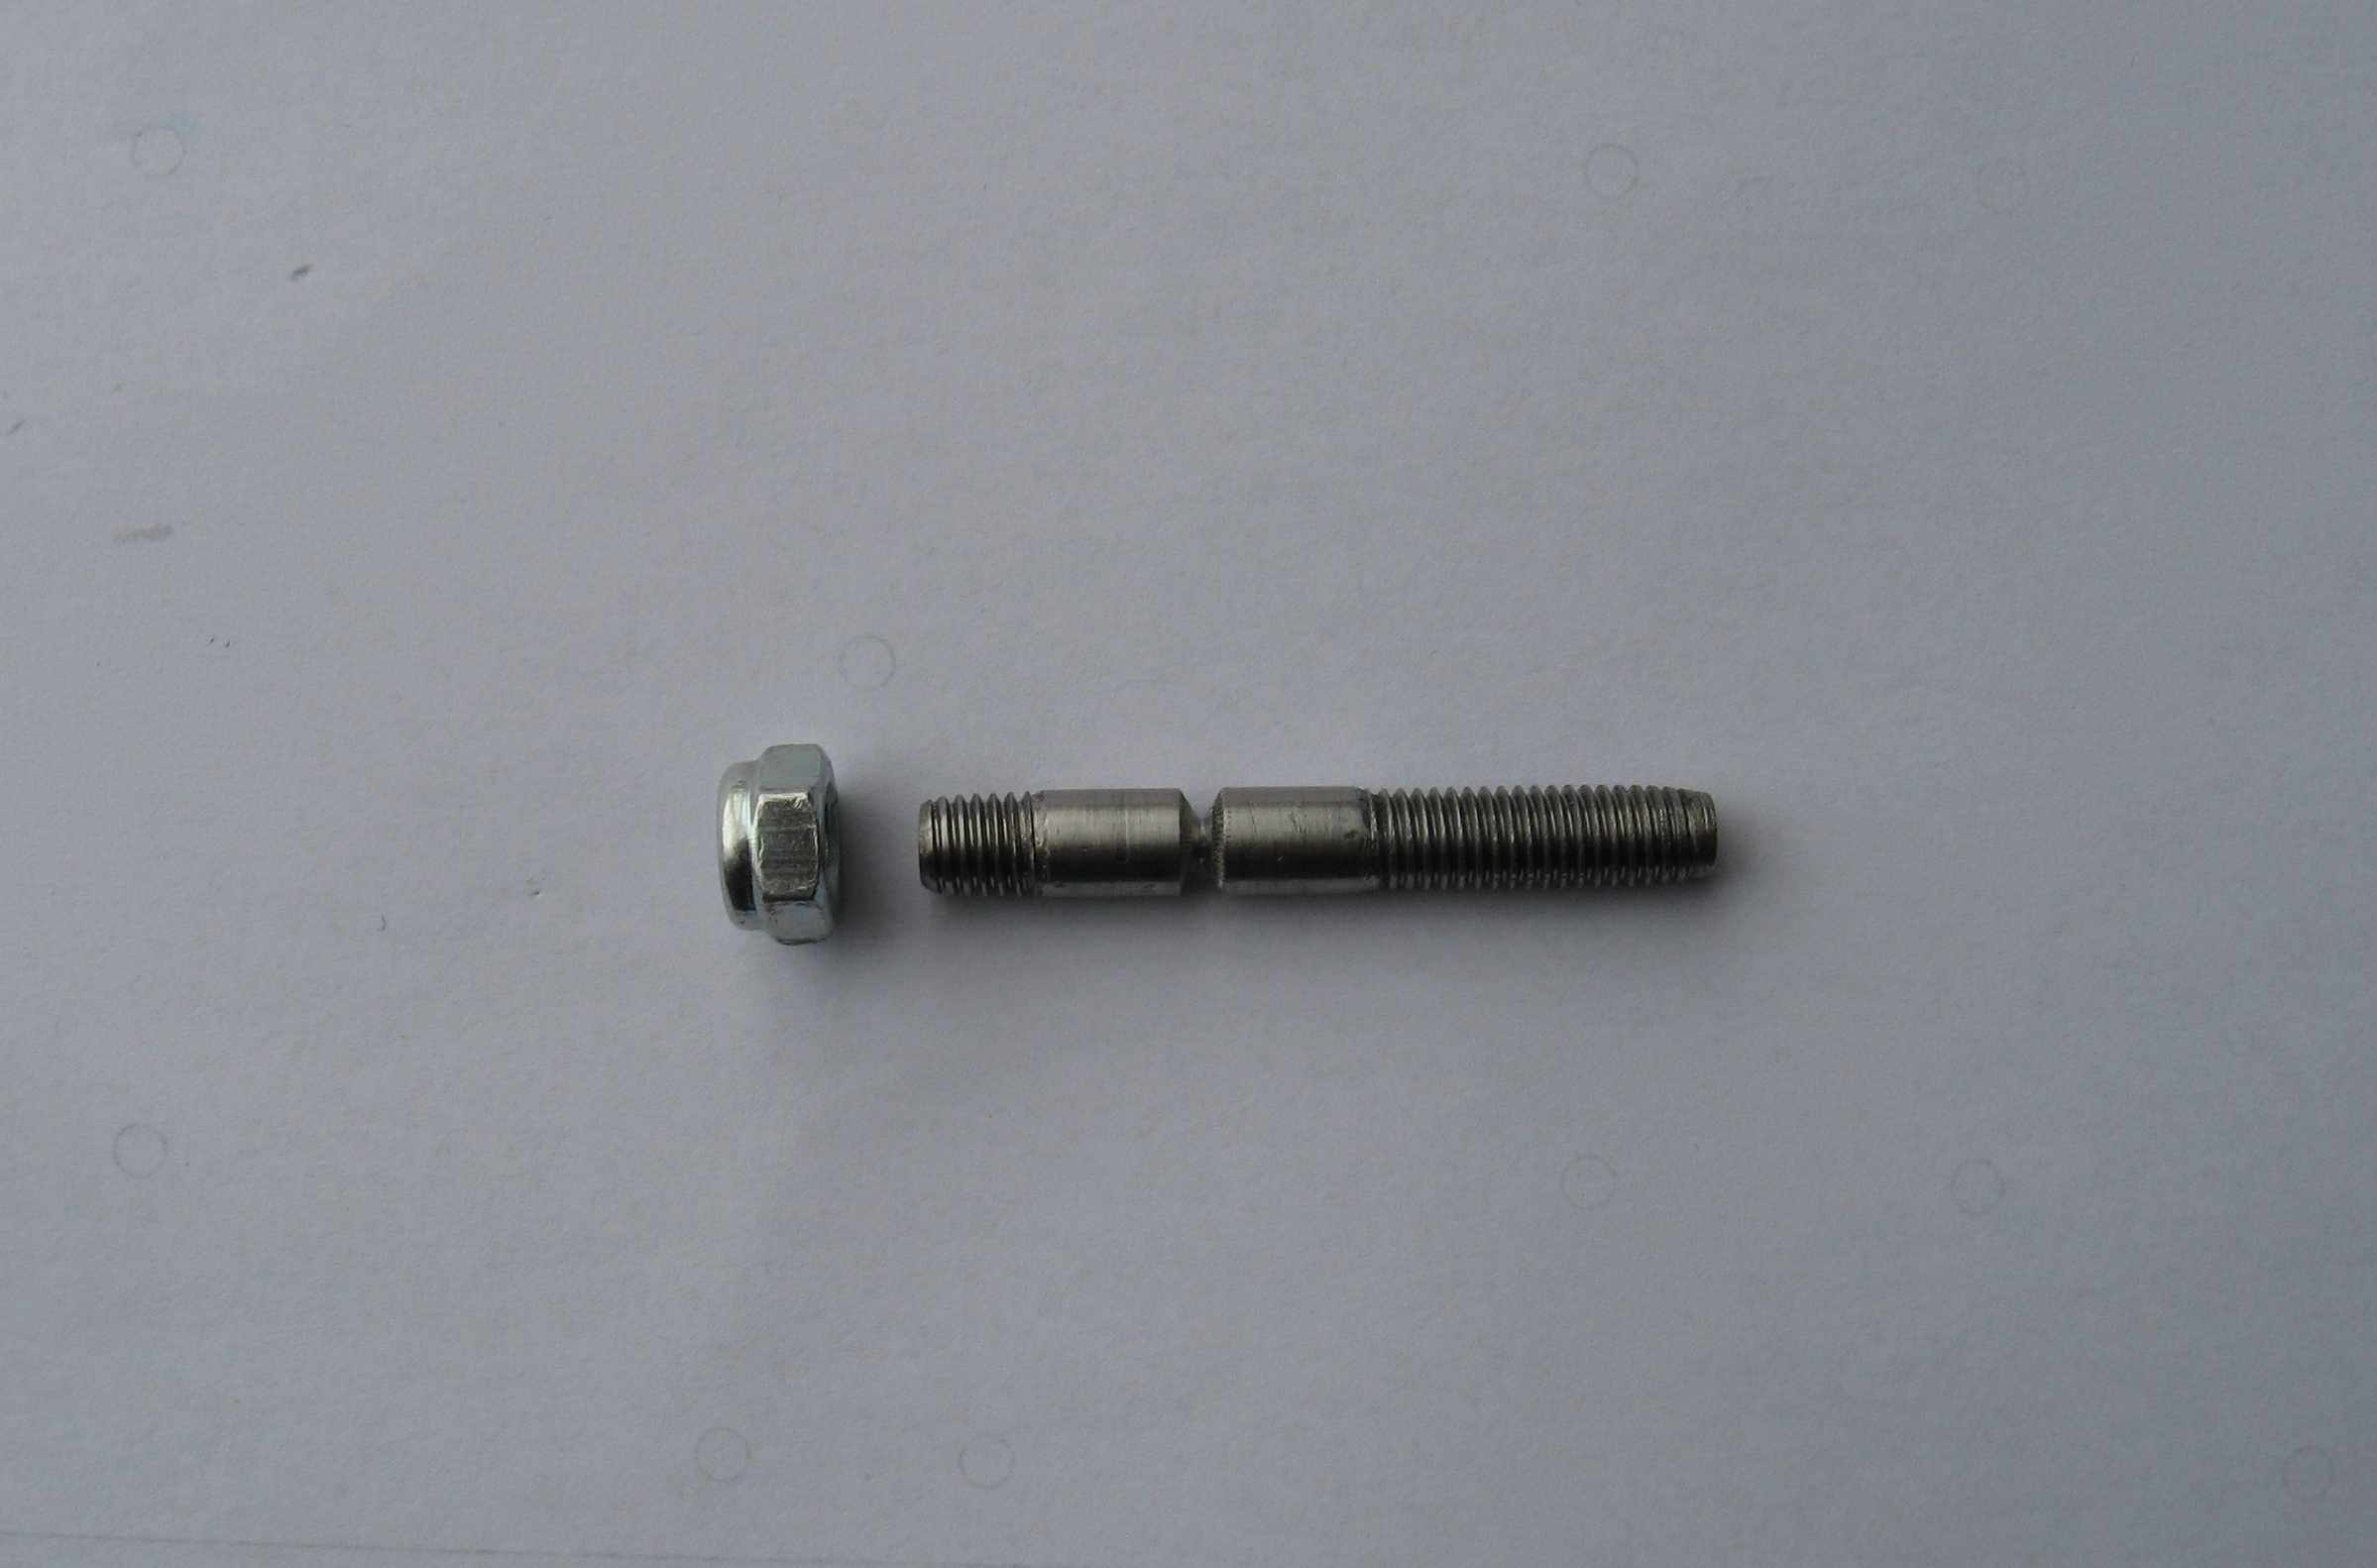
I did the hobbing the way some others are doing it - with a 3mm tap. I cut a 60 degree groove. You absolutely have to mount the shaft between 2 decent bearings and they must rotate with total freedom. The shaft should turn itself slowly by virtue of the taps' "winding force" on it. Run the power drill at a slower speed too. As I said Simon, I will test mine when my build is finished (soon I hope). I cut the threads on mine before I did the grooving. The first pic shows the shaft clearer, I just posted the 2nd cos' it shows its a shaft and not a bolt (and I cleaned the threads up  )
)
I'm gonna start another thread on calibration of extruders - there's an anomaly in the maths that bothers me
)I'm gonna start another thread on calibration of extruders - there's an anomaly in the maths that bothers me
|
Re: Hobbing Flavours November 30, 2012 06:32AM |
Registered: 11 years ago Posts: 72 |
I made about 5 hobbed bolts while experimenting with the technique. First I turned a groove on the lathe then mounted the grooved bolt in two bearings in a vice on the mill and spun a 5mm tap in the mill. Only problem was that the mill would walk my carefully measured groove along the shaft. The whole hole also ended up to deep. The final solution seemed to be, skip the lathe part and put the bolt straight in the vice (with bearings of course) and take vicious first cut, then gently increase the cu\t till the hobbing looked good. You still need to tweak the bolt position with packing washers of course. I had hoped to get around this. It would be possible if I built up a jig which would stop the initial "walk". However the current bolt works so well I havn't bothered yet.
|
Re: Hobbing Flavours November 30, 2012 02:49PM |
Registered: 11 years ago Posts: 525 |
A jig to hold the 8mm bolt with a hole in the correct position for the 3mm tap might work. How are these made commercially?
_________________________________________________________________________________________
Richmond, New Zealand
Thingiverse ~ YouTube
_________________________________________________________________________________________
Richmond, New Zealand
Thingiverse ~ YouTube
|
Re: Hobbing Flavours November 30, 2012 09:55PM |
Registered: 11 years ago Posts: 1,592 |
|
Re: Hobbing Flavours December 01, 2012 01:50AM |
Registered: 11 years ago Posts: 525 |
Thanks for that idea Waitaki, I did a quick search and found a dozen or so then selected this one [www.thingiverse.com] which I am printing out now. I think I'll go with your idea of using a piece of smooth rod and threading each end for nylocks.
_________________________________________________________________________________________
Richmond, New Zealand
Thingiverse ~ YouTube
_________________________________________________________________________________________
Richmond, New Zealand
Thingiverse ~ YouTube
|
Re: Hobbing Flavours December 01, 2012 05:55AM |
Registered: 11 years ago Posts: 72 |
|
Re: Hobbing Flavours December 02, 2012 11:08PM |
Registered: 11 years ago Posts: 137 |
My extruder was having difficulty feeding filament to the Bowden hot end , so I had to "re-hobb" the bolt I was using. .one end clamped on a vice pulling with my hand on the bearing side . .and a tap going CCW on the hobbed area . .doing it CW will make it jump everywhere . .but I guess you all know that. .
|
Re: Hobbing Flavours December 03, 2012 12:36AM |
Registered: 11 years ago Posts: 103 |

|
Re: Hobbing Flavours December 03, 2012 07:00PM |
Registered: 11 years ago Posts: 72 |
|
Re: Hobbing Flavours December 03, 2012 07:54PM |
Registered: 11 years ago Posts: 1,592 |
Maybe I should have explained when I started the thread that I used no special tools. After threading the rod,I turned my drill press on its side to cut the groove. I then bored 2 scraps of wood, inserted a couple of "608's", clamped it to my bench, then inserted my grooved rod into the bearings. I used my cordless drill to hob the groove.
Sorry, only registered users may post in this forum.