Hangprinter version 3
Posted by tobben
|
Hangprinter version 3 October 20, 2017 06:44AM |
Registered: 10 years ago Posts: 401 |
This thread is for discussions between builders of Hangprinter version 3.
At the time of thread start, version 3.3 lives in Openscad_version_3 branch of Hangprinter repo.
Mechaduino mounting, configuration and setup will be discussed here even though it is entirely possible to build a working Hangprinter v3 without Mechaduinos.
Mechaduinos are expensive, but they give closed loop control, a handy torque mode for pushing mover around by hand, and possibly auto calibration in the future.
Version 3 is designed such that Mechaduinos can be retrofitted.
torbjornludvigsen.com
|
Infill October 21, 2017 06:44PM |
Registered: 6 years ago Posts: 6 |
|
Re: Hangprinter version 3 October 22, 2017 10:06AM |
Registered: 10 years ago Posts: 401 |
I'm using 14% but I'm sure even less would work just fine. Just be sure to make the gear teeth solid, using 2 or 3 perimeters 
torbjornludvigsen.com

torbjornludvigsen.com
|
Re: Hangprinter version 3 October 25, 2017 01:51PM |
Registered: 6 years ago Posts: 6 |
Hello fellow reprappers. Let's friggin build a Hangprinter version 3.3.
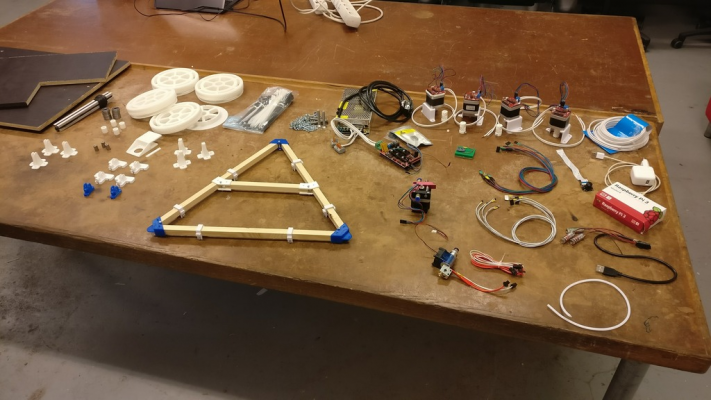
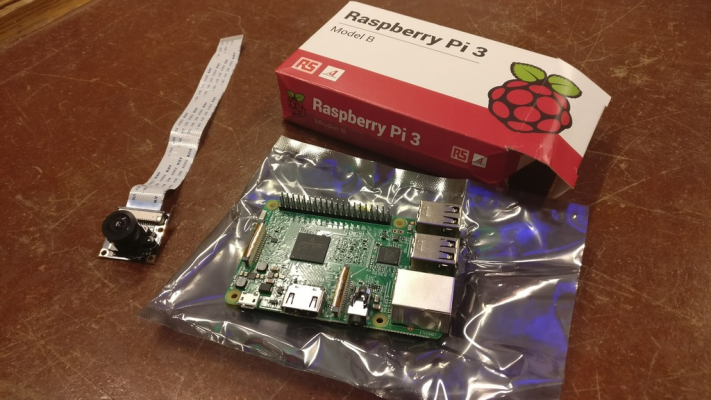
This one has some additional stuff (not mentioned in the BOM on [github.com]), such as a raspberry pi with a camera. In this case, it's not to enable spying on your unknowing printer while you're away. Nono. It's to experiment with anchor localization (auto calibration) using openCV and apriltags. OpenCV is a computer vision library and apriltags are somewhat like QR-codes, but instead meant to enable robust localization. More about that later, because we all know most of you are here to see some pictures. So here's an update of my progress so far:
Mmmmm. A Swedish smörgåsbord.
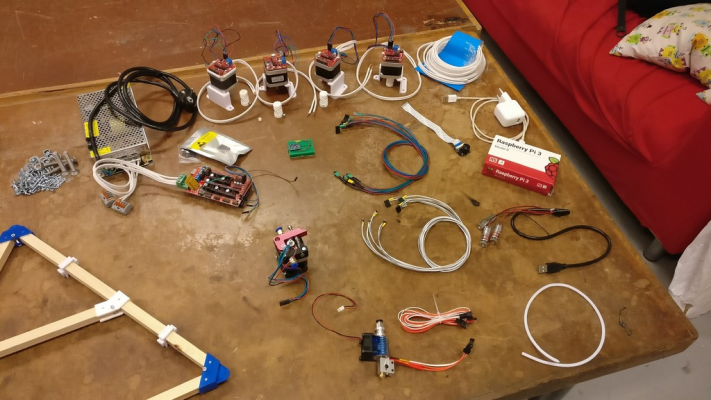
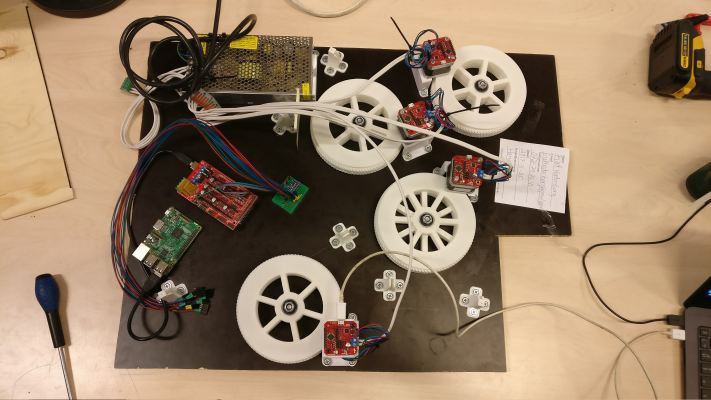
The electronics. Notice that I've got some line lasers.. because who doesn't want lasers on their 3D-printer?
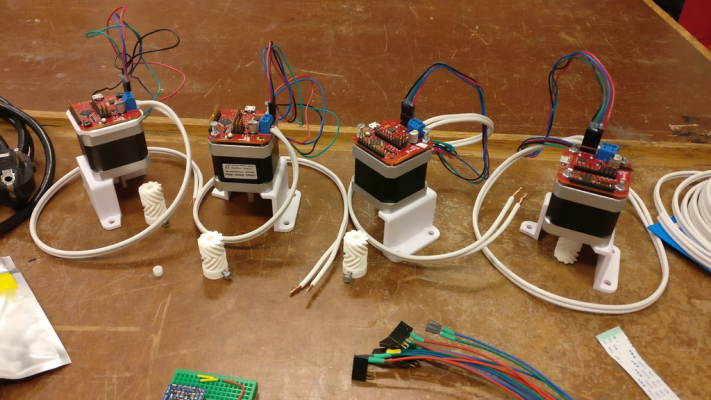
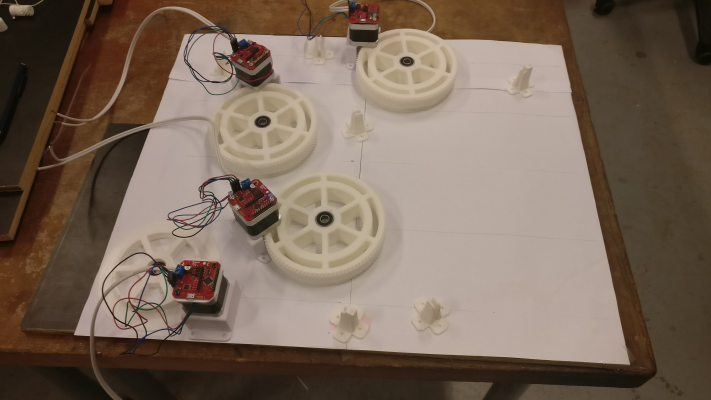
The stepper motors with mechaduinos. Lots of work went into these expensive (at least Hangprinter-wise) little beasts.
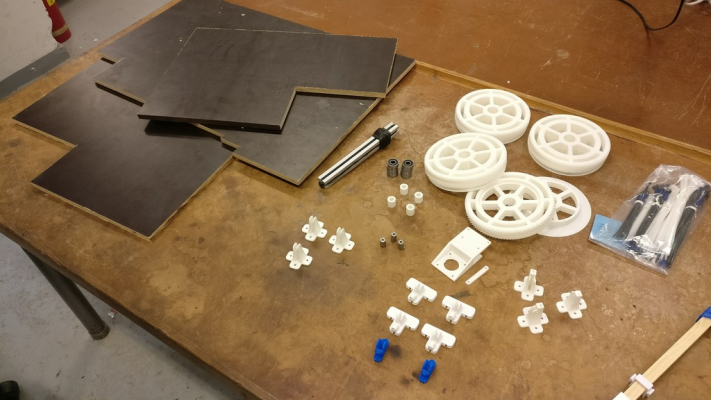
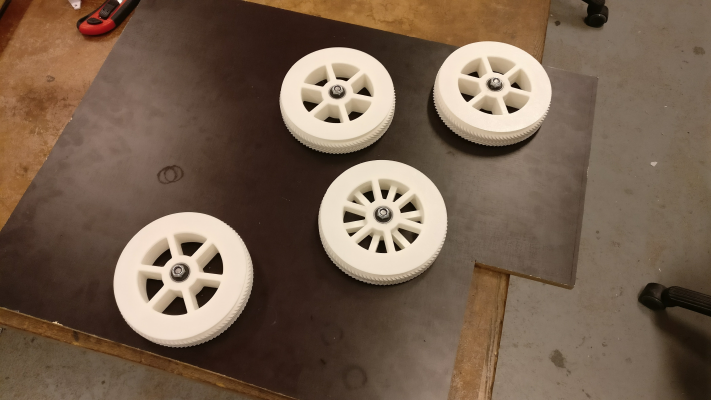
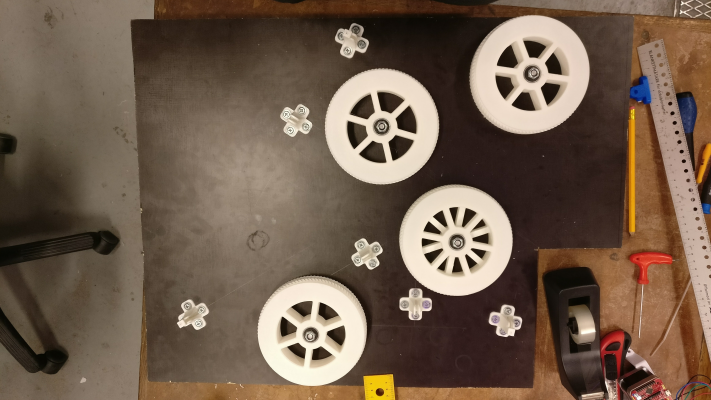
Plywood used for top plate and anchor plates, together with some of the 3d printed parts.
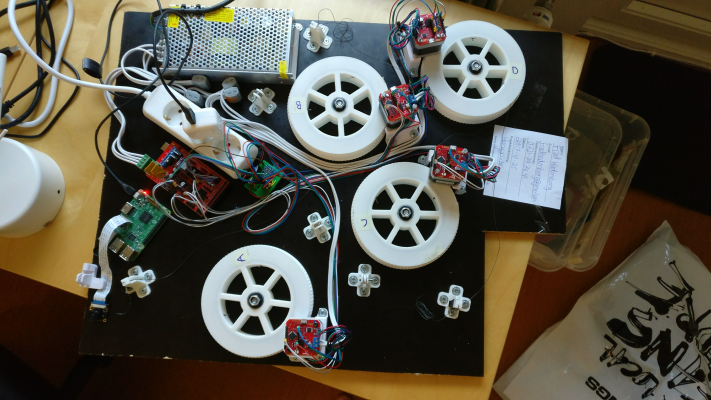
The OctoPi and cam.
A few things to keep in mind when building:
1. The BOM isn't fully complete. Nuts, spacers and some other stuff is left out. Moreover, raspberry pi running octoprint is probably a good idea.
2. BOM for attaching mechaduino isn't included. I tried a few different methods and the best one was with a threaded M3 rod, 5mm plastic standoffs and an M3 nut. The mechaduino manual suggests using 4mm standoffs. Remember that you don't want too great of a distance between the hall effect sensor and the magnet. Moreover, in the mechaduino manual it says that you shouldn't detach all mounting screws at once, since it might weaken the magnetization of the motors. To avoid this, get some threaded plastic standoffs. That way you can replace the original stepper motor screws, one at a time, with threaded M3 rods and use the threaded standoffs to hold the motor together. Having a threaded standoff that hold the motor together also relieves the mechaduino PCB from the duty of a victimized middleman. Holding together a motor is no easy job.
Another alternative to using threaded standoffs is gluing standoffs to the threaded M3 rod. From the mechaduino manual: "We use m3 threaded rods epoxied into 4mm M3 standoffs. Be careful not to remove all motor screws at once while installing: Opening a stepper motor can weaken its magnetization"
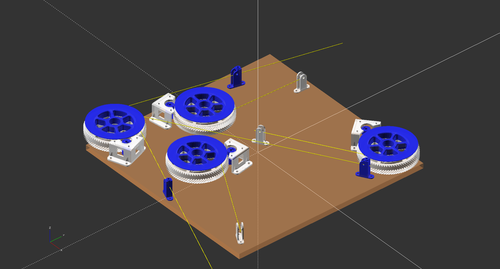
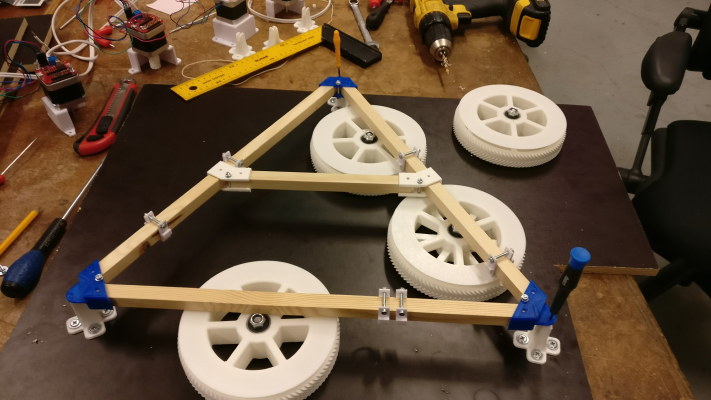
3. I think Tobben wanted to be space efficient and make the top plate so that everything just fits. Notice that two of the spools/gears are actually partly outside of the top plate. I’m taking a slightly larger top plate than specified in the BOM. If you plan to detach the printer from the ceiling, the spools and gears are exposed and could be damaged. Furthermore, a slightly larger top plate enables me to add hardware and change the design/layout without too much sweat.
Image taken from Tobbens blog (http://vitana.se/opr3d/tbear/bilder/winch3.3_liten.png)
4. An easier way to attach motor gears is to print them without press fit. Or use a drill to widen the diameter afterwards. The gear teeth are V shaped, which hopefully keeps the gear in place even without press fit. Plus, there’s also a set screw on the motor gear, craving for more to do. If you still want to use press fit for some reason, here’s some slightly discouraging instructions on what you need to think about:
Don’t attach the mechaduinos before you’ve already attached the gears on the motor shaft. Even more so, don’t calibrate the mechaduinos before attaching the gears. Ideally, you should also wait with attaching the magnets onto the shaft. I learned all of this the hard way, so you won’t have to.
Why is this a big nono when press fitting the motor gears? Since the gears are press fitted onto the shaft, you need to support the shaft from behind when you bang the gears with a hammer. Otherwise the force might damage the motor. Moreover, you’d have to recalibrate the mechaduino.
To sum it up, here’s what you need to do before attaching the mechaduinos:
1. Attach the spool and their gears to the top plate.
2. Attach the motors to the motor brackets.
3. Now you can attach the motor gears to the motor shaft. Do this very carefully. This is so you don’t push them too close to the motor, since it’s a bad idea to pull the motor gear back.
Make sure the spool gear and motor gear align. Remember to do it thoroughly, since it might end up being painful AF to align the gears later on when the mechaduinos are attached.
4. Your motors are now ready for the mechaduino mating season. Enjoy.
As I mentioned earlier, I'm adding a raspberry pi to the top plate (boy does it feel good quitting the Hangprinter v2 size n weight constraint diet). This is to run octoprint as well as hooking up a wide angle raspberry pi camera. The camera would then be placed on the top plate facing down (surprise) and hopefully all anchors will be in sight. Then, openCV will be used for camera calibration, as well as localizing the apriltags laying in front of the anchors. Ideally, this auto calibration feature would then be implemented as a plugin for octoprint. Ideally.
Demo of April Tag Localization System
Btw, here’s an apriltags treat, to familiarize you with the concept: Demo of April Tag Localization System
Happy reprapping,
fredrudolf
|
Re: Hangprinter version 3 October 26, 2017 05:58AM |
Registered: 10 years ago Posts: 401 |
Hi!
I think the PI+PIcam+OpenCV calibration idea is a very rational concept, particularly for XY-localization of ABC anchors on a flat floor!
Please help me convince fredrudolf about writing up a Bachelor's about this, and also help him with technical details if you can.
Thanks for ordering motor the motor mounting steps for us.
Get your point that motor gears and the encoders have a strong and unfortunate interdependency.
I have a personal preference for tight press fits since it keeps gears centered and bound to the motor shaft.
Loose gears is a common failure mode in 3d printers.
After having debugged very many loose gears, I actually prefer stuffing the gear center with epoxy glue.
I have not experienced problems with pulling gears back and forth along motor shafts, as long as shaft is supported and as long as I bend back with two flat screwdrivers at a time (not one).
Drilling out an already printed D-shaped press fit might mean trouble later since your drilled hole will most probably not be centered.
Added two more set screws to motor_gear to help manual motor gear centering.
I also tapered the entrance for the motor shaft slightly, in case bulging top layers contributed to your too tight press fit.
Link to commit 1, link to commit 2.
Edited 1 time(s). Last edit at 10/26/2017 06:29AM by tobben.
torbjornludvigsen.com
|
Re: Hangprinter version 3 October 29, 2017 08:48PM |
Registered: 6 years ago Posts: 6 |
Hello again fellow reprappers. Sorry about the horrible image hosting from my part. That ends today, thanks to tobben. I'll give him a cookie the next time I see him.
Here's a repost of the previous images:
Mmmmm. A Swedish smörgåsbord.
http://hangprinter.org/fredrudolf/IMG_20171025_151844.jpg
The electronics. Notice that I've got some line lasers.. because who doesn't want lasers on their 3D-printer?
http://hangprinter.org/fredrudolf/IMG_20171025_151833.jpg
The stepper motors with mechaduinos. Lots of work went into these expensive (at least Hangprinter-wise) little beasts.
http://hangprinter.org/fredrudolf/IMG_20171025_152135.jpg
Plywood used for top plate and anchor plates, together with some of the 3d printed parts.
http://hangprinter.org/fredrudolf/IMG_20171025_151851.jpg
The OctoPi and cam.
http://hangprinter.org/fredrudolf/IMG_20171025_172234.jpg
Onward with today's stuff...
I've been inactive from the forums for a few days, but I'll promise you, I've been actively building my HP. In total, I've worked about two full days since I last posted some pictures. Here's the current progress:
I placed everything on the platform and moved it around until I roughly had a layout I was happy with:
Then I drilled the M8 holes for the spools and attached them to the platform:
Next up was the D linerollers. To align the D linerollers with the mover, put small allen keys (or something else with a small diameter) through the mover D line holes and then through the D linerollers:
Then comes the ABC linerollers:
The steppers were the next thing to mount. This is where I adjusted the positioning of the motor gears (followed by mounting and calibration of the mechaduinos). After calibrating the mechaduinos it was time to mount the electronics. The wiring was already prepared, which accelerated the process a lot.
Regarding the mounting of the motor gears:
I tried out the mechaduinos. Keep sound on, but bring down the volume.
https://photos.app.goo.gl/tGaGmLbjvX9LcihV2
If your steppers sound like a freight train (like in the video above), then you know something's wrong. I don't recall exactly what was faulty, but I think they simply weren't calibrated yet when I shot this vid. Here's how it should look (and sound) like once you calibrate the mechaduinos:
https://photos.app.goo.gl/o975JUE5dsaLxtyj1
Sweeeet music in comparison to the previous video Default PID values were kept, which seems to work just fine.
Here's the video that apparently made tobben jump up and down out of joy (since it meant that the Hanggprinter v3 Marlin software he's been refactoring heavily seems to work). This video was shot once the mechaduinos were hooked up with I2C + step and dir to the RAMPS:
https://photos.app.goo.gl/HEvyTXEZ7idwLee73
Currently my RAMPS is supplying 5V to all the mechaduinos, which definitely has bad mojo written all over. That's why, from now on, I'm gonna use a voltage regulator (L7805) to supply the mechaduinos with power. It brings down the power supply's 12V to 5V. If you wanna do the same, remember to stabilize the voltage with capacitors. In addition to the damage that might be caused to the RAMPS, (I'm assuming that) your computer USB-port might be damaged as well. This is if you unplug the 12V supply from the RAMPS while still having the USB-cable connecting your computer and RAMPS.
That's all for now. More to come, so stay tuned.
BTW, here are some smileys to show how happy I am about the progress so far, together with the fact that there haven't been any major show stoppers so far:


Cheers,
fredrudolf
Here's a repost of the previous images:
Mmmmm. A Swedish smörgåsbord.
http://hangprinter.org/fredrudolf/IMG_20171025_151844.jpg
The electronics. Notice that I've got some line lasers.. because who doesn't want lasers on their 3D-printer?
http://hangprinter.org/fredrudolf/IMG_20171025_151833.jpg
The stepper motors with mechaduinos. Lots of work went into these expensive (at least Hangprinter-wise) little beasts.
http://hangprinter.org/fredrudolf/IMG_20171025_152135.jpg
Plywood used for top plate and anchor plates, together with some of the 3d printed parts.
http://hangprinter.org/fredrudolf/IMG_20171025_151851.jpg
The OctoPi and cam.
http://hangprinter.org/fredrudolf/IMG_20171025_172234.jpg
Onward with today's stuff...
I've been inactive from the forums for a few days, but I'll promise you, I've been actively building my HP. In total, I've worked about two full days since I last posted some pictures. Here's the current progress:
I placed everything on the platform and moved it around until I roughly had a layout I was happy with:
Then I drilled the M8 holes for the spools and attached them to the platform:
Next up was the D linerollers. To align the D linerollers with the mover, put small allen keys (or something else with a small diameter) through the mover D line holes and then through the D linerollers:
Then comes the ABC linerollers:
The steppers were the next thing to mount. This is where I adjusted the positioning of the motor gears (followed by mounting and calibration of the mechaduinos). After calibrating the mechaduinos it was time to mount the electronics. The wiring was already prepared, which accelerated the process a lot.
Regarding the mounting of the motor gears:
I followed your advice and it worked out just fine.Quote
tobben
I have not experienced problems with pulling gears back and forth along motor shafts, as long as shaft is supported and as long as I bend back with two flat screwdrivers at a time (not one).
Drilling out an already printed D-shaped press fit might mean trouble later since your drilled hole will most probably not be centered.
I tried out the mechaduinos. Keep sound on, but bring down the volume.
https://photos.app.goo.gl/tGaGmLbjvX9LcihV2
If your steppers sound like a freight train (like in the video above), then you know something's wrong. I don't recall exactly what was faulty, but I think they simply weren't calibrated yet when I shot this vid. Here's how it should look (and sound) like once you calibrate the mechaduinos:
https://photos.app.goo.gl/o975JUE5dsaLxtyj1
Sweeeet music in comparison to the previous video
 Default PID values were kept, which seems to work just fine.
Here's the video that apparently made tobben jump up and down out of joy (since it meant that the Hanggprinter v3 Marlin software he's been refactoring heavily seems to work). This video was shot once the mechaduinos were hooked up with I2C + step and dir to the RAMPS:
https://photos.app.goo.gl/HEvyTXEZ7idwLee73
Currently my RAMPS is supplying 5V to all the mechaduinos, which definitely has bad mojo written all over. That's why, from now on, I'm gonna use a voltage regulator (L7805) to supply the mechaduinos with power. It brings down the power supply's 12V to 5V. If you wanna do the same, remember to stabilize the voltage with capacitors. In addition to the damage that might be caused to the RAMPS, (I'm assuming that) your computer USB-port might be damaged as well. This is if you unplug the 12V supply from the RAMPS while still having the USB-cable connecting your computer and RAMPS.
That's all for now. More to come, so stay tuned.
BTW, here are some smileys to show how happy I am about the progress so far, together with the fact that there haven't been any major show stoppers so far:


Cheers,
fredrudolf
|
Re: Hangprinter version 3 October 30, 2017 05:05AM |
Registered: 10 years ago Posts: 401 |
Seeing the first physical build move after ~100 largely untested commits is indeed a great joy for me as well =D
torbjornludvigsen.com
torbjornludvigsen.com
|
Re: Hangprinter version 3 November 05, 2017 12:04AM |
Registered: 6 years ago Posts: 6 |
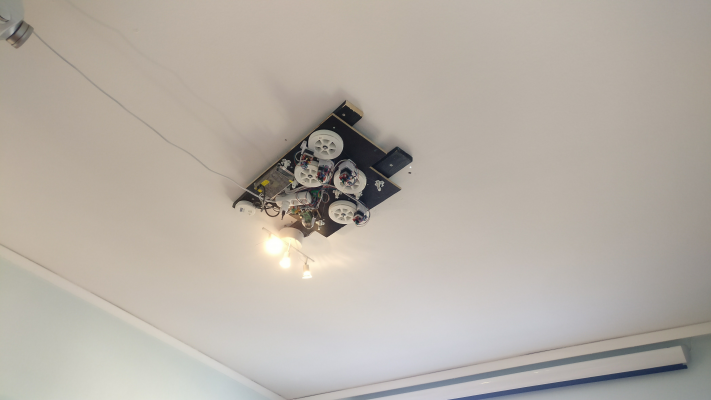
The marriage is complete. The Hangprinter is now attached to the ceiling. Mazel tov!
First I planned on attaching the printer directly to the ceiling. But I mounted two beams first and then mounted the printer onto the beams. It made the mounting much, much easier. The placing of the screws that mounted the printer onto the beams were strategically placed close to the D line rollers. Another two screws made it feel even more stable.
Camera mounted and tested. Needs some tinkering and love, but that’s secondary for now.
I live in a 20 sqm (220 sqft) student dorm room. Now that my Hangprinter just moved in, the interior layout needs to be rearranged. Kinda like when a partner moves in. Well, as in any relationship, you have to be ready to compromise.
Did some rewiring of the cables. Also attached the extruder with a 3m long ribbon cable. The hot end was connected with 3 wires for each pole while the rest got 1 each => 14 wires in total. I might keep another few ones as spares. Maybe a 12V to supply a raspberry pi zero w with a camera and IMU? Anyway, some minor tests were made with the hot end, extruder stepper motor, thermistor and fan. They all seem to be working. I still have some hardware to add to the extruder, so filament extrusion test will have to wait for now.
The mover is now assembled. To add stability, I used wooden screws. Remember to pre-drill! Otherwise the wood will crack, 4sho.
Here’s a tip to make your life a lot easier: Connect the raspberry pi to your home wifi. Setup VNC (remote desktop) on raspberry pi and your computer. Install pronterface and arduino IDE on the raspberry pi. Et voilà.
For development, this is purely awesome. I now have the marlin and mechaduino source code on my raspberry pi and can easily flash both RAMPS and mechaduinos using arduino IDE. Moreover, I can connect to my RAMPS with pronterface for testing and printing. But I still plan to switch to OctoPi when the time is right.
I had a slight setback, when I tried pulling the C wires while the mechaduinos were in positioning mode. At first, the motor was able to sustain a constant force. However, after a couple of seconds, it just let go freely. Later on I’ll explain why this was such a bad thing. Anyway, Tobben thinks this sudden shutdown might be caused by the A4954 driver chip being subject to a continuously high current. The shutdown was basically caused by overheat protection. After glancing through the A4954 datasheet, I found this:
Thermal Shutdown Temperature – 160°C
Thermal Shutdown Hysteresis – 15°C
The chip will shut down when it reaches 160°C and start again at 145°C. Tobben suggested reducing the maximum allowed current to the motor. This together with a heatsink on the A4954 chip will hopefully make it avoid overheat protection limit from being reached.
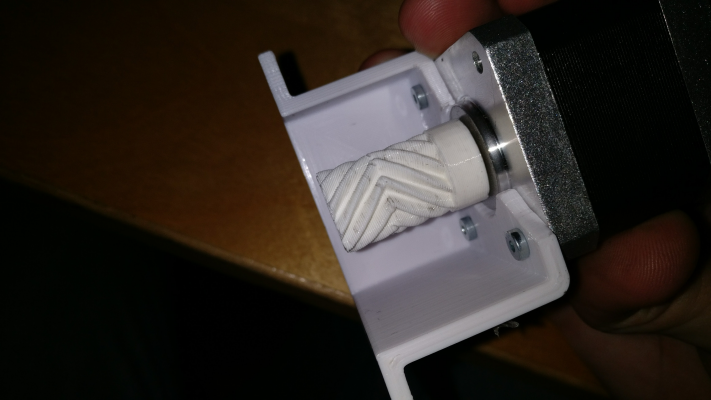
So why was overheating such a bad thing in this case? Well, the overheat protection made the spool spin freely, much like a drunk panda on ice. The wires tangled and got stuck on the motor gear. Moreover, the gears got misaligned, and because of that, the motor gear was damaged to a point where I now have to replace it. Hopefully, this is the only thing I have to replace. Below is an image of how the motor gear looks like, post conflict. Zoom in and you’ll see that the motor gear lost the gear war. But what people don’t realize about the gear wars is that it was never really about the gears, at all.
My reaction:
That's it for today.
Goodbye moonmen
|
Re: Hangprinter version 3 November 07, 2017 01:41PM |
Registered: 6 years ago Posts: 6 |
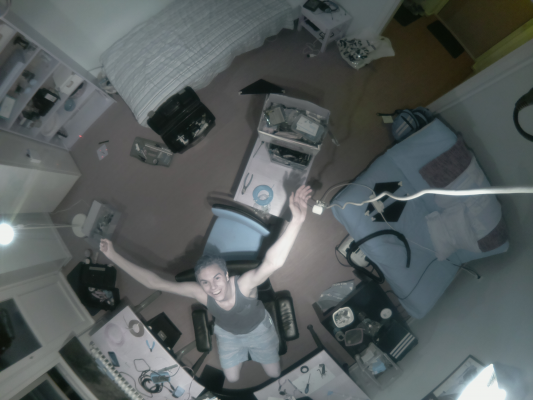
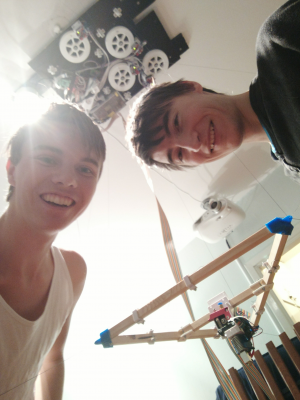
Yesterday was a good day. Torbjörn came over for some printing and cinnamon tea.
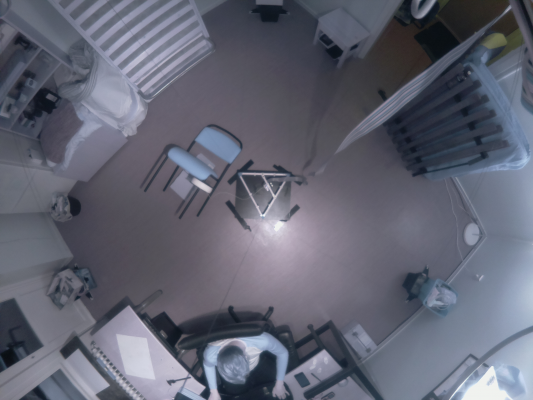
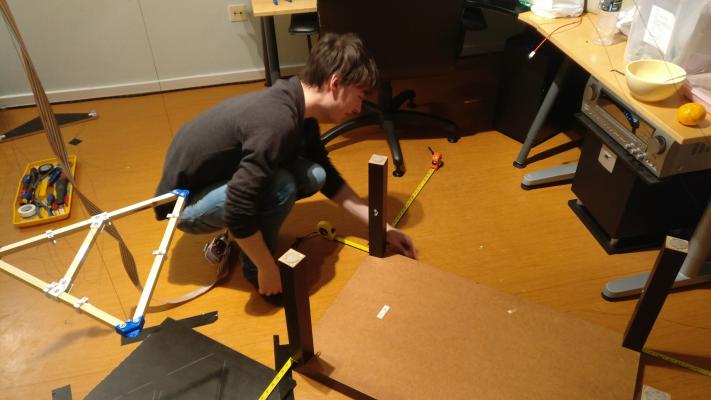
I temporarily removed my bed and couch to fit my ABC anchors. My room is approx 4x4m.
Torbjörn doing some anchor calibration.
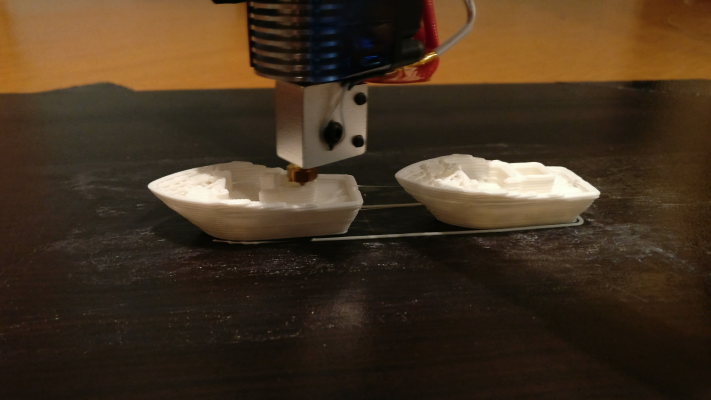
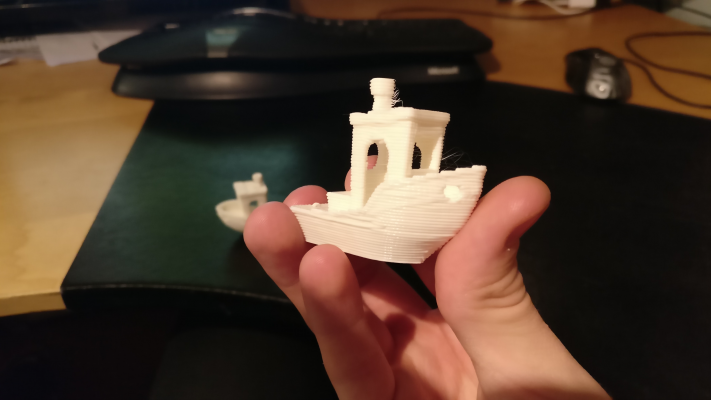
Aaaand.. off we go! Looks surprisingly good for a first print.
Here's a video, showing some printing action as well as the whole setup:
https://photos.app.goo.gl/H1v2FSxzmzbJOS3z1
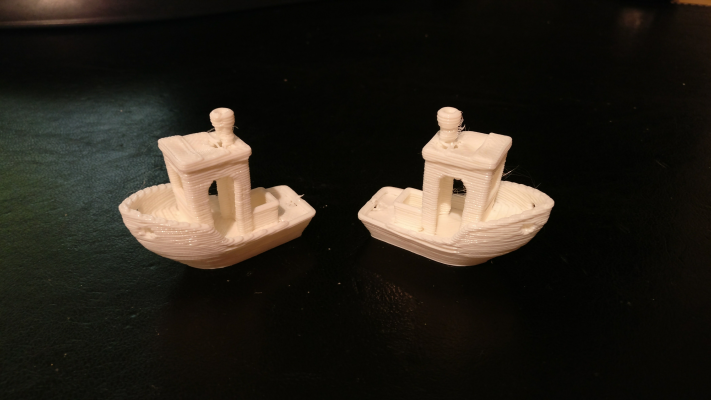
And the result:
Basically, the HP3 is alive!
Hope I get accompanied soon by other builders!
Over and out,
fredrudolf
|
Re: Hangprinter version 3 November 07, 2017 04:18PM |
Registered: 10 years ago Posts: 401 |
Wonderful! Still gobsmacked by that Benchy.
Chiming in with a few chronologically ordered pics from the HP3 build at my place:
1_Mover.JPG
2_D_Lineroller_Alignment.JPG
3_Spool_Lineroller_Alignment.JPG
4_Layout_Planning.JPG
5_D_Spool_and_Lineroller_Hole_Markings.JPG
Here's a short image series to show what's inside the spool-gear sandwiches:
6_D_Screw_and_Washer.JPG
7_D_Gear.JPG
8_D_Spacer.JPG
9_D_Spool.JPG
10_D_Sandwich.JPG
Since the mover triangle is not exactly equilateral, we need to mark its orientation relative to the winch:
11_Marking_Mover_Orientation.JPG
Image series showing how I tie line to spools. I call the knot "Hangprinter Hitch". Please excuse my ignorance and inform me about the proper name if you know this knot from before.
12_Hangprinter_Hitch_0.JPG
13_Hangprinter_Hitch_1.JPG
14_Hangprinter_Hitch_2.JPG
15_Hangprinter_Hitch_3.JPG
16_Hangprinter_Hitch_4.JPG
17_Hangprinter_Hitch_5.JPG
PS! The above image shows two half hitches. I used three but didn't photograph the third one.
18_Hangprinter_Hitch_6.JPG
19_Hangprinter_Hitch_7.JPG
20_D_Motor_Mounted.JPG
21_Marking_Positions_for_A_and_B.JPG
22_Countersunk_Sandwich_Core_Screw.JPG
23_Winch_Ready_for_Electronics_Mounting.JPG
Electronics mounting starts tomorrow, I guess.
I'll try SilentStepSticks with coolStep enabled this time, to confirm that HP3 works well without closed-loop.
Will touch ceiling this week, I hope.
torbjornludvigsen.com
|
Re: Hangprinter version 3 November 09, 2017 07:57AM |
Registered: 8 years ago Posts: 120 |
|
Re: Hangprinter version 3 November 14, 2017 06:43AM |
Registered: 7 years ago Posts: 24 |
Hi everyone, it's been a good half year since I last checked in, things have progressed and in an awesome way. I love the static motor-plate, makes a lot of sense.
Actually, I'm personally a big fan of parallel cable robots, and I want to contribute.
I'm the project lead for the ODrive project, and I think this kind of printer would do very well with brushless motors: with more power you can use heavier and hence stiffer cables.
I want to donate 2 ODrives (so 4 axes) to this project, along with some encoders and motors. Do any of the developers have the time to use something like that? Of course I am happy to provide support with integrating the communications and any help to get started.
I already have an idea for a mechanics arrangement that might work with the Hobbyking Donkey motor and the CUI AMT102 encoders. Though maybe an additional reduction stage may be appropriate. How much torque is on the steppers at the moment?
Cheers,
Oskar
|
Re: Hangprinter version 3 November 14, 2017 08:42AM |
Registered: 10 years ago Posts: 401 |
Wow, this is great news!
We've long been wanting a BLDC version. The goal with version 3 was actually to go fully self-calibrating, closed loop BLDC.
I have time to make a push from January and onwards.
I'll do my best to get my local DC-motor experts on board as well (looking at you, Vilse).
The steppers exert only ca 30-35 Ncm.
I think we can get up and running quickly with simple 3d-printed reduction stage using two different sized gears on a common shaft.
We have the luxury of not having to care too much about either backlash, weight or size of the reduction stage.
torbjornludvigsen.com
We've long been wanting a BLDC version. The goal with version 3 was actually to go fully self-calibrating, closed loop BLDC.
I have time to make a push from January and onwards.
I'll do my best to get my local DC-motor experts on board as well (looking at you, Vilse).
The steppers exert only ca 30-35 Ncm.
I think we can get up and running quickly with simple 3d-printed reduction stage using two different sized gears on a common shaft.
We have the luxury of not having to care too much about either backlash, weight or size of the reduction stage.

torbjornludvigsen.com
|
Re: Hangprinter version 3 November 17, 2017 09:39AM |
Registered: 10 years ago Posts: 401 |
Electronics mounting; RAMPS + 5xSilentStepSticks with TMC2130 drivers.
24_SilentStepStickTMC2130.JPG
25_Electronics_but_no_SPI_for_TMC2130s.JPG
26_SilenStepSticks_going_to_the_hairdresser.JPG
27_separating_the_SDI_cables.JPG
28_SDI_and_SCK_bundeled_and_plugged.JPG
29_All_SPI_cables_plugged_1.JPG
30_All_SPI_cables_plugged_2.JPG
31_electronics_bush_is_growing.JPG
torbjornludvigsen.com
|
Re: Hangprinter version 3 November 18, 2017 08:01PM |
Registered: 10 years ago Posts: 401 |
Videos of the tmc2130 setup: TMC2130 stepper driver testing and Shadow Hangprint using TMC2130.
For tmc2130 prepared firmware, see the tmc2130 branch in the repo (edit 19 Nov. The tmc2130 stuff is now merged into the Openscad_version_3 branch. Use that one instead. edit end)
Edited 1 time(s). Last edit at 11/19/2017 03:09PM by tobben.
torbjornludvigsen.com
For tmc2130 prepared firmware, see the tmc2130 branch in the repo (edit 19 Nov. The tmc2130 stuff is now merged into the Openscad_version_3 branch. Use that one instead. edit end)
Edited 1 time(s). Last edit at 11/19/2017 03:09PM by tobben.
torbjornludvigsen.com
|
Re: Hangprinter version 3 November 20, 2017 12:51PM |
Registered: 6 years ago Posts: 7 |
|
Re: Hangprinter version 3 November 20, 2017 03:23PM |
Registered: 10 years ago Posts: 401 |
Yup, as long as motors are run cool (or motor_bracket and extruder_holder are printed in a heat resistant plastic).
torbjornludvigsen.com
torbjornludvigsen.com
|
Re: Hangprinter version 3 November 20, 2017 05:51PM |
Registered: 10 years ago Posts: 14,672 |
I'd love to see a Hangprinter using a Duet WiFi or Duet Ethernet controller  Help with the kinematics support is available.
Large delta printer [miscsolutions.wordpress.com], E3D tool changer, Robotdigg SCARA printer, Crane Quad and Ormerod
Disclosure: I design Duet electronics and work on RepRapFirmware, [duet3d.com].
 Help with the kinematics support is available.
Large delta printer [miscsolutions.wordpress.com], E3D tool changer, Robotdigg SCARA printer, Crane Quad and Ormerod
Disclosure: I design Duet electronics and work on RepRapFirmware, [duet3d.com].
|
Re: Hangprinter version 3 November 21, 2017 09:43AM |
Registered: 10 years ago Posts: 401 |
Me too!
They're quite unique in using the more heavy duty TMC2660s. This could allow us to use stronger motors, which in turn could allow us to use heavier tool heads (like cheramics/pellet extruders), or just tighter lines. They also give features equivalent to PI+tmc2130, but are much easier to assemble and set up. They would be well worth the extra ca €50 it costs compared to a RAMPS+tmc2130+Pi setup for many users I think.
DuetWifi is on my wishlist, but I currently don't know when/if I will find the time to implement myself. Any HP3 builder who wants to go the DuetWifi/DuetEthernet route of course has my support as well
torbjornludvigsen.com
They're quite unique in using the more heavy duty TMC2660s. This could allow us to use stronger motors, which in turn could allow us to use heavier tool heads (like cheramics/pellet extruders), or just tighter lines. They also give features equivalent to PI+tmc2130, but are much easier to assemble and set up. They would be well worth the extra ca €50 it costs compared to a RAMPS+tmc2130+Pi setup for many users I think.
DuetWifi is on my wishlist, but I currently don't know when/if I will find the time to implement myself. Any HP3 builder who wants to go the DuetWifi/DuetEthernet route of course has my support as well

torbjornludvigsen.com
|
Re: Hangprinter version 3 November 21, 2017 09:49AM |
Registered: 6 years ago Posts: 7 |
fredrudolf, instead of VNC you can use the firmware updater plugin for Octoprint Firmware updater
|
Re: Hangprinter version 3 November 21, 2017 10:10AM |
Registered: 10 years ago Posts: 401 |
A few pictures of how the extruder_holder part is intended to be used:
32_extruder_holder_usage_left.JPG
33_extruder_holder_usage_right.JPG
34_extruder_holder_usage_back.JPG
torbjornludvigsen.com
32_extruder_holder_usage_left.JPG
33_extruder_holder_usage_right.JPG
34_extruder_holder_usage_back.JPG
torbjornludvigsen.com
|
Re: Hangprinter version 3 November 21, 2017 11:01AM |
Registered: 10 years ago Posts: 401 |
@imrcly Have you had luck using the Octoprint Firmware updater?
I tried using it, but it asked me for a hex-file. My Arduino IDE creates two hex-files, and I chose the wrong one. This resulted in overwriting the bootloader on my Mega. So I stopped using it. It seems like I must have missed some important instruction somewhere?
torbjornludvigsen.com
I tried using it, but it asked me for a hex-file. My Arduino IDE creates two hex-files, and I chose the wrong one. This resulted in overwriting the bootloader on my Mega. So I stopped using it. It seems like I must have missed some important instruction somewhere?
torbjornludvigsen.com
|
Re: Hangprinter version 3 November 21, 2017 01:51PM |
Registered: 6 years ago Posts: 7 |
I have had luck. You have to use the .hex file that is just the name of your firmware filename.
example
Marlin.ino.hex is what you want to use.
if you use the Marlin.ino.with_bootloader.hex will overwrite the Arduino bootloader
Question about the wood spars, and plywood. With the plywood/mdf is there a min/max thickness? On the spars for the triangle, I cut them to 15mmx15mm but they seem to be too large is that the actual size of those or are they smaller?
|
Re: Hangprinter version 3 November 21, 2017 01:58PM |
Registered: 10 years ago Posts: 401 |
Thx! I might give the Octoprint firmware uploader another try 
I don't have any exact spec for min/max thickness since every ceiling is different. But you want "as stiff as possible". I've used 4mm and 5mm plywood, as well as 5 mm MDF in the past. The 5mm plywood was the stiffest one, and worked best.
I just noticed today that my own pinewood spars, that I have used while modelling, are actually 14.5x14.5 mm. I tested with some 15.1x15.1 mm spars yesterday, and the beam_slider didn't fit. Updated that part. What parts did not fit for you?
Edited 1 time(s). Last edit at 11/21/2017 01:59PM by tobben.
torbjornludvigsen.com
|
Re: Hangprinter version 3 November 21, 2017 02:48PM |
Registered: 6 years ago Posts: 7 |
|
Re: Hangprinter version 3 November 21, 2017 05:59PM |
Registered: 10 years ago Posts: 401 |
Did the following two commits:
commit 1, commit 2.
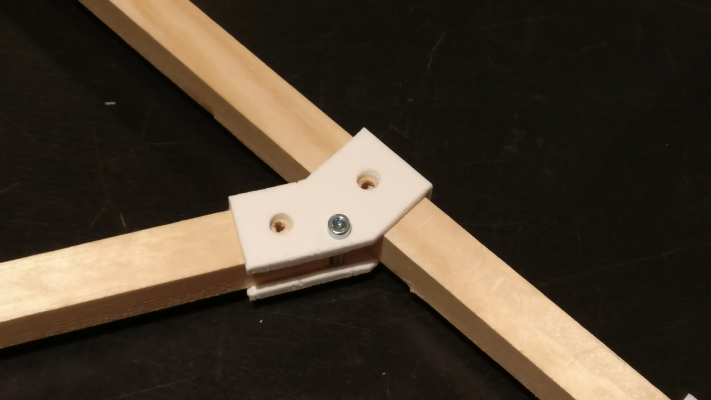
I'll look into corner_clamp tomorrow.
torbjornludvigsen.com
commit 1, commit 2.
I'll look into corner_clamp tomorrow.
torbjornludvigsen.com
|
Re: Hangprinter version 3 November 22, 2017 02:45AM |
Registered: 6 years ago Posts: 48 |
|
Re: Hangprinter version 3 November 22, 2017 04:40AM |
Registered: 10 years ago Posts: 14,672 |
Quote
tobben
Me too!
They're quite unique in using the more heavy duty TMC2660s. This could allow us to use stronger motors, which in turn could allow us to use heavier tool heads (like cheramics/pellet extruders), or just tighter lines. They also give features equivalent to PI+tmc2130, but are much easier to assemble and set up. They would be well worth the extra ca €50 it costs compared to a RAMPS+tmc2130+Pi setup for many users I think.
DuetWifi is on my wishlist, but I currently don't know when/if I will find the time to implement myself. Any HP3 builder who wants to go the DuetWifi/DuetEthernet route of course has my support as well
If you or anyone else gets time to do a little work on this, let me know and give me a pointer to the kinematics equations and a description of the homing behaviour. Then I'll write the Kinematics class for you. You will need to try it out and give me plenty of feedback, because there are bound to be some things not working correctly at the start.
Large delta printer [miscsolutions.wordpress.com], E3D tool changer, Robotdigg SCARA printer, Crane Quad and Ormerod
Disclosure: I design Duet electronics and work on RepRapFirmware, [duet3d.com].
|
Re: Hangprinter version 3 November 22, 2017 07:17AM |
Registered: 10 years ago Posts: 401 |
@delloman
Cool! I'm excited to hear that. Mechaduinos give you closed-loop control. Details are on my blog.
@dc42
Forward kinematics
The motors A, B, C, and D should be constantly enabled.
Homing for HP3 with Mechaduino: Put all motors in torque/constant force-mode and drag mover to origo by hand. Then send G28.
Homing for HP3 without Mechaduino: Get mover to origo by manually stepping individual motors using G6 (I know it makes more sense to call this command G1 S2). Then send G28.
Suggestions for more repeatable, less time consuming homing are welcome
Bonus features, not required for basic operation:
If you want the Line buildup compensation as well, see this blog post. Constants are defined here, derived here and used here.
The inverse of that last equation is implemented here. It is relevant only for auto calibration, that is using motor shaft encoder data to find the cartesian anchor positions (
torbjornludvigsen.com
Cool! I'm excited to hear that. Mechaduinos give you closed-loop control. Details are on my blog.
@dc42
Forward kinematics
anchor_ABCD_xyz are calibration constants. carthesian[XYZ_AXIS] are absolute positions from G0/G1-command. Motor names are mapped like [X, Y, Z, E0, E1] <-> [A, B, C, D, E].The motors A, B, C, and D should be constantly enabled.
Homing for HP3 with Mechaduino: Put all motors in torque/constant force-mode and drag mover to origo by hand. Then send G28.
Homing for HP3 without Mechaduino: Get mover to origo by manually stepping individual motors using G6 (I know it makes more sense to call this command G1 S2). Then send G28.
Suggestions for more repeatable, less time consuming homing are welcome

Bonus features, not required for basic operation:
If you want the Line buildup compensation as well, see this blog post. Constants are defined here, derived here and used here.
The inverse of that last equation is implemented here. It is relevant only for auto calibration, that is using motor shaft encoder data to find the cartesian anchor positions (
anchor_ABCD_xyz) without user interaction.torbjornludvigsen.com
|
Re: Hangprinter version 3 November 22, 2017 10:48AM |
Registered: 6 years ago Posts: 48 |
Sorry, only registered users may post in this forum.
