Isothermal Heated Bed - First Pass
Posted by rq3
|
Isothermal Heated Bed - First Pass May 16, 2022 07:48PM |
Registered: 4 years ago Posts: 285 |
Attached is a document describing my first attempt at a heat pipe, or more properly, a vapor chamber, heated bed. I've used thermochromic film to map the temperature variation across my borosilicate bed. While it isn't as bad as I thought it would be, it's not great either (15C by IR gun), across a 380mm diameter bed, edge to edge.
I'm hoping this idea will bring it to within 0.5C across the bed, or better, no matter the energy input (within reason).
Edited 1 time(s). Last edit at 05/16/2022 08:17PM by rq3.
I'm hoping this idea will bring it to within 0.5C across the bed, or better, no matter the energy input (within reason).
Edited 1 time(s). Last edit at 05/16/2022 08:17PM by rq3.
|
Re: Isothermal Heated Bed - First Pass May 16, 2022 11:04PM |
Registered: 11 years ago Posts: 5,780 |
IR guns aren't the way to measure temperature of glass. They are calibrated to specific emissivity targets. You're more likely measuring the temperature of whatever is under the glass or reflected by the glass than the glass itself, where the molten plastic will be deposited.
A thermal camera may give a better visualization of the temperature distribution, though absolute accuracy, especially on glass may be questionable.
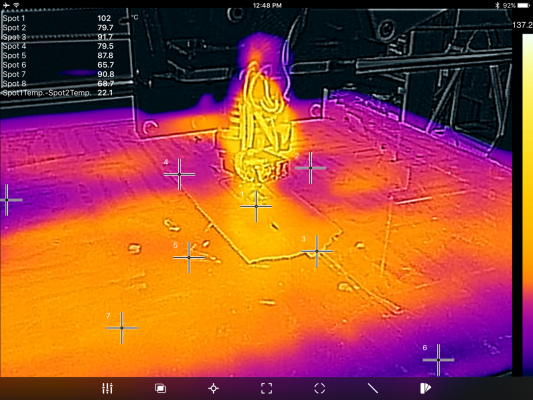
Here's a thermal camera image of a glass bed (or the heater under it?) on a Taz printer, This is just a heater glued directly to glass:
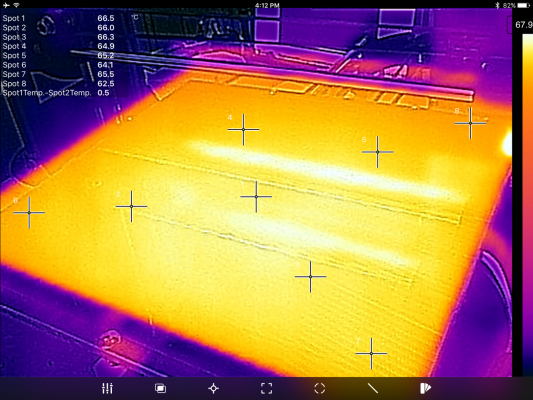
Here's the same heater attached to a 1/4" cast aluminum plate with thin layers of adhesive and PEI on top that replaced the glass after it broke, The white bars are reflections of the X axis guide rails, which are relatively cool, but for some reason appear hot (the guide rail reflections may be part of the optical overlay, not the thermal image):
Maybe you could coat the glass with some sort of thin, low thermal mass paint or other dark pigment that matches the emissivity of a calibrated IR thermometer (not a $10 unit from Harbor Freight Tools, but an actual scientific instrument- you'll need that to measure 0.1C variations in temperature).
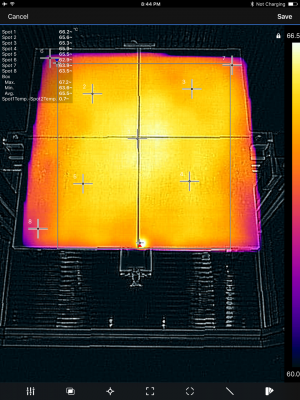
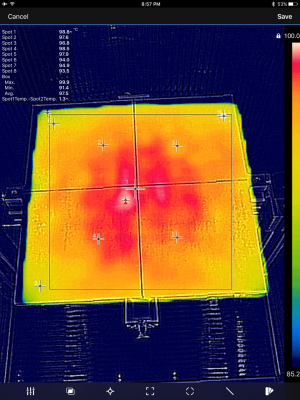
Here are two thermal images of my printer's uninsulated 300x300x8 mm cast aluminum bed (with adhesive and PEI) and a 300x300 mm 750W heater, controlled by the printer's controller board (PID) with a single thermistor mounted at the center of the heater.
I'm not sure why you want to get to 0.1 C variation across the surface- it isn't needed for FDM printing with plastic. I print edge to edge on that printer with ABS, PETG, TPU, and rarely PLA, without first layer adhesion problems.
There may be other uses for a 0.1C distributed surface, however, the bed and heater will have thermal mass that takes time to heat and cool (as does your liquid/vapor medium). If the heater turns on for 2 seconds, how long will it take the added heat to propagate through the glass? And how much will the glass surface temperature drop while that heat is moving toward it? And if there's slight variation in thickness of the glass can you expect the temperature at the surface to be the same everywhere? Where will you measure the temperature for control purposes? How will the glass plate be coupled to the heat spreader?
Edited 1 time(s). Last edit at 05/16/2022 11:12PM by the_digital_dentist.
Ultra MegaMax Dominator 3D printer: [drmrehorst.blogspot.com]
|
Re: Isothermal Heated Bed - First Pass July 25, 2022 06:35PM |
Registered: 4 years ago Posts: 285 |
With many thanks to the digital dentist, my go-to bed is borosilicate, with a microscopic waffle pattern of matte black glaze, and was commonly supplied with AnyCubic printers as "UltraBase Pro". It works as intended, with some caveats, but provides a pretty good target for IR guns as regards emissivity (i.e. it's matte black, not transparent).
In any case, the final discussion of the assembly of the vapor chamber heated bed is attached. I used a DS18B20 sensor, lightly coupled with Krytox grease, as a probe, and can confirm that the entire surface is within 0.0625C at 60C. While the DS18B20 may not be wildly accurate in absolute temperature terms, it IS very consistent and sensitive.
For anyone needing a surface that is very consistent in its temperature over a large area, this idea may be of use, you can etch meander heaters into the lower laminate, and remove the upper copper surface completely to reveal a very stiff and flat ceramic loaded material that works very well as a printing surface. It has a glass transition of 285C.
It is imperative that you get all of the air out of the assembly prior to seal off. Also, keep in mind that the entire point of this exercise is that you can apply, say, 500 watts of input to a few square inches of the bottom surface, and expect very consistent spreading of that input to the entire top surface. Almost instantly, like a lid on a boiling pot of water.
Edited 1 time(s). Last edit at 07/25/2022 06:39PM by rq3.
Sorry, only registered users may post in this forum.


