组装热床
       介绍|搭建框架|组装Y轴|组装X轴|组装Z轴|组装热床|挤出机组装|热端组装|电源|布线|调试|打印
                                多颜色/多材料|维护|故障排除|改进
目标
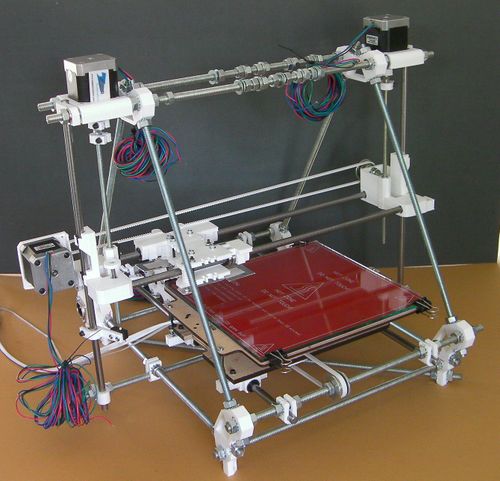
在完成这一阶段以后,你的Reprap将会像图中所示:
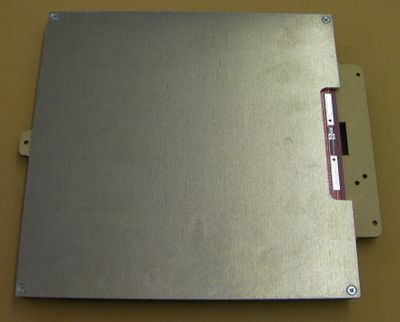
另外,在红色电路板上还会有一块铝板。
工具
你将使用以下工具
- M3 内六角扳手
- 十字形螺丝刀
- 万用表
- 电烙铁和焊锡丝
零部件
| Hardware | Quantity | 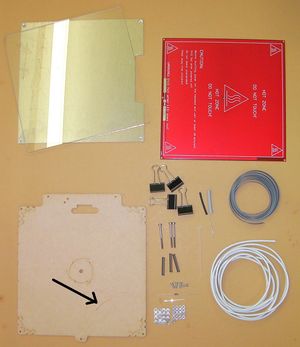 Click the image for a high-res version. |
| 激光切割绝缘板 | 1 | |
| PCB热床 | 1 | |
| 玻璃印刷板 | 1 | |
| 折返式弹簧夹 | 4 | |
| M3 x 40mm 螺丝 | 3 | |
| 30mm 弹簧 | 3 | |
| M3 螺母 | 13 | |
| M3 垫圈 | 16 | |
| 10K 玻璃珠热敏电阻 (箭头所指向的; 它很小;详情 点击这里) |
1 | |
| 双带状线 | 1.1m | |
| 20A 导线 | 1.1m | |
| 3mm LED | 1 | |
| 1k 电阻 | 1 | |
| 铝散热片 | 1 | |
| M3 x 10mm or 16mm 沉头螺钉* | 4 | |
| 3mm 直径的热缩管 (通常为黑色) | 30mm | |
| 5.5mm 直径的热缩管 (通常为灰色) | 30mm | |
| 电缆接头 | 1 |
*其中任意一个都可以。
现在你有的是一根较长的20A的导线,在这一阶段的操作中使用完整的导线,在后面的步骤中你将会进行裁剪。
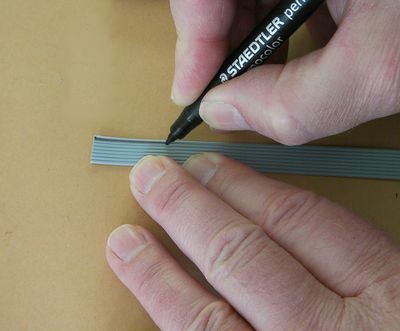
双带状线包含在套件中,将双带状线剥下。如果带状线有彩色条纹,那么从离这最远的一侧剥下两条线。如果没有彩色条纹的线,从一侧开始剥,把剩余的线放在平台上,然后从上往下做标记:
这将使线在以后很容易分辨。我们将在后面使用更宽一些的带状线。
第一步:组装主要部分
使用沉头螺钉,4个螺母,垫圈将PCB热床夹在铝板的MDF绝缘体之间。
PCB板上的锯齿形加热器线路朝向铝板。
确保PCB焊接端,绝缘体的矩形部分,铝板上的槽口对齐。
小心,不要破坏在绝缘体角上的弹簧(它们允许不同程度的扩展)。
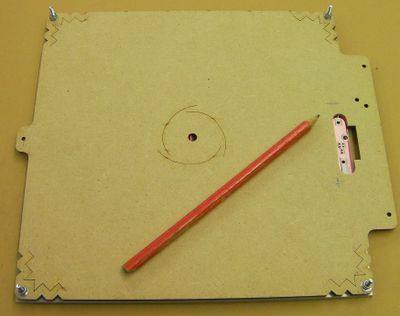
这是一个底部的视图。使用一支铅笔做+,-的标记,如图所示。这将有助于布线。
第二步:布线
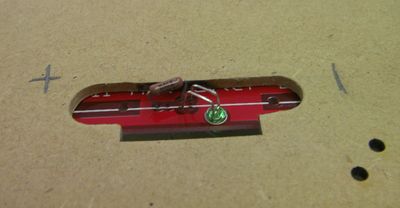
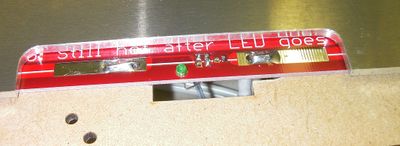
Bend the LED's legs and resistor legs as shown above and insert them from the MDF insulator side. The longer LED leg goes to the end marked +.
The LED and the resistor are in series, and the two of them together are in parallel with the main heater element - the zig-zag pattern of the PCB.
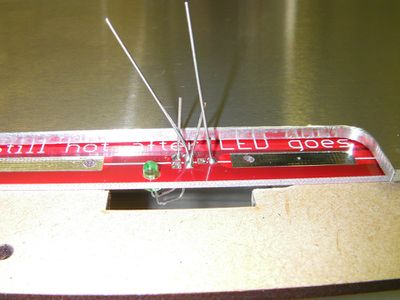
Solder the LED and the resistor as shown on the aluminium plate side. You may find this easier if you prop the bed up on something clear of the bench.
Trim the wires flush with the top of the PCB using side cutters. Make sure that the connections do not project higher than the thickness of the aluminium plate, or they will foul the glass plate which will go on top of it.
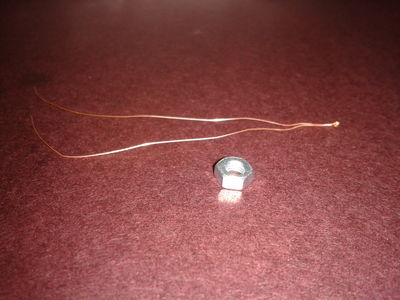
Locate the 10K Glass Bead thermistor. This is very small and can get lost in the folds of the bag. It looks like this (M3 nut for size comparison):
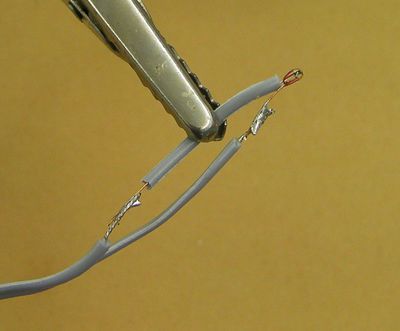
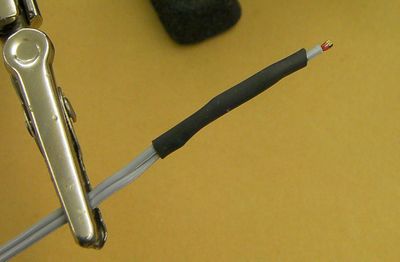
Solder the twin ribbon wires onto the thermistor as shown above. Stagger the connections. Use the insulation stripped from the short connection to insulate the thermistor wire.
Tin the ends of the wires, then tin the wires on the thermistor, then sweat them together.
Insulate the joins with a length of heatshrink.
Strip the insulation from the other ends of the wires and use your meter to check the resistance. It should be about 10K ohms, though the exact value will depend on room temperature.
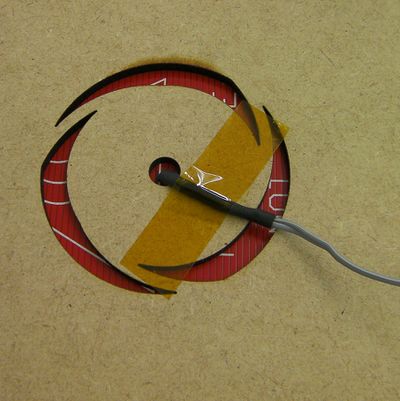
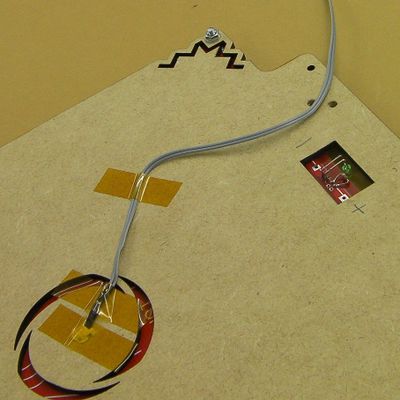
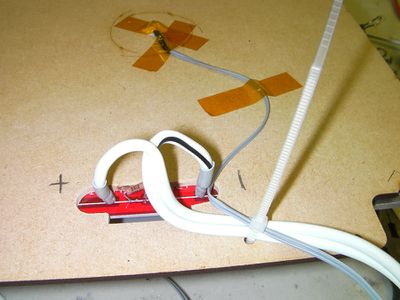
Bend the thermistor at right angles and tape it to the bed. Make sure it goes through the hole in the insulator and the hole in the PCB and touches the aluminium plate. If you like you can add a little heatsink grease to improve the thermal contact between the thermistor and the plate.
Pack the hole in the insulator with something fluffy: cotton wool or a bit of scrunched tissue both work well. Put tape over the hole. (The LED and resistor are the wrong way round in this picture - ignore them.)
Lead the wires to the edge of the bed where the two cable-grip holes are and tape them down. Use the holes on the side you marked -. Note the strain relief loop; don't run the wires straight.
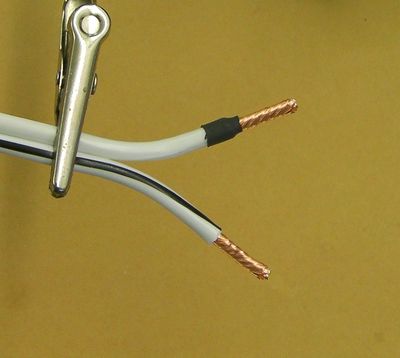
Bare the ends of the high current wire. Put heatshrink on such that it covers only a couple of mm of the bare strands.
The picture shows one wire complete, the other ready to be wrapped.
Push the wires through the bed as shown and bend them flat against the tinned areas of the PCB (you may need to drill the holes out with a 3mm diameter drill first. Do this from the tinned side to get a clean hole). The wire with the black stripe goes to the side marked -. Solder the wires. Be generous with the solder (it's giving both mechanical strength and high current carrying capacity), but again make sure that the join is lower than the thickness of the aluminium plate.
Put the glass plate on the aluminium and make sure that none of the wires nor the LED stick out and foul it.
Use the cable tie to attach the high-current wires and the thermistor wires. Again, note that the high-current wires are not pulled taught. They have a strain relief loop. Make sure they do not project too far on the MDF insulator side - if they do bend them gently flatter.
Pull the cable tie good and tight (but take care not to break the lasercut insulator), and then clip the excess off it.
Step 3: Attach to the machine
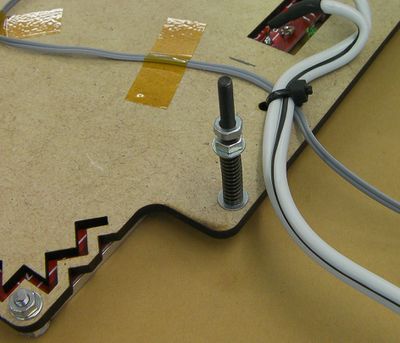
Put the three long screws through the mounting holes with washers under their heads.
Put the springs on. The sequence from the screw head goes:
- Screw head
- Washer
- MDF insulator
- Washer
- Spring
- Washer
- Nut
- Nut
If you want a superb machine (of course you do), before you mount the bed put a little superglue on the heads of the screws that hold down the toothed-belt clamps, cut two rectangles of aluminium foil about 20 mm x 30 mm and glue these onto the screw heads. These will act as a heat shield, and will prevent the printed clamps from getting warm.
Note that we will shortly upgrade the design of the Y bearing mounts to move the hexagonal nut cavity to the top of them when when they are mounted in the machine. This will make bed adjustment easier.
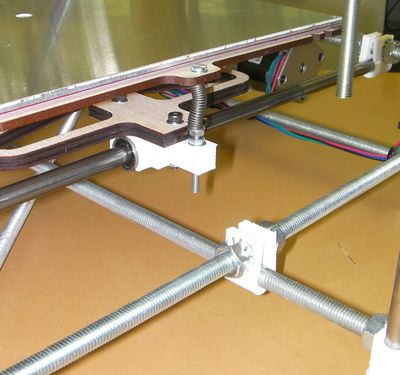
Either way, pull the nuts into their hexagonal recesses in the printed bearing holders on the Y carriage with a shorter screw with a washer under its head. Take care that the nut and the hexagon are aligned.
Use the last three nuts and washers to mount the bed on the machine. If you have the newer variant the washers go underneath and you need to leave the lower nuts lose for the moment. If you have the older variant the washers go on top, and you need to do the nuts up on both sides of the printed Y bearing holder finger tight.
Adjust the screws to get the bed roughly level (measure the heights of the corners above the Y rods with digital callipers).
Tighten the nuts against the Y carriage to secure the bed.
Adjust the nuts above that set the spring compression so that the bed is held firmly against the screw heads, but can be pushed down with a finger.
Fit the glass plate using the four clips and check that the Y axis moves freely back and forth. Then take the glass off and put it in a safe place - you don't want to break it as you build the rest of the machine...
Finally, take a look at the wiring page and run the fat cable roughly along the route it will take round the machine. Cut it a little long (you don't want it to be too short...) and save the rest - you will use the remainder for the power supply and the other power wire in the machine.
