Aluminatus TrinityOne Printing Manual
Revision as of 16:48, 21 March 2013 by MrRocketman (talk | contribs) (Added changing filament sections)
Aluminatus TrinityOne Documentation
Contents
Overview
The easiest way to print is using the LCD Controller. Simply slice your file, load it on the SD Card, pop the SD card into the LCD Controller, and select the file to print it.
Slicing
- Add info here
Maintenance
- Add info here
Things To Know
Layer Height
- Use a layer height <80% of your nozzle diameter (0.4mm for stock Aluminatus), and an extrusion width >nozzle diameter.
- So for a 0.4mm nozzle this means:
- 0.3mm Maximum layer height
- 0.45mm Minimum extrusion width
| 0.01 | 0.010625 | 0.01125 | 0.011875 | 0.0125 | 0.013125 | 0.01375 | 0.014375 | 0.015 | 0.015625 | 0.01625 | 0.016875 | 0.075 | 0.08125 | 0.0875 | 0.09375 |
| 0.1 | 0.10625 | 0.1125 | 0.11875 | 0.125 | 0.13125 | 0.1375 | 0.14375 | 0.15 | 0.15625 | 0.1625 | 0.16875 | 0.175 | 0.18125 | 0.1875 | 0.19375 |
| 0.2 | 0.20625 | 0.2125 | 0.21875 | 0.225 | 0.23125 | 0.2375 | 0.24375 | 0.25 | 0.25625 | 0.2625 | 0.26875 | 0.275 | 0.28125 | 0.2875 | 0.29375 |
| 0.3 | 0.30625 | 0.3125 | 0.31875 | 0.325 | 0.33125 | 0.3375 | 0.34375 | 0.35 | 0.35625 | 0.3625 | 0.36875 | 0.375 | 0.38125 | 0.3875 | 0.39375 |
Printing Temperatures
- PLA
- 195°C is a good base temperature
- Optimal temperatures are from 185°C to 220°C
- Heated build plate should be 70°C
- ABS
- 230°C is a good base temperature
- Heated build plate between 95°C to 120°C.
- Determining Filament Temperature
- Choose a fairly simple model that's large enough that you can clearly see the infill while it's printing
- Make sure your hobbed bolt's teeth are clean of debris such as chunks of plastic
- Make sure your idler is tight! really tight! "it hurts my fingers to pull on it and I still can't move it" tight! A too-loose idler gives exactly the same symptoms as too low temperature.
- Start printing.
- Lower temperature by 5°C every 2-3 layers.
- When infill starts being a row of dots instead of a line, increase temperature by 10 degrees. Record this temperature for the filament.
- Keep monitoring print. If the filament goes spotty again, adjust up by 5 degrees and replace the temperature from step 6.
- Record the temperature on the side of the filament spool.
Changing Filament
- For PLA to PLA, or ABS to ABS you can just cut the old filament and push in a new one while printing. This will give a noticeable bit where the two colors blend together.
- Filament may curl gently when it exits the nozzle. If it curls sharply, it is likely clogged. If so, follow the steps below
- For PLA to ABS, or ABS to PLA or to make sure there is no blending of to colors of the same filament:
- Turn set extruder temp to PLA or ABS print temperature.
- Release extruder idler so that you can manually press on the filament.
- Push gently as the hot-end cools, to avoid bubbles in the melt chamber. This will also compress filament inside peek.
- Turn off extruder and let it cool to room temperature.
- Heatbackupto65°C(PLA)or110c(ABS).
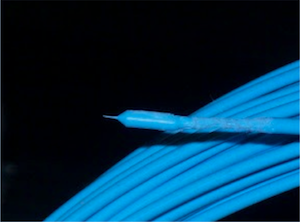
- As soon as the light on your RAMPS turns off, pull the filament firmly but slowly. This should clean inside nozzle hole. The “plug” will have a conical shape with a small nipple at the end.
- Insert new filament.
- Wipe filament that is between extruder and filament coil with damp cloth with alcohol (Don't let filament contact the floor or other dirty surfaces.)
- Set extrude temp and test extrude.
- Repeat if it didn't work, but try to remove filament at lower temp, such as 80°C or 60°C.
- Replace nozzle if it didn't work
Helpful Links
- A great article detailing basic calibration and slicing parameters: Article
- A fantastic overview/reference to 3D Printing with your Aluminatus: 3D Printer Reference - Compiled by Eugene B.
- Triffid Hunter's excellent calibration guide
- A list of general reprap guides/manuals Manuals/Guides
'***' Much of the information on this page is from Eugene B.'s 3D Printer Reference which in turn has been compiled from all over the web, including the links above '***'
