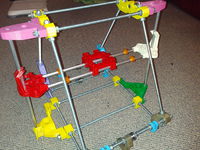
Assembling An M8 Rroofl Frame
A Rroofl RepRap can be fabricated in a number of different ways. The closest to a true RepRap is probably the version using M8 threaded rod. This is extremely adjustable and great for experimentation, though could in theory be replaced with a cheaper, simpler stick-and-socket system for mainstream production. Americans can use 5/16" threaded rod if M8 is not available in your country.
Contents
Y Carriage
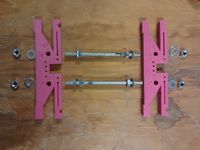
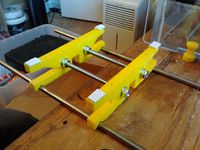
File:Y bed runners.scad Easy bit first. This is composed of two Y Runners held together with a couple of 130mm lengths of M8 rod. As with this entire assembly process, put a washer (usually M8 x 17mm) between the flat, plastic surface and every nut so the nut does not chew into the plastic. Bolt the two Runners together finger tight so they are spaced equally apart at the ends of the rods and the whole contraption will sit flat on the table. Then fully tighten.
Frame Side
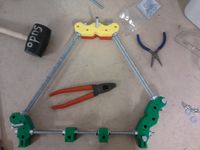
Each of the two sides has a Foot Vertex, Double Foot Vertex and a Top Vertex all bolted together as before with M8 nuts, washers and two different lengths of M8 rod: 2 x 375mm and 1 x 310mm (though if you shorten them both by 20mm it'll all cut nicely out of a 1m rod; hmmmm).
It's a good idea to start by threading the 4 Mendel Frame Adaptors on the lower rod and nutting them in place so you do not forget them!
Make sure that when you bolt the last top vertex in place that you have one vertex with a hexagonal nut inset on each side - both a left-handed and right-handed version.Make one side, then temporarily hold the second side's parts to the first before tightening the second frame's nuts. Use the M8 bolts needed later for the X axis. This will allow you to assemble two frames with the holes in the same place, so thing stand a fighting chance of being parallel.
Y Motor End
Put two plain Y Rail Clamps and the Y motor bracket on two of the 310mm rods.
Y Idler End
Put one plain Y Rail Clamp and the Y switch holder clamp one of the 310mm rods and add a 608Z pulley assembly to the middle of the other.
Joining Frame Sides
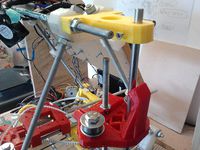
Adding in the long threaded rods that hold the Z axis brackets in place and the other ones that join the top vertexes, Join the two frame sides with the Y Ends.
X Carriage
X Axis
Z Axis
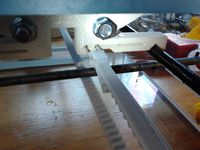
The current gears make a lot of noise and stick until all the little bits of misprint get knocked off.
Frame Completion
Belting The Y Carriage On
Ease the frame into shape on the rails, temporarily slackening the nuts if necessary. Y Slider legs can be compressed with a bolt or zip ties if it is necessary to level the bed. The actual deposition bed is attached by using 4 small double-sided foam adhesive pads. Clean the bed before sticking pads to it.The Y belt goes from the Y Runner, around the Y idler pulley, under the RepRap, back up around the Y motor drive pulley, over the Y motor idler and to the other Y Runner.
The Y belt is attached to the Runners with zip ties; Make loops in the belt ends and secure with zip ties. Thread another zip tie through the small holes in one side of the leg of the Y carriage, pass it through the loop in the belt and then use to tension the belt to your requirements. Note that if you leave a large loop of zip tie this introduces unwanted springyness, so you'll have to cinch it with a zip tie or two.
Ⓥ
Back to Rroofl.
