BoomBOx
|
English • العربية • български • català • čeština • Deutsch • Ελληνικά • español • فارسی • français • hrvatski • magyar • italiano • română • 日本語 • 한국어 • lietuvių • Nederlands • norsk • polski • português • русский • Türkçe • українська • 中文(中国大陆) • 中文(台灣) • עברית • azərbaycanca • |
Release status: experimental

| Description | beastly child of Prusa Air and Mendel Max
|
| License | |
| Author | |
| Contributors | |
| Based-on | |
| Categories | |
| CAD Models | |
| External Link |
BoomBOx (aka BoomBOt) was started September 2012, as an undergraduate engineering research project at the University of Michigan Flint(UMF). BoomBOx stands 2 feet tall, with a standard 8x8 inch printbed. The name "BoomBOx" was coined in the reprap IRC after various instances of the LCD screen screaming on google hangout.
- BoomBox is in the final stages of the build and has yet to get 'wet'
BUILD
LoM List of Materials
Bearings<u/>
Qt.10 - LM8UU (Asia) or LME8UU (US, Europe) linear bearings OR 8mmx25mm brass bushings -$12.52+shipping
Qt.5 - 608 "roller skate" bearings "6082RS" for sealed, "608ZZ" for shielded.-$25.50+shipping (est $12.70)
<u>M8 threaded Rods<u/>
(can all be cut from 6 1m lengths of M8 threaded rod, Amazon - $37.14)
Qt.6 - 370mm M8 threaded rod Three per side
Qt.4 - 294mm M8 threaded rod Front/rear. Can use 300mm too
Qt.3 - 440mm M8 threaded rod Top/Bottom. Can use 450m too
Qt.2 - 210mm M8 threaded rod z-axis lead screws. Can use 300mm too
Qt.6 - 405mm M8 smooth rod
<u>Bed<u/>
Qt.2 slabs of metal
Qt.4 springs
Qt.4 extra pieces of threaded rod
Qt.4 brass bushings
<u>Belts, eBay<u/>
Qt.1 - 840mm GT2 toothed belt, matching pulleys Gates Corp.
Qt.1 - 900mm+ GT3 toothed belt, matching pulleys Gates Corp.
Qt.2 - 16-tooth matching GT2 pulleys bore dia. 5mm Gates Corp.
Qt.2 - - 16-tooth matching GT3 pulleys bore dia. 5mm Gates Corp.
(GT2 belt advised if long enough, 16 or 12 tooth pulley- 16 advised)
<u>Filament<u/>
1 3mm ABS/PLA roll - $42 per roll + $12.60 shipping = $57.12 (Protoparadigm LLC)
<u>Wire - Amazon<u/>
Qt.1 12AWG THHN stranded wire 8ft $18.51+ shipping (est. $12.70)
<u>Motors<u/>
5 NEMA 17 Stepper Motor 40N/m $68 + $33 shipping = $105.08
<u>Plates<u/>
Qt.1 Heatbed MK1 PCB $31.79 + shipping (est. $20) ebay
Qt.1 8x8 in glass plate estimated $3
<u>Extruder<u/>
- BoomBOt extruder custom made by in a machine shop
Qt.1 Hot end $63.59 + shipping (est.$20)
Qt.1 High Heat Braided wire McMaster Part No. 8209K11 (or equivalent)- $1.31 +shipping (est. $13)
Qt.1 Teflon (PTFE) sleeve (2 feet) for thermistor lead insulation and filament tube McMaster Part No. 5335k11 (or equivalent)
Qt.1 Kapton tape roll for thermistor mounting
<u>Plastic Parts<u/>
Mendel Max Parts kit
<u>Frame<u/>
Qt.4 8-foot, 1.5 inch aluminum extrusions
Qt.50 M8 screws (½-20), 20mm length
Qt.1 4ftx4ft sheet of plexi/lexan for the encasing
Qt.2 Sheet metal for the backing and the bottom of the machine (we use sheet on back, steel on bottom)
<u>Electronics<u/>
Qt.1 ATMEGA2560 with RAMPS 1.4 (original) or ATMEGA328P Board + USB $18 + free shipping
Qt.1 H-bridge for Z Stepper Motors $5.17 + free shipping (not included in original build)
<u>Area<u/>
Qt.1 Machine Shop with a mill, lathe, bandsaw, and 1 large cart
<u>Total Estimated Cost: $850<u/>
DIY Extruder
Do it yourself BoomBOx extruder build
WARNING: EXPERIMENTAL
LoM
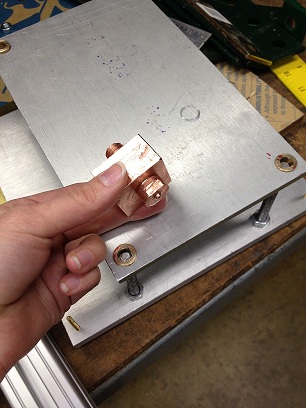
Qt.1 Chunk of copper Qt.1 Section of copper rod
Instructions
- Keep in mind to build the extruder before you build the x-carriage

1) Take anout a 3.5 inch length of copper rod, drill a 1mm hole in it.
NO PICTURE AVAILABLE
2) Take a drill bit a little bigger than your PTFE tubing and drill over the hole. Drill down until there is about 1.5-2cm left for the head on the bottom.

3) Use a lathe to shave the nozzle down towards the hole, but not toching the hole- therefore, creating a 'nozzle'. This nozzle will not be like a cone. More...think of a little piece of the straw sticking out of your softdrink. Try to lathe about 1mm away from the hole and move down about 2mm, to create a 1mm long tip. Move VERY SLOWLY with copper. VERY VERY SLOWLY
4) Flip the rod piece in the lathe with only 1.5-2cm inside of the lathe, nozzle facing inward. Now shave the length of the rod down.


5) Take the extruder piece out and place it in a copper clamp.
6) If you have decided on threads for your peak block, thread the extruder accordingly. I think we used 2/3 threads- in any case, they should be large.
NO PICTURE AVAILABLE
7) Cut/prepare your peek block accordingly with a drilled hole and threads for the extruder.
8) The fun part- if you can't thread straight, you may have to stick the head back into the lathe and turn the lathe to get the peek block on. Warning: this may take three people to do
9) Drill a hole smaller than your resistor into the block.

10) Drill a hole the size of your resistor a little more than halfway into your block. This lets the resistor rest there without having a way to coming out from the other side. You're done!
--Amanda Korant 04:46, 16 August 2013 (UTC)