FoldaRap User Manual
|
English • العربية • български • català • čeština • Deutsch • Ελληνικά • español • فارسی • français • hrvatski • magyar • italiano • română • 日本語 • 한국어 • lietuvių • Nederlands • norsk • polski • português • русский • Türkçe • українська • 中文(中国大陆) • 中文(台灣) • עברית • azərbaycanca • |
Contents
Preliminar readings
This guide on to how to design for FFF may be useful. It's written for the Stratasys Dimension proprietary RP machine, but almost all of what it says is relevant to RepRap too.
is also a good read.
Softwares
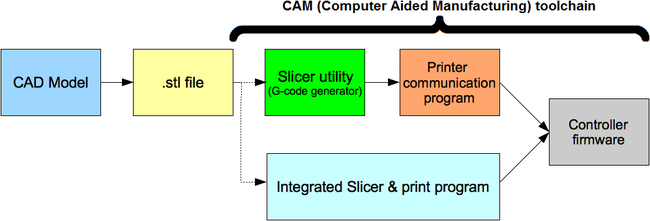
As per CAM_Toolchains here is a little overview of the toolchain :
Download and install Slic3r and Pronterface if not already done.
Slicer
Here is a great manual : http://manual.slic3r.org/ and some translation (French) of the interface Notice Slic3r v4
From Slic3r, go in File > Load config, and choose these config file (or take them from the github repo).
- You may have to tweak some parameters like Z-offset if you think you are too close from the bed when starting, or bed-center if the print seems offset by a few mm.
Host
Could be Pronterface / Cura / Repetier / Repsnapper
Pronterface
In Pronterface settings, set the following essential settings, or place these config files in the user's folder (e.g : ~/.pronsolerc (GNU/Linux) C:\Users\yourname (Windows)).
Build surface to 140x140mm
XY mm/min : 9000
Z mm/min : 115
Heater temp : 195°C
Bed temp : 55°C
Cura
Repetier
Firmware : Marlin
Add something like RepRapPro_Huxley_maintenance and marlin firmware basic config
The FoldaRap github repo contain also a copy of the firmware I'm using.
Here are some of the main settings, in case you upload a new firmware.
For mac users, this little software can help finding the correct USB port : http://www.ftdichip.com/Drivers/VCP.htm
Config.h
Thermal Settings
You may want to finetune the PID for your own machine : PID_Tuning
Mechanical Settings
The direction can change depending of the motor you are using (coils) or the sequence of wiring (e.g : red, blue, green, black, or black, green, blue, red; etc.)
#define INVERT_X_DIR true
#define INVERT_Y_DIR false
#define INVERT_Z_DIR true
#define INVERT_E0_DIR true
#define HOMING_FEEDRATE {30*60, 30*60, 2*60, 0} // set the homing speeds (mm/min)
At 1/16 microstepping, double everything for 1/32 (FoldaRap#086 and newer)
- XY : 80 for 16 tooth pulley with T2.5 belts
- Z
- 3200 for M6
- 4000 for M5 threaded rods
- E
- 1200 for the PG35L geared stepper with a brass insert drive-gear
- 140 for a direct drive Nema14
- 660 for a geared mini-extruder
#define DEFAULT_AXIS_STEPS_PER_UNIT   {80, 80, 4000, 140} // Z-step-mm = 3200 for M6 // 4000 for M5
#define DEFAULT_MAX_FEEDRATE          {400, 400, 4, 45}
#define DEFAULT_MAX_ACCELERATION      {3000, 3000, 40, 200}
#define DEFAULT_ACCELERATION          1500
#define DEFAULT_RETRACT_ACCELERATION  1500
#define DEFAULT_XYJERK                20.0
#define DEFAULT_ZJERK                 0.4
#define DEFAULT_EJERK                 5
Soft limit
const bool max_software_endstops = true;  //If true, axis won't move to coordinates greater than the defined lengths below.
const int X_MAX_LENGTH = 145;
const int Y_MAX_LENGTH = 145;
const int Z_MAX_LENGTH = 150;
Config_adv.h
Don't forget to change the advanced parameters accordingly to your filament/motor.
Advance
 #define D_FILAMENT 1.75
 #define STEPS_MM_E 140 // look for the value used for your extruder
Cleaning the bed
Often clean the eventual dust with a rag, try to never touch it with bare fingers, and if necessary wipe the surface with window cleaner or isopropyl alcohol or acetone (preferably when bed is cold).
If the plastic don't stick to the bed, although properly cleaned and heated to a correct temperature, it is maybe time to replace the kapton.
Here is a video example :
<videoflash>MdCMMt7siy4</videoflash>
Lubrication
Rods and bearings
With time the smooth-rods will accumulate some dust at their ends, it's not critical but you can wipe it sometime and once in a while add a drop of oil for the bearings (Igus bushings don't need lubrication).
The threaded rods can eventually benefit from a light lubricating too (read : http://forums.reprap.org/read.php?1,151646 about that, not every oil is good).
Sliders
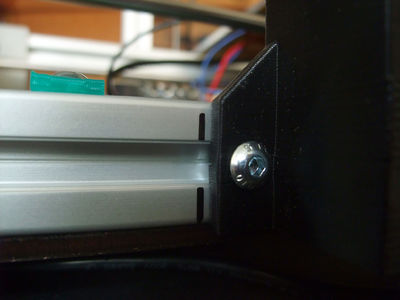
Because the X-axis-ends slides directly on the bare extrusion profiles in Z, it is may be a good idea to impregnate these parts with a little bit of oil (the little porosity of the plastic will make a sort of auto-lubrication then).
Folding or Unfolding it
<videoflash>Fj1O9QgNJnk</videoflash>
Transportation
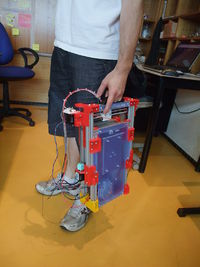
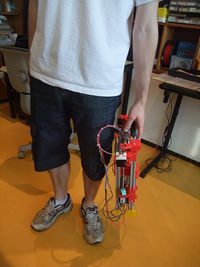
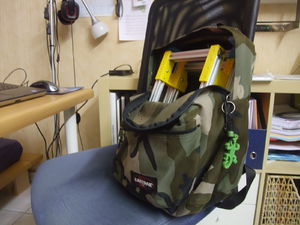
Regarding the distance you travel : by hand, on a bike, as is in a bag, well packaged in a bag or a cardboard box, or even in an heavy-duty case if you want to ship it by plane :P
By bike : 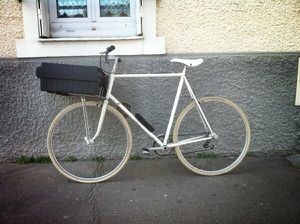 [1] on the bike or holding it
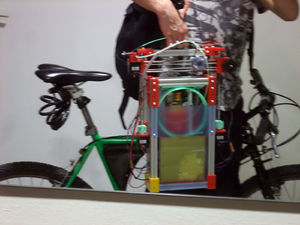
With an overkill flightcase (you may have the room to also fit your laptop inside) : 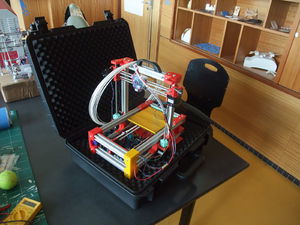
Troubleshooting
See also : Print_Troubleshooting_Pictorial_Guide
We will record here all problems as they happen, and the solutions to fix them.
Connection
See the page about Printrun and Marlin for more information. There is also plenty information on the forum and elsewhere on the web.
- on some Mac OS X a bauds rate of 115200 was needed instead of the 250000
- on XP SP3, it seems recommended to use the 3.5 .net framerwork (not the 4.0)
Not consistent printing
Possible causes are related to the hotend (requiring too much force) or to the extruder motor pushing/pulling on the filament (slipping on the filament or not having enough power).
It is also possible that your "filament diameter" in your slicer software is not correct, e.g.: 1mm instead of 1,75mm will cause an overflow of plastic.
hotend
- contamination (see cleaning next bellow)
- low temp or too hight temp (not enough cooling)
extruder
- springs
- driver curent
Hotend cleaning
Taken from http://www.emakershop.com/wiki/troubleshooting
The most likely reason for the bowden tube popping out of its fittings is due to contamination inside the melt chamber. To ensure the melt chamber is free from contamination, follow these steps:
- Heat nozzle to around the plastic extrusion temperature and feed (by hand) some filament into the nozzle.
- Set the nozzle temperature to 75C and wait for the temperature to settle there.
- While heating to 100-120°C, reverse the extruder, pulling out the filament from the melt chamber, along with any contamination.
- Cut the contaminated end from the filament
- Re-insert the filament and see if it extrude well, start again if needed
Note to self : use a good fan, cooling is very important (after having replaced a broken fan --Emmanuel 20:12, 6 September 2013 (UTC))
- as also seen on bukobot : nozzle-cleaning
If the tube pop out of the pneufit
In case of ejection or if you pulled on it, you can remove few mm to have a lenght good enough to be gripped inside the pneufit (before eventually replacing it)
First Layer not sticking
- is the bed clean ? (grease is bad)
- is the bed at temp ? (too low <50 or too high >60)
- is the distance between nozzle and bed correct ?
- is the speed ok ? (eventually slow the first layer speed)
Some good tips on the Ultimaker wiki for the [2]
My perimeters are not aligned
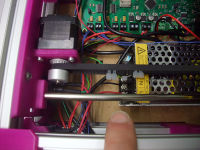
- It's probable that the belts are not correctly tightened or have loosen up a little over time (X or Y)
- Check if the x-motor's bolts are still in place
- If the Y-belt is too loose you can pull a little more on the zip-tie
- If the printhead bump on some parts on the printed object it can happen too
- active cooling can help a little
- increase the slowdown in Slic3r
- try to avoid using too much perimeters as it will keep the plastic hot by moving on the same area again
My heatbed stopped heating
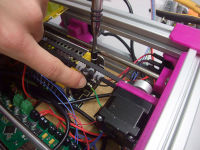
- It's likely that a wire of the peltier got loose from the screw terminal
- Put it back in place with a tweezer and a screwdriver (flat or philips)
- In worse case you will have to replace it (5$)
(A possible hack is to put the Live of the peltier on the power supply and the other wire on the board)
Replacing the power supply
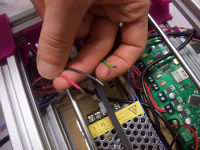
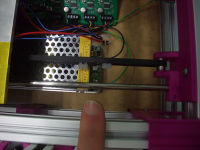
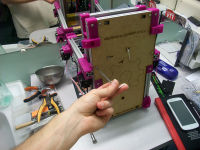
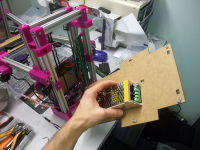
If you need to replace the power supply, remove the wires, then underplate, change the psu, put the underplate back and the wires too.
