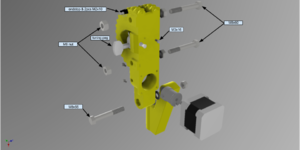
GUS Simpson assembly
Introduction | Bill of materials | Assembly | Electronics and calibration
Contents
Base
Parts Needed:
Basalt Bed
Top Plate
Bottom Plate
Heated Bed
3 Shoulders
3 Plastic Washers
3 M8x100 Screws
3 M8 Nuts (or M8 Nylock Nuts)
6 M8 Washers
12 608 Bearings
Instructions:
- Place 4(four) 608 bearings into each of the Shoulders. These bearings should slide right in if your parts have printed accurately. If they don't slide in easily, these can be carefully tapped in with a rubber mallet. If they still not fitting you should not force the bearings into place. Try heating up the parts in the oven on the lowest temperature and attempt to insert the bearings.
- Slide one Plastic washer onto each of the the M8x100 bolts and insert the bolt/washer sub assemblies into the holes in the corners of the bed.
- Place the heated bed (not illustrated) on the top plate, making sure that it fits flat in place without any bumps. Guide the wires for the heated bed through the hole in the top plate(not pictured).
- Now carefully slide the top plate up the bolts that are threaded through the basalt bed, aligning the bolts by hand to fit the holes. You should be able to get the basalt bed, heated bed and top plate to stack with no gaps. If you ended up with gaps check to make sure that the heated bed is in place correctly and that it is flat against the top plate.
- Slide an M8 washer onto each of the bolts.
- Slide shoulders onto the bolts.
- Slide an M8 washer onto each of the bolts.
- Slide the Bottom Plate onto the bolts and attach a M8 Nut (or Nylock Nut) ontoto each bolt. The Shoulders should move freely, so don't tighten the base assembly too much.
Hub
Parts Needed:
Bowden Nut
Lock Nut
Hub Top
Hub Washer
Hub Center
Hub Bottom
? M3 Bolts
? M3 Nuts
4 6702 Bearings
3 608 Bearings
Ubis Hotend
Instructions:
- Insert 608 and 6702 bearings in each hub part (Hub Bottom, Hub Center, Hub Top).
- Screw the Hub Screw into the Hub Bottom.
- Slide the Hub Center, Hub Washer, Hub Top onto the Hub Screw in this order.
- Screw the Lock Nut onto the Hub Screw making sure that the ring on the Lock Nut is oriented towards the Hub Top.
- Screw the Bowden Nut onto the top of the Hub assembly.
- Push the Ubis Hotend into the Hub Bottom and secure it with M3 Nuts and M3 Bolts.
Arms
Parts Needed: 608 Bearings 80lb+ Fishing Line M8 Nuts 3 M3x16 Bolt Machine Head Guitar Tuner
Instructions:
Before assembling arms you should carefully check all the corners of the gears and edges of the holes near the string path. These should be smooth with no sharp edges that could cut into the Fishing Line. It is recommended to sand all inner corners should also be sanded.
- Insert 608 Bearings on the arms.
- Motor Arm Assembly:
- Insert 2 M8 Nuts into the slots inside the arm.
- Screw a M8x60 bolt through the M8 Nuts from the inside of the Motor Arm and make sure that there are no gap between non-threaded parts of the bolts and nuts.
- Secure these bolts firmly with M8 Nylock Nuts from the other side of the Motor Arm. Do not over tighten as this may cause the motor arm to break.
- Secure the spring to the of the Motor Arm with a M3x16 Bolt. This bolt should thread well into the plastic.
- Install the Machine Head Guitar Tuner with the hardware that came with it.
- Screw NEMA 17 motor onto the arm. Do not install pulley just yet.
- Assemble the slave arm by inserting M8 nuts screwing two M8x60 bolts just like you did with motor arm.
- Insert two M3 nuts in each pulley.
- Just barely slide the pulleys on the tip of the motor's shafts
- Tie a string to the spring and string the arms using this illustration
- Cut the string and tie it to the tuner, do not tighten it just yet.
- Push the pulley on the shaft untill holes on the motor arm match the holes on pulley and thread 2 M3 screws into the pulleys in order to fix them solid.
- Tighten the tuner so the hand will stay together.
Finishing
- Insert M8x55 bolts in places on the hub and motor arms.
- Slide a M8 washer on each bolt.
- Join the parts so the motor arms are on top.
- Slide a washer on each bolt again and fix them with M8 nylock nuts.
- Screw essentric stops and limit switches on the arms using M3 and M2 bolts.
- Unscrew the bowden nut from hub, insert a bowden tube through the hole on the nut.
- Screw two M4 nuts on the ends of bowden tube and drill the tume with 2mm drill from the ends.
- Place a nut into the slot on the hub screw and fix it with bowden nut.
- Slide the second nut in the extruder.
Filament Drive
This is yet to be done.


