Generation 2 OnABoard
This page is a development stub. Please enhance this page by adding information, cad files, nice big images, and well structured data!
Release status: Experimental
| Description | One board to handle most of the gen 2 electronics.
|
| License | unknown
|
| Author | [[User:{{{author}}}]]
|
| Contributors | |
| Based-on | [[]]
|
| Categories | |
| CAD Models | |
| External Link |
Generation 2 OnABoard
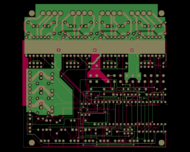
This is a single board that contains most of the electronics required to run a RepRap. All the components that require soldering are through-hole. The cost is slightly less than the generation 2 electronics because there is less need for connectors and PCB space to support connectors.
Circuit Board
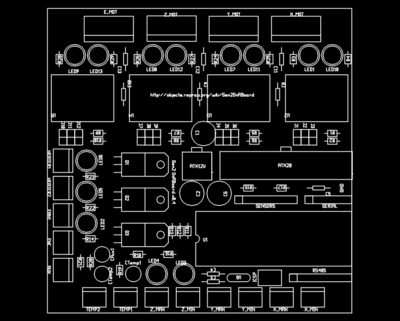
The lower right is an Arduino mini board. I plan to change this to the same chip that is used in a Sanguino, in a DIP socket.
Across the middle I have 4 pololu stepper drivers. available here. This board supports up to 2 A per coil (with proper cooling) and micro-stepping in full, 1/2, 1/4, 1/8 or 1/16 steps. Under each stepper driver there are jumpers used to configure the micro-stepping.
Below that is two PWM drivers for the fan and heater. I hope to add two more to support a heated build platform and a future expansion.
Below that is a 24-pin ATX connector. I'm using the 5V standby to power the microcontroller and I have a pin on the Arduino connected to the power switch wire so that the Arduino will be able to turn the power supply on and off. There is also a 2.7K load resistor on the 5V line, which is to help the regulator in the power supply. There will be a PTC resettable fuse on each of the 5V and 5V standby lines. These will prevent traces from burning up in the event that something gets connected incorrectly.
The temp sensor has a place for a resistor between +5V and the sensor pin, meaning that a separate thermistor board is not needed.
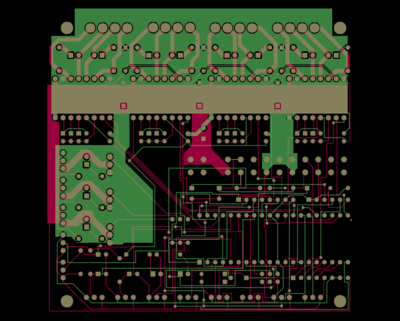
I made all the traces that carry significant current thicker. Most of these are 0.05 inch.
Most of the traces on the top half of the board are on the bottom layer with a ground plane filling the top layer. I hope this will help to cool the stepper drivers, but I am uncertain if I can efficiently transfer heat through the pins from the breakout board.
Since there isn't much going on under the stepper drivers I filled the bottom layer in that area with a +12V power plane. The idea here is to limit interference between the stepper drivers each pulling from the same supply.
I'm estimating this will cost about $100 for the prototype board.
To build a RepRap using this board you will also need a USB-ttl cable, 3 or 6 opto-endstop and an ATX power supply.
Pin Assignments
| usage | Arduino | ATMega644P | Special Function |
|---|---|---|---|
| X_STEP | D15 | PD7 | PWM |
| X_DIR | D18 | PC2 | TCK |
| X_MIN | D20 | PC4 | TDO |
| X_MAX | D21 | PC5 | TD1 |
| X_ENABLE | |||
| Y_STEP | D23 | PC7 | |
| Y_DIR | D22 | PC6 | |
| Y_MIN | D25 (A6) | PA6 | |
| Y_MAX | D26 (A5) | PA5 | |
| Y_ENABLE | |||
| Z_STEP | D29 (A2) | PA2 | |
| Z_DIR | D30 (A1) | PA1 | |
| Z_MIN | D2 | PB2 | INT2 |
| Z_MAX | D1 | PB1 | INT1 |
| Z_ENABLE | D19 | PC3 | TMS |
| E_STEP | D28 (A3) | PA3 | |
| E_DIR | D16 | PC0 | SCL |
| E_ENABLE | |||
| HEATER1 | D14 | PD6 | PWM |
| TEMP1 | A4 (D27) | PA4 | |
| HEATER2 | D4 | PB4 | PWM |
| TEMP2 | A7 (D24) | PA7 | |
| FAN | D3 | PB3 | PWM |
| PS_ON | D17 | PC1 | SDA |
| ENCODER | D0 | PB0 | INT0 |
| AUX | A0 (D31) | PA0 | |
| MOSI | D5 | PB5 | MOSI |
| MISO | D6 | PB6 | MISO |
| SCK | D7 | PB7 | SCK |
| RX (Serial) | D8 | PD2 | RX0 |
| TX (Serial) | D9 | PD3 | TX0 |
| RS485 IN | D10 | PD2 | RX1 |
| RS485 OUT | D11 | PD3 | RX2 |
| RS485 Tx Enable | D12 | PD4 | PWM |
| RS485 Rx Enable | D13 | PD5 | PWM |


